Slash Commands
IMPORTANT!: Before you create your Slash Command make sure you have your Slack App set up correctly. If you don't already have a Slack App check out the Slack Apps section above.
PLEASE NOTE: Adding a Slash Signin Secret will give you an extra layer of security but is not mandatory. Slash commands will continue to work without this.
A Slack slash command is a text-based command that starts with a forward slash ("/") and is used within the Slack messaging platform in order to trigger specific actions or interactions with integrated apps and services.
They are customizable and extensible, enhance automation and integration and offer a clean user experience.
In Tray the primary use of Slack Slash Commands is to allow Slack users to manually trigger workflows which can perform automated tasks. A few examples include:
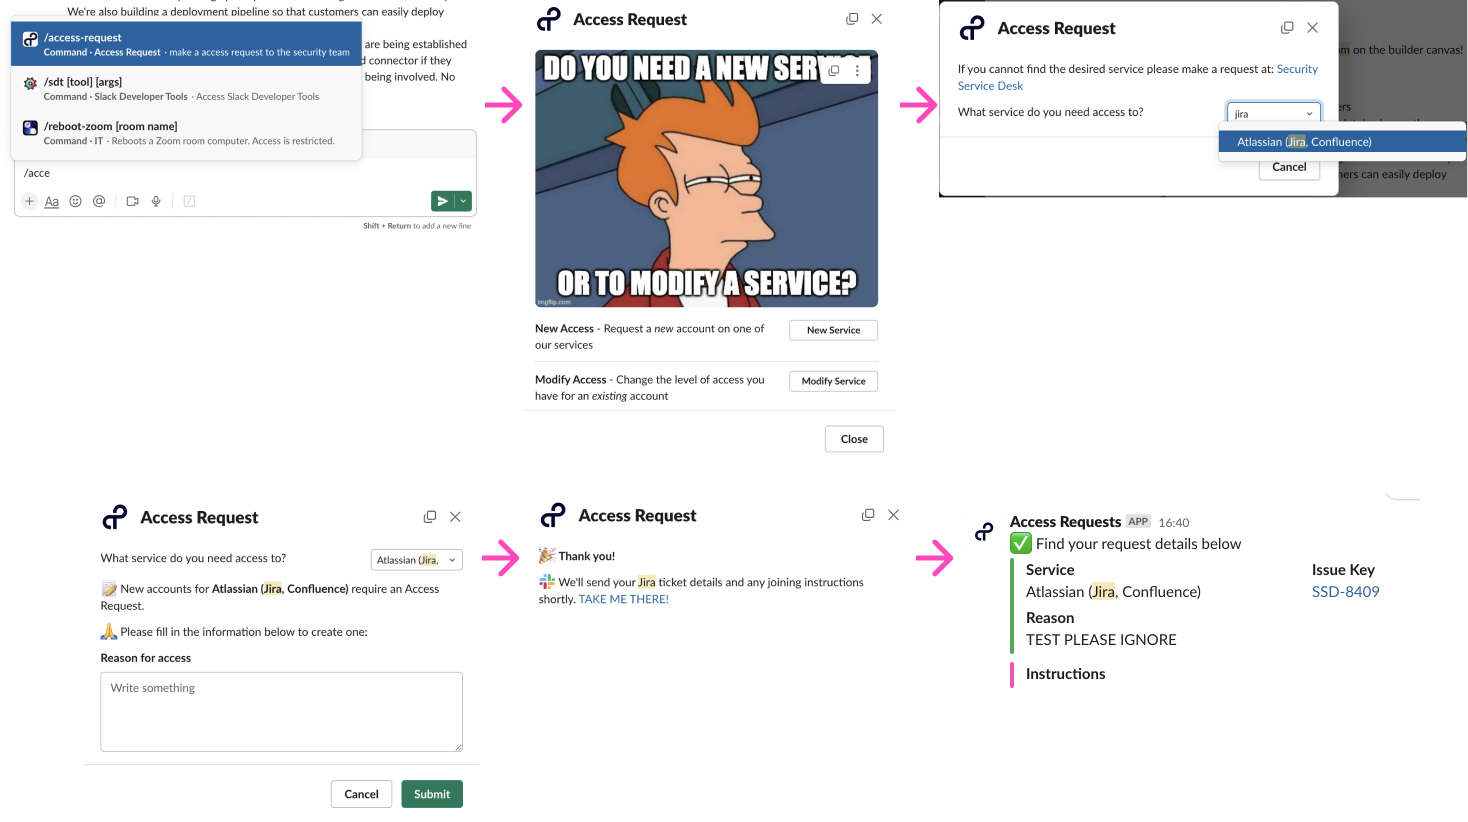
Generate access requests
Gather Slack user details
Create Jira tickets
Run HR commands
Below is just a small sample of the different types of fields, kinds of personification and levels you can add to an integrated Slash command.

Creating Slash CommandsCopy
A brief summary for setting up your Slash command is as follows:
Create an App (in the Slack UI) to associate your command with.
Name and create your command (in the Slack UI).
Enable your Slash command (in the Slack UI) to send and receive messages.
Build a Tray workflow using a Slack Slash command trigger workflow.
Setup NotesCopy
There are two approaches to consider when deciding where to host your Slash commands.
1 Slash command per App: This is the simplest organisational method. This is the methodology outlined in the templates below where they demonstrate using 1 branch in 1 workflow, allocated for a singular incoming command.
Multiple slash commands per App: This method is slightly more complex. With mulitple Slash commands per App your workflow must be tailored to having several potential incoming commands.
Using a branching method/connector would be necessary along with multiple callable workflows. Doing so would help create a "single responsibility principal" per command. As the resulting command would be taken to a workflow specific to its use case.
Please note that due to the kind of ID's Slack creates (per command), it is very difficult to predict or even format the incoming Slash command ID and therefore use it as a point of reference.
Example WalkthroughCopy
USER TIP: For an example on how to create and handle Slack Slash commands with a templated workflow checkout the Create Salesforce accts / opps with Slack modal workflow.
Below is a step by step guide which details all relevant aspects of creating a Slash command.
As is typical of all Slash commands this walkthrough allows users to invoke their app by typing a relevant command/string into a Slack message box. The submitted command sends a payload of data from Slack to the associated app. The app then responds (accordingly) to the context provided by the payload.
This particular example uses the '1 Slash command per App' method to collect the contact details of any given Slack user. The logic of the workflow is as follows:


PrerequisitesCopy
IMPORTANT: You will ALWAYS need a Slack App to associate your command with so please make sure you already have this setup before continuing.
Please note that your command is built WITHIN a Slack Application associated with your Slack Account. If you don't already have a Slack App please check out the Slack App Creation page.
This particular walkthrough requires:
Airtable account (& authentication): In this example we are using Airtable but feel free to use any database service you prefer.
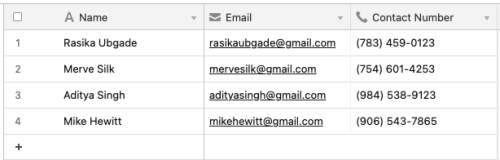
Pre-populated database: You will need to have your Airtable/database table set up with some sample data.

1 - CreateCopy
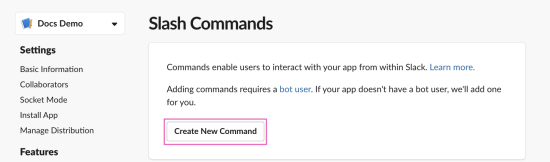
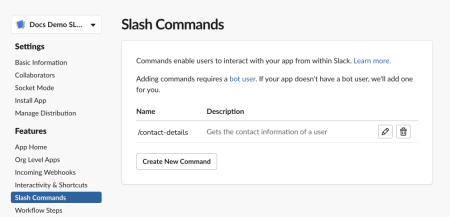
Head to your chosen App's App's Management Dashboard. In this case it is known as Docs Demo which can be confirmed by looking for the name in the top right corner. Click the Slash Commands feature from the left navigation menu.
On the page Slash Commands page select Create New Command.


2 - DefineCopy
You will need to fill in the following parameters:
Command: Add the name of the command. This will be the string/ text users will type in order to trigger the action related your command.
If you are building alongside this walkthrough please use the command
/contact-details.
Request URL: This is the URL your payload will be sent to when a user invokes the command.
You will need a workflow which uses a Slack trigger with the operation set to On slash command.
Copy the URL needed for your Command from your Slack trigger.
Short Description: Add a short description of what your command actually does.
Usage hint: This is displayed to users when they try to invoke the command in case they get stuck.
If you have any parameters that can be used with your command it is recommended that you explain them here.
Escape channels, users, and links sent to your app: This feature will modify the parameters sent with a command by the user.
It is recommend that you enable this feature if you expect to receive user or channel mentions in the command text.
For example:
/todo ask @crushermd to bake a birthday cake for @worf in #d-socialYou'll receive the following in the sent data payload:
ask <@U012ABCDEF> to bake a birthday cake for <@U345GHIJKL> in <#C012ABCDE>If disabled the payload will just repeat the plain text:
ask @crushermd to bake a birthday cake for @worf in #d-social


3 - InitiateCopy
Under the Features heading on left hand menu click App Home. Scroll down to the Show Tabs section and check the Allow users to send Slash commands and messages from the messages tab field.


4 - Build your Tray WorkflowCopy
PLEASE NOTE: How you choose to integrate your Slash command with your Workflow will vary depending on your use case. Below is a walkthrough based on the example command used in the explanation sections above.
Setup begins with a Slack trigger. Please make sure that the authentication you are using is associated with the Slack account that you built your Slash command in. The On Slash Command will trigger your workflow whenever you type in
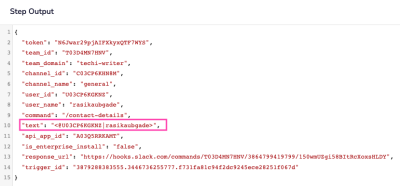
/contact-detailsinto any Slack message box. This will return a unique ID for the user in question.As you can see in the screenshot below the data received through the trigger comes in the following format:
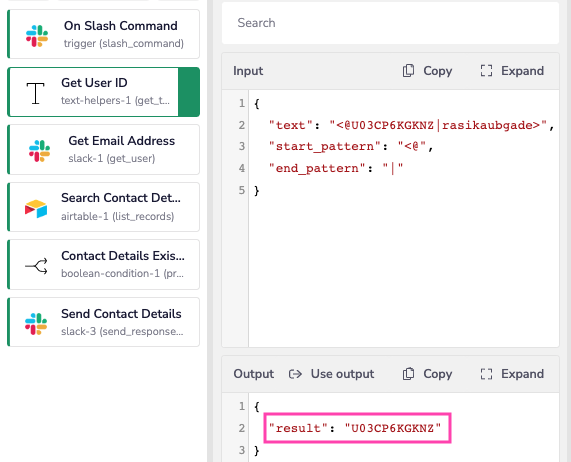
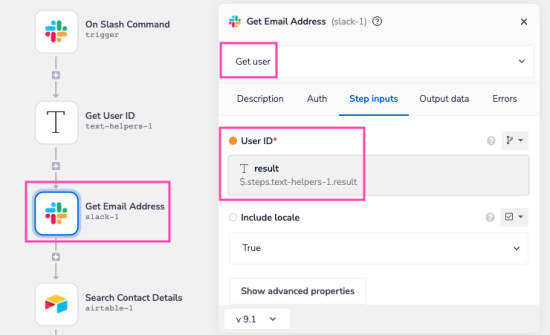
<@U03XXXKGKNZ|rasikaubgade>.Using the Text helper allows us to retrieve the text between<@and|(which is the only information required): Slack ID:U03CP6KGKNZ.At this point you would begin to collect any useful user information required. Here we demo using the Slack connector and Get user operation to collect the email address using the Slack ID we retrieved earlier. This information is particularly useful as email addresses are commonly used across platforms and always unique to the user.
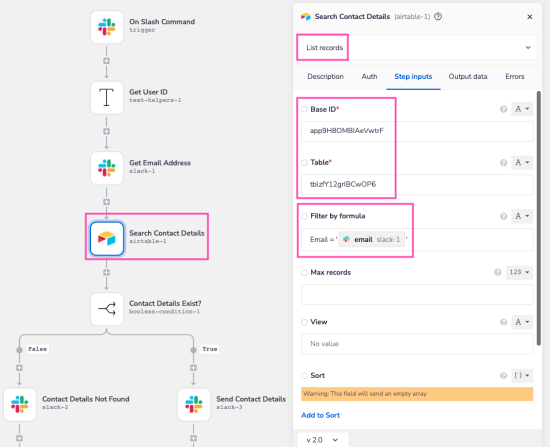
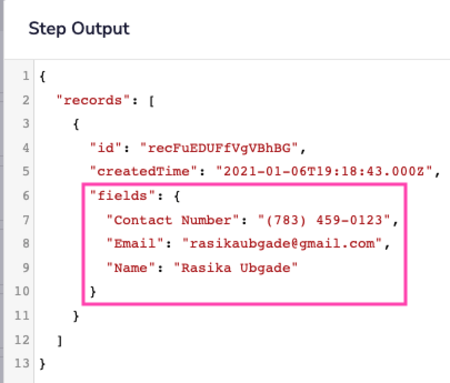
The Airtable connector searches for the Slack user's contact details using their email.
If the Airtable database contains a Contact Number for the user then attribute is returned.
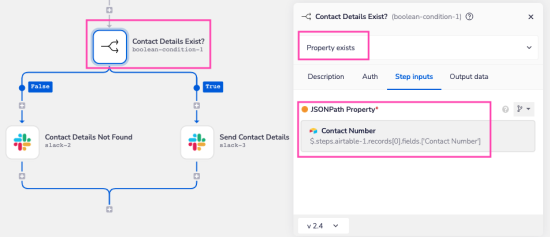
A Boolean connector is used to validates this.
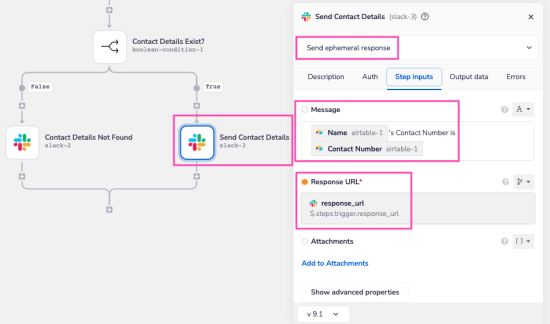
TRUE: If the Contact Number exists in the Airtable database then the user's contact information is sent in a response to the user who initiated the Slash command. It will contain the name of the user and their associated contact number.
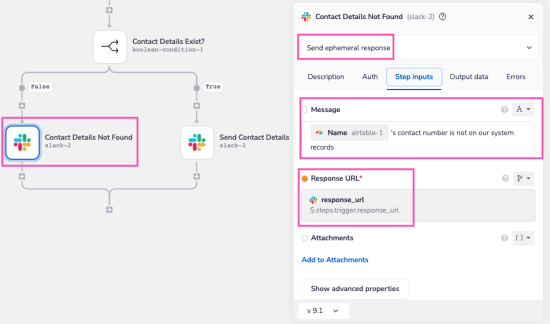
FALSE: If the Contact Number doesn't exist in the Airtable database then the response message will indicate that the user's contact number is not within the system records.