Authentication
Starting from version 10, Slack connector uses the modern app, while version 9.1 uses the classic app.
Due to differences in behavior, we recommend creating separate authentications for each version.
Refer to Slack's Differences between classic and modern Slack apps document for more details.
Version 10Copy
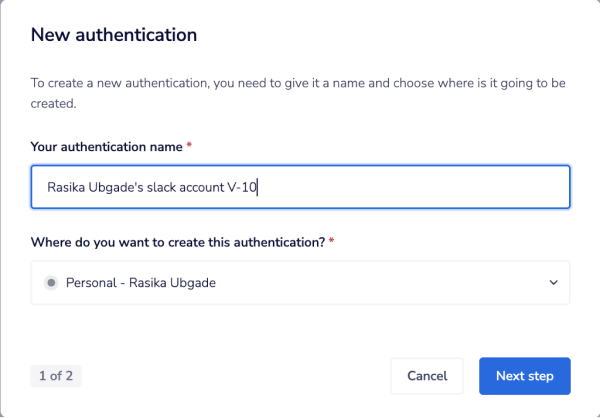
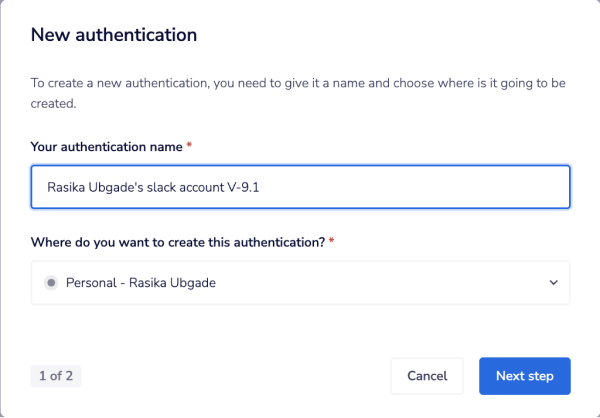
When using the Slack connector for the first time, you need to create a new authentication.

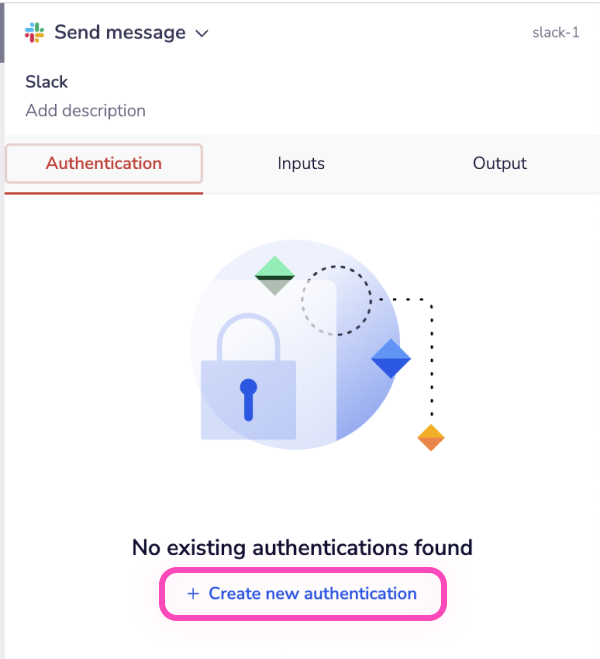
Name your authentication and specify the type ('Personal' or 'Organizational').

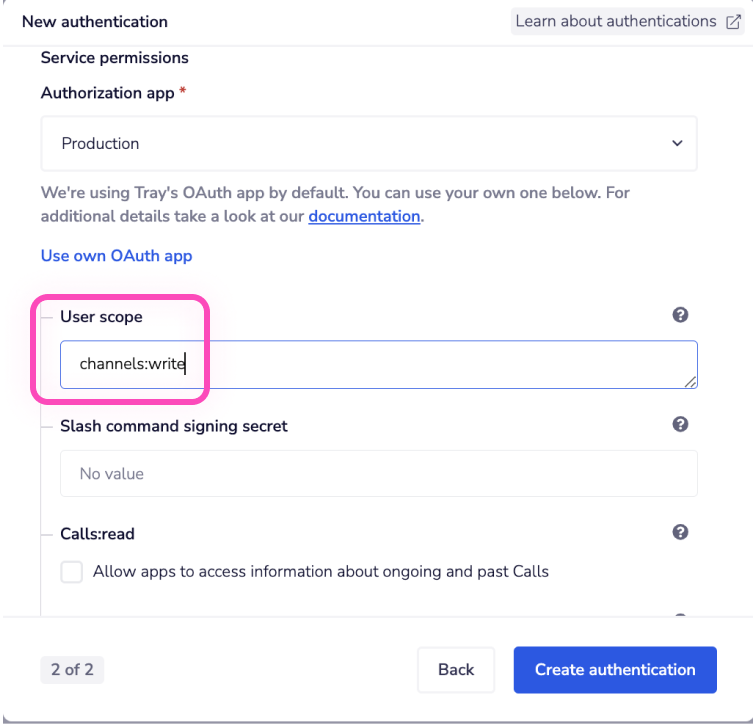
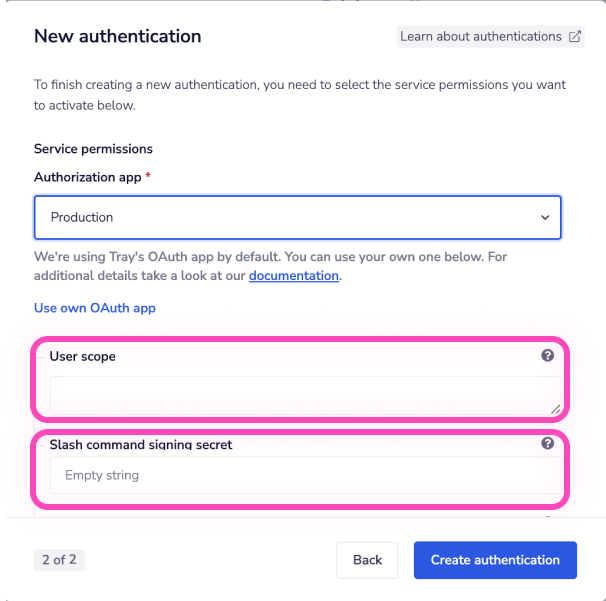
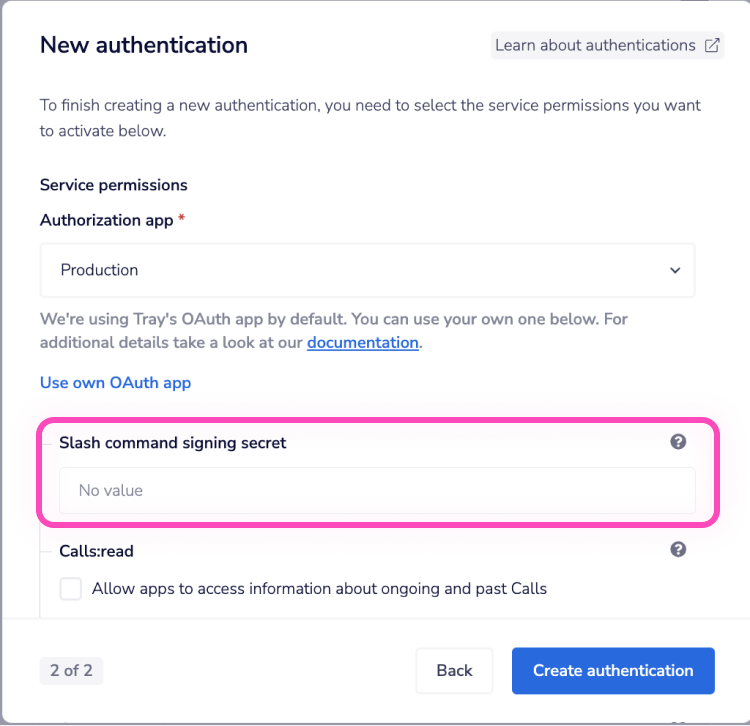
The next page optionally asks you for User scope and Slash command signing secret.
User scope: You can set additional permission scopes for users if needed, following Slack's Permission scopes document.
Add only user scopes to this field; adding other scopes will cause authentication failure.
Once you add the user scope make sure to set the Use user token field from the Advanced properties section on the Slack's properties panel to
true. If not set to true the scope from the User scope field will not be applied.The User scope permission,
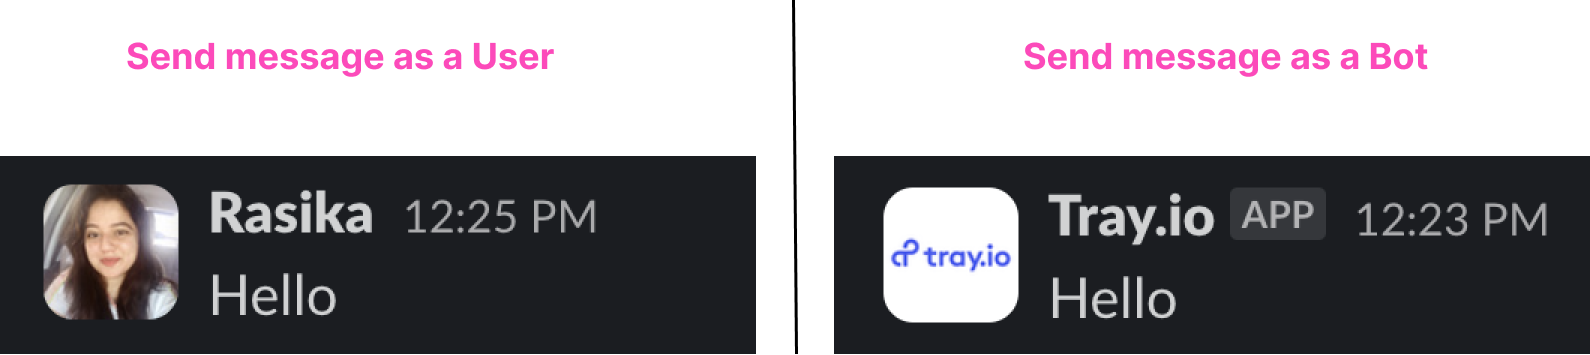
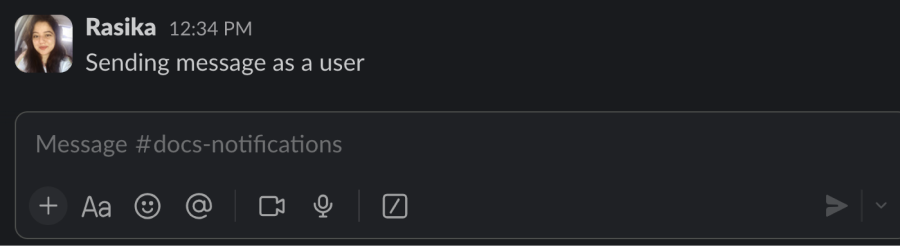
channels:writeallows you to send messages as a user rather than a bot.For a detailed understanding, refer to the User Scope vs. Extra Permission Scopes section.
Slash command signing secret: It is only necessary if you intend to use Slash commands and you want an added layer of security. Slash commands work without Signin Secrects.
IMPORTANT:
This is not a mandatory part of the authentication process.
This is also not necessary when working with Slash commands.
You only need this field if you require an extra security layer for your a Slash command.
Refer to the Slash Command Signing Secret section for instructions on how to obtain your Slash command signing secret. Feel free to skip ahead if this field is not required for your use case.


The next step is to select your service permissions. For your convenience note that the basic permissions are already pre-selected. Feel free to check or un-check the permissions based on your use case.

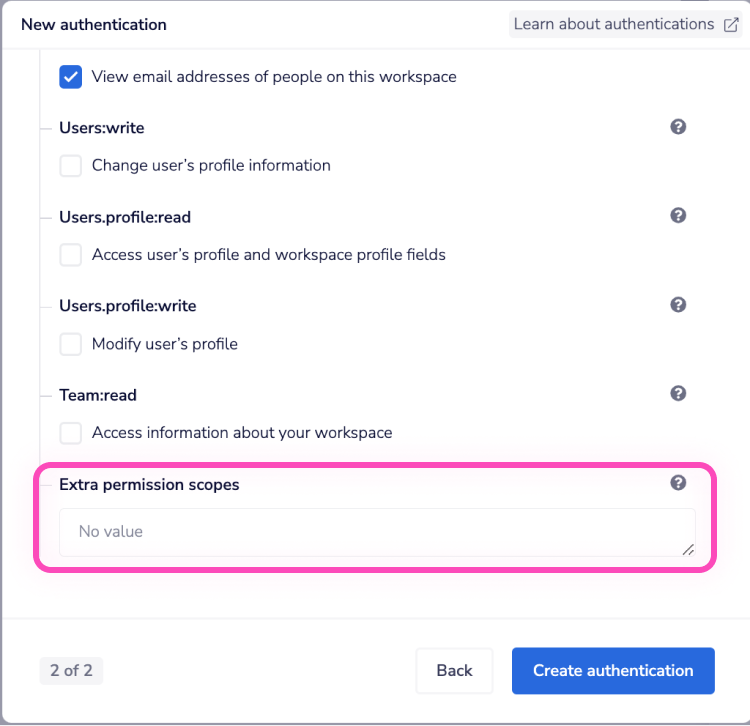
The last field is an optional field. Set additional permission scopes for users if needed, following Slack's Permission scopes document. For a detailed understanding, refer to the User Scope vs. Extra Permission Scopes section.
Do not add user scopes to this field; adding user scopes will cause authentication failure.


Once done, click Create authentication.
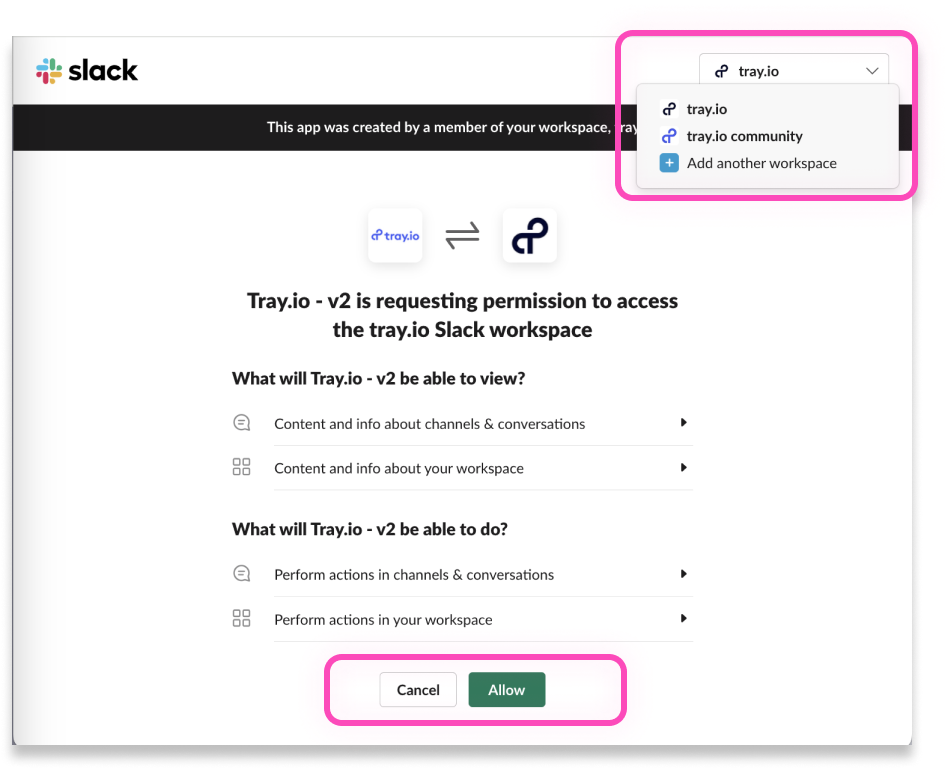
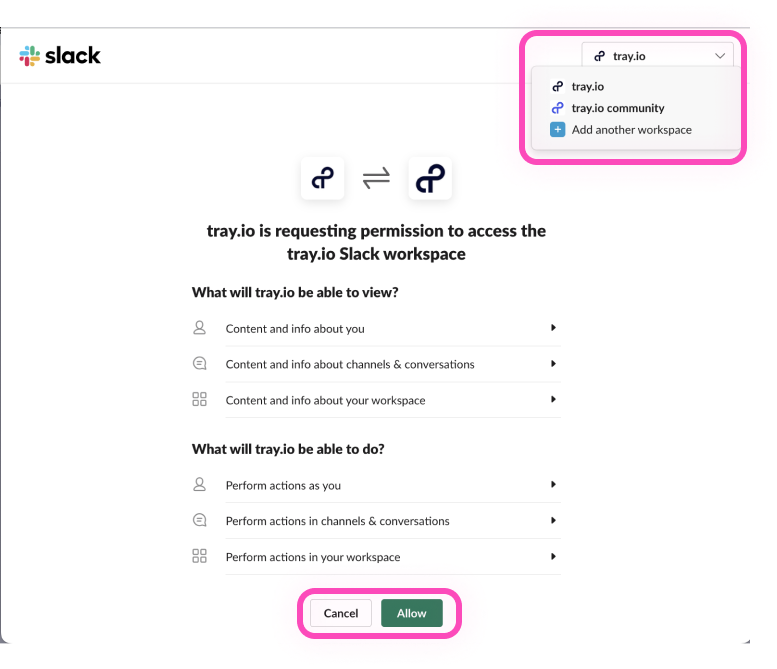
In the dialog box, choose the workspace from the top right, and then click Allow.

Go back to your settings authentication field (within the workflow builder properties panel), and select the recently added authentication from the available dropdown options . Your connector authentication setup for Slack's version 10 is now complete.
Version 9.1Copy
When using the Slack connector for the first time, you need to create a new authentication.
Name your authentication and specify the type ('Personal' or 'Organizational').
The next page optionally asks you for Slash command signing secret.
It is only necessary if you intend to use Slash commands and you want an added layer of security. Slash commands work without Signin Secrects.
IMPORTANT:
This is not a mandatory part of the authentication process.
This is also not necessary when working with Slash commands.
You only need this field if you require an extra security layer for your a Slash command.
Refer to the Slash Command Signing Secret section for instructions on how to obtain your Slash command signing secret. Feel free to skip ahead if this field is not required for your use case.

The next step is to select your service permissions. For your convenience note that the basic permissions are already pre-selected. Feel free to check or un-check the permissions based on your use case.
[Add V9 Gif here]
The last field is an optional field. Set additional permission scopes for users if needed, following Slack's Permission scopes document. For a detailed understanding, refer to the User Scope vs. Extra Permission Scopes section.
Do not add user scopes to this field; adding user scopes will cause authentication failure.
Once done, click Create authentication.
In the dialog box, choose the workspace from the top right, and then click Allow.

Go back to your settings authentication field (within the workflow builder properties panel), and select the recently added authentication from the available dropdown options . Your connector authentication setup for Slack's version 9.1 is now complete.
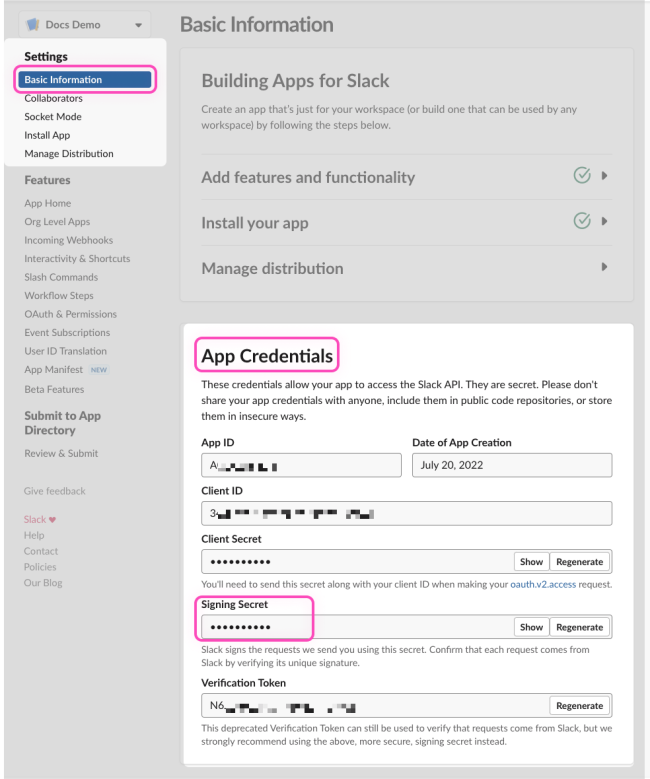
Slash command signing secretCopy
To locate your slash command signing secret:
Go to the Slack API page and click on Your apps in the top right corner. On the next page select an app from your available list or create a new one if necessary.
You will be redirected to the Basic Information page of your App. Scroll down to the App Credentials section.
This is where your Signing Secret i.e. Slash command signing secret; can be found.

User Scope vs. Extra Permission ScopesCopy
The User Scope field is available from version 10.
Ensure that you create distinct authentications for sending messages as a Bot and as a User.
User scope | Extra permission scopes | |
|---|---|---|
Acceptable scopes | accepts scopes that are relevant to both Users and Users + Bots | accepts scopes athat are relevant to both Bot and Bot + Users |
Requirement | Use when need to send message as a User | Use when need to send message as a Bot |
Forbidden scopes | Does not accept Bot scopes; providing them leads to authentication failure. | Does not accept User scopes; providing them leads to authentication failure. |