App Creation
Creating an app within Slack allows you to enhance its functionality, integrate with other tools and services, and tailor it to your specific needs. You can use Tray to build your own hyper specific Slack integrations with tools like Salesforce, Github, Asana, Dropbox etc.
Furthermore you can make these multi-service integrations i.e. you can make several services talk to each other via Tray workflows.
You need to create Slack Apps in order to use Slash commands and interactive modals, which act as the basis of your automations.
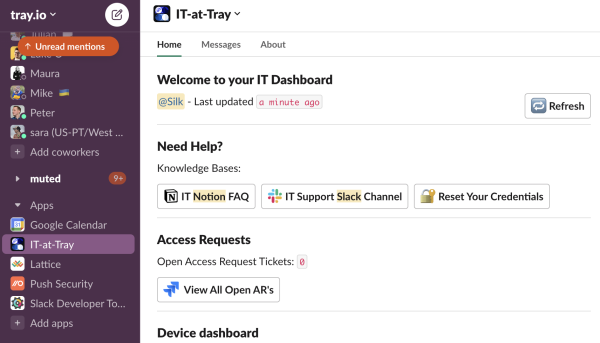
Your Apps section (at the bottom of the left hand Slack menu bar) is where your available apps are listed:

Old vs New Slack AppsCopy
Please be aware that Tray.io currently uses of Slack's OAuth 1.0 flow and works with Classic Apps only.
This means when you are building we recommend you do so according to Classic App guidelines and alongside classic Scopes. More details can be found here.
If you wish to build using Slack's OAuth 2.0 flow and use "New Slack App methodology" it would be best to build this using our custom service guidelines and use the HTTP Client connector for Slack operations.
How to create a Slack AppCopy
How to create a new Slack App Copy
If you already have a Slack App you would like to use please head to the next section.
Head to your app's management dashboard. Click the Create New App button from the top right corner of this page.
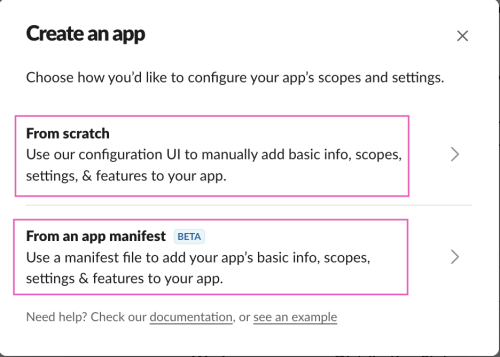
Choose how you would like to configure the scopes and settings for your app. You essentially have two input options available for you:
From scratch: This is the UI option, where you manually click and add your fields. This is the option outlined in our documentation.
From an app manifest: Manifest files are essentially a way of inputting your app preferences using a code based format (in this case YAML or JSON). This will essentially allow you to create a Slack app with a pre-defined configuration, or allow you to adjust the configuration of an existing app once you've uploaded your file.
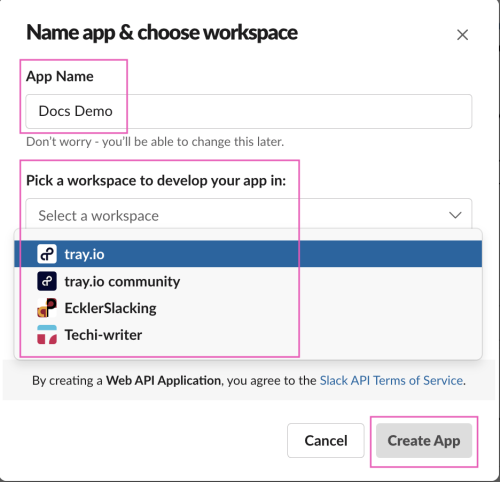
Provide an appropriate name for your application so that it can be easily identified and pick a workspace to continue your app development.


Configure your appCopy
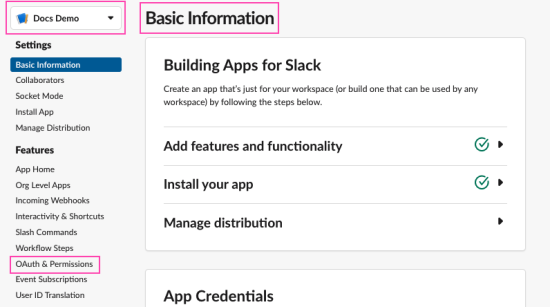
Head to the Basic Information page for your chosen app.
To add scopes select the OAuth & Permissions tab from the left navigation menu to add the required scopes needed for your use case.
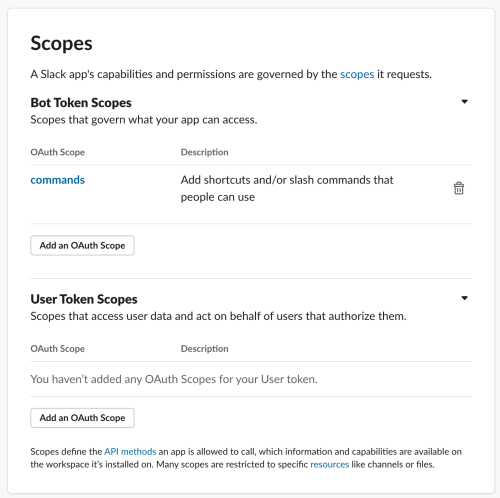
Scroll down to the Scopes section. You can add required scopes using the Add on OAuth Scope button (based on your use case).
If you are unsure of the required scopes you can add basic ones such as
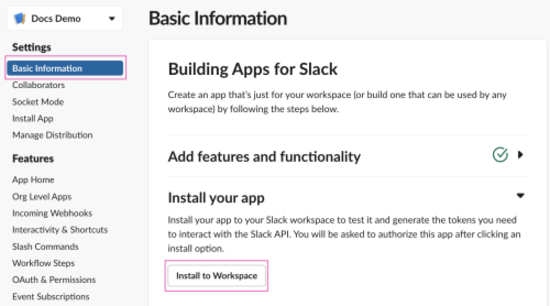
like,read and write, and others when needed.Go back to the Basic Information page. Click the Install to Workspace button.
You will be redirected to a popup screen where you will be asked to confirm the permission you are granting.
You should now be able to see your app in your selected Slack workspace.