Quickstart
Turning a project into an integrationCopy
In order to build an Embedded integration, you need to turn a 'Project' into a 'Solution'.
To demonstrate this quickly we will continue with the example from our first quickstart - showing how to turn them from basic automations into integrations that anybody (internal or external to your company) can activate for their own use.
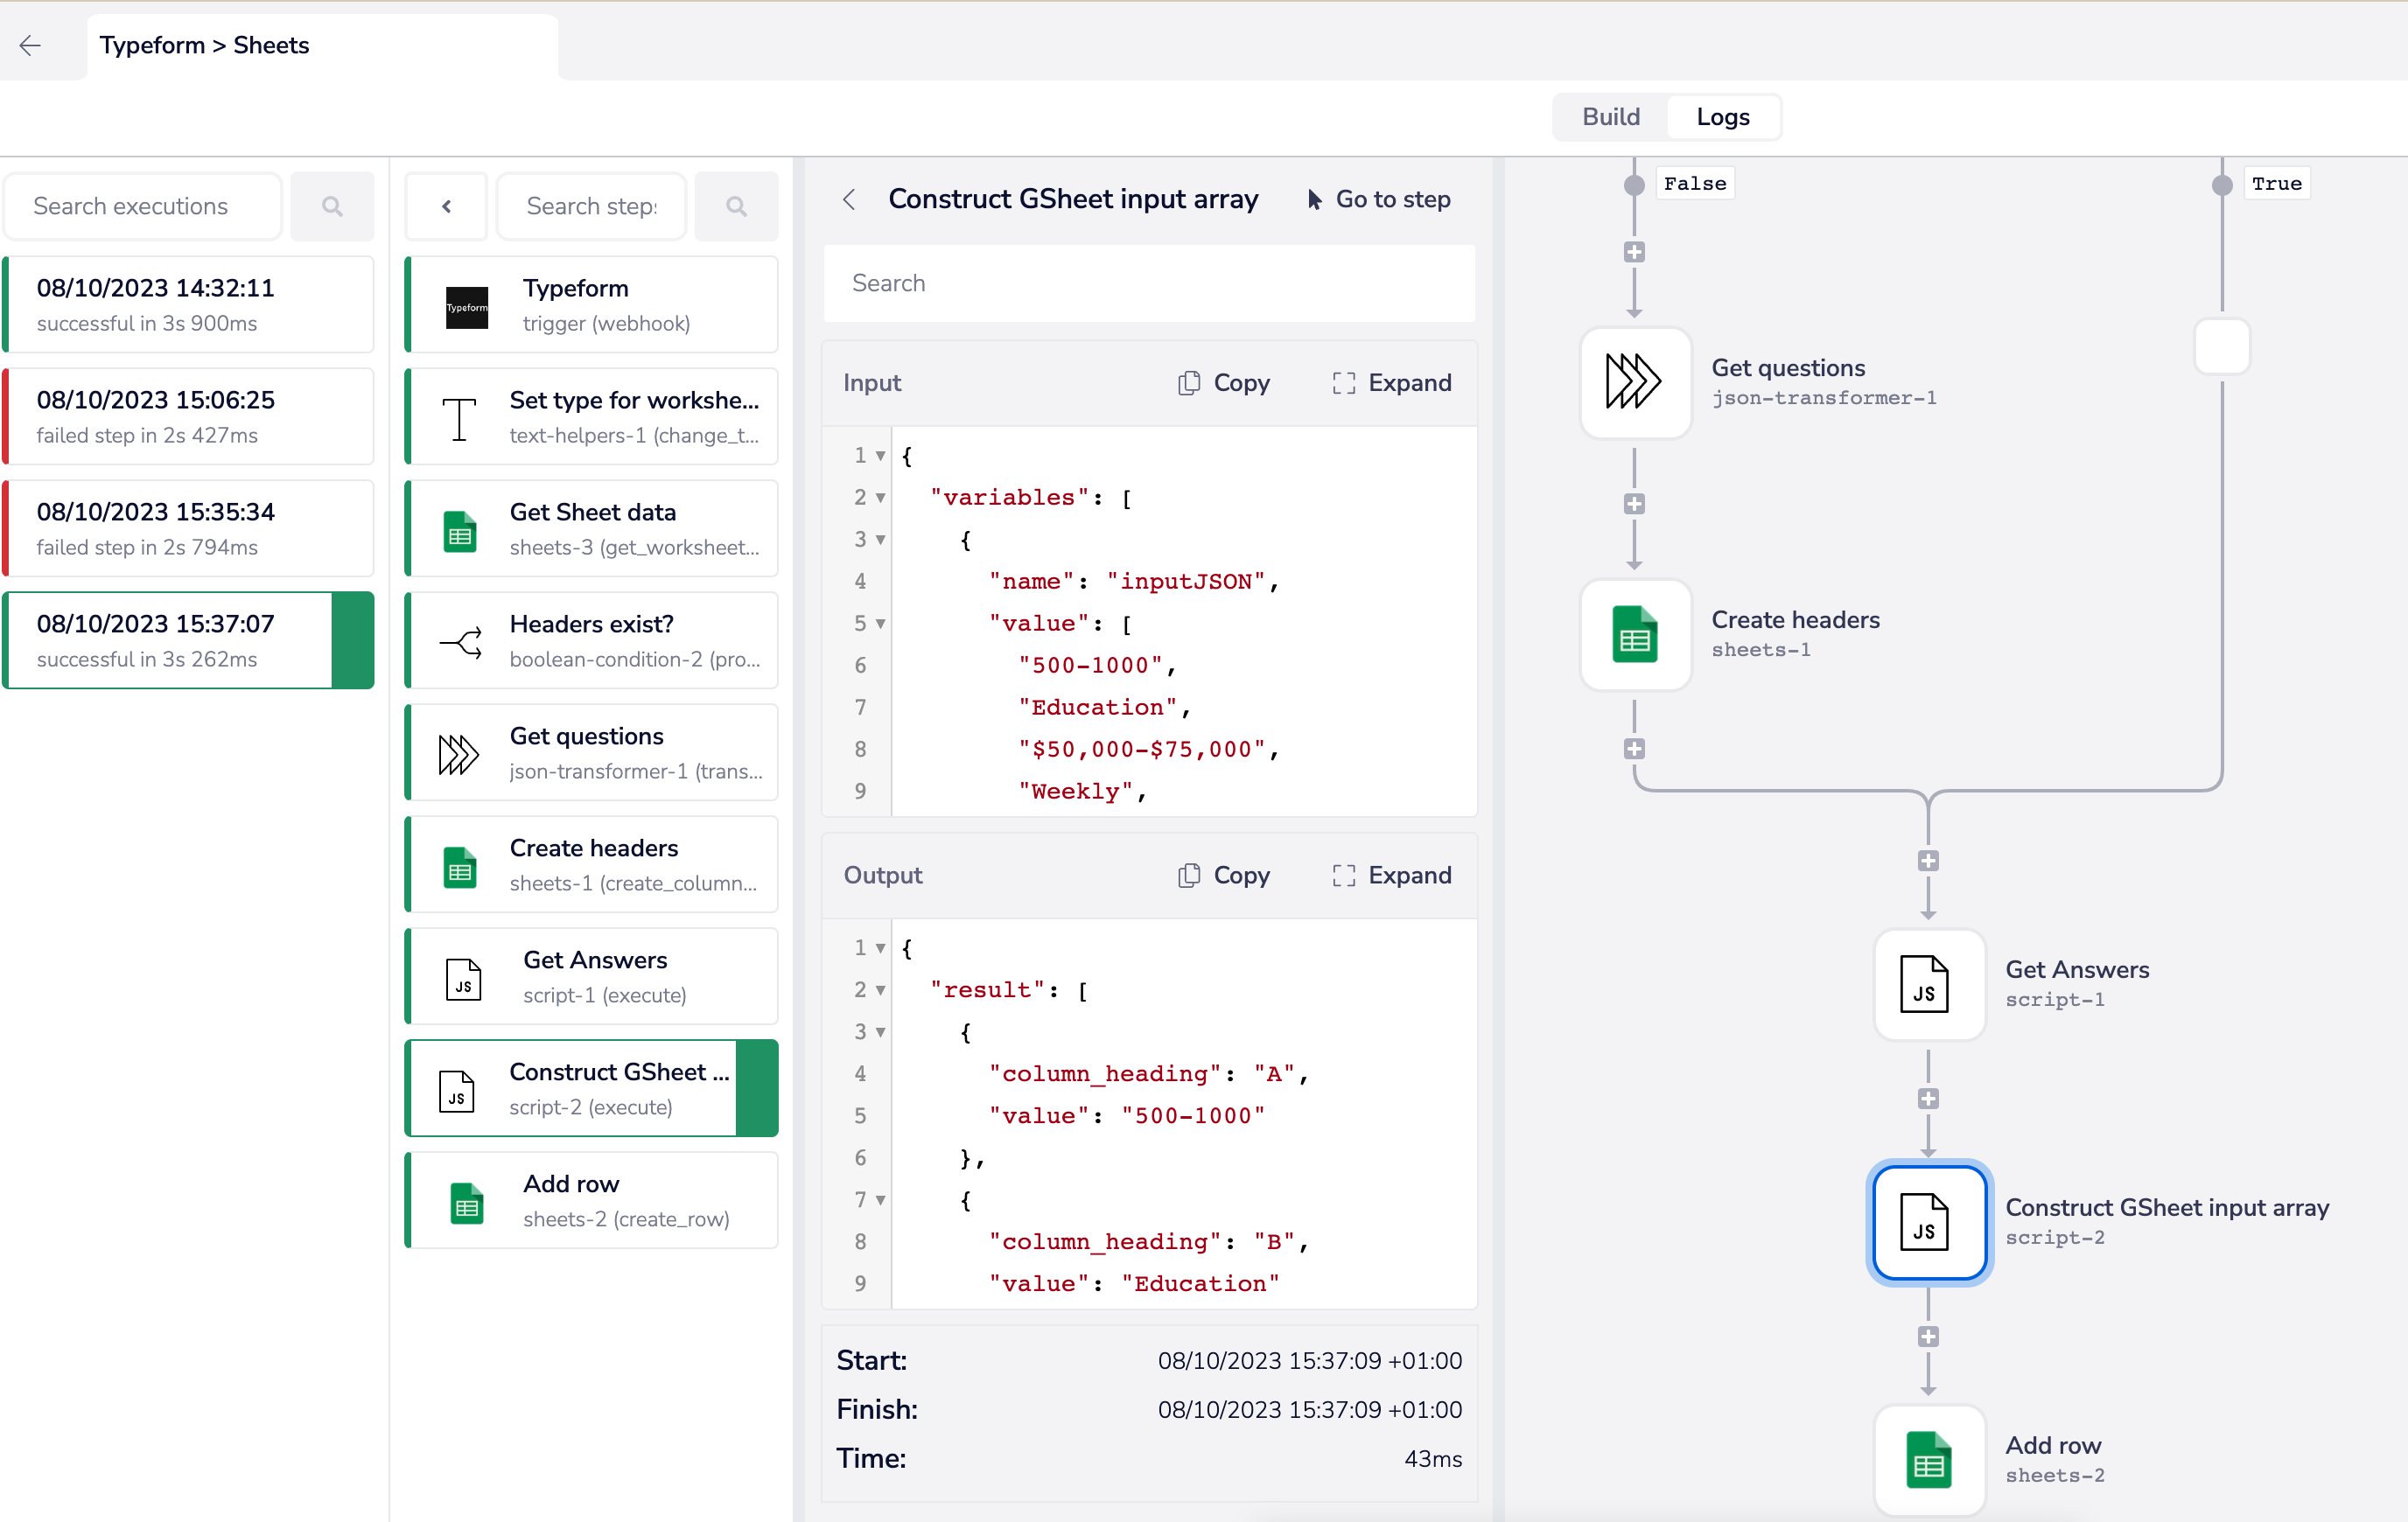
The following integration makes use of Tray's Typeform trigger.
It is set to be triggered every time a particular form in your Typeform account has a response, and send the response details to a Google Sheet:


It then does the following:
Checks if your Google Sheet has already been started (i.e. is this the first run?)
If not then it will pull the questions from the response payload and add them as headers to the Sheet
Pull the answers from the response payload and add them as a new row in the Sheet


Deploying the templateCopy
Click use template on the template card below:


Sync Typeform responses to Google Sheets (Embedded quickstart tutorial)
Every time a Typeform survey is submitted the answers are stored in a Google Sheet
When you import the template you will be asked to create new or choose existing authentications for Typeform and Google Sheets:

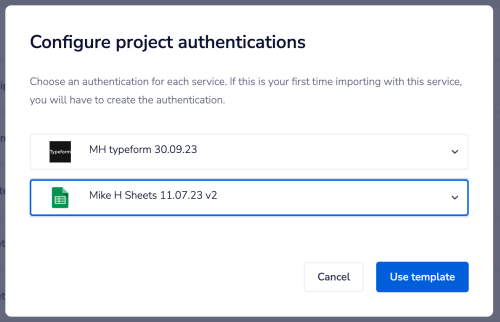
If your browser session is already logged into both services then you can just pick up the logged in sessions for each when the auth dialog is launched. Once imported, follow the rest of this tutorial to learn how to test the source workflows, followed by creating a test Instance for an End User.
Creating config slotsCopy
In order to enable End Users to personalize integrations for their own use, you need to identify what pieces of Config Data they need to be able to set:

In this case they need to be able to set:
The form id of their individual Typeform survey (obtained from the url when working in the Typeform UI)
The spreadsheet id of the Google Sheet they want to record the results in
The worksheet name of the Google Sheet
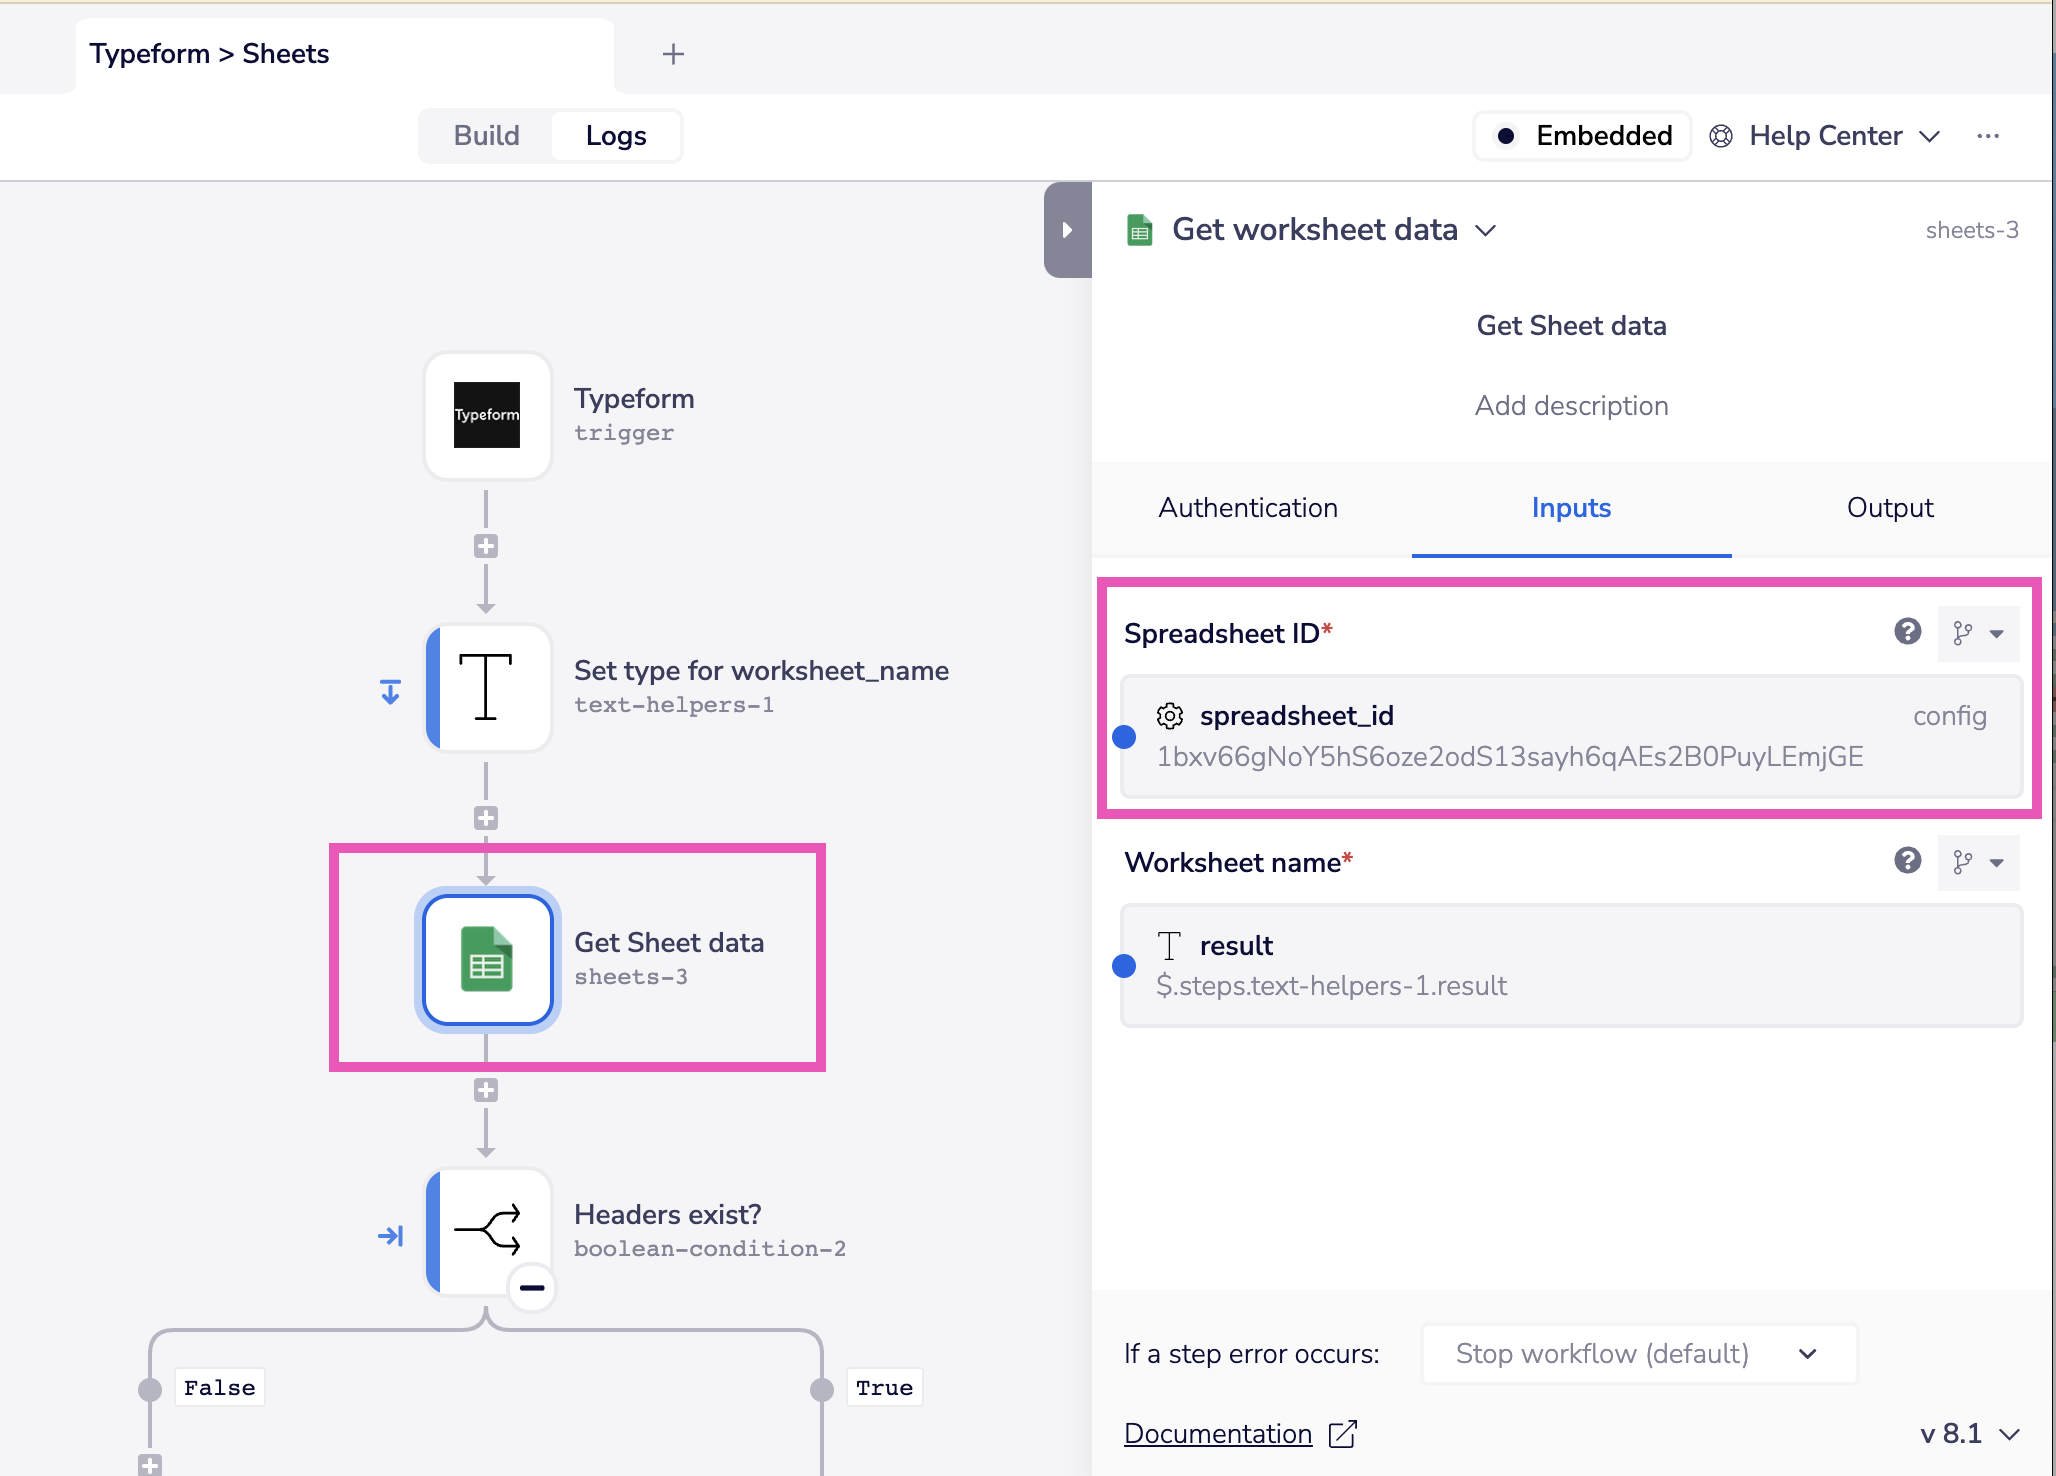
The config is then referenced at the appropriate points in the workflow steps:

Testing the source workflowsCopy
Before publishing a solution, you will need to do some test runs of the source workflows using test auths and data.
In this case we:
Create a Typeform survey in the Typeform UI
Create a Google Sheet to store the results of the form submissions (don't add any column headers as the workflow will do that for you when the first form is submitted)
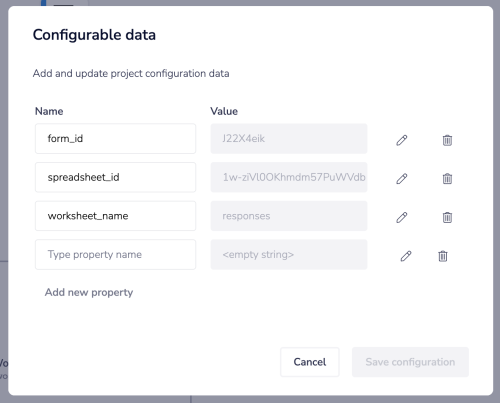
Update the 'default' project config with:
The typeform form_id
The Google Sheet spreadsheet_id
The Google Sheet worksheet_name
Enable the workflow
Go to the Typeform survey url to complete and submit a full set of responses
Check the logs of your workflow to ensure the submission has triggered a successful run
Check your dedicated Google Sheet to find the results of the first form submission
Creating the SolutionCopy
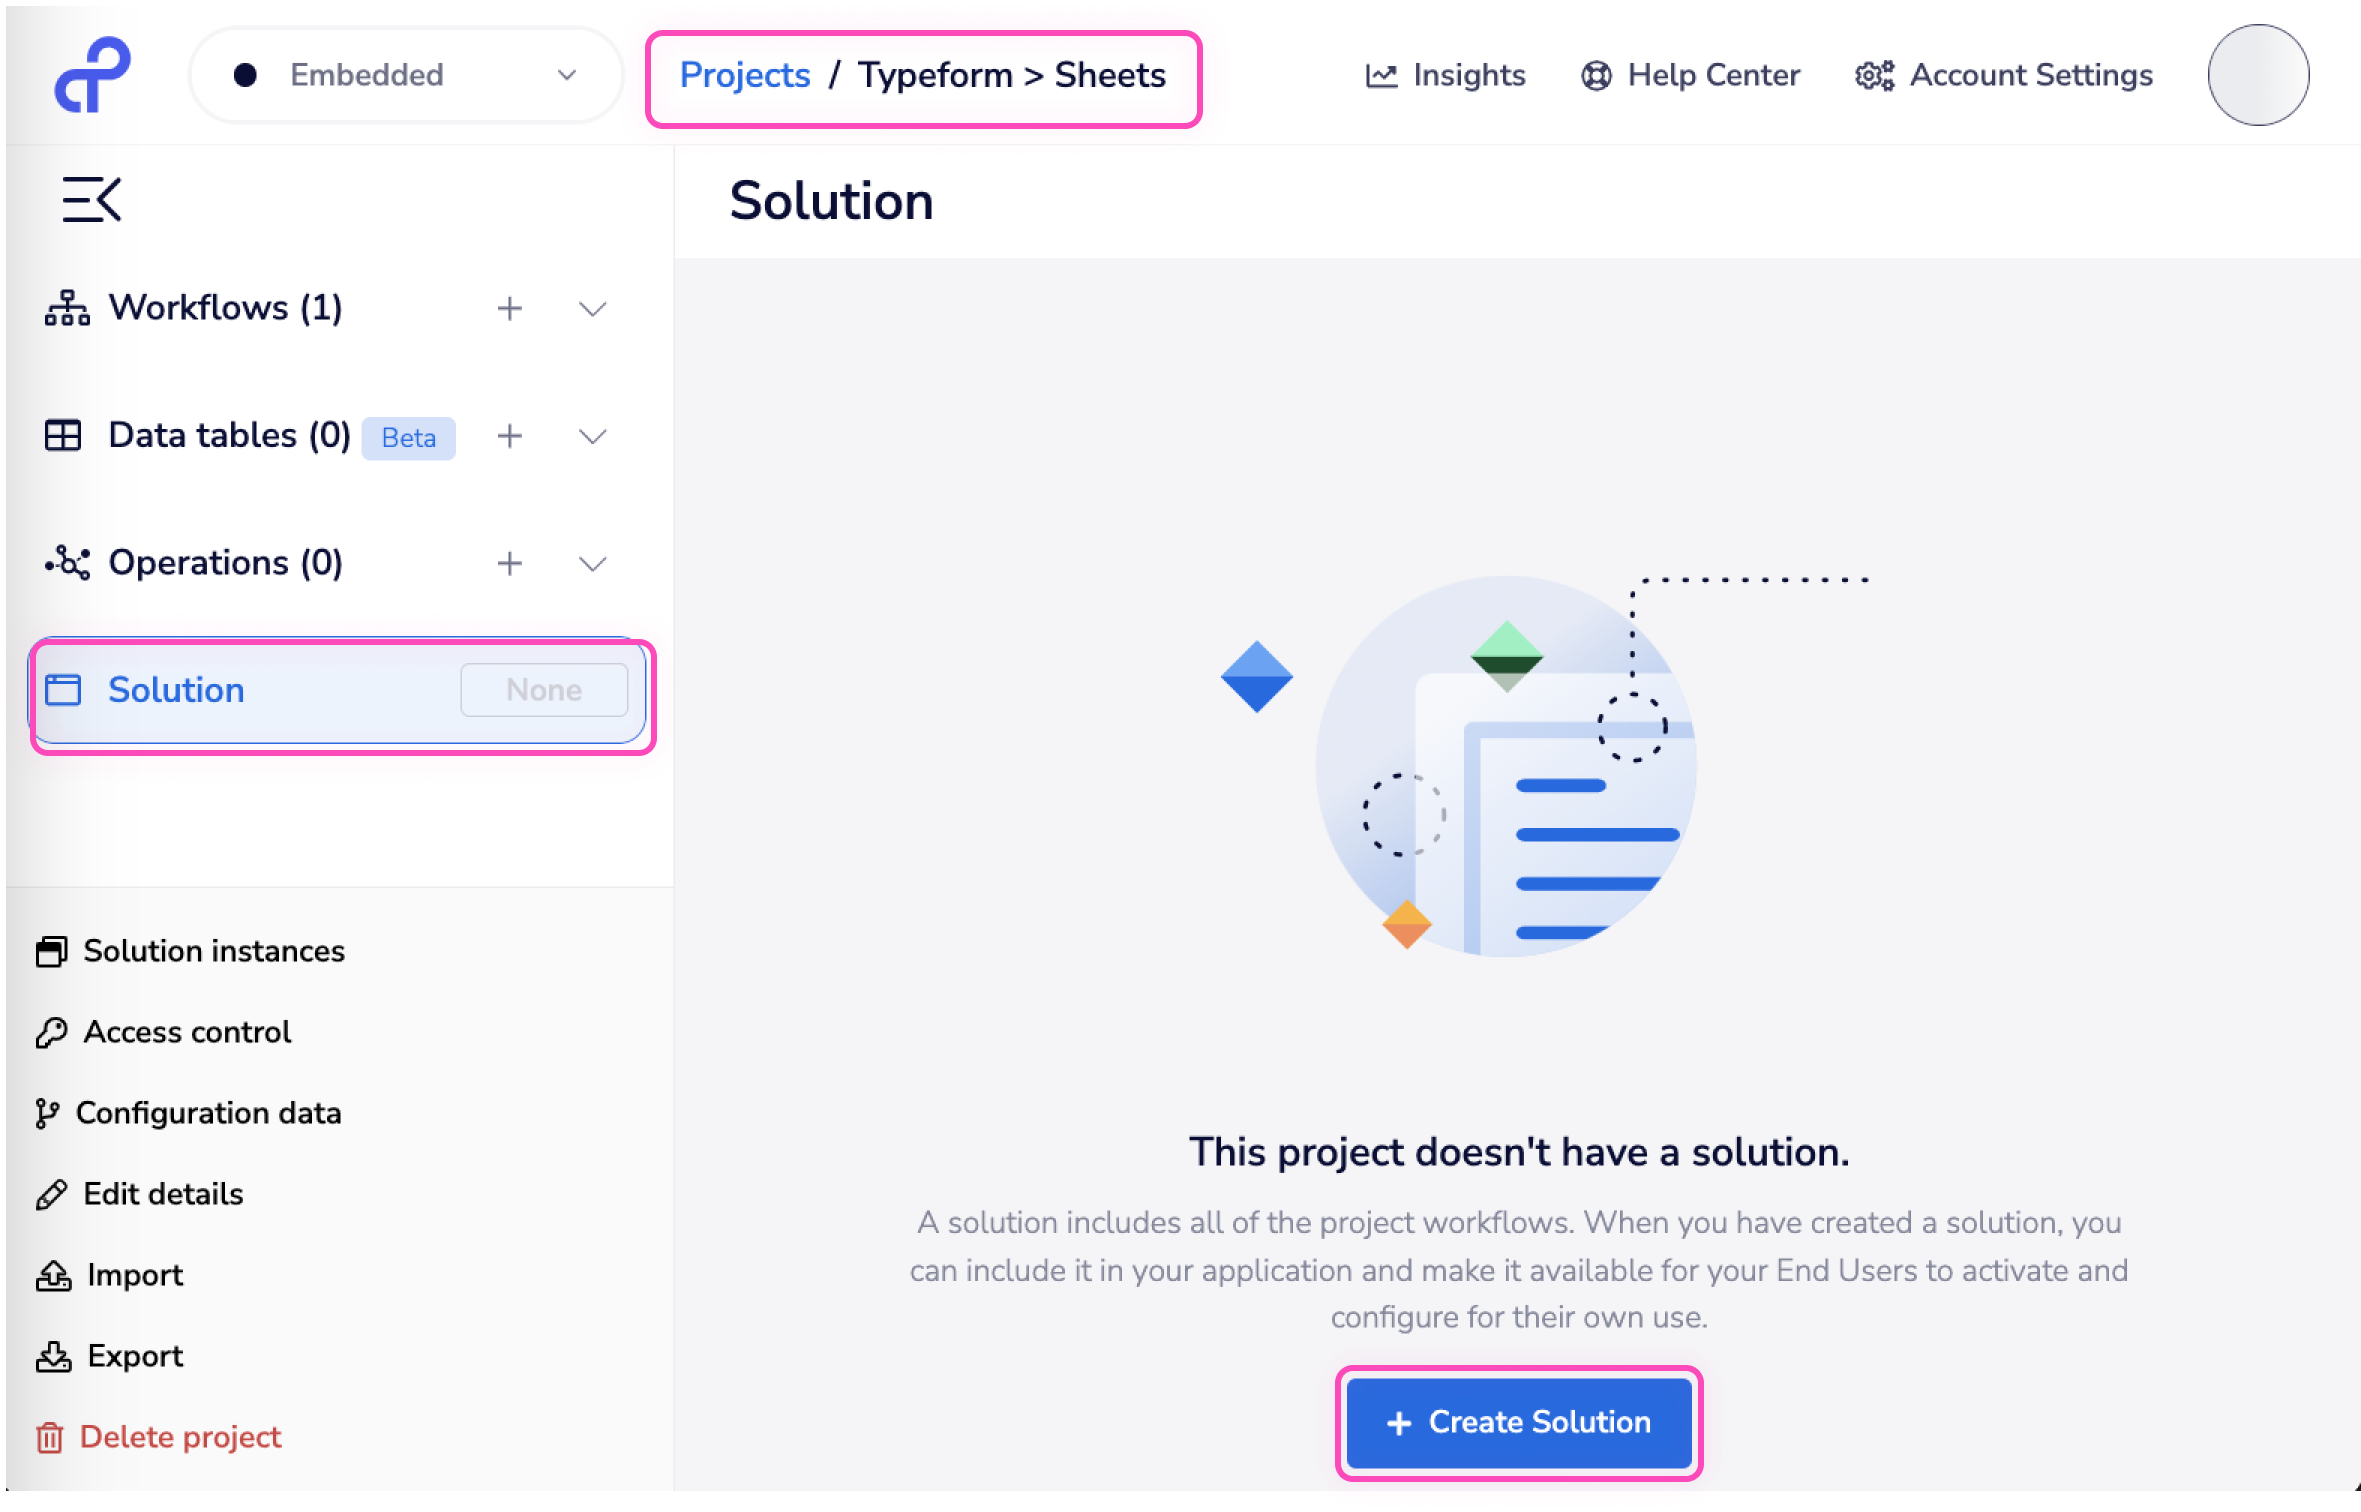
Once you have tested the source workflows you can return to the main project screen and click 'Create solution':

Editing the SolutionCopy

Once your Solution has been created you will see the Solution Editor.
The primary function of the Solution Editor is to edit the screens which appear in the Config Wizard.
You can:
Edit and rearrange the order of the screens
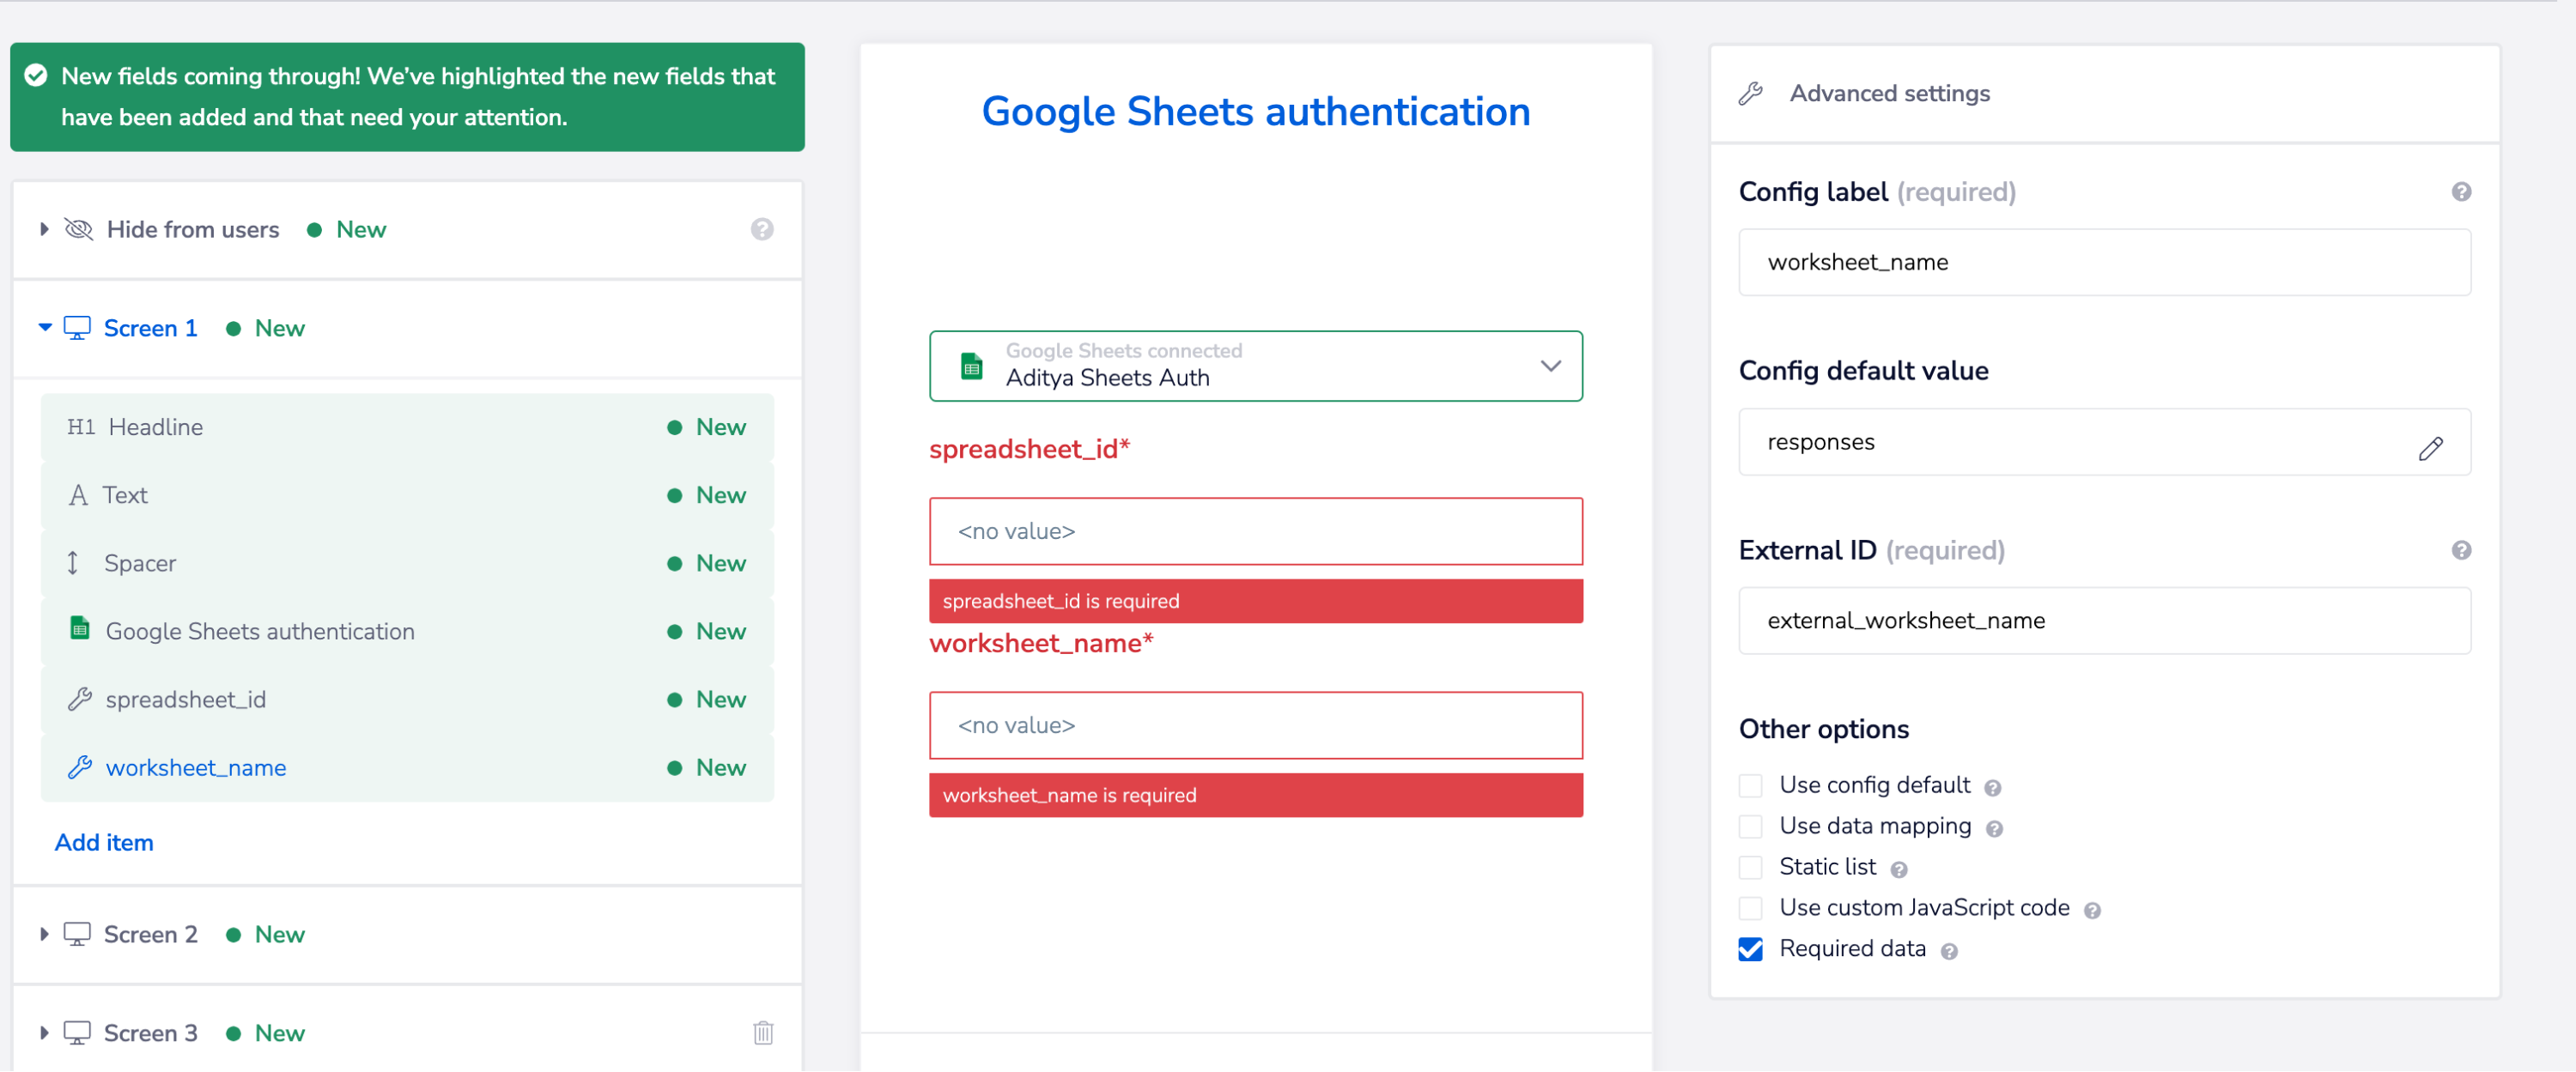
View, edit and rearrange the auth slots / config slots and their default values
View and edit the external id of the auth / config slots (these are returned when e.g. listing Solutions using the Embedded API and are also used with Custom JS)
However, with this template you won't need to make any changes, and can just go ahead and publish
Publish the SolutionCopy
When ready you can click on 'publish' as shown above in the Solution Editor screen.
Creating a Solution InstanceCopy
Once your Solution is published, registered End Users can create Solution Instances.
This can be done by presenting the Solutions within your own application and making use of the Embedded APIs to register and login users, and allow them to create / edit their own instances, as demonstrated in our integration marketplace demo
Within the Tray UI, it is also possible to manage this process entirely on behalf of End Users - assuming you are running a small-scale integration with a limited number of End Users.
For this example we can take you through that process.
1. Within the project, you can view existing and create new Solution Instances by clicking on the 'Solution Instances' tab


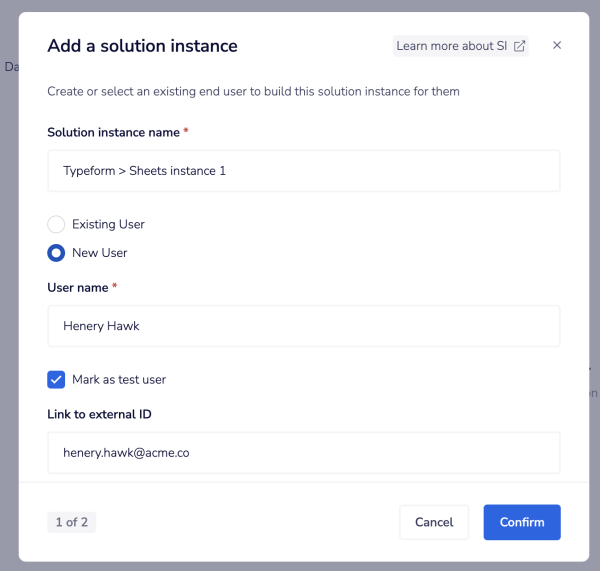
2. When creating an instance you can create a new End User (and mark them as a test user so they don't contribute to billing):

3. Create an auth for Google Sheets, enter a sheet id and select the worksheet (notice this is available as drop-down!):


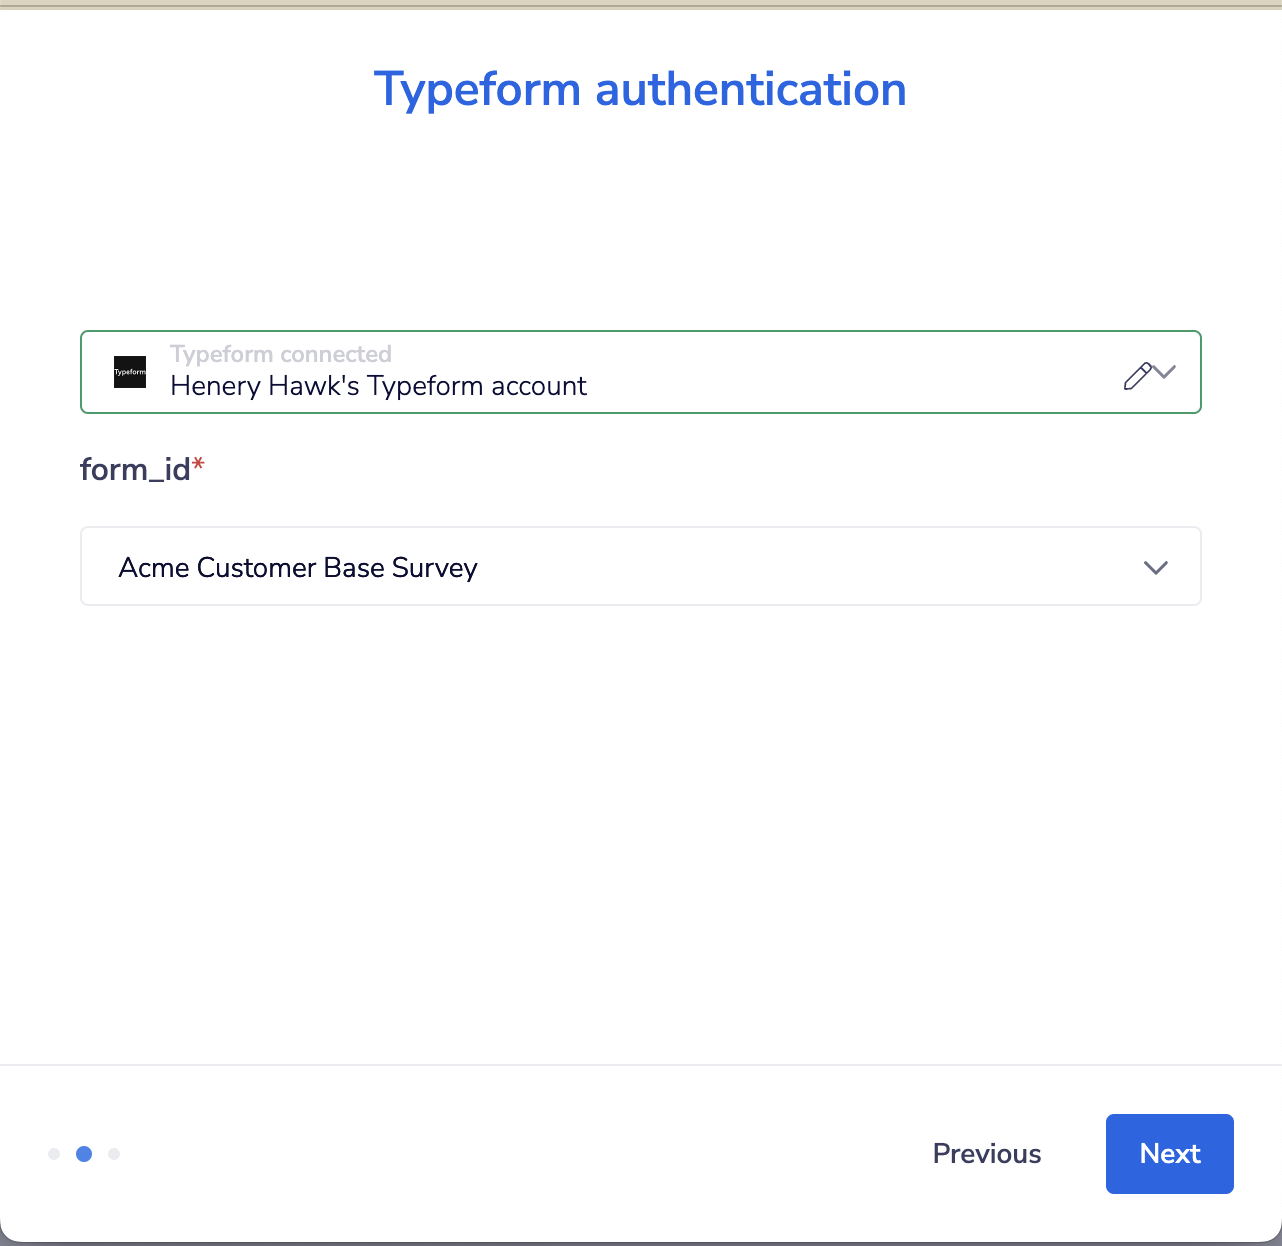
4. Create an auth for Typeform and select the form (again notice this is available as a drop-down!):

Testing the instanceCopy
Once an instance has been created, you can generate a test run for that End User.
In this case you should:
Go to the url of the Typeform survey that was specified in the Config Wizard when creating their instance
Answer all the questions and submit the form
Go to the Google Sheet that was specified in the in the Config Wizard when creating their instance, and observe the created headers and first row of results
Debugging the instanceCopy
For any Solution Instance, it is possible to view the instance-specific workflows by clicking on 'Debug workflows' for that instance:


This will open the workflows in read-only mode and you will be able to view the logs for all successful / failed runs of the workflows: