Tray partner-defined schema
Here we present a scenario where you can use the 'Hardcoded list' option for mapping data in your integration.
The following solution imagines a situation whereby:
Single customer data objects from a source service are coming into a webhook-triggered workflow,
You want to map the fields in that data so it matches the field names (keys) in your destination service.
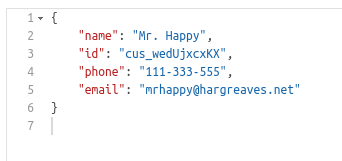
The incoming data is in the following format:

While the destination (in this case we are using Airtable as a generic placeholder for any service you may be mapping data to (Salesforce, Hubspot, Marketo etc.)) data is in the following format:

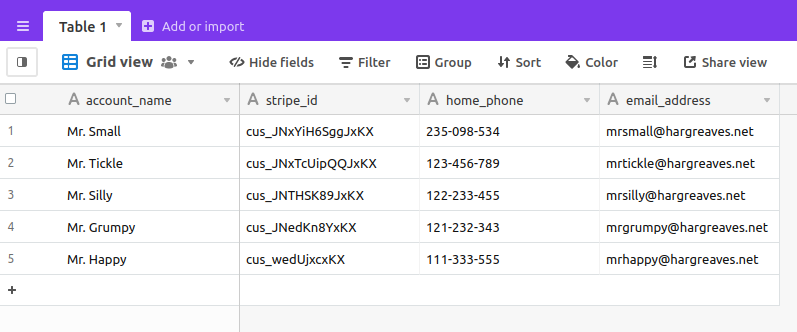
So you can see that we are wanting to map the following fields:
| Service 1 | Service 2 |
|---|---|
| name | account_name |
| id | stripe_id |
| phone | home_phone |
| email_address |
Creating a data mapping SolutionCopy
There are 2 main steps involved in creating a data mapping solution:
Create the source workflow with the 'Mapping' project config and run some test data through it
Turn this workflow into a solution, and make the data mapping config available for End Users to configure
1 - Create and test the workflowCopy
The webhook-triggered workflow for this solution is very simple:

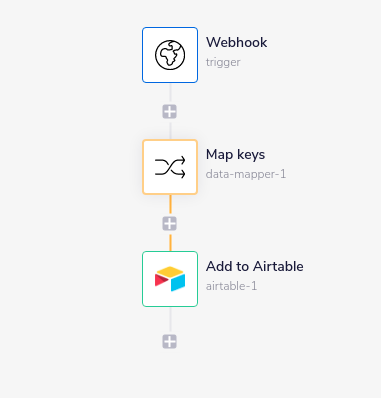
The following is a break-down of the three connector steps involved:
2 - Creating the SolutionCopy
In the Solution Editor, to set the mapping option available to your End Users, make sure the 'Use data mapping' box is ticked.
Then click on the pencil icon for the 'Mapping' config:

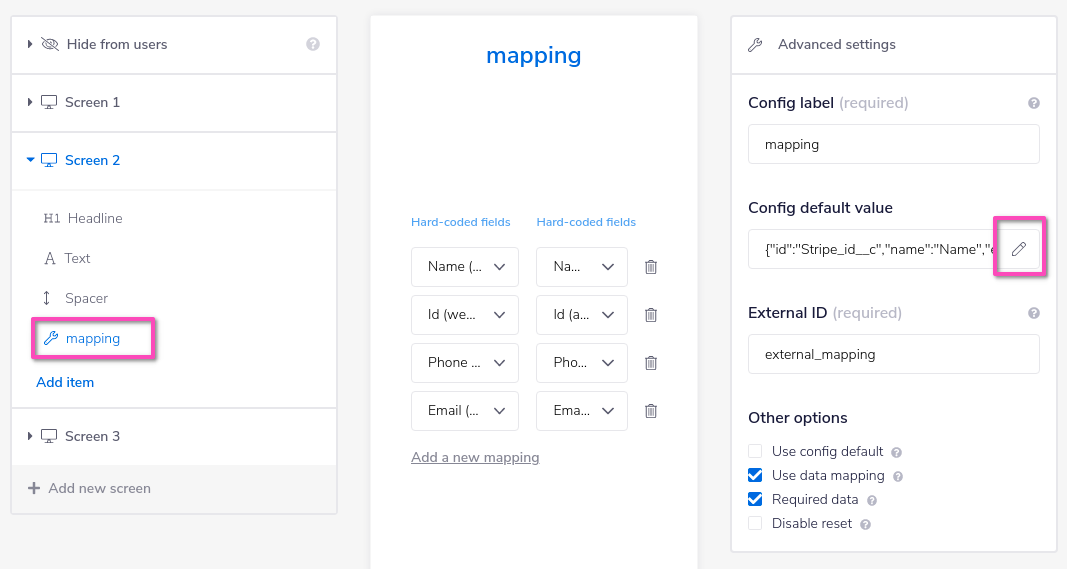
You can then set up the hardcoded mapping for the two services:
Remember that the field names for Service 2 must exactly match the column names in your Airtable database:


Please see the note on determining service field names below for more guidance on establishing the field name requirements for the source and destination services.
3 - End User activates instanceCopy
The final stage of the process is when the End User activates an Instance by starting the Config Wizard, and they can then choose the mapping based on the hardcoded fields you have made available to them:

