Translating Programming Constructs to Tray Workflows


Zach Gay
Solutions Architect
How do I implement a function in the Tray Platform? What about a switch statement? While loops? This blog will show how to implement such programming constructs in the Tray Platform. Click on a construct below to see how to do its implementation.
- In this blog
- If Statement
- Switch Statement
- For Loop
If Statement
Suppose we had the following code segment:
1let x = 3;2let y;3if (x == 3 || x == 4)4{5y = true;6}7else8{9y = false;10}
In the Tray Platform, this code segment would look like this:
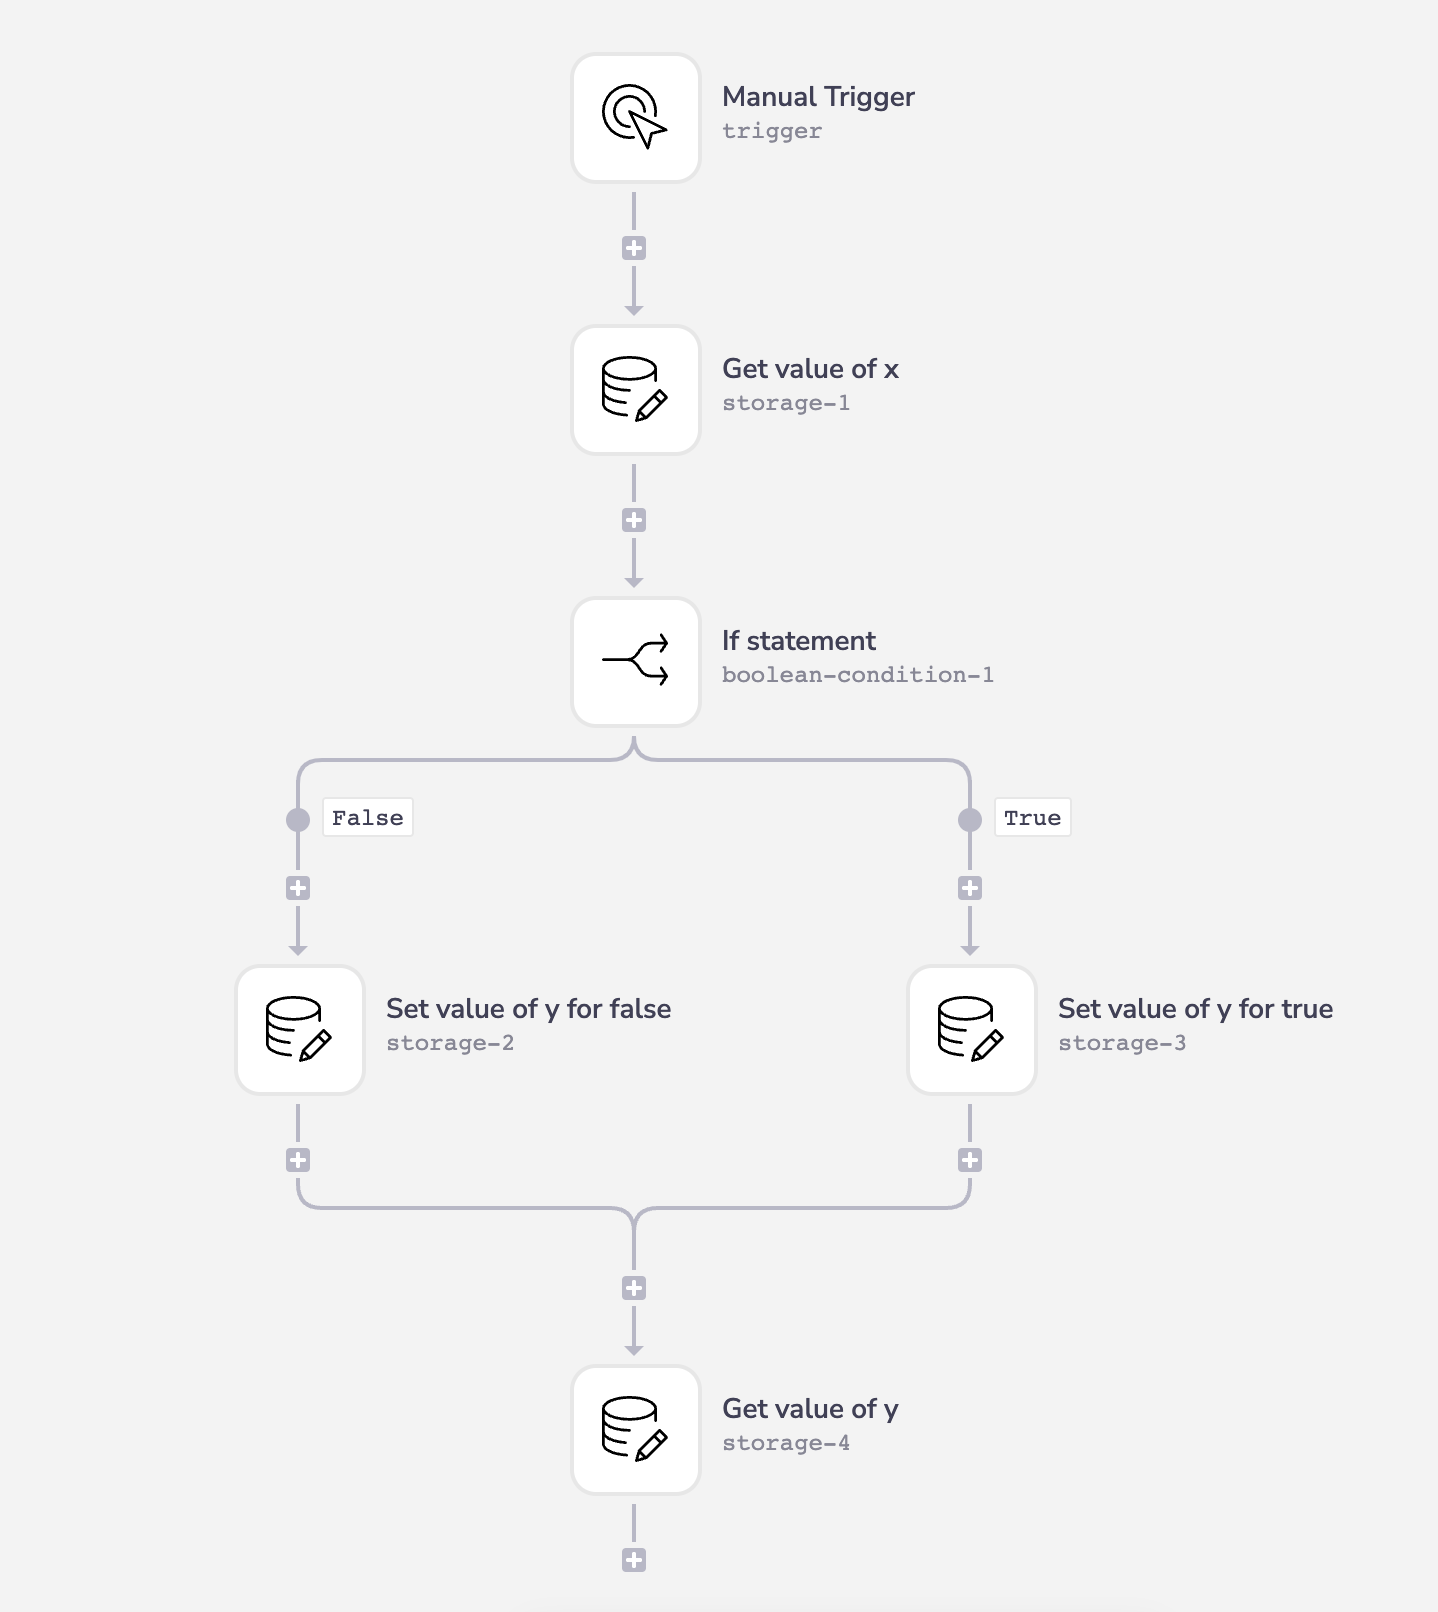
In the first step of this workflow, we will get the value of the x variable using the Data Storage connector. If it does not have a value, we will set it to 3 by default. This variable that is used in the if statement can come from any service. For the sake of the example, we created it in a Data Storage connector step.
In the subsequent step, we will use the Boolean connector to simulate an if statement. Inside the Boolean connector, you can specify the number of conditions that must be satisfied to navigate down the appropriate path.
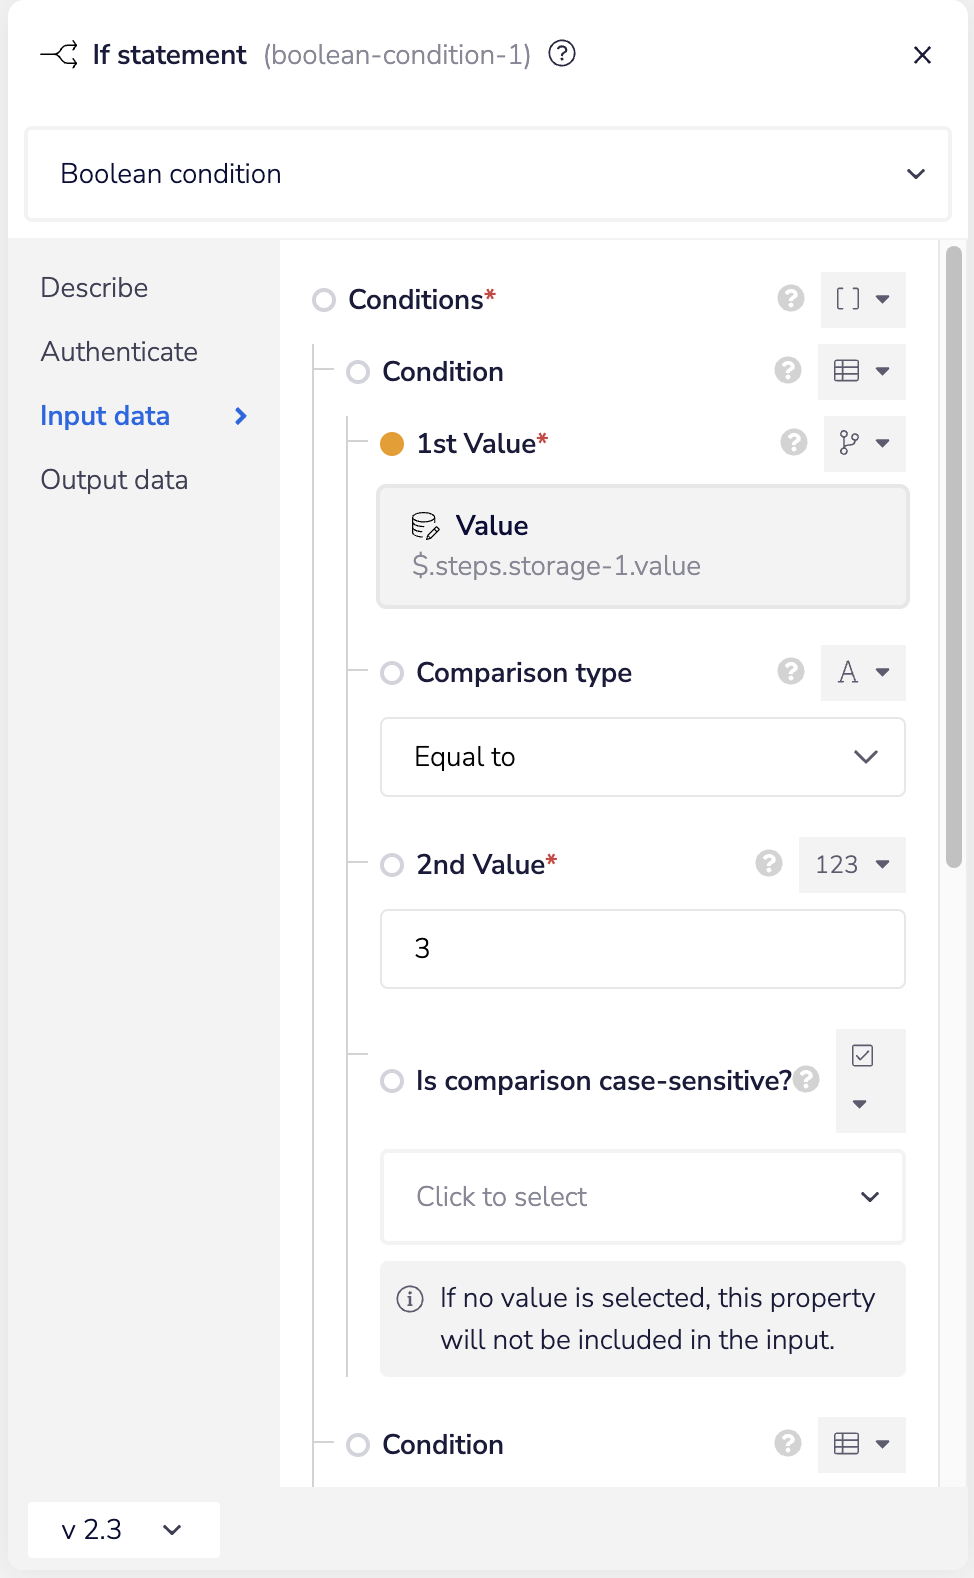
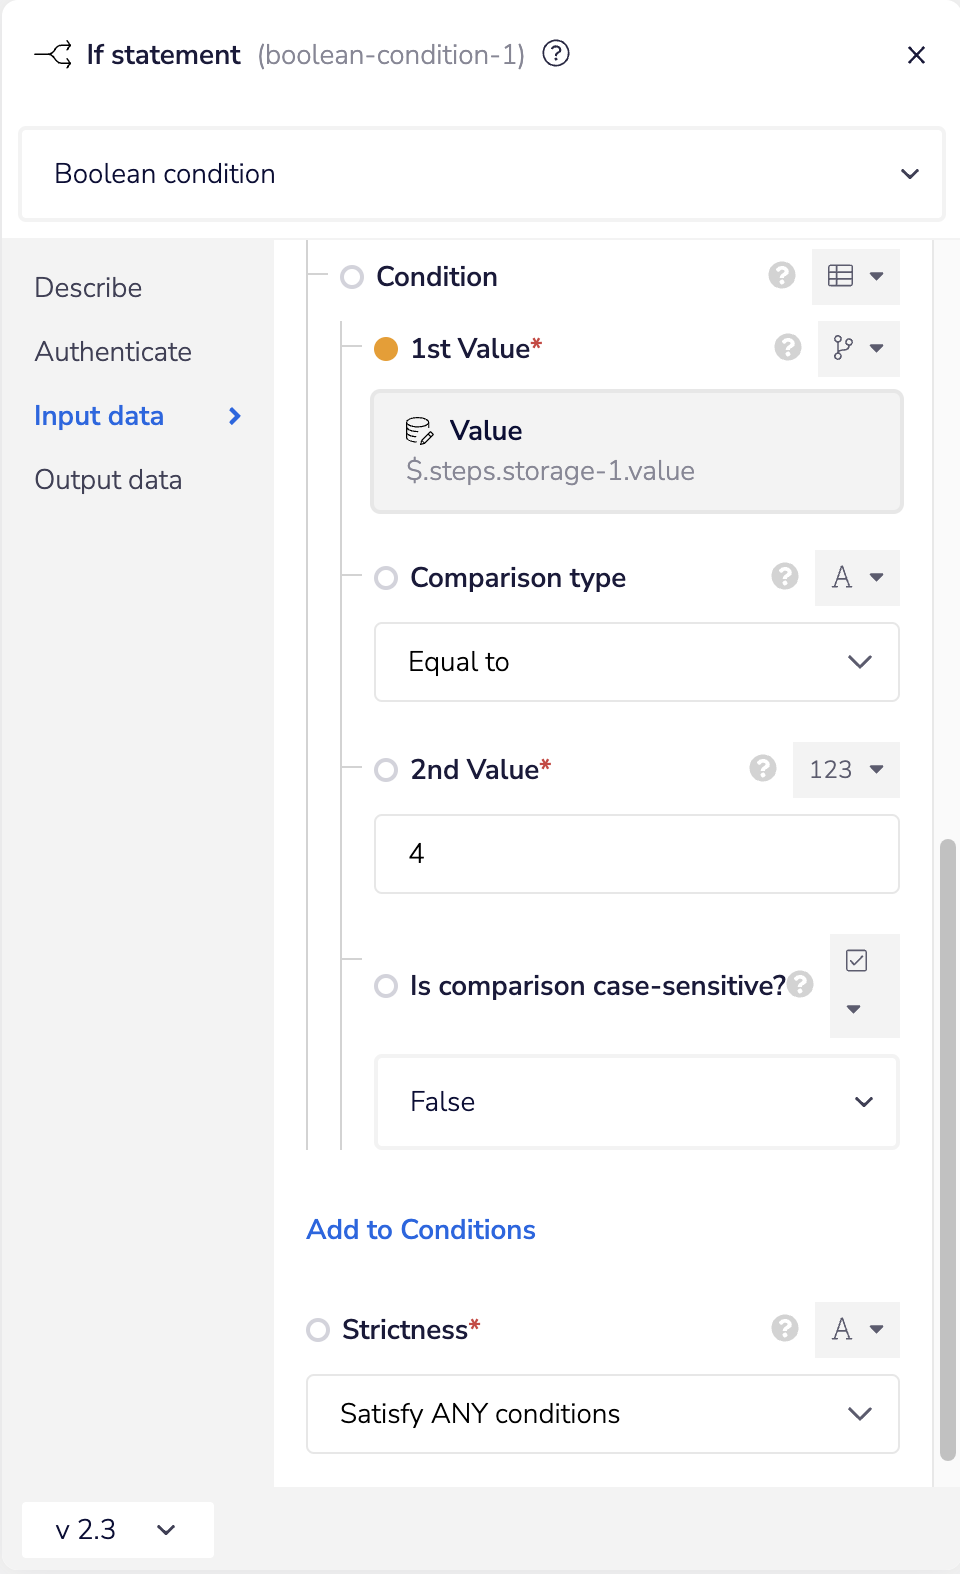
Inside the Boolean connector, we will set the Strictness to be Satisfy ANY conditions because our code segment is performing an OR conditional. If the if statement was an AND conditional, we would set the value of Strictness to be Satisfy ALL conditions. After the if statement is complete, we will retrieve the value of y using the Data Storage connector, so we can use re-use the result of the if statement in subsequent workflow steps.
Switch Statement
Suppose we had the following code segment:
1let text = "";2let fruit = "apple";3switch (fruit) {4case "apple":5text = "The fruit is apple!";6break;7case "banana:8text = "The fruit is banana!";9break;10default:11text = "No fruit found";12}
In the Tray Platform, this code segment would look like this:
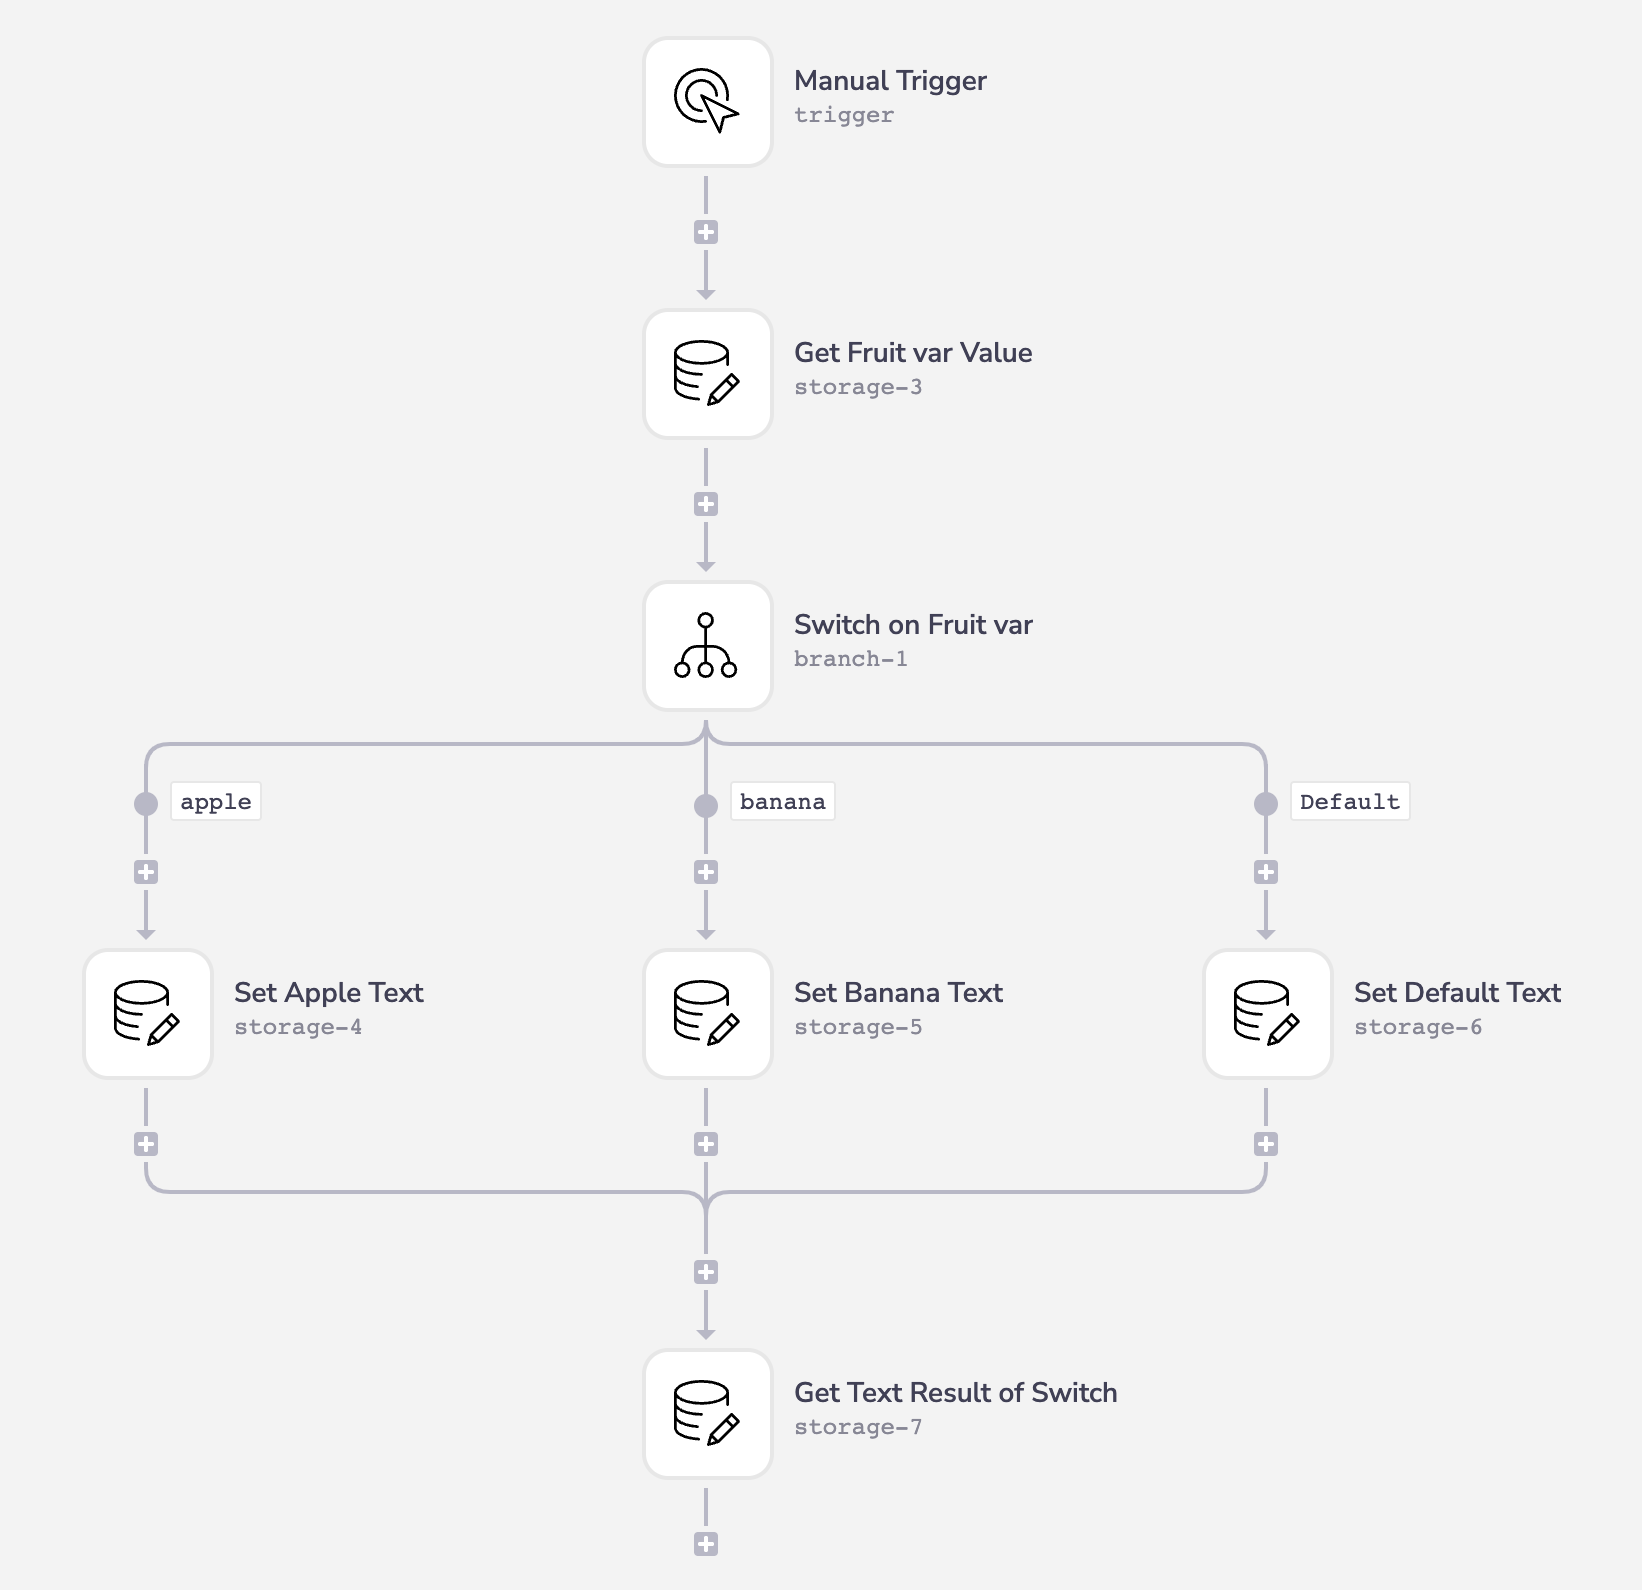
In the first step of this workflow, we will get the value of the fruit variable using the Data Storage connector. If it does not have a value, we will set it to "apple" by default. This variable that is used in the switch statement can come from any service. For the sake of the example, we created it in a Data Storage connector step.
In the subsequent step, we will use the Branch connector to simulate a switch statement. Inside the Branch connector, you can specify the value to perform the switch statement on. In our case, the switch statement will be performed on the fruit variable. There are two values to set per branch: value and label. Think of value as the equivalent of the case in the code segment. The label is the text that appears on the branch in the workflow builder to help the builder visualize the reason why a workflow execution would follow down any given path.
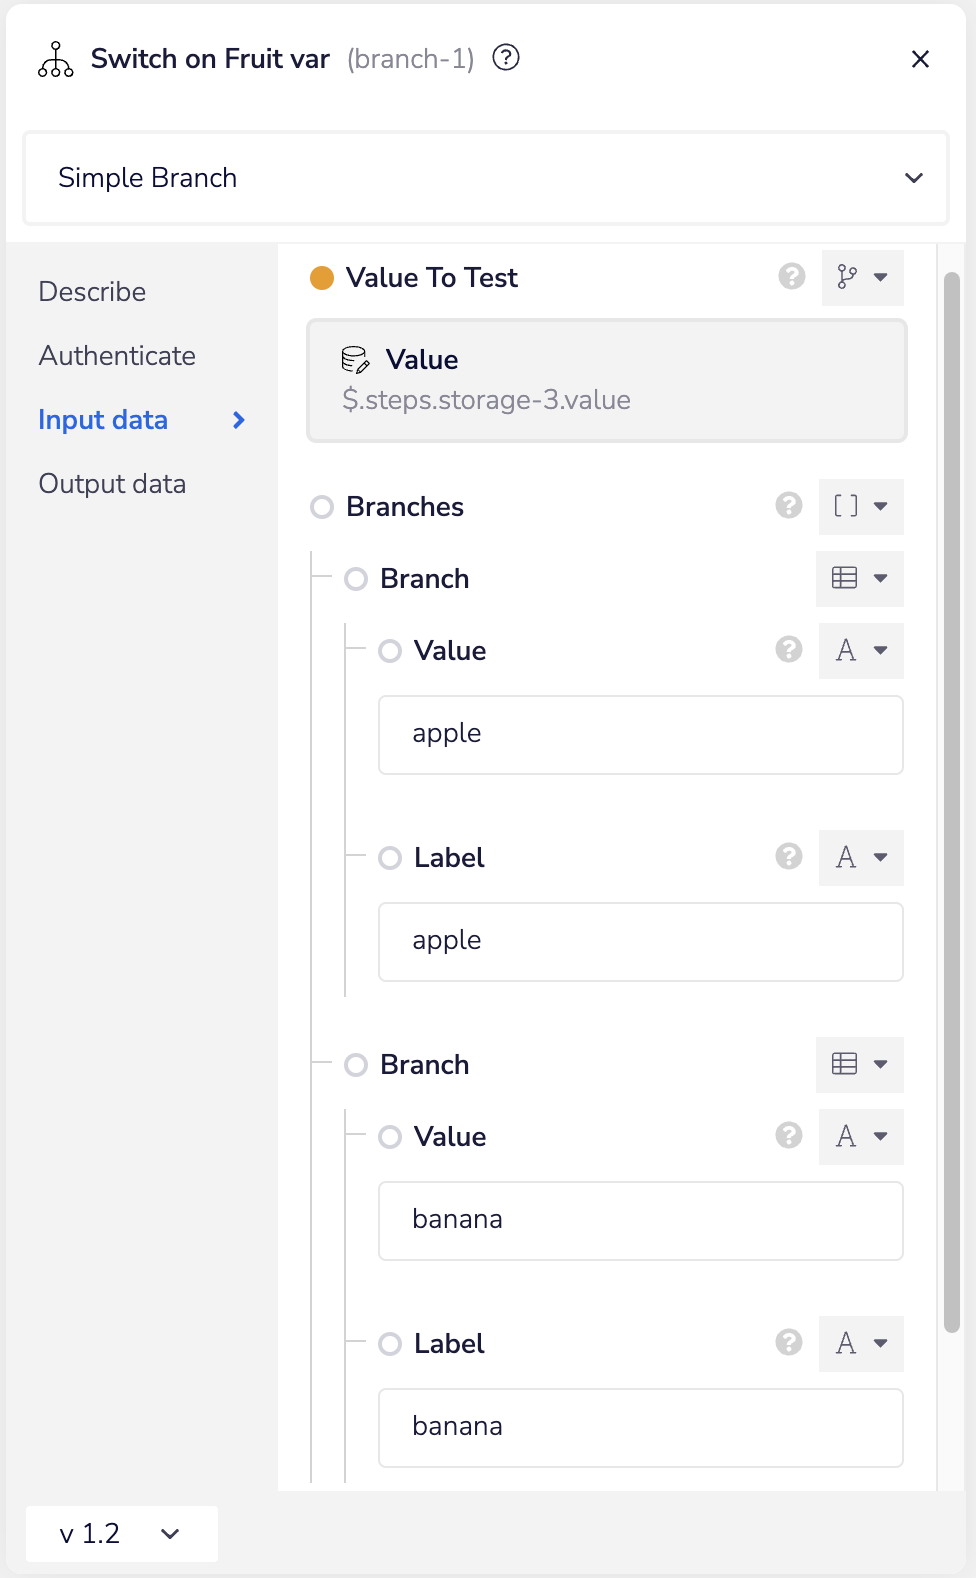
Inside each switch statement case, we will set the value of text using the Data Storage connector. After the switch statement is complete, we will retrieve the value of text using the Data Storage connector, so we can use re-use the result of the switch statement in subsequent workflow steps.
For Loop
Suppose we had the following code segment:
1let myObjects = {2"records": [3{4"id": "1",5"name":"apple"6},7{8"id": "2",9"name":"banana"10}11]12}1314for (let record in myObjects.records) {15// do something16// console.log(record.name);17}
In the Tray Platform, this code segment would look like this:
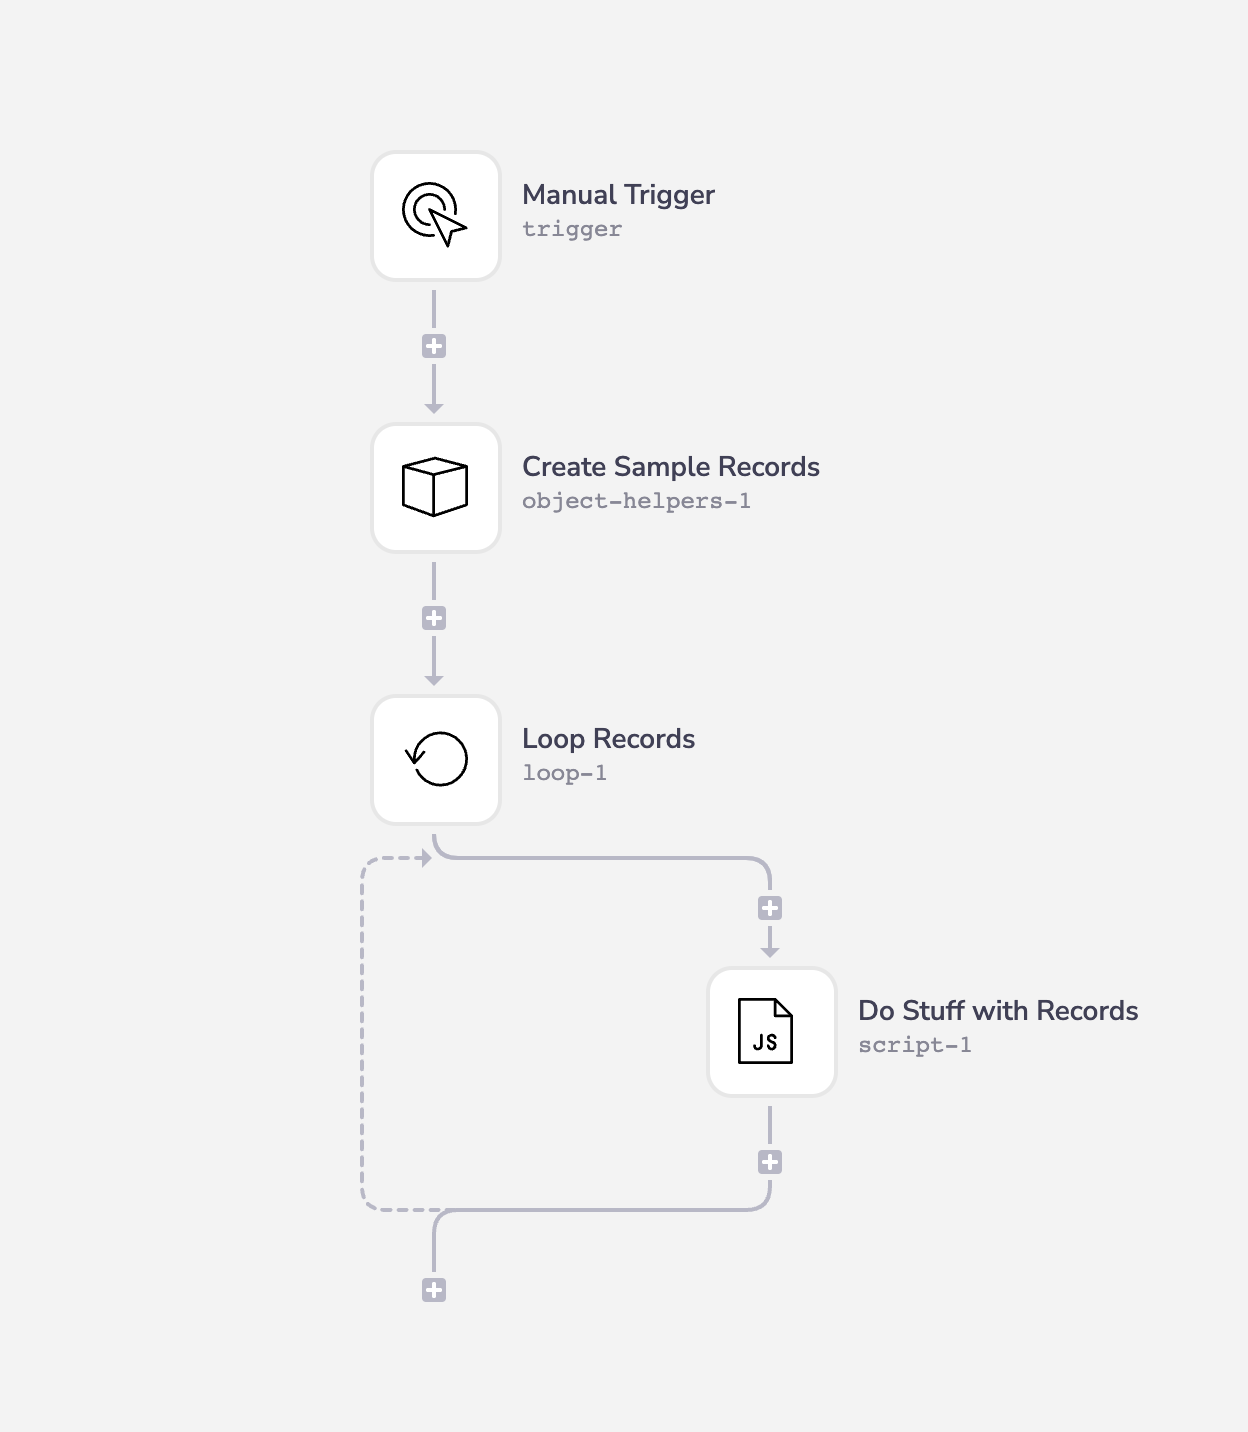
In the first step of this workflow, we will construct the sample object containing records which is an array of objects containing id and name properties. The result of this step is a JSON object that can be used in our for loop. For the sake of the example, we created this using the Object Helper. However, this data could be coming from any service.
In the subsequent step, we will use the Loop connector to simulate a for loop. In order to iterate over each record individually, we will use the Loop List operation found on the connector. In that operation, we will specify to iterate over the records property found in the object created in the previous step.
The entire object being iterated over is stored in the JSON path $.steps.loop-1.value. In order to access the id found on the iterated object, we would use the JSON path $.steps.loop-1.value.id.
While Loop
Suppose we had the following code segment:
1let counter = 0;23while (counter <= 3) {4// do stuff5counter++;6}
In the Tray Platform, this code segment would look like this:
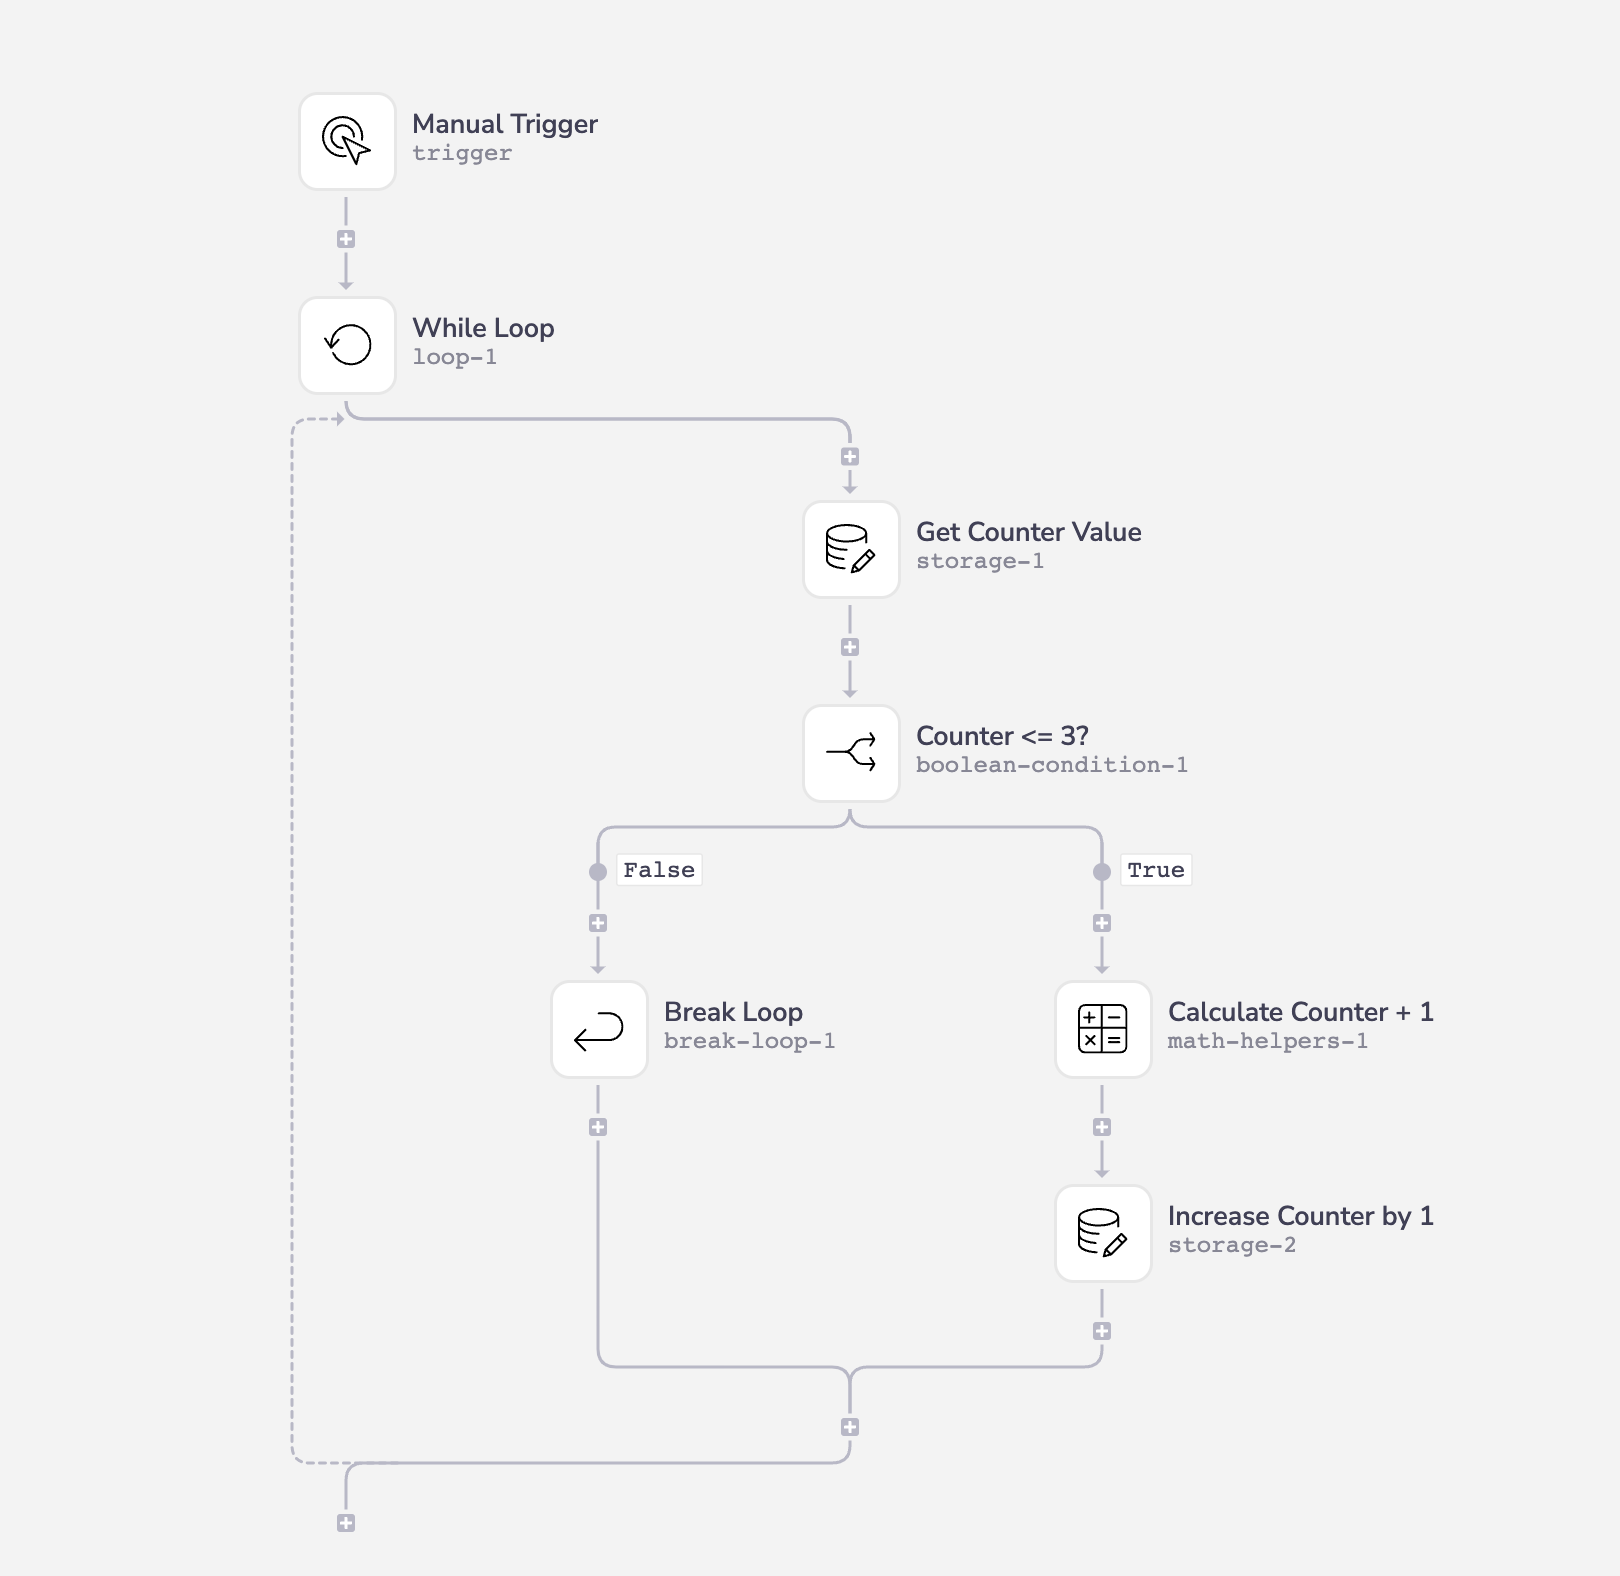
We will use the Loop connector again to simulate a while loop. This time, however, we will use the Loop Forever operation. Within the while loop, we will perform an if statement to check whether or not the counter property is less than or equal to 3. If it is greater than 3, we will use the Break Loop connector to get out the loop. If it is less than or equal to 3, we will increase the value of the counter property by 1.
Function
Suppose we had the following code segment:
1function IncreaseValByOne(x) {2return x + 1;3}45let counter = 0;6while (counter <= 3) {7// do stuff8counter = IncreaseValByOne(counter);9}
In Tray, this would require two workflows and would look like this:
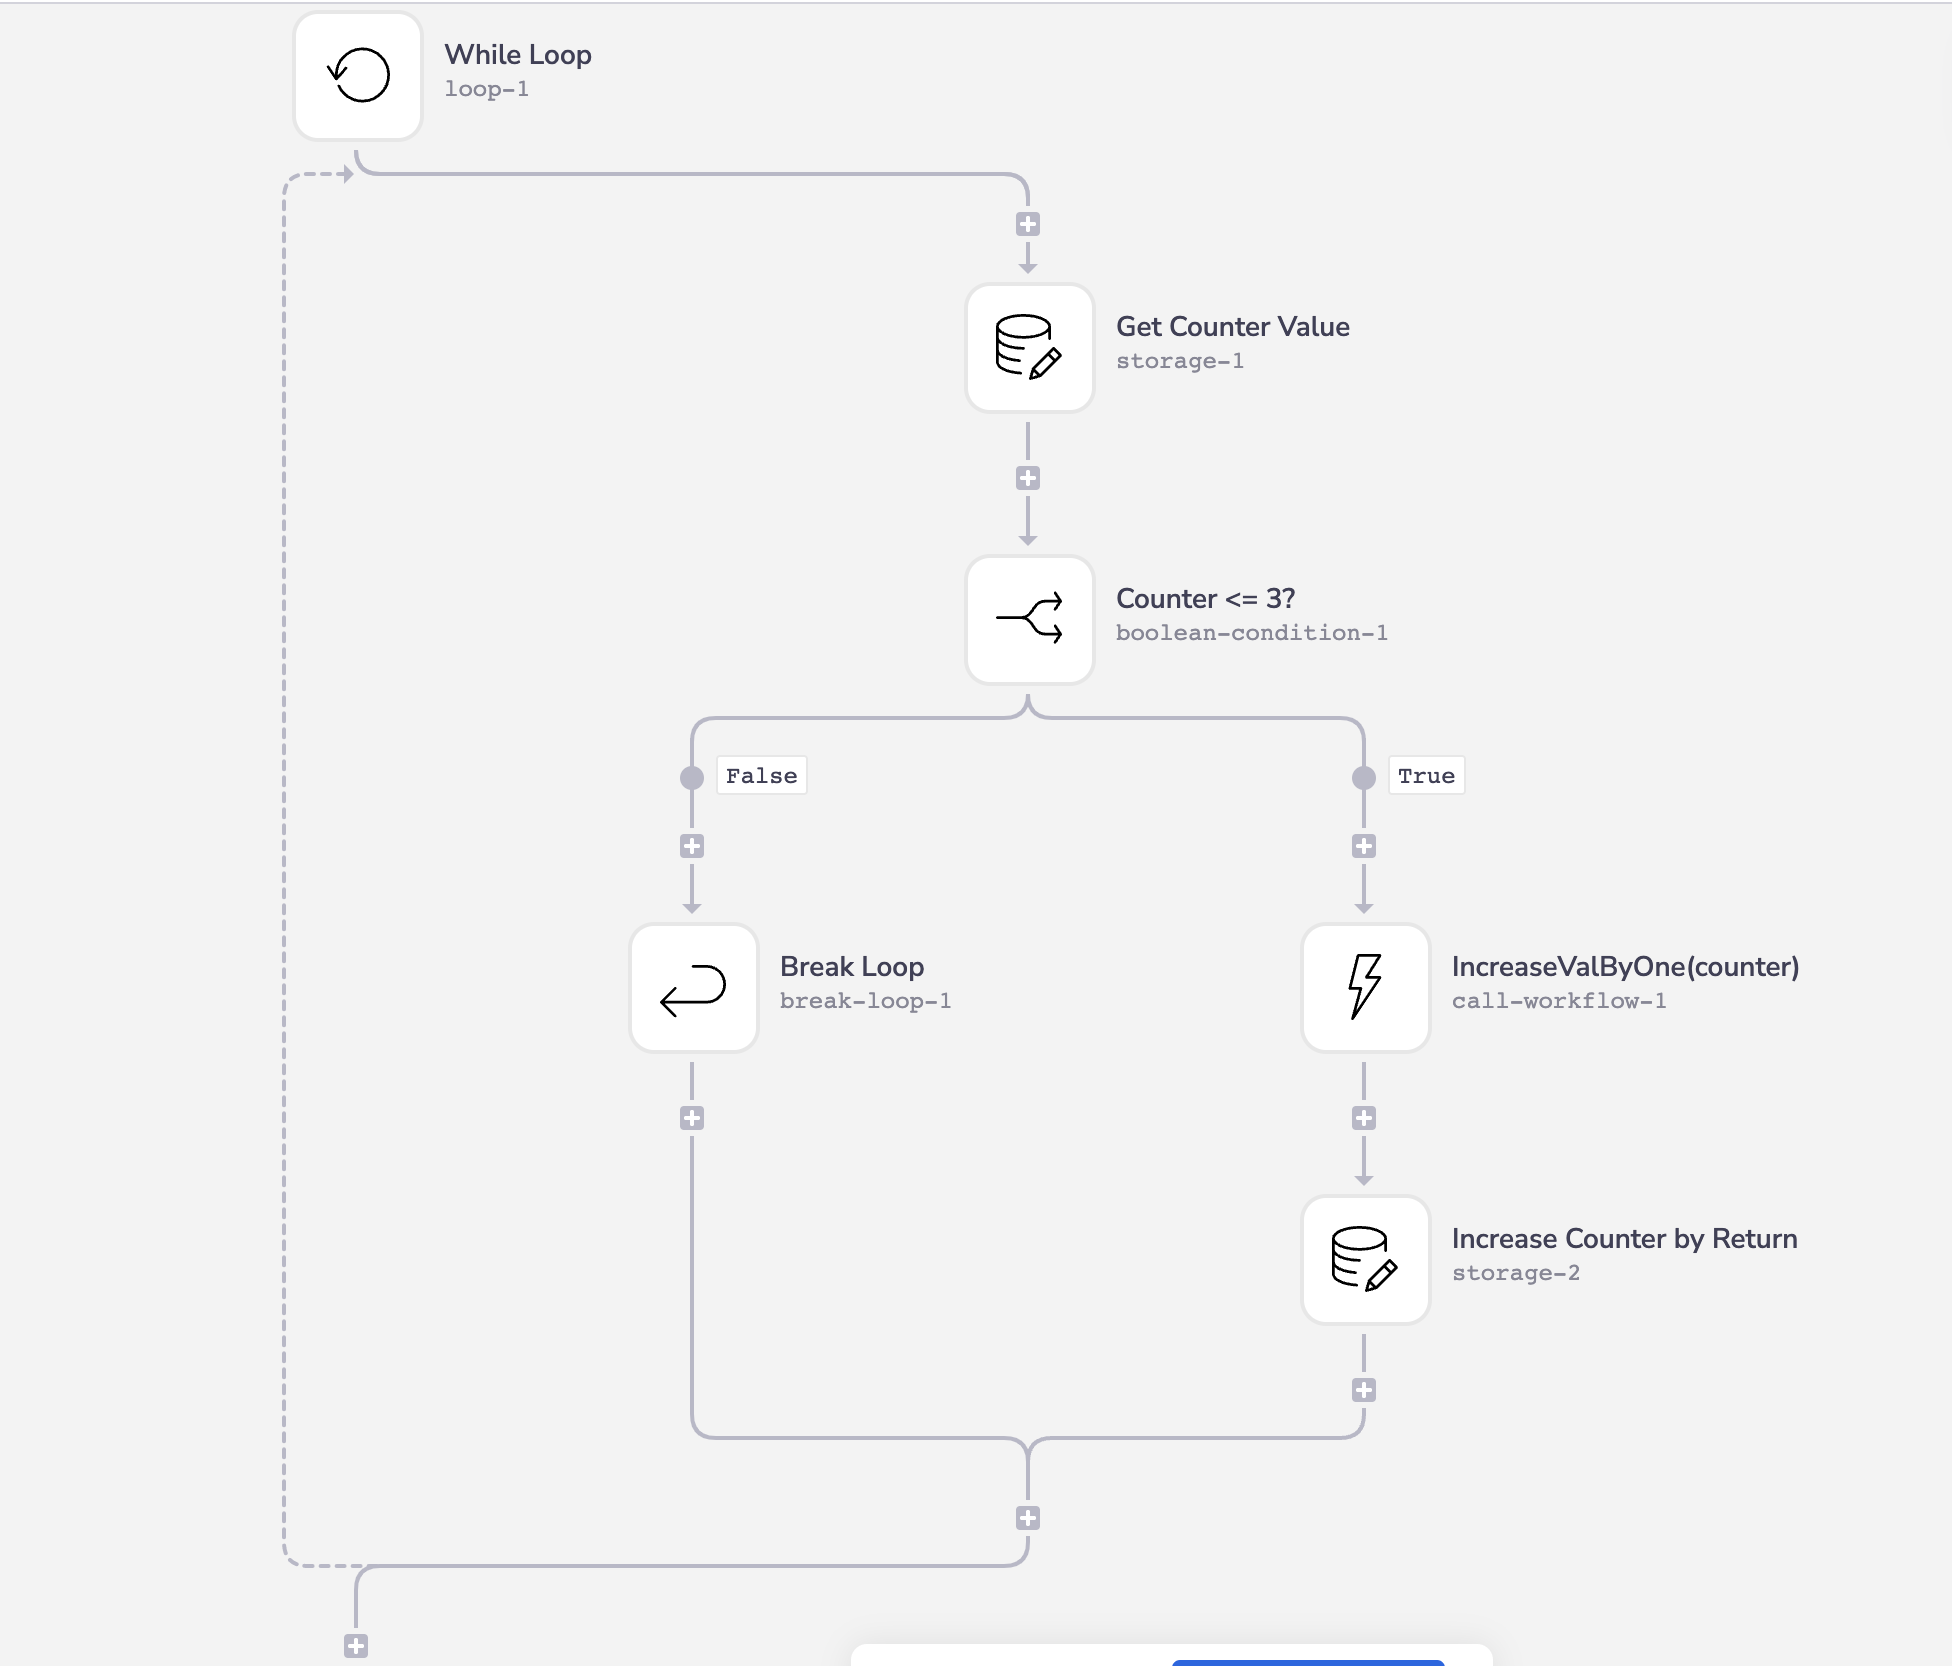
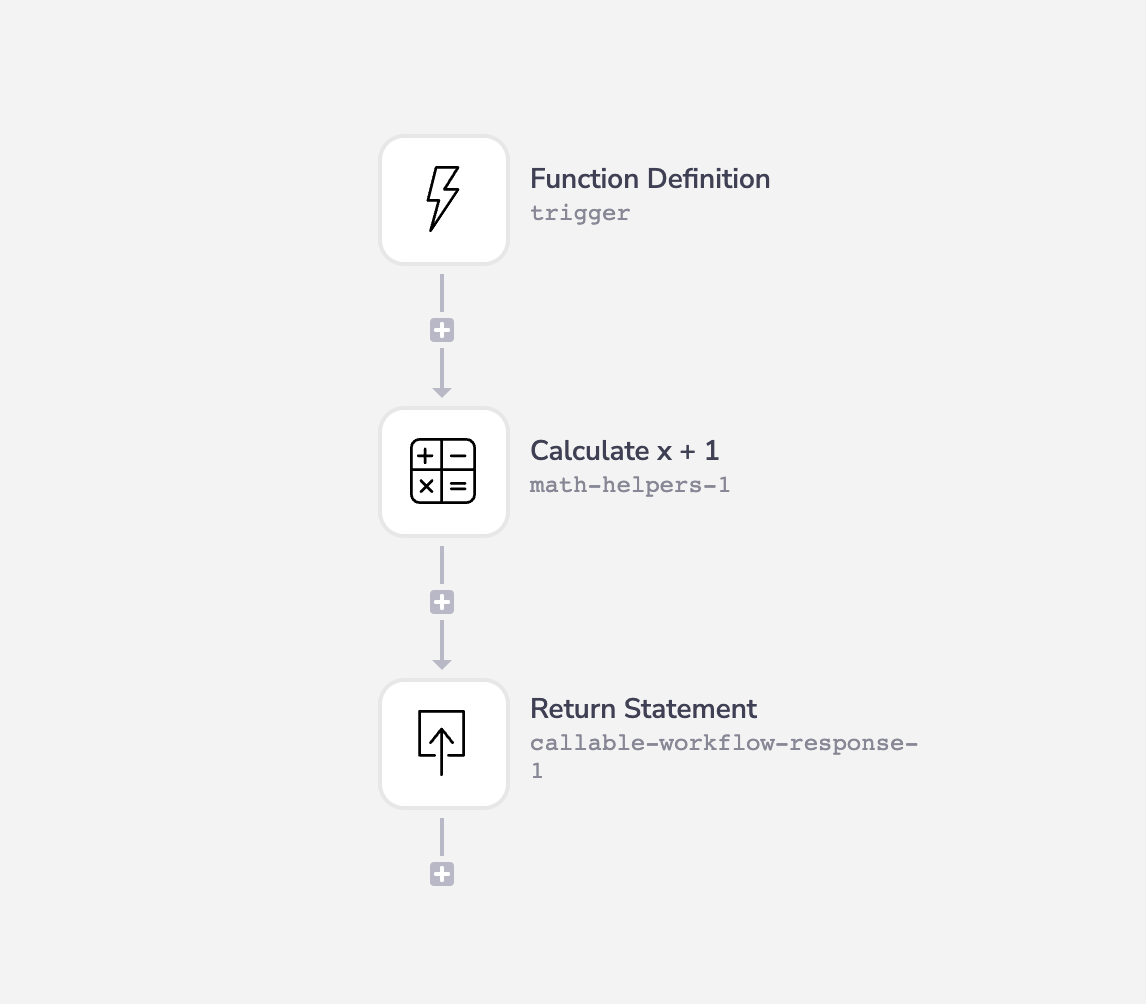
To create a function in the Tray Platform, we need to create a workflow that is triggered by the Callable Trigger connector. You are able to define the parameters on the function directly on that trigger. In the Tray Platform, the parameters are defined as Input Schema. In this example, we are using the Call Workflow connector in the while loop to call a function to increase the counter used in the conditional of the while loop. The Callable Workflow Response simulates the return statement in the function. Setting the operation on the Call Workflow connector to Fire and wait for response enforces the function to be a synchronous function. This means the function must complete before the parent workflow can continue its execution. If we wanted the function to be asynchronous, we would use the Fire and forget option on the Call Workflow connector.