Basic polling
When the Tray.io connector for a service you are using has no built-in trigger, and the service itself has no Webhook to subscribe to, you can use a technique we call 'polling' to manually check for updates with the Scheduled Trigger.
This can be used to check for service updates (new records created, new contacts added etc.) e.g. every day, every 30 mins etc.
This is effectively building your very own trigger mechanism in that you can specify the exact conditions that will trigger the rest of the Workflow.
You might also use polling if the service does have a webhook but the data provided in the Webhook payload is not satisfactory.
Note: When using a polling workflow with a scheduled trigger it is important to make sure that a run of the workflow is allowed to complete before any more runs are triggered. Please see Step 1 below for instructions on doing this.
Simple Polling ExampleCopy
Note: This workflow only shows how to use polling in a very simple 'check for new stuff' way. A lot of service connectors have operations that accept date filtering, in which case you will wish to use the polling method whereby you set the last run time in order to pull new records based on what has happened since the last date and time you checked. Please see our page on Polling with last runtime for more details.
In this example, we will set up a very simple polling operation which checks if any new lines have been added to a Google Sheet. It makes use of the Google Sheets connector, the Data Storage connector and the Boolean Condition connector.
When creating this workflow remember that each step which uses the Data Storage connector can access a particular variable(s) which may have been set by a previous Data Connector step, i.e. all steps write to and read from a common data store.
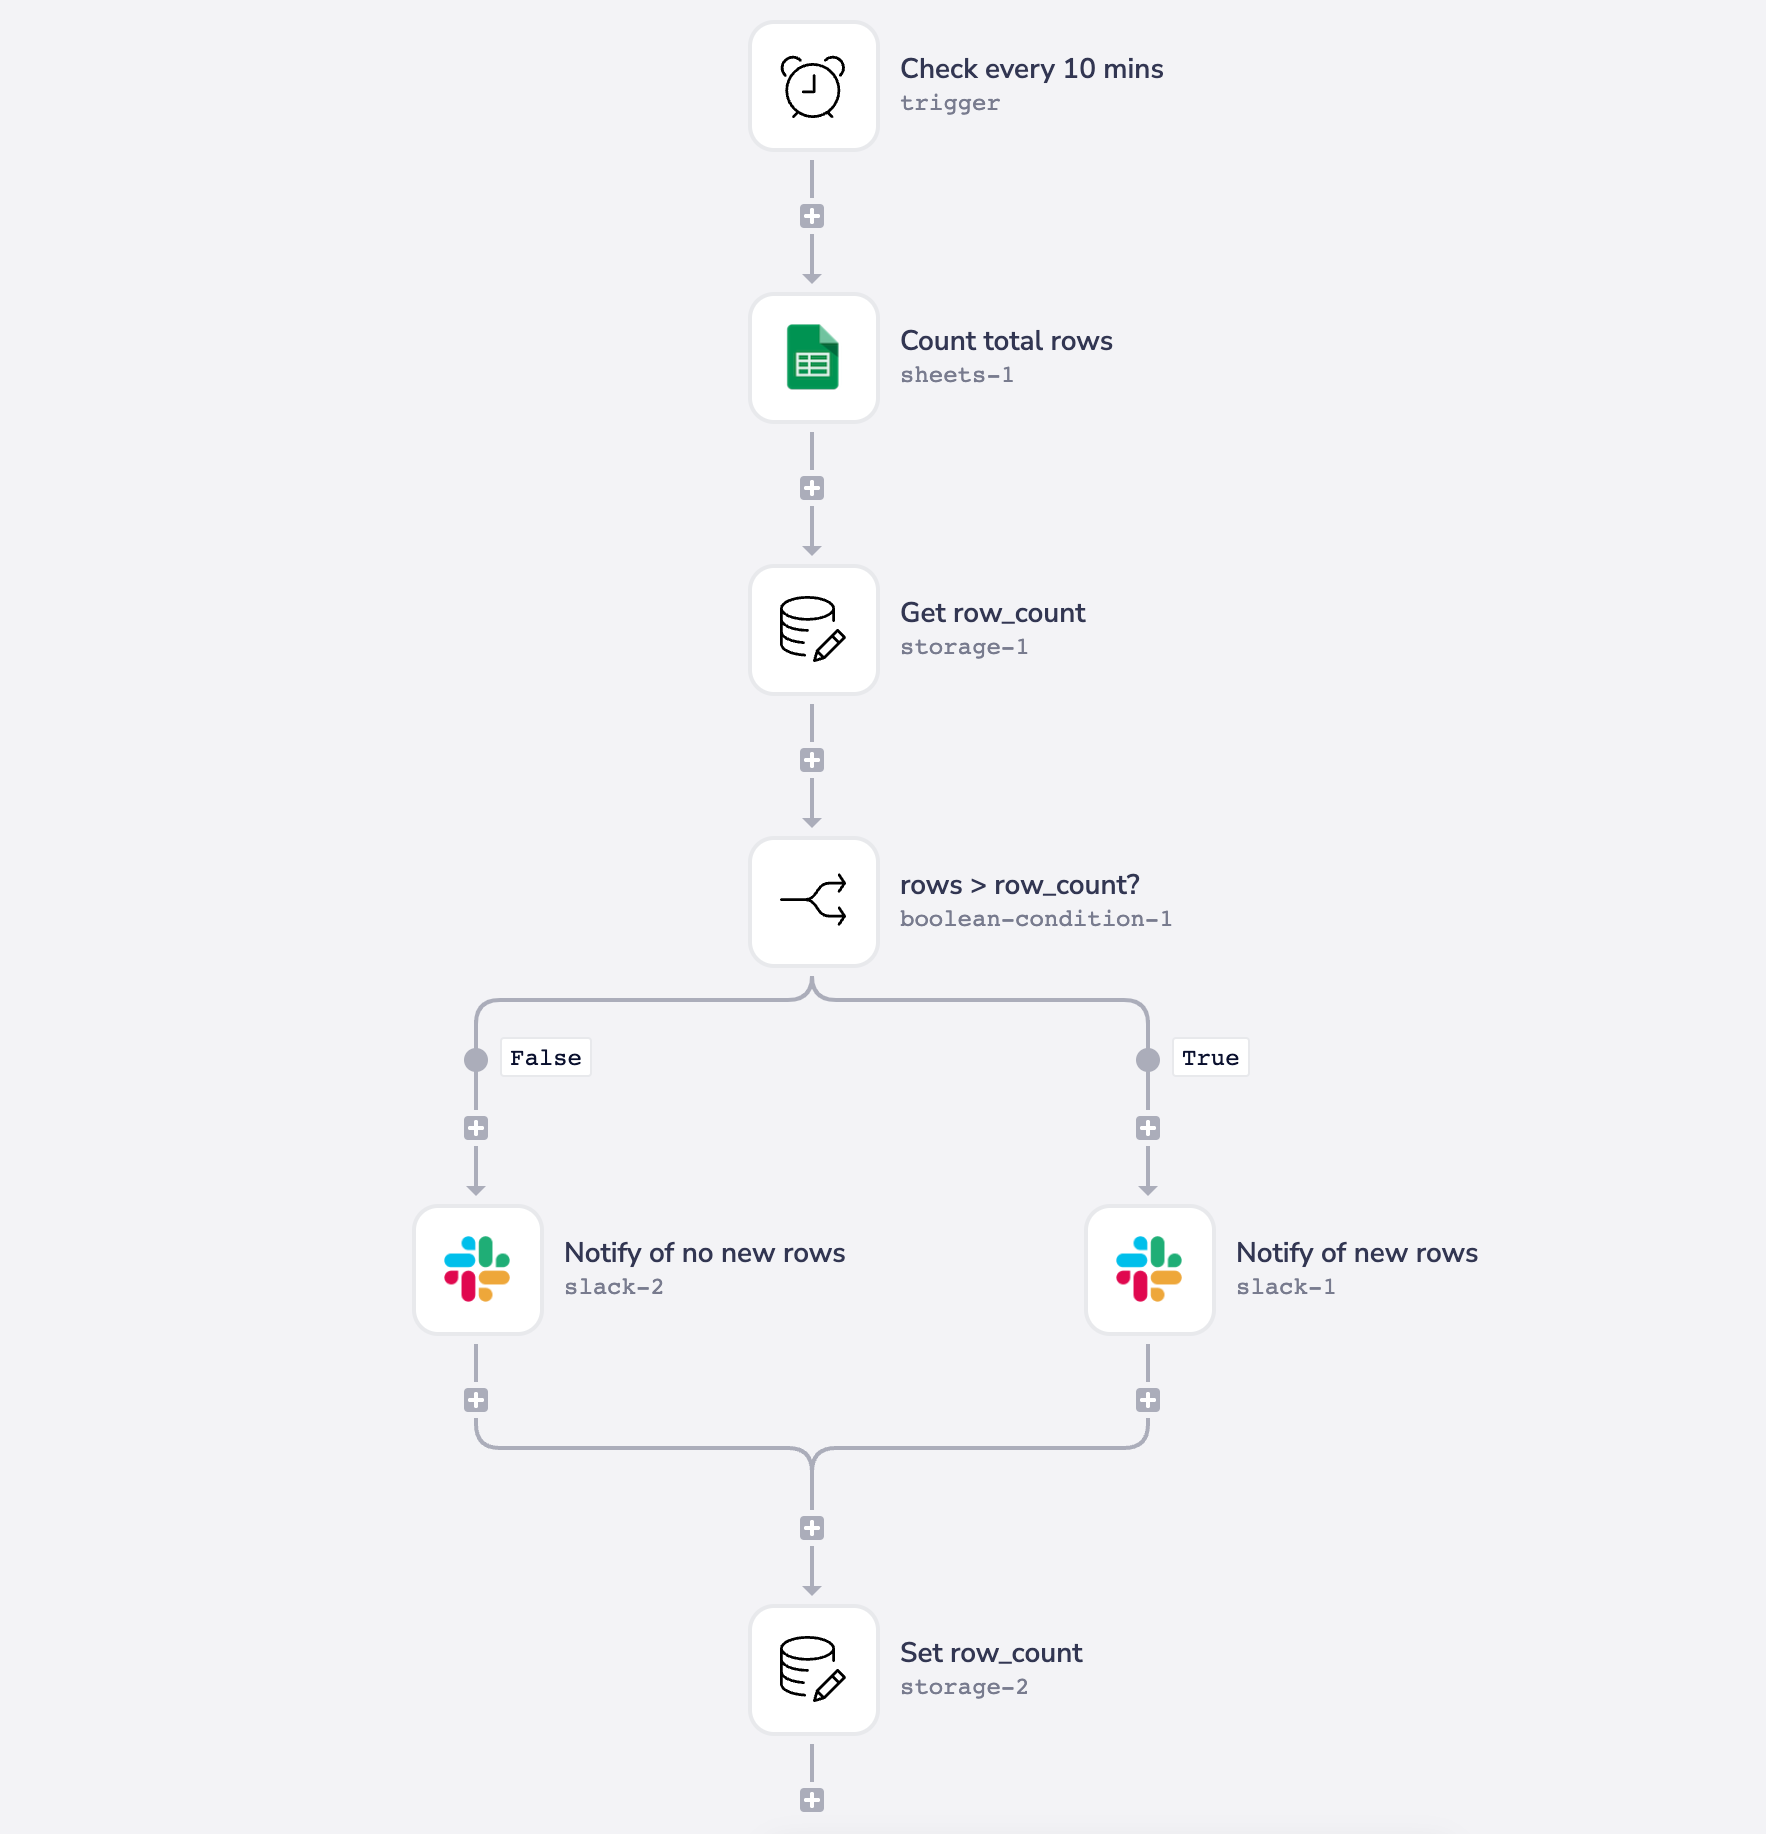
The test workflow to set up here is:

Note that the Data Storage connectors in this workflow use the 'Workflow' Scope which means that they can store and recall data for all the times this workflow is run (i.e. the variables do not get reset when a run of the workflow is complete).
The idea behind this workflow is:
A Google Sheets connector is added which counts the number of rows in a particular sheet
Data Storage connectors are used to store and fetch the number of rows. Note that it is the last Data Storage connector which sets the row count value, and the first which fetches it to check if the number of rows has changed since the last workflow run.
Each time the workflow is run:
The Google Sheets connector will count the number of rows in the sheet
The first Data Storage connector will fetch the count from the last run of the workflow
The boolean connector will then check if the number of rows in the sheet is now greater than the number from the last run
If so, then a simple Slack message is sent
The last Data Storage connector will set the count from Google Sheets so that it can be retrieved in the next run
1 - Set up the Scheduled triggerCopy
Set the Operation for your trigger to Interval and to run every 10 minutes:


Important noteCopy
Your schedule should be set so that you allow plenty of time for runs to complete.
In a case where 3 attempts at starting a run are made while one is still completing, these runs are missed. They are not added to a queue.
2 - Setup the Google Sheets connectorCopy
Authenticate with your Google account, choose the Count Total active rows operation and select the correct spreadsheet and worksheet:


3 - Add the first Data Storage connectorCopy
Set the Operation to Get Value, the Scope to Workflow and the key to row_count
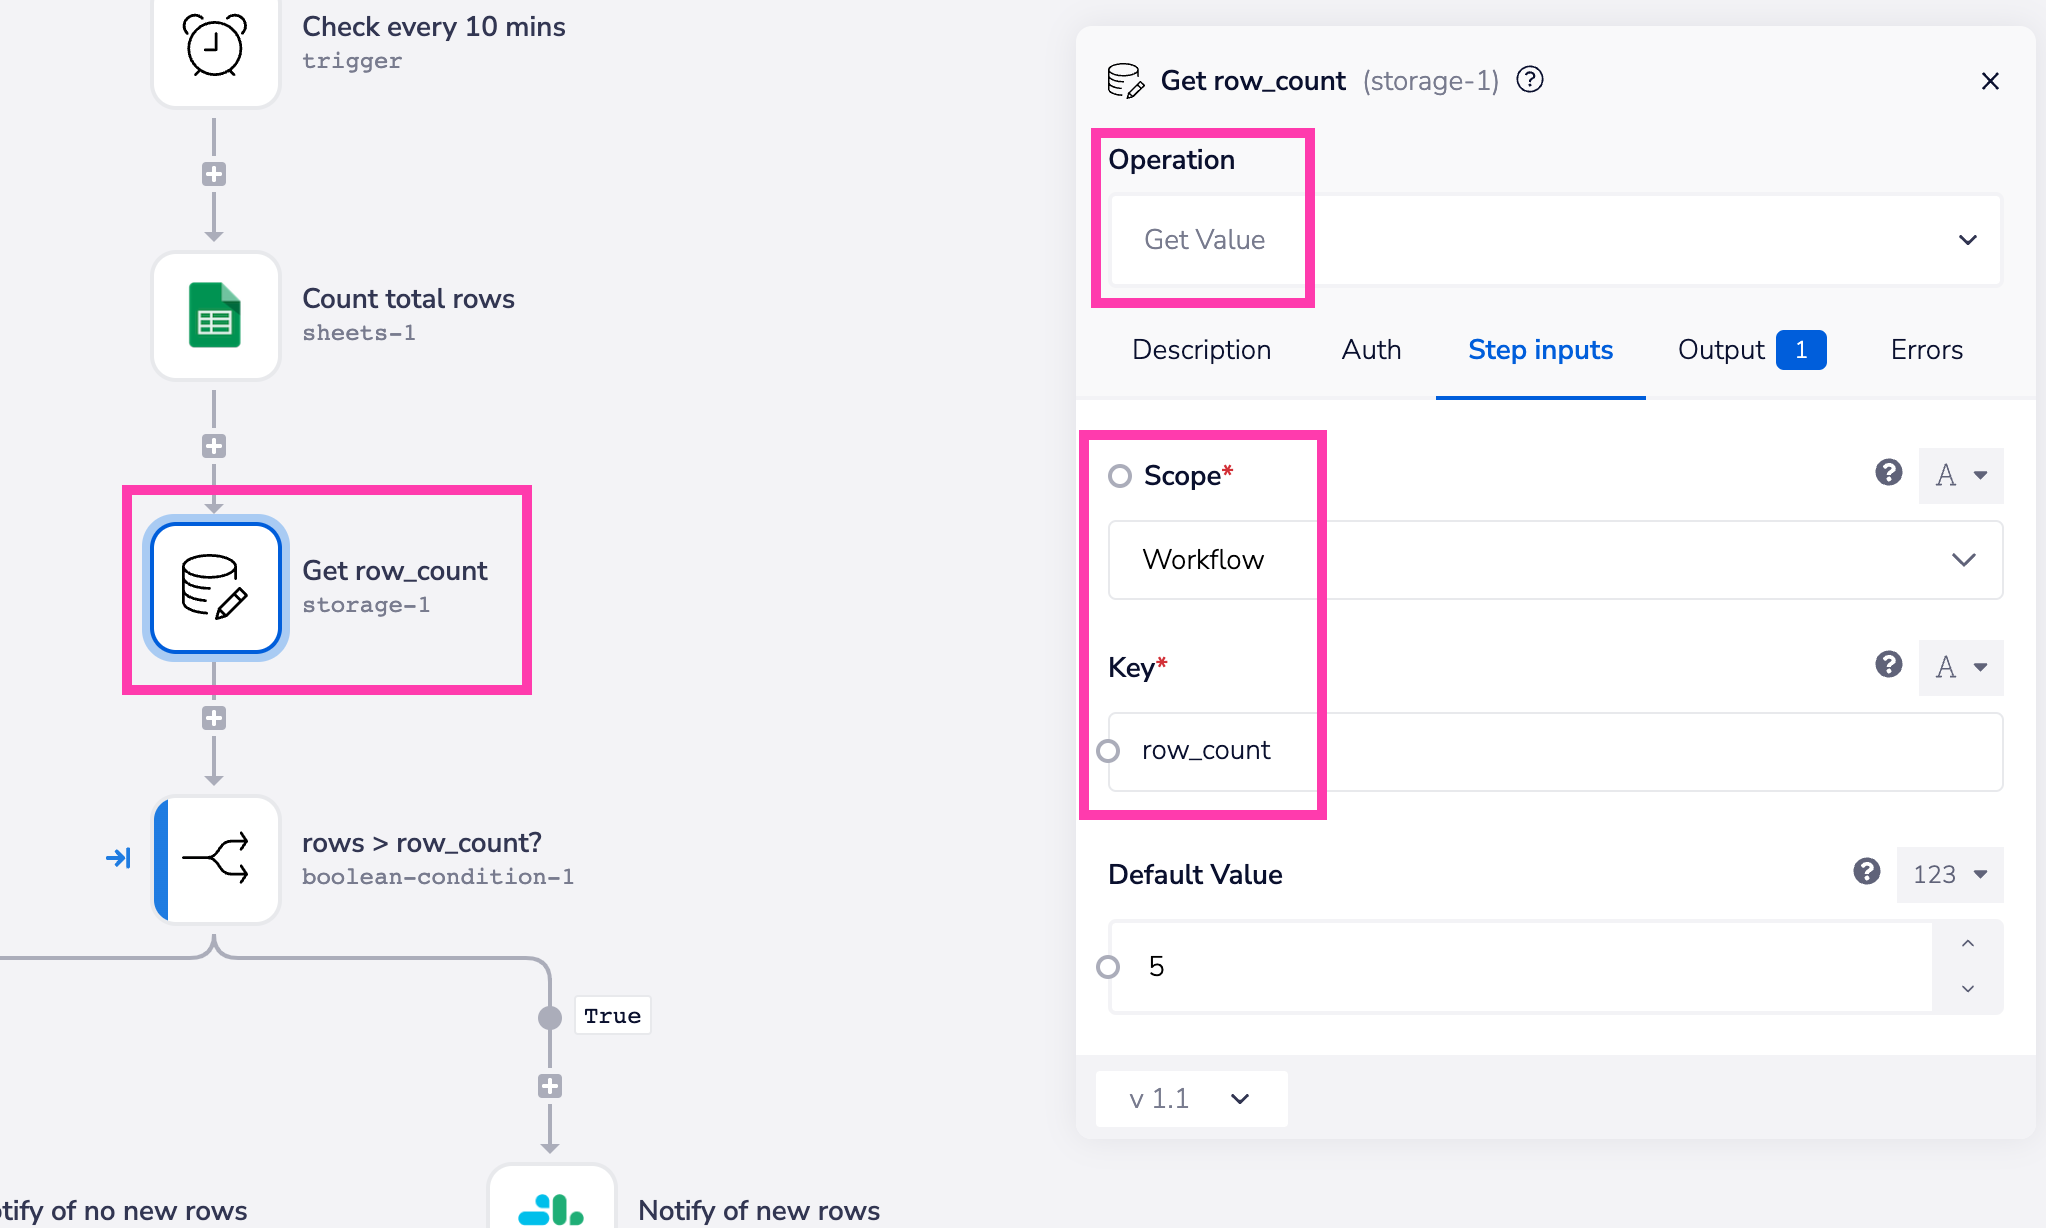
Note that you can set the Default Value to be the number of rows that currently exist in your spreadsheet, before you start adding any more. This will only apply to the first run of the workflow and means you won't get an error because of a null value.
An alternative method for this would be to set the Default Value to be null and place another Boolean Condition above the first one to check that row_count is not equal to null, to allow for the first run of the workflow.
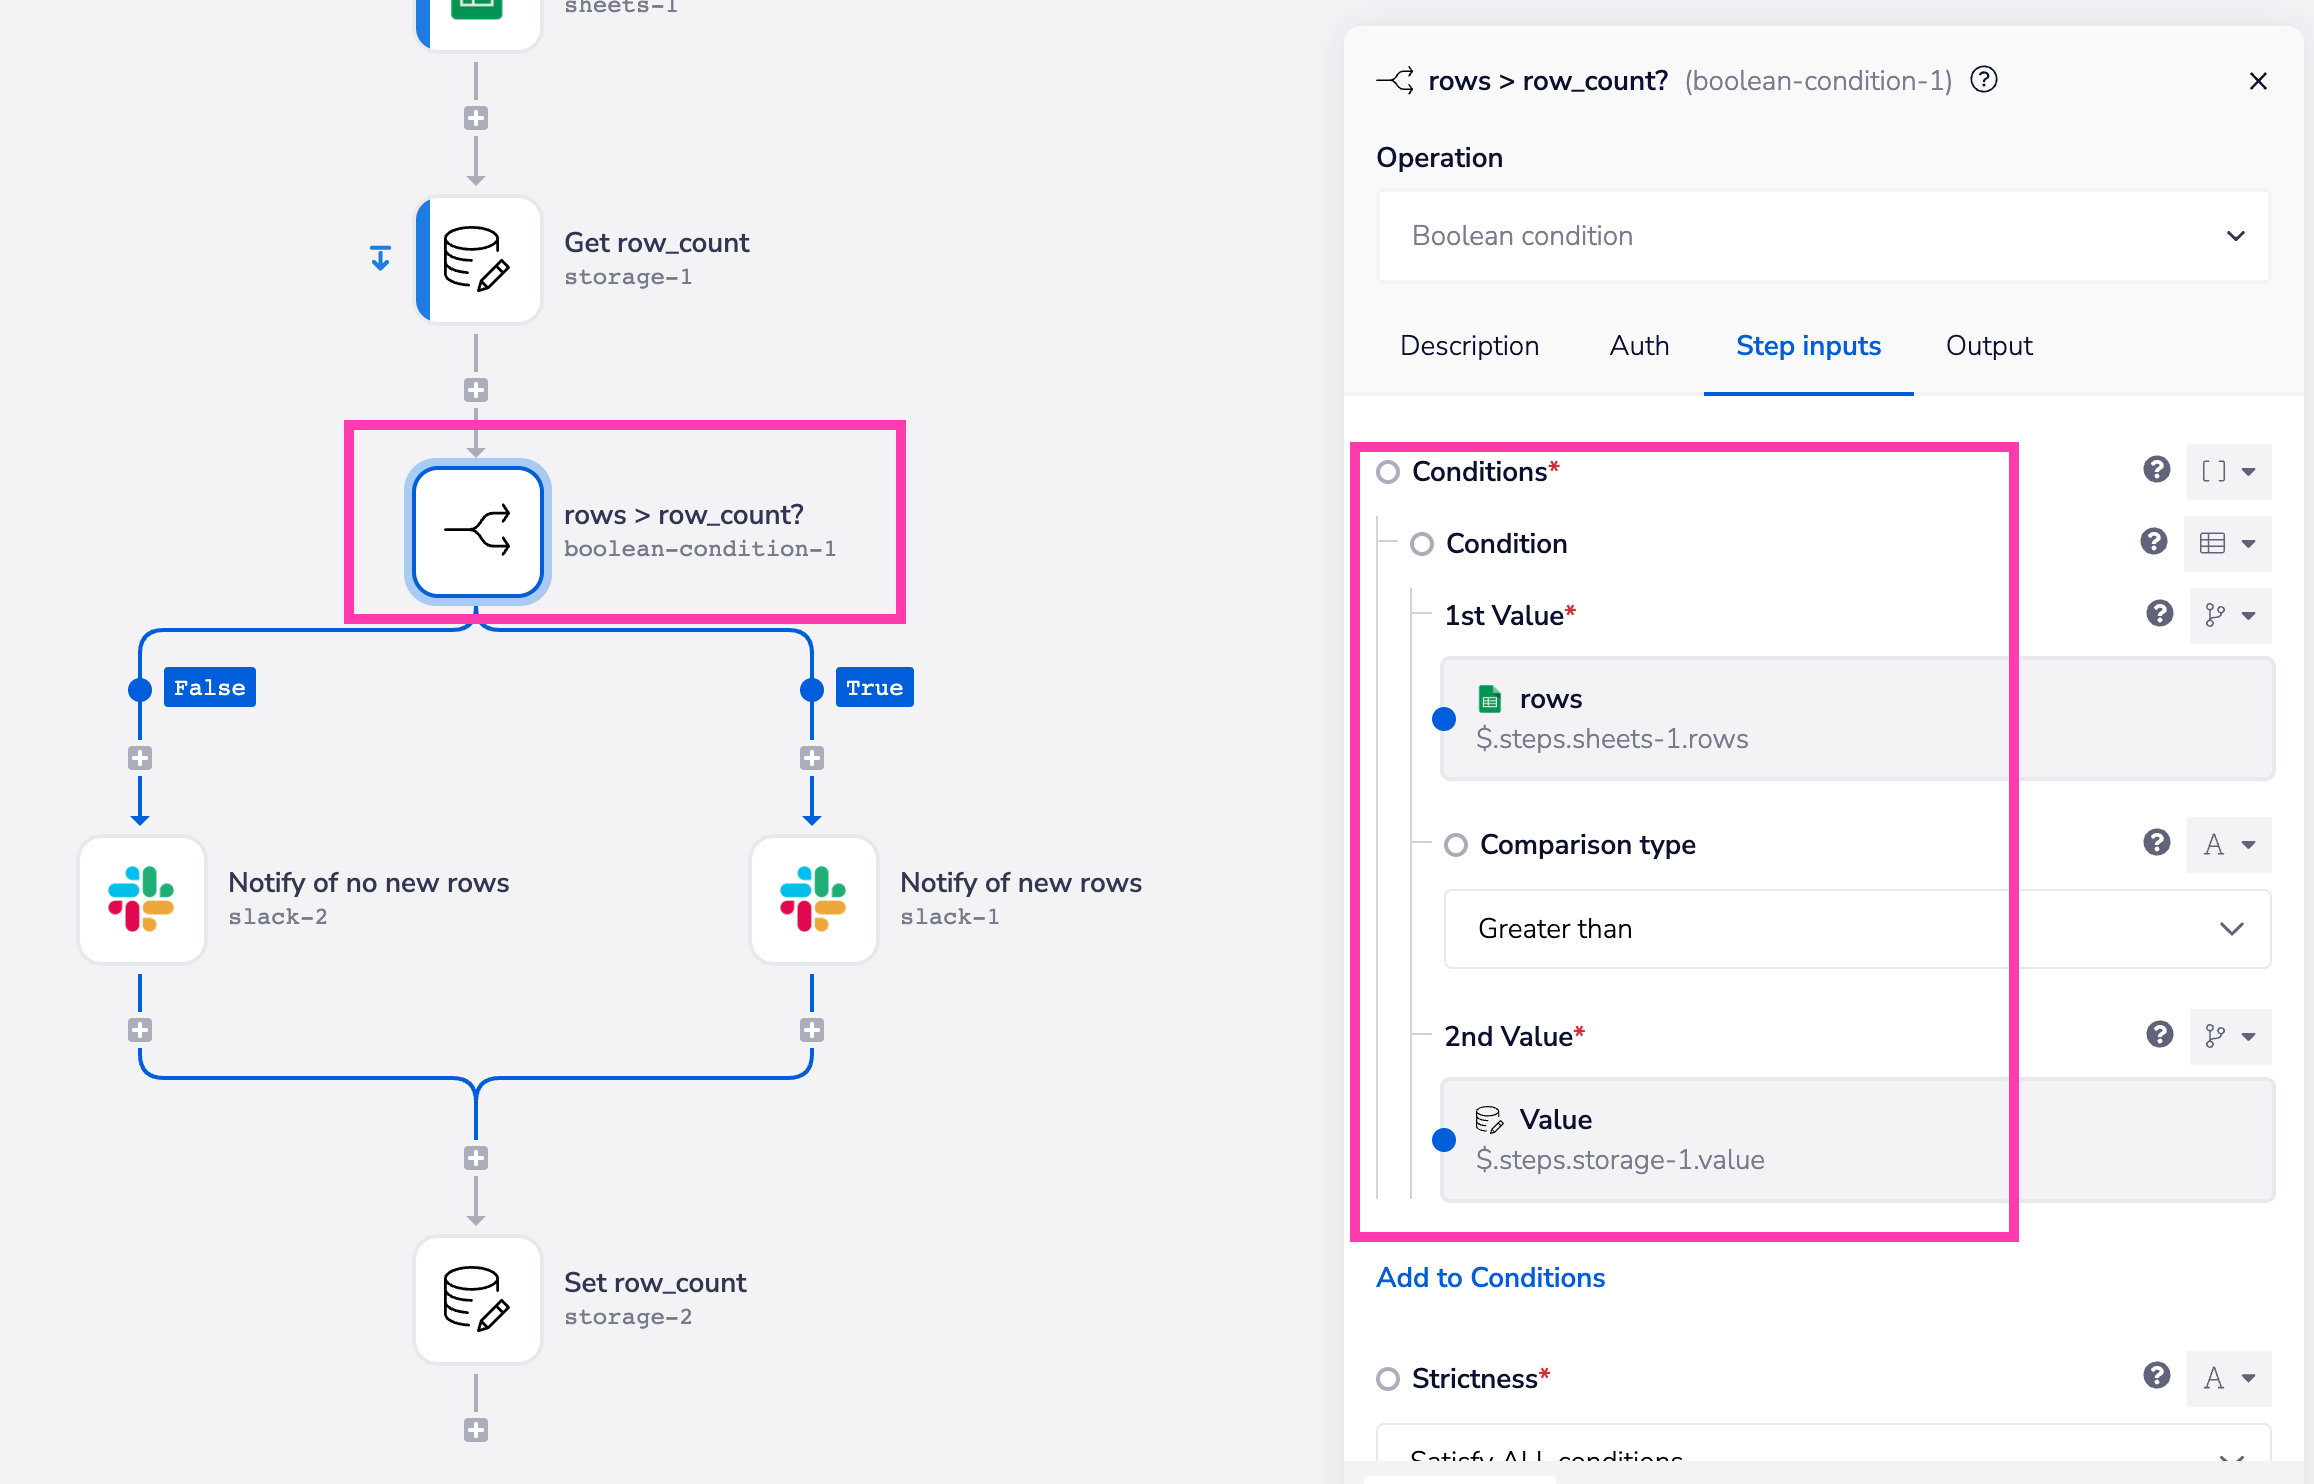
4 - Set the Boolean ConditionCopy
Set the Operation as Boolean Condition, the first value as $.steps.sheets-1.rows to grab the count from Google Sheets, the Comparison Type as Greater than and the second value as $.steps.storage-1.value:

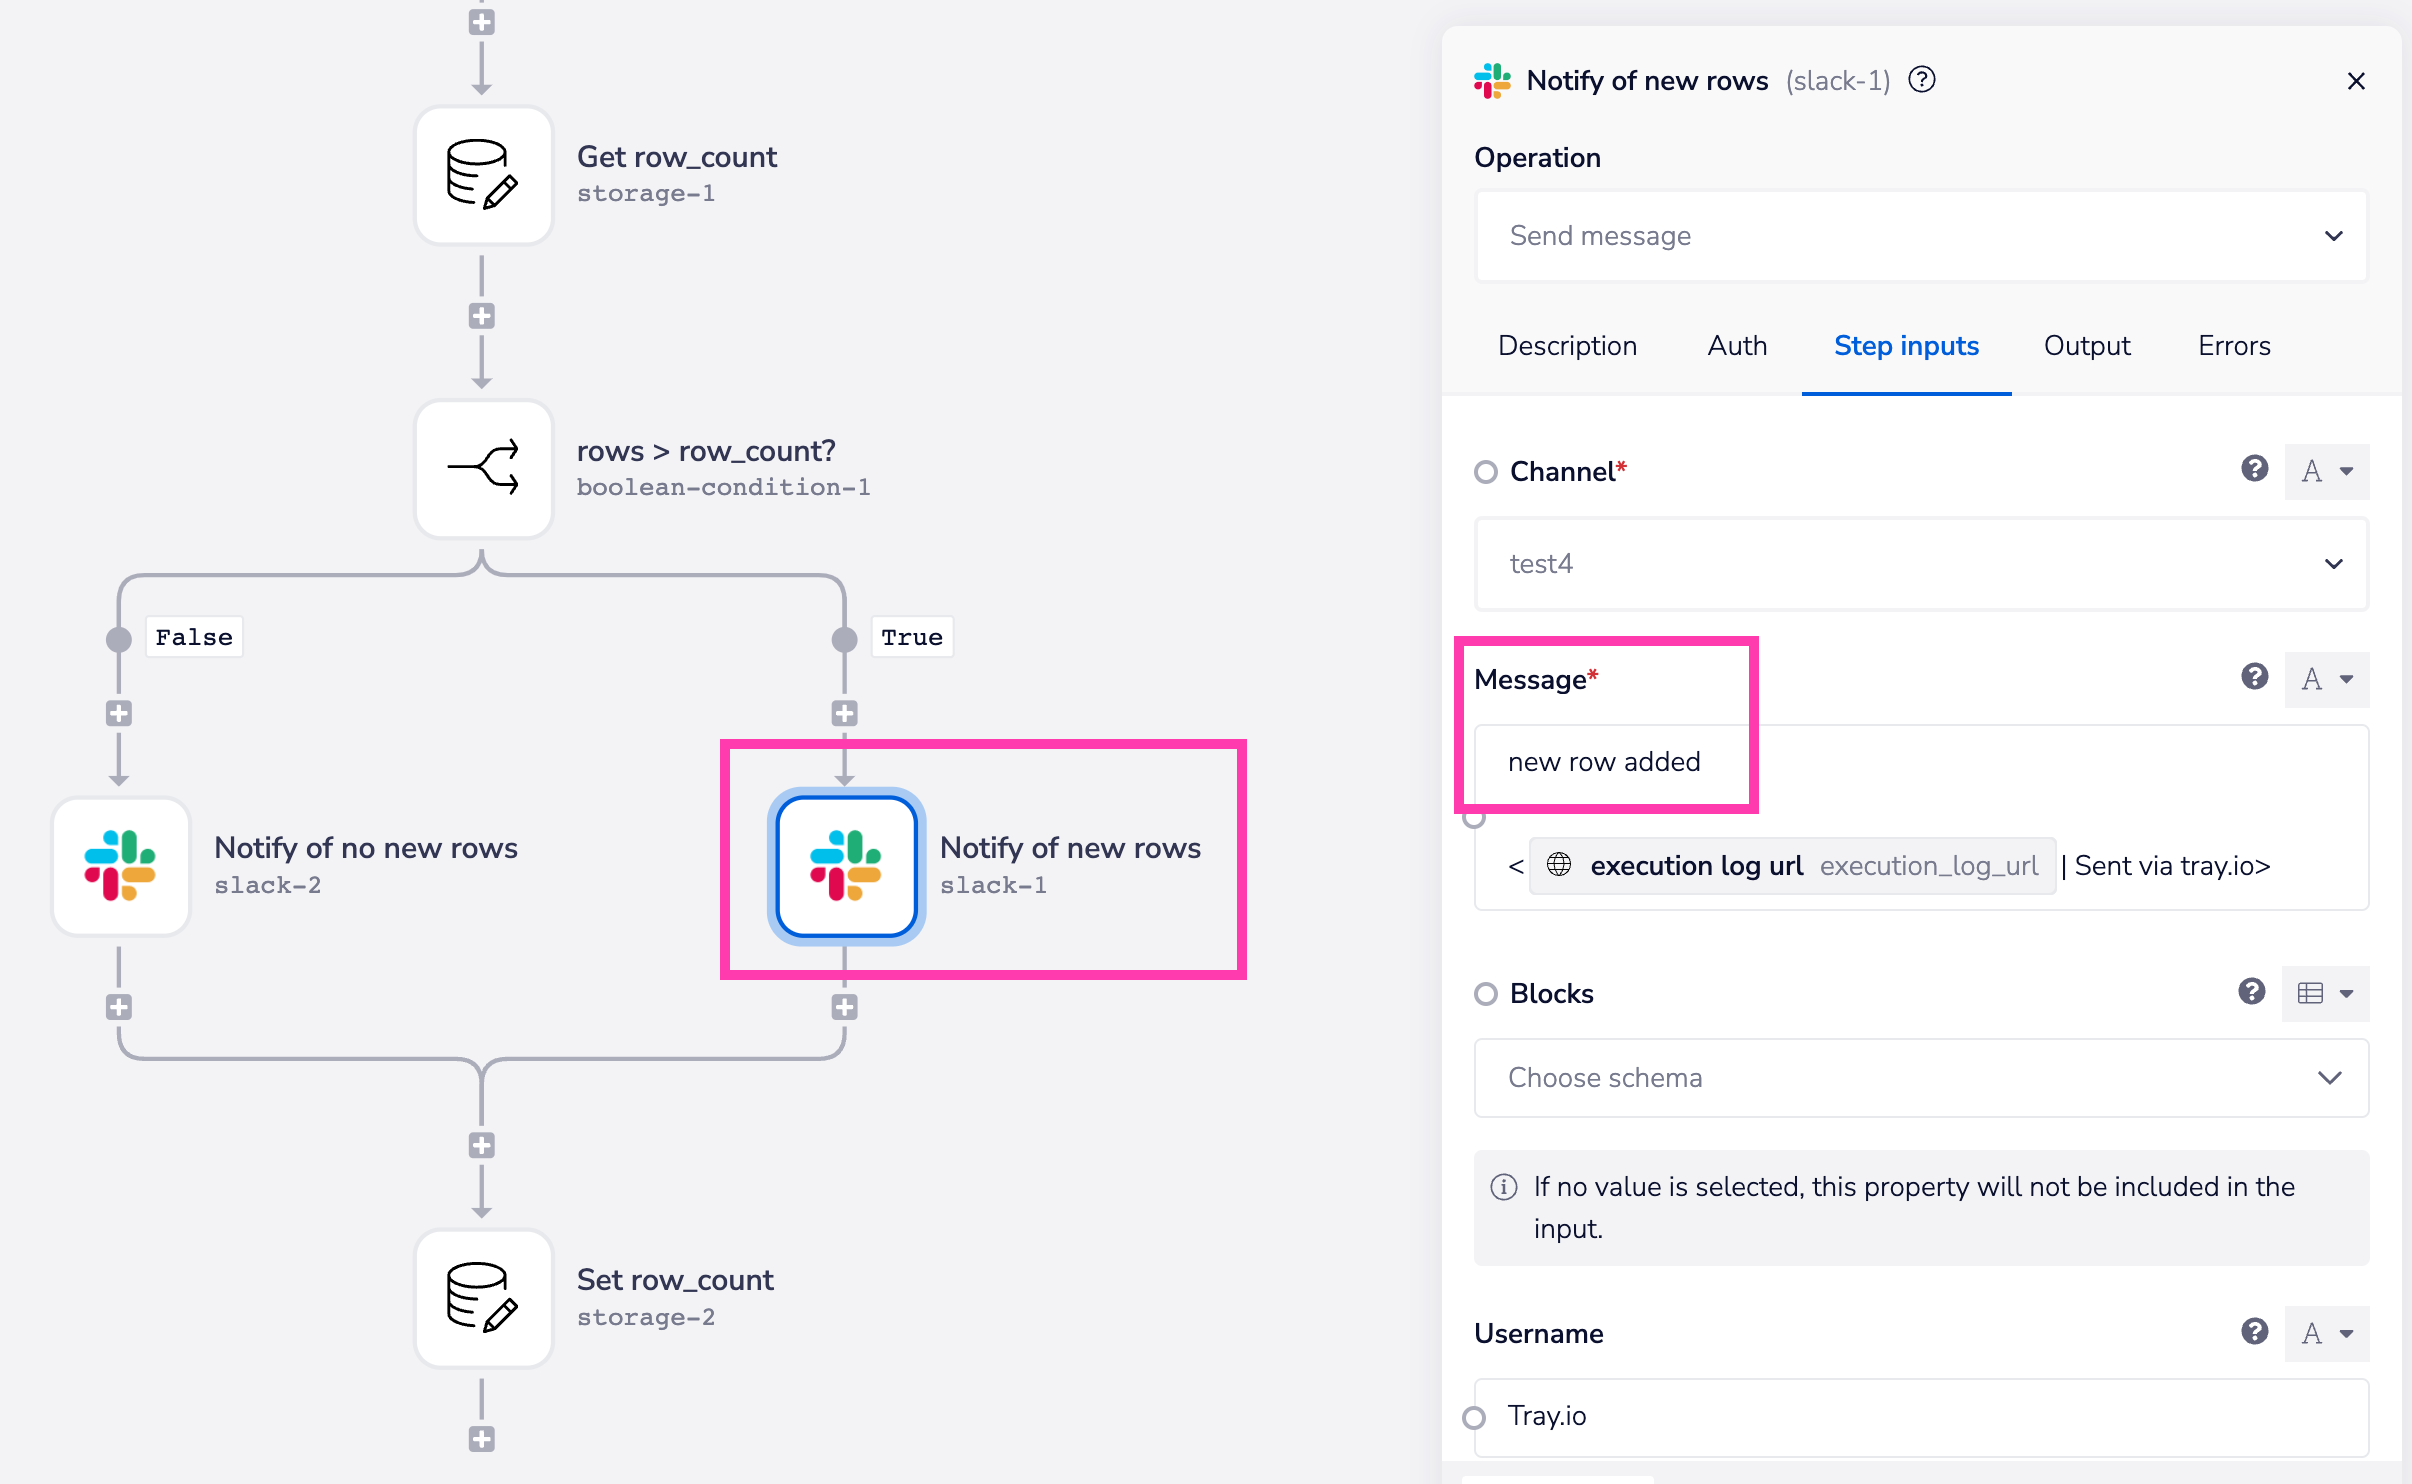
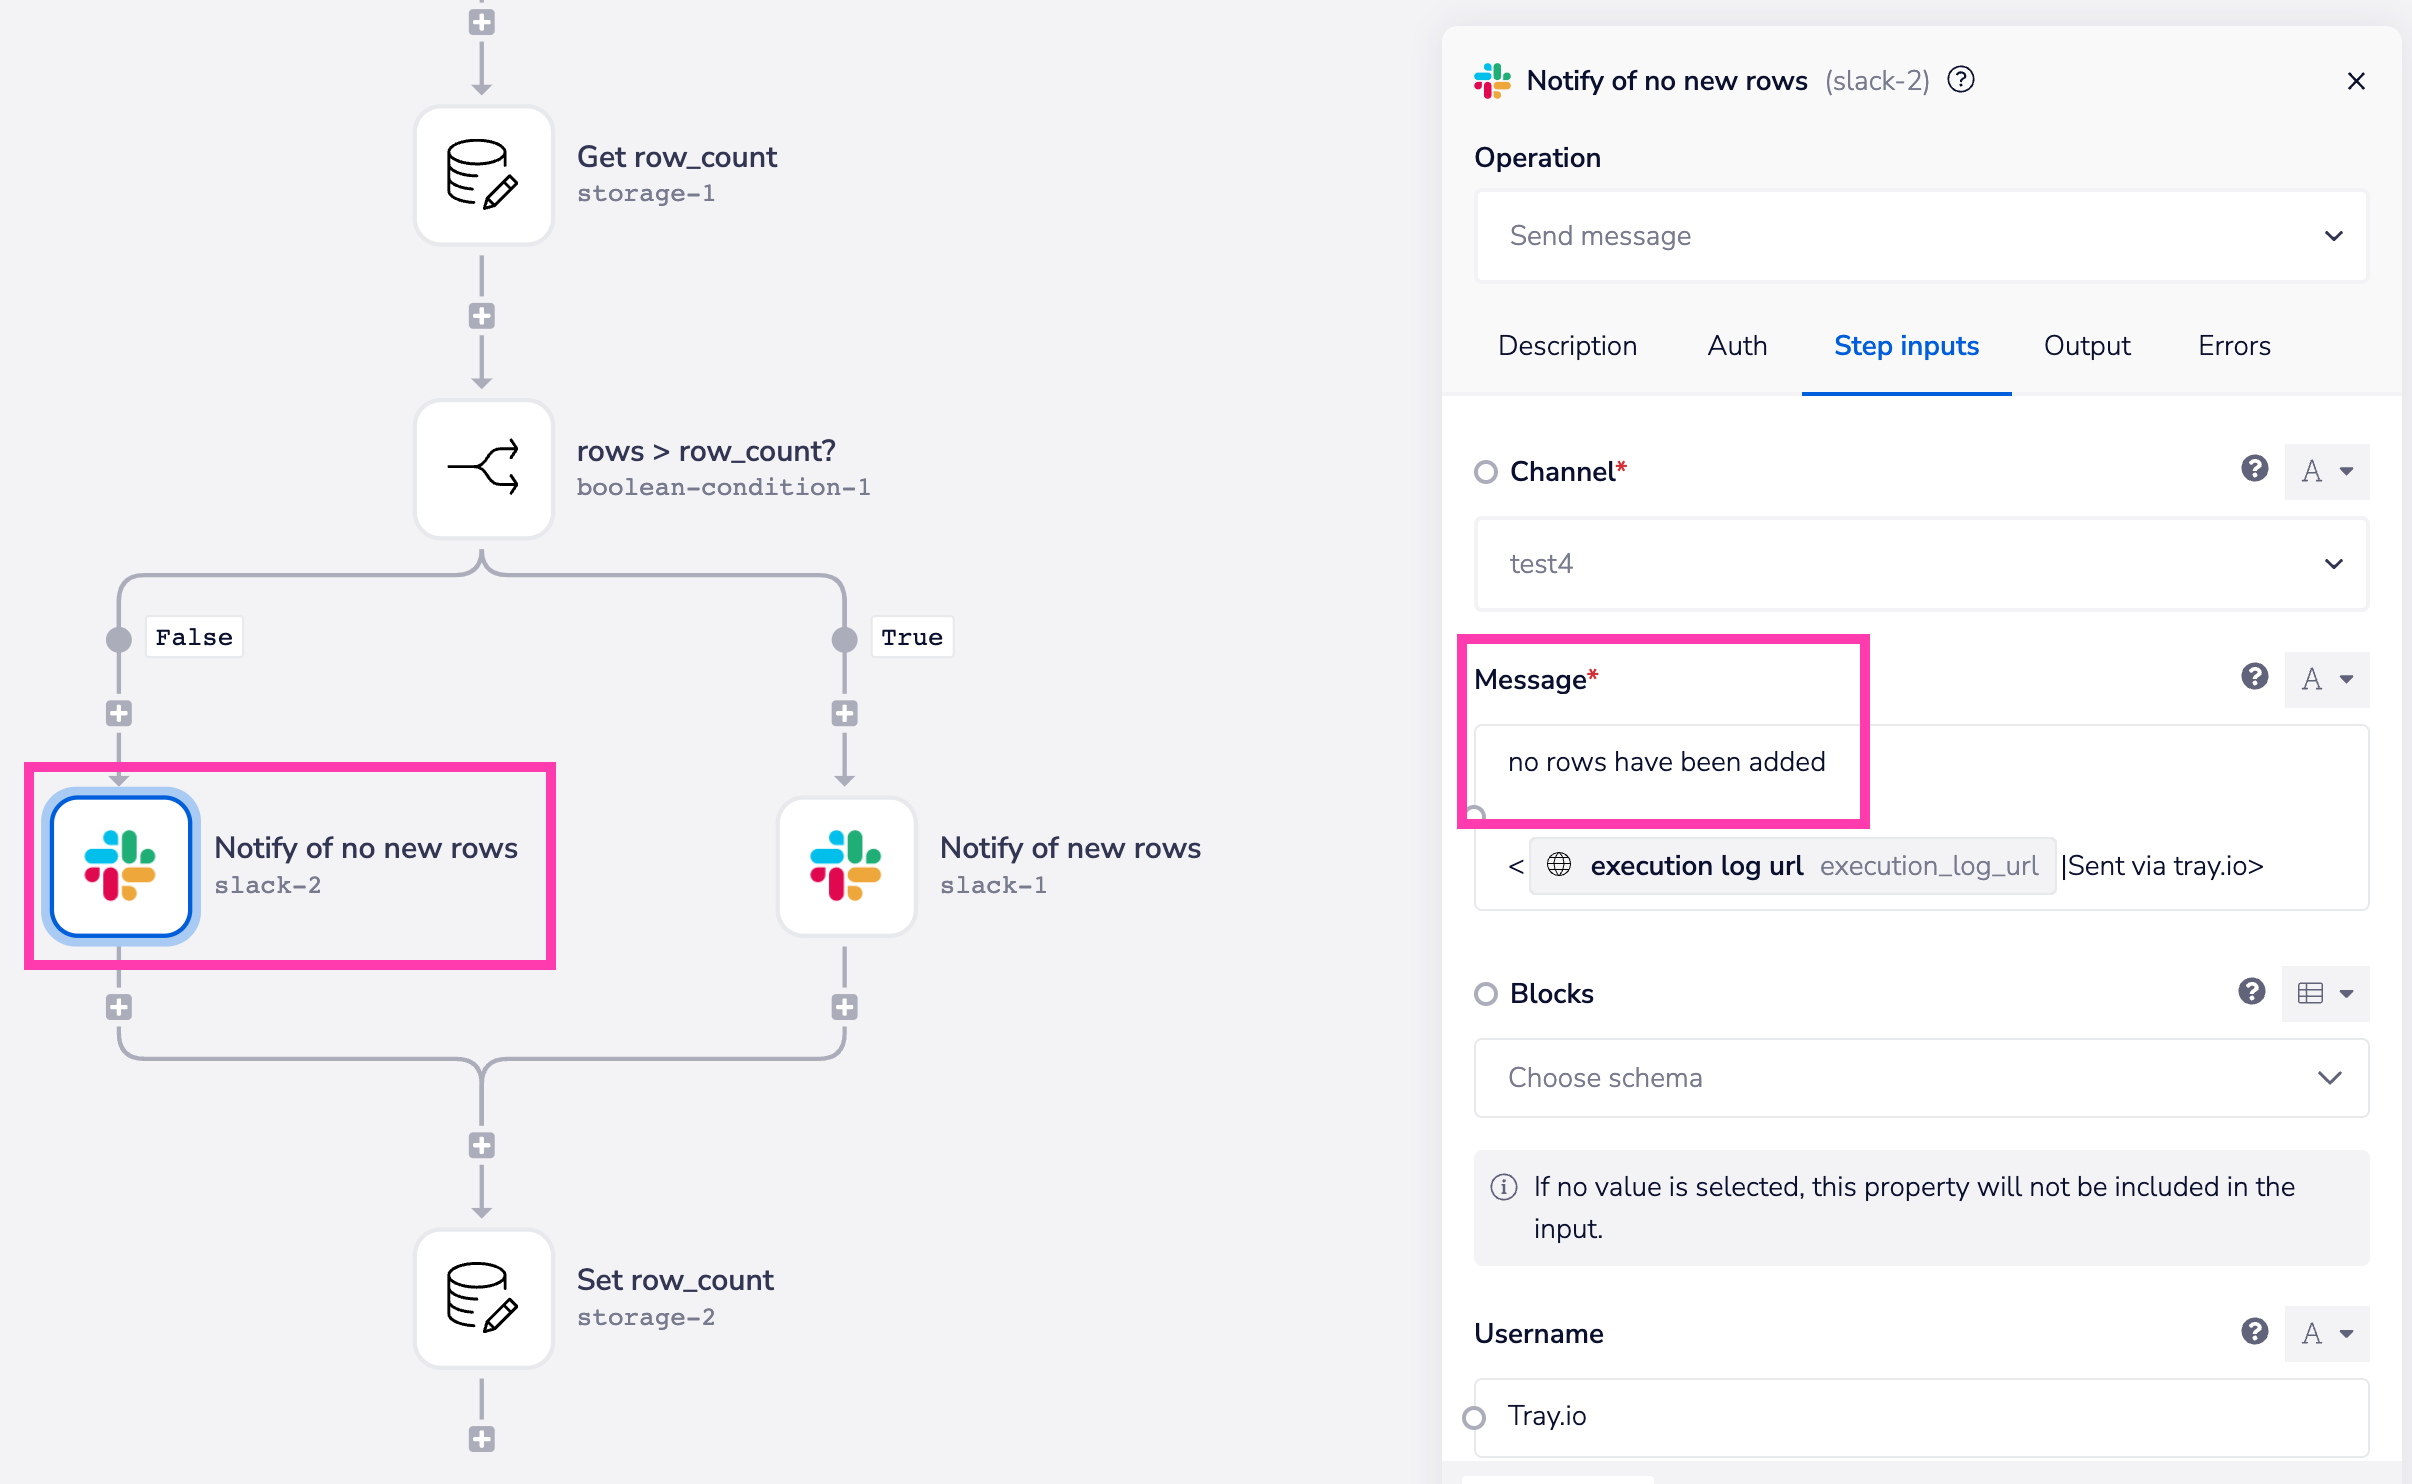
5 - Add the Slack messages to the 'True' and 'False' pathsCopy
Authenticate with your Slack account for both Slack steps, set the Operation as Send Message and choose a channel and short message to indicate that a new row has been added for the 'True' path:

And that no rows have been added to the 'False' path:
6 - Add the second Data Storage connectorCopy
Set the Operation to Set Value, the Scope to Workflow and the key to row_count. Then, in Value, grab the count from Google Sheets with $.steps.sheets-1.rows so that it is available for the next run:

Test the workflowCopy
Once finished, click on 'Enable' to enable the workflow and begin the scheduled checking.
Now go to your actual spreadsheet in your Google Sheets account and add a new row(s).
The next time your workflow is triggered by the schedule, if your workflow is setup correctly, the appropriate Slack message should be triggered and you can click on 'Debug' to check the output logs for each stage of the process.