Queueing data
OverviewCopy
Please be aware that building a queue may not be appropriate for your requirements.
A queue system will generally be required when you have a high throughput of single items of data coming in to your webhook-triggered workflow.
If you are trying to process large batches / lists of data (likely obtained by a scheduled polling workflow) then you will generally need to follow the guidance found in Pushing data in batches (chunking)
A potential scenario to be aware of is that the throughput of data in your workflow might be at a rate that is too high for the API limits of the destination service.
For example you may have too many requests coming in to a webhook-triggered workflow such that if you were to process them straight into e.g. Google Sheets it would exceed your limits.
In such a case you would see a 429 error in your Tray logs from the Google Sheets connector:


And if we look at this page on the rate limits for Google Sheets API we see that the rate limit is 100 requests per 100 seconds per user.
So this means that if your workflow is being triggered 100 times and adding 100 records to a Google Sheet in less than 100 seconds, then you will receive the above error.
Likewise Slack has a rate limiting page which explains their rate limits. The amount of API requests which can be made depend on your Web API Tier
https://api.slack.com/docs/rate-limits
Slack's rate limiting window is every minute, but small amount of burst behaviour are tolerated. This means that if you are limited to 100 calls per minute you might be allowed to send 120 in the 1st minute, assuming the 2nd minute has 80 requests, and the overall average is still 100.
In this case you will need to build a First In First Out (FIFO) queue.
Building a queue to process dataCopy
This can be done natively in Tray (with caveats explained below), using data storage.
Our Academy course on queue processing takes you through this in detail.
Creating a queueCopy
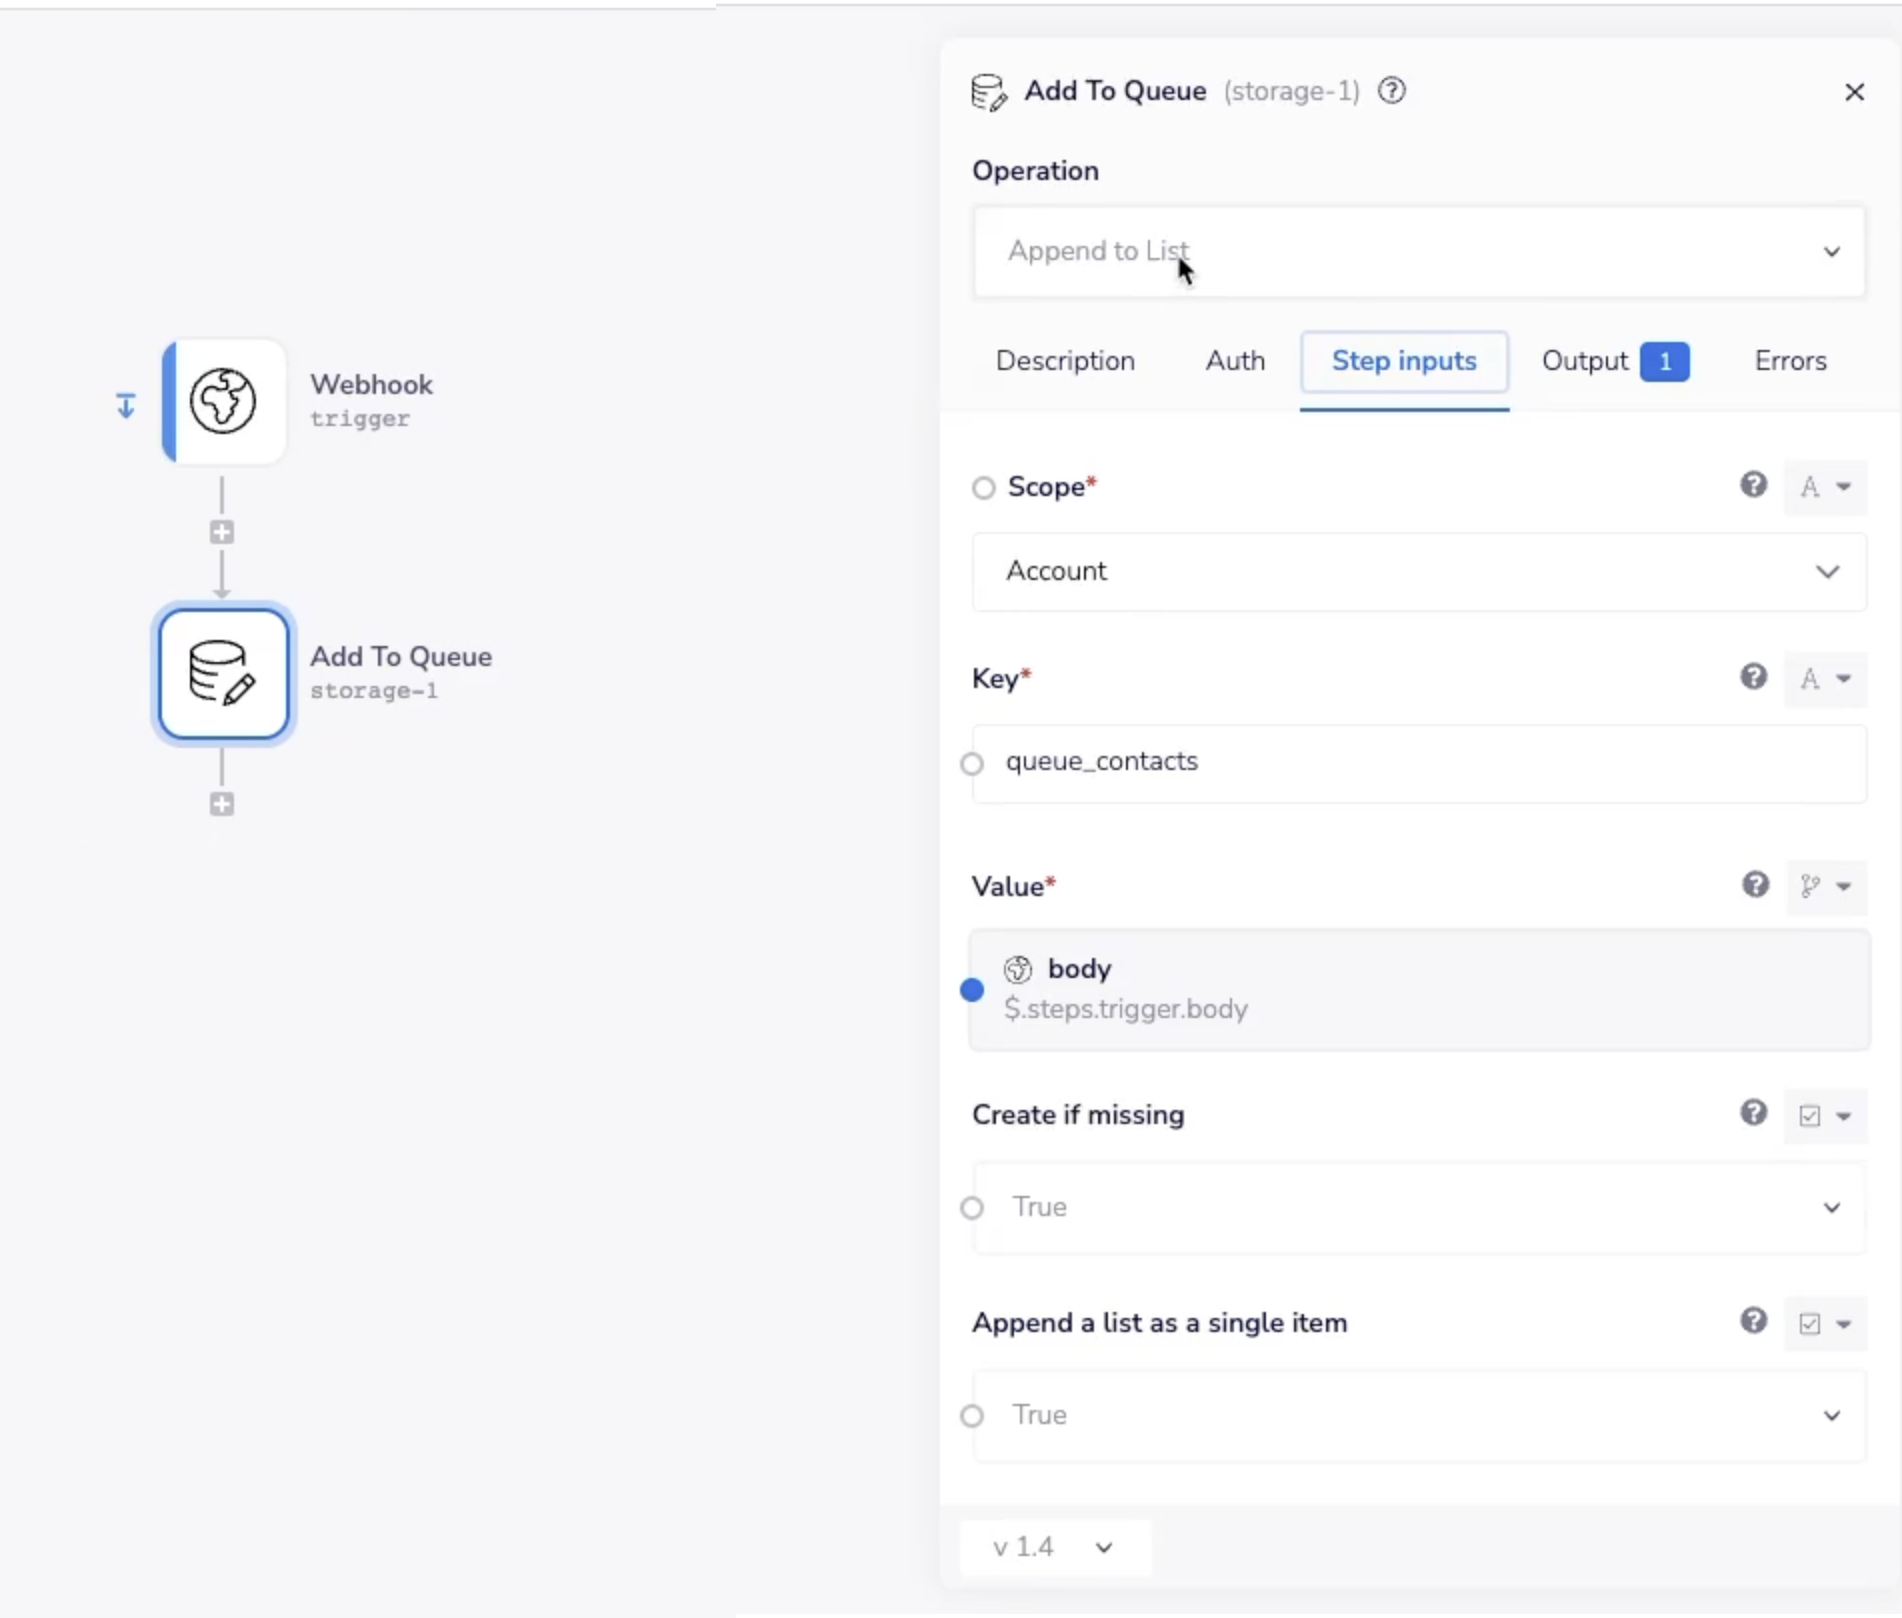
The following screenshot from the Academy example shows how you can use simple account-level data storage to build a queue of items as they come into your webhook:

Processing a queueCopy
This queue can then be consumed with a setup like the following:


The key points here are:
You can control the rate of consumption of the queue through a combination of:
The frequency of the scheduled trigger (e.g. every minute)
How many items you allow to be processed each time before breaking with the boolean step and break loop connector
Each iteration of the loop the [0] item is deleted from the queue
Any leftover items will be dealt with the next time the queue is run
LimitationsCopy
This native Tray solution is not robust and scalable for massive volumes of data for two reasons:
The data storage connector has a storage limit of 400KB under a single key
There is no built-in protection against race conditions at scale
Using a 3rd party queueing serviceCopy
Therefore for a truly robust and scalable solution we recommend using a third-party solution such as Amazon SQS.