SharePoint 3.2
SharePoint is a web-based collaborative platform that integrates with Microsoft Office
- On this page
- SharePoint
- Overview
- API Information
- Authentication
OverviewCopy
SharePoint is a web-based collaborative platform that integrates with Microsoft Office. SharePoint is primarily sold as a document management and storage system, but the product is highly configurable, and usage varies substantially among organizations.
API InformationCopy
The SharePoint connector has the following Base URL: https://{{#auth.tenant_name}}.sharepoint.com/_api. More information can be found on their main API documentation (v1) site. Details regarding their API limitations can be found here.
AuthenticationCopy
Version 3.0 +Copy
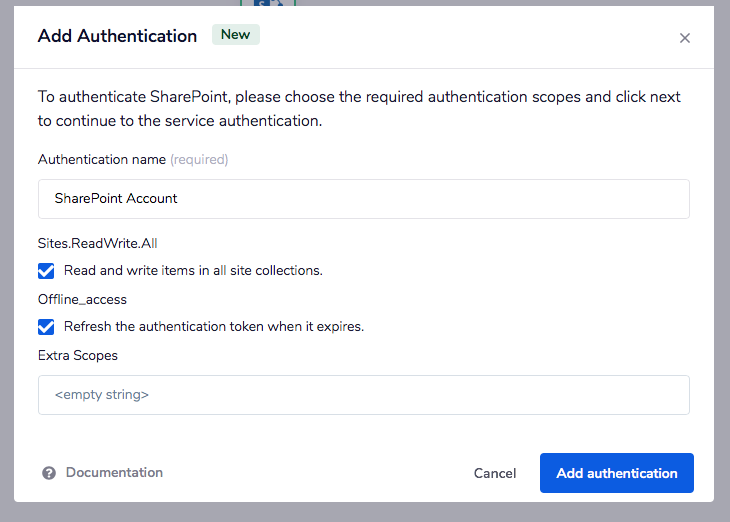
Within the workflow builder, highlight the SharePoint connector.
In the SharePoint connector properties panel to the right of the builder, click on the Authenticate tab and the 'New authentication' button.


This will result in a Tray.io authentication pop-up modal. The first page will ask you to name your authentication and select the type of authentication you wish to create ('Personal' or 'Organisational').
The next page asks you for your 'Tenant name', 'Tenant ID', 'Client ID', and 'Client secret' credentials.


The 'Tenant name' is your organization's domain that was created when you signed up with Microsoft SharePoint.
The 'Tenant ID' can be found in the Azure Active Directory on the Overview page.


In order to get the remaining credentials, you would need to register your app and give it the required permissions.
To learn more about registering your app refer to the Register SharePoint Add-ins document.
To register your app, go to: https://[TENANT-NAME].sharepoint.com/_layouts/15/AppRegNew.aspx.

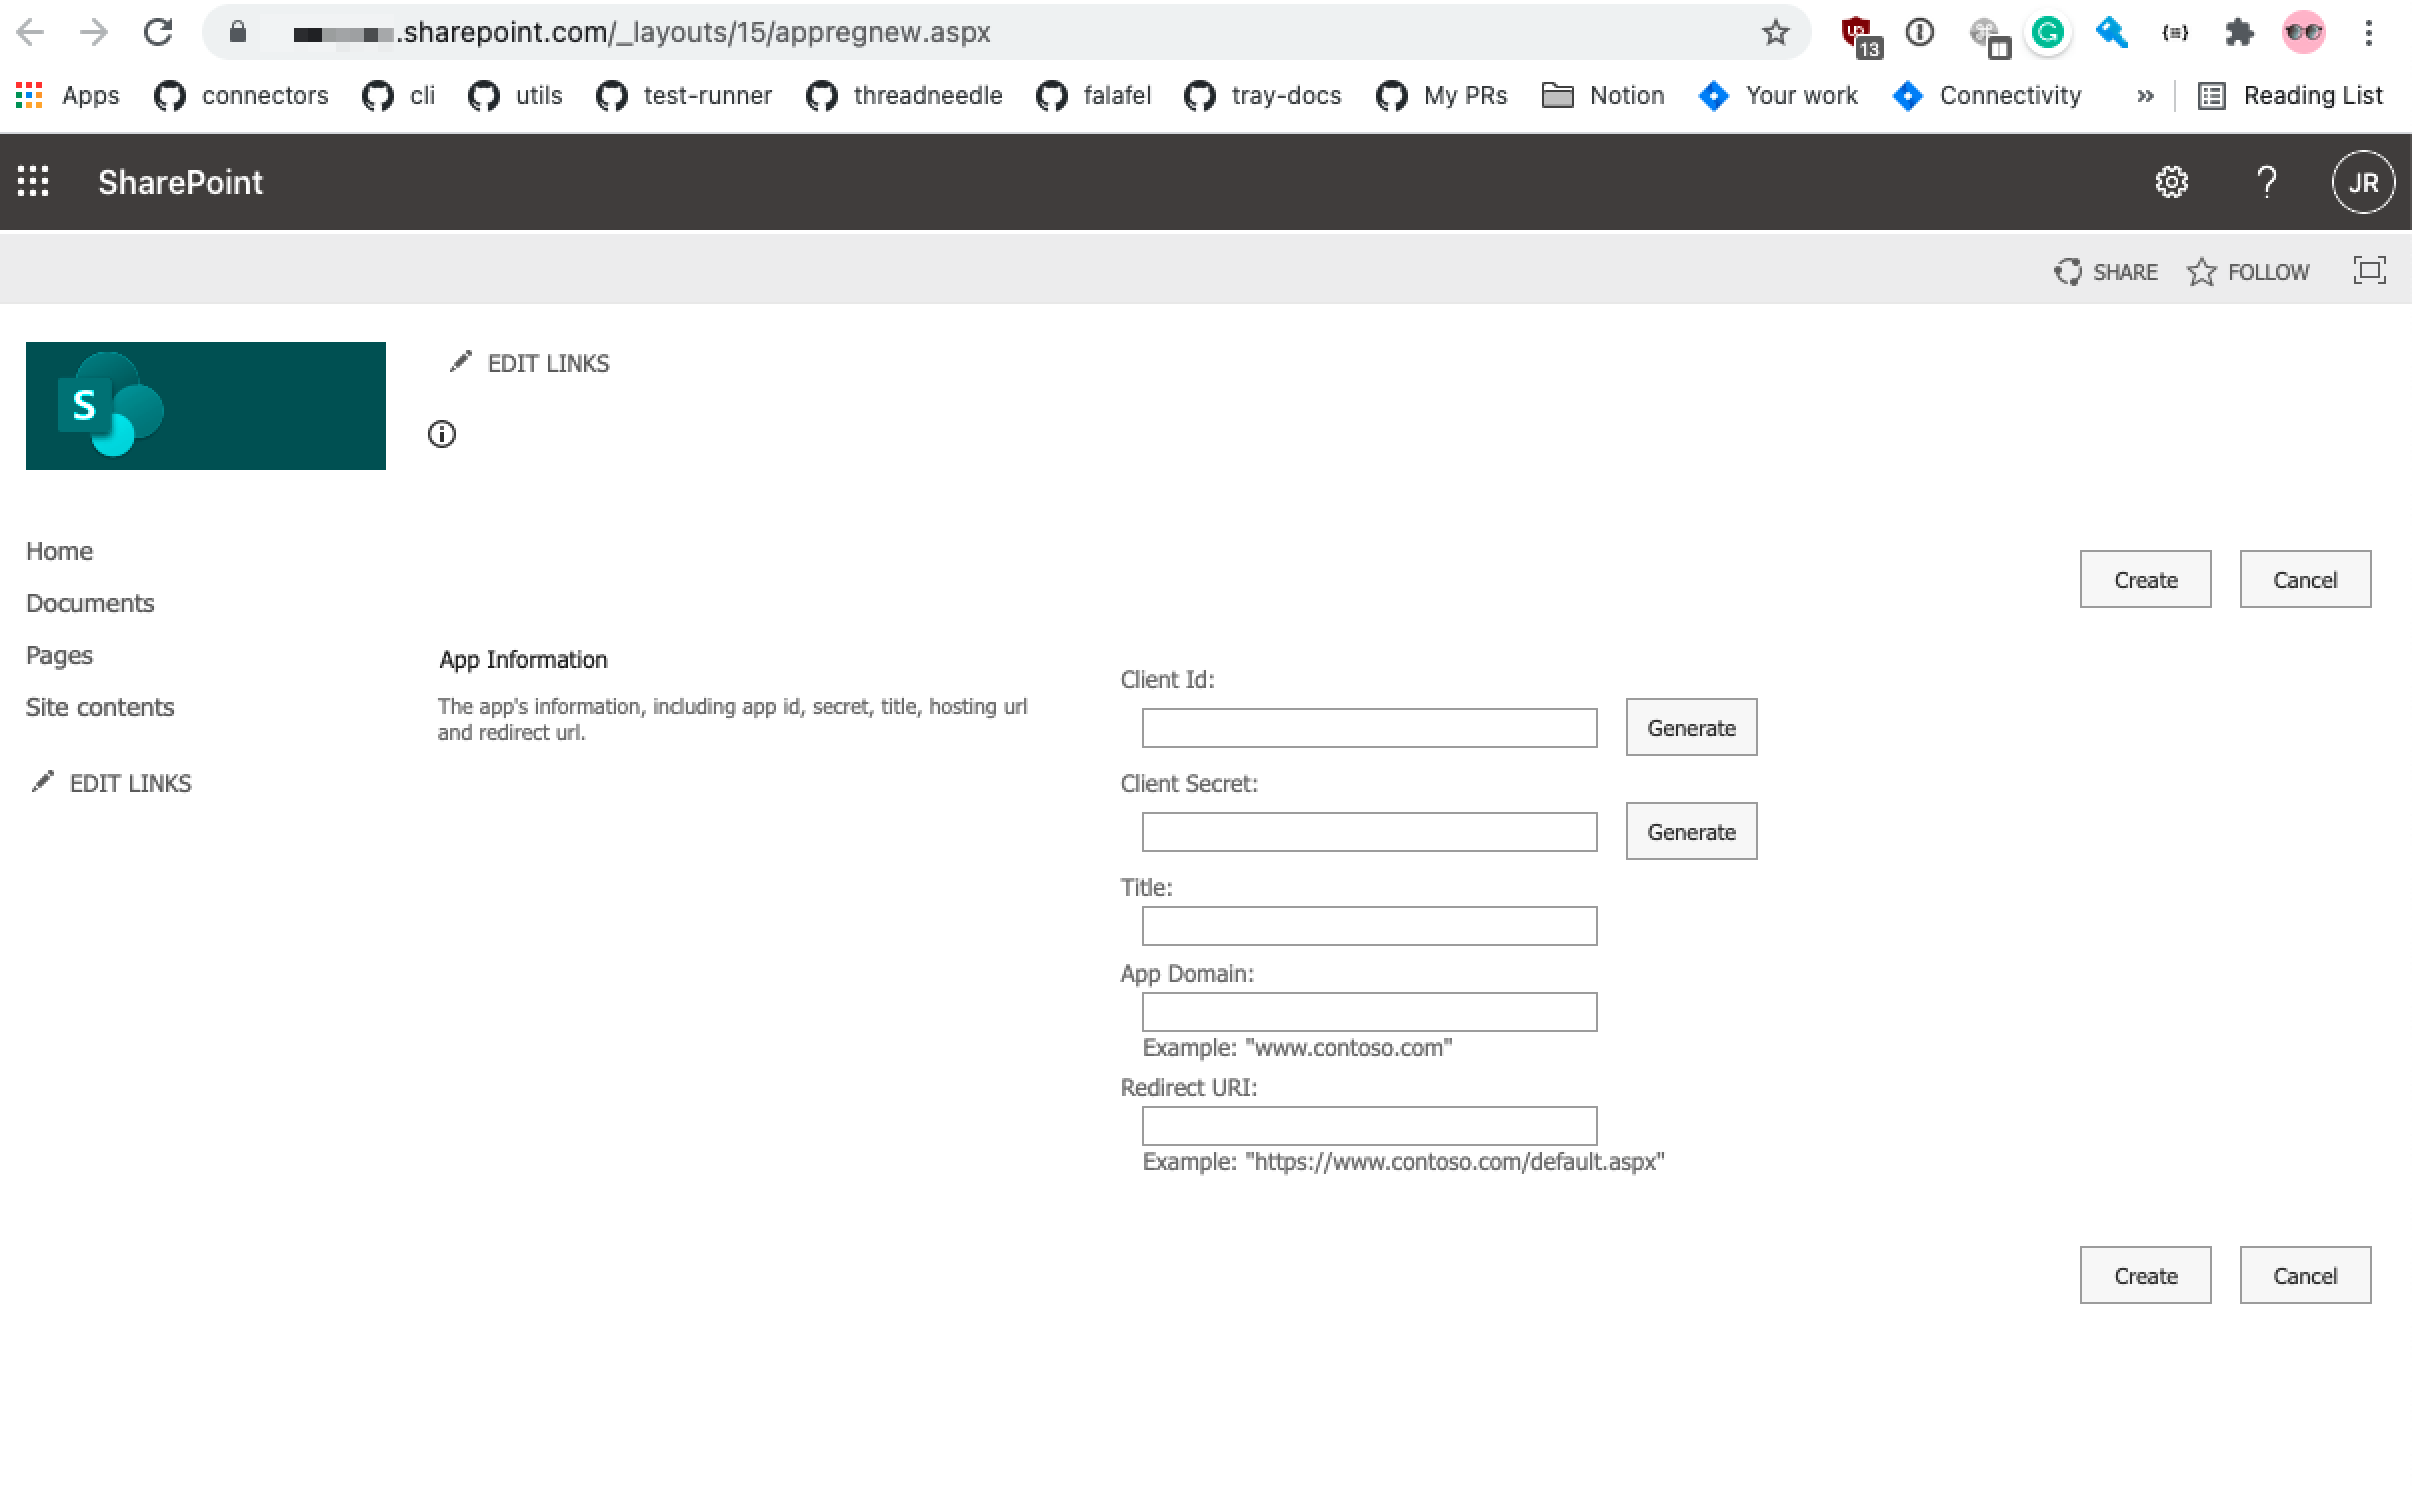
Fill in the required fields as explained below:
Client Id: The 'Client Id' can be generated using the 'Generate' button beside the 'Client Id' field.
Client secret: You can generate the 'Client secret' using the 'Generate' button beside the 'Client Secret' field. The newly generated client secret should look similar to this: xvVpG0AgVIJfch6ldu4dLUlcZyysmGqBRbpFDu6AfJw=.
Title: A user-friendly title for the application, for example, Contoso photo printing add-in. Users are prompted to grant or deny the permissions the add-in is requesting. This title appears as the name of the add-in on the consent prompt.
App domain: The add-in domain must match the URL bindings you use for your web application. Do not include protocol https: or / characters in this value.
Redirect URI: The redirect URI needs to be https://auth.tray.io/oauth2/token.
Once you have added all the information, click on the 'Create button'.
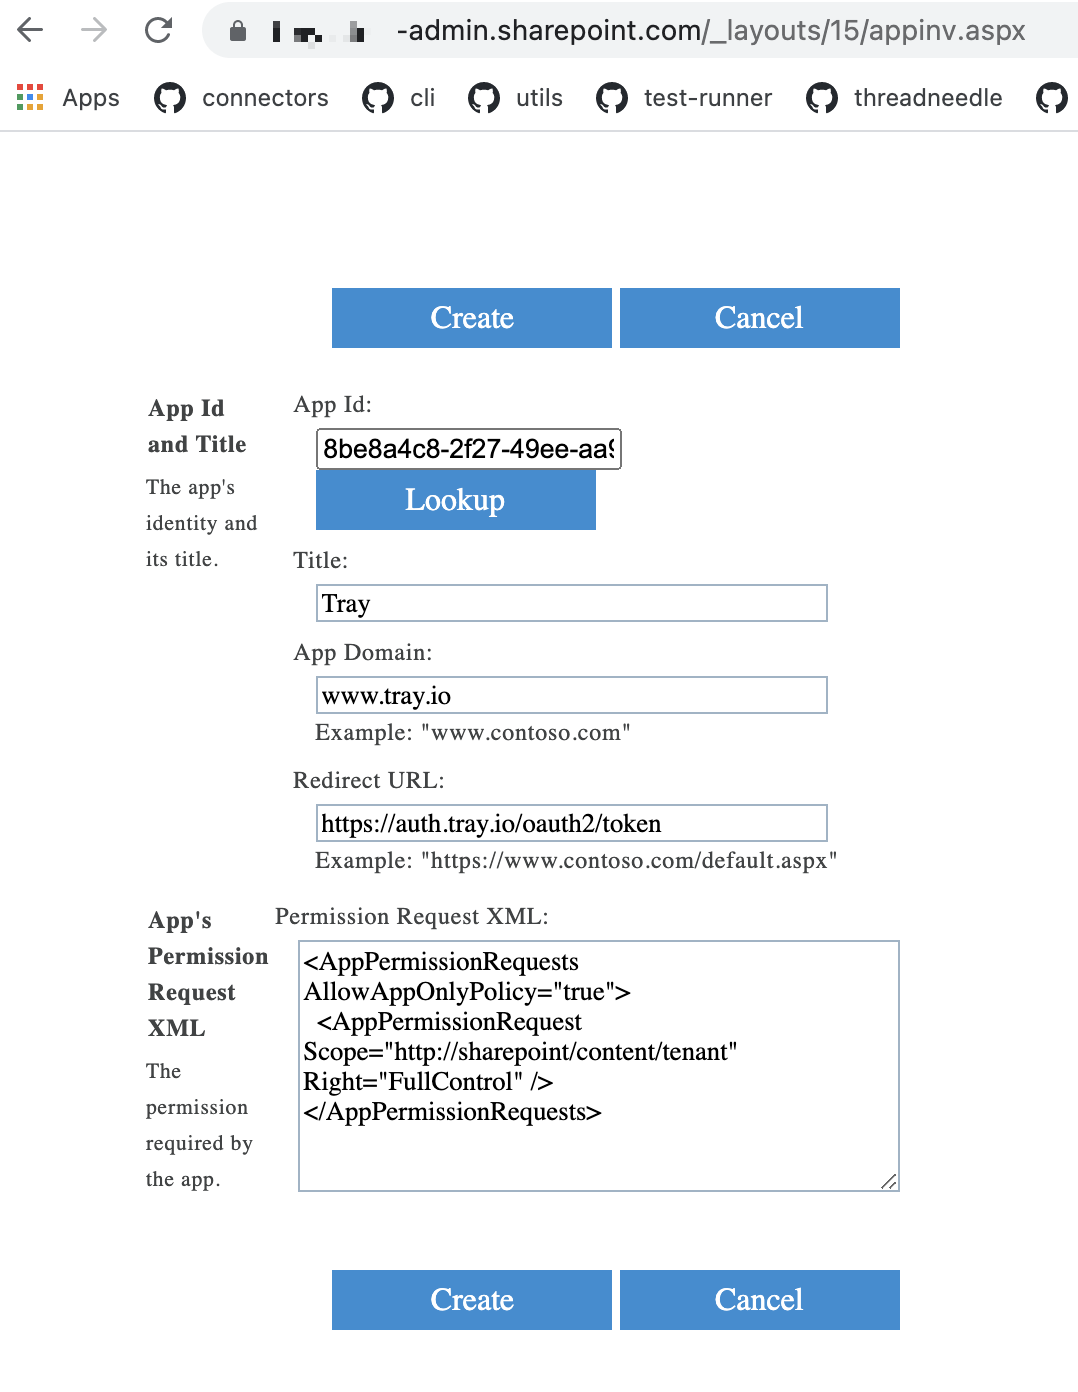
Now the next step is to grant permissions to the newly created app by going to:
https://[TENANT-NAME]-admin.sharepoint.com/_layouts/15/appinv.aspx
IMPORTANT!: The link that you have may not contain the 'admin' keyword as you can see in the above link. The link won't work without the admin keyword So, do not forget to add the admin keyword after your tenant name.
Once you are redirected using the above link, to add the permissions, provide the 'App Id' that you have just created.
Once done, click on the 'Lookup' button. It will autoload all the information for the below fields except the permissions.
Add the permissions based on your need. To learn about the permissions refer to the Granting access using SharePoint document.

Once you have added these fields to your Tray.io authentication pop-up window, click the 'Create authentication' button.
Go back to your settings authentication field (within the workflow builder properties panel), and select the recently added authentication from the dropdown options now available.
Your connector authentication setup should now be complete.
Version 2.3 and earlierCopy
Authentication for the Sharepoint connector version 2.3 and earlier is done through a simple OAuth2 login process.
After clicking Add authentication, you will be redirected to Sharepoint's login screen.

Available OperationsCopy
The examples below show one or two of the available connector operations in use.
Please see the Full Operations Reference at the end of this page for details on all available operations for this connector.
Notes on using SharePointCopy
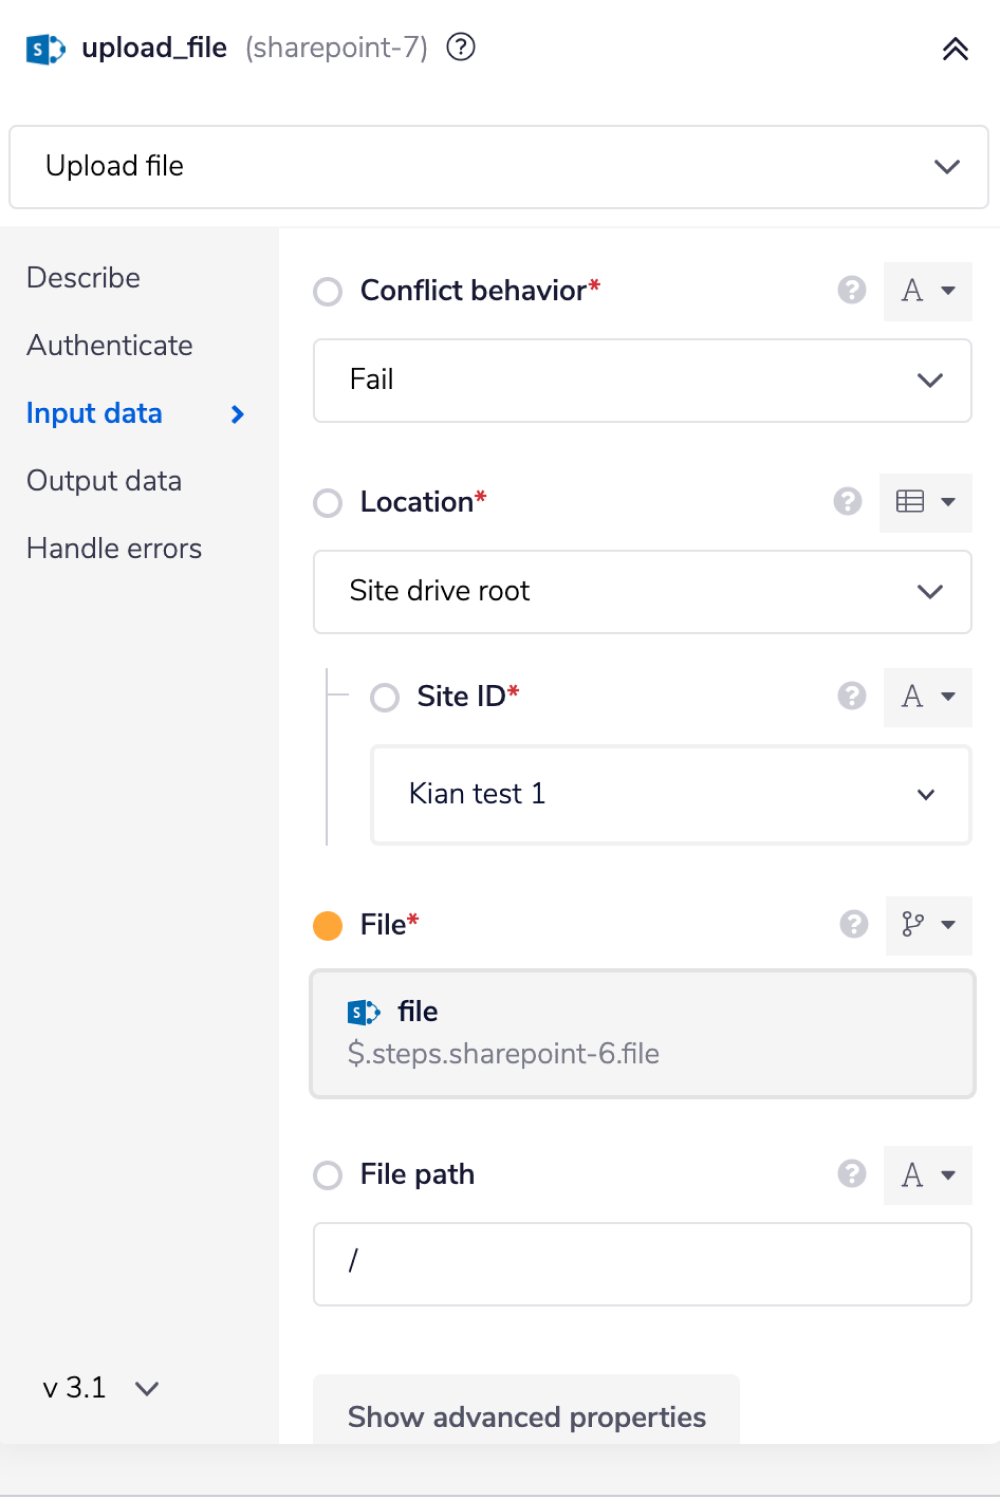
Upload FileCopy
The 'Upload file' operation can be used to create new files or update existing files.
To upload a file, the operation needs the following information.
Conflict behavior: The first input tells the workflow how to deal with conflicts. Conflicts happen when a file with a certain name already exists. The default behavior is to
Failthe operation to avoid overwriting the existing file.If you do not want to overwrite the file but still want to upload the file, you can select the
Renameoption from the drop-down. This option will rename the file in the destination, usually by appending a number to the filename.The last option is to overwrite the file. To overwrite the file, select the
Replaceoption from the drop-down.Location: The second is the location of the file. This can be anything from the provided options. Such as in the root directory of a site drive, or relative to an item in a site drive, such as a folder. Select appropriate value based on your situation.
File: The third input is the file itself. The input value for this field is mostly a jsonpath for the file from the previous connector or helpers such as
File helpers.File path: The last input is a file path. This path will be set relative to the location, so if you choose a site drive as the location, this file path will be relative to that.

Download fileCopy
The download file operation takes in the location of a drive item. This can be a file in either a OneDrive, or a Sharepoint site drive.


Using the Raw HTTP Request ('Universal Operation')Copy
As of version 3.0, you can effectively create your own operations.
This is a very powerful feature which you can put to use when there is an endpoint in SharePoint which is not used by any of our operations.
To use this you will first of all need to research the endpoint in the SharePoint API documentation, to find the exact format that SharePoint will be expecting the endpoint to be passed in.
Note that you will only need to add the suffix to the endpoint, as the base URL will be automatically set (the base URL is picked up from the value you entered when you created your authentication).
The base URL for SharePoint is: `https://[TENANT-NAME].sharepoint.com/_api`
IMPORTANT!: The base URL for SharePoint v2.3 is https://graph.microsoft.com/v1.0 as we migrated from the Microsoft Graph API to SharePoint API effectivley from version 3.0
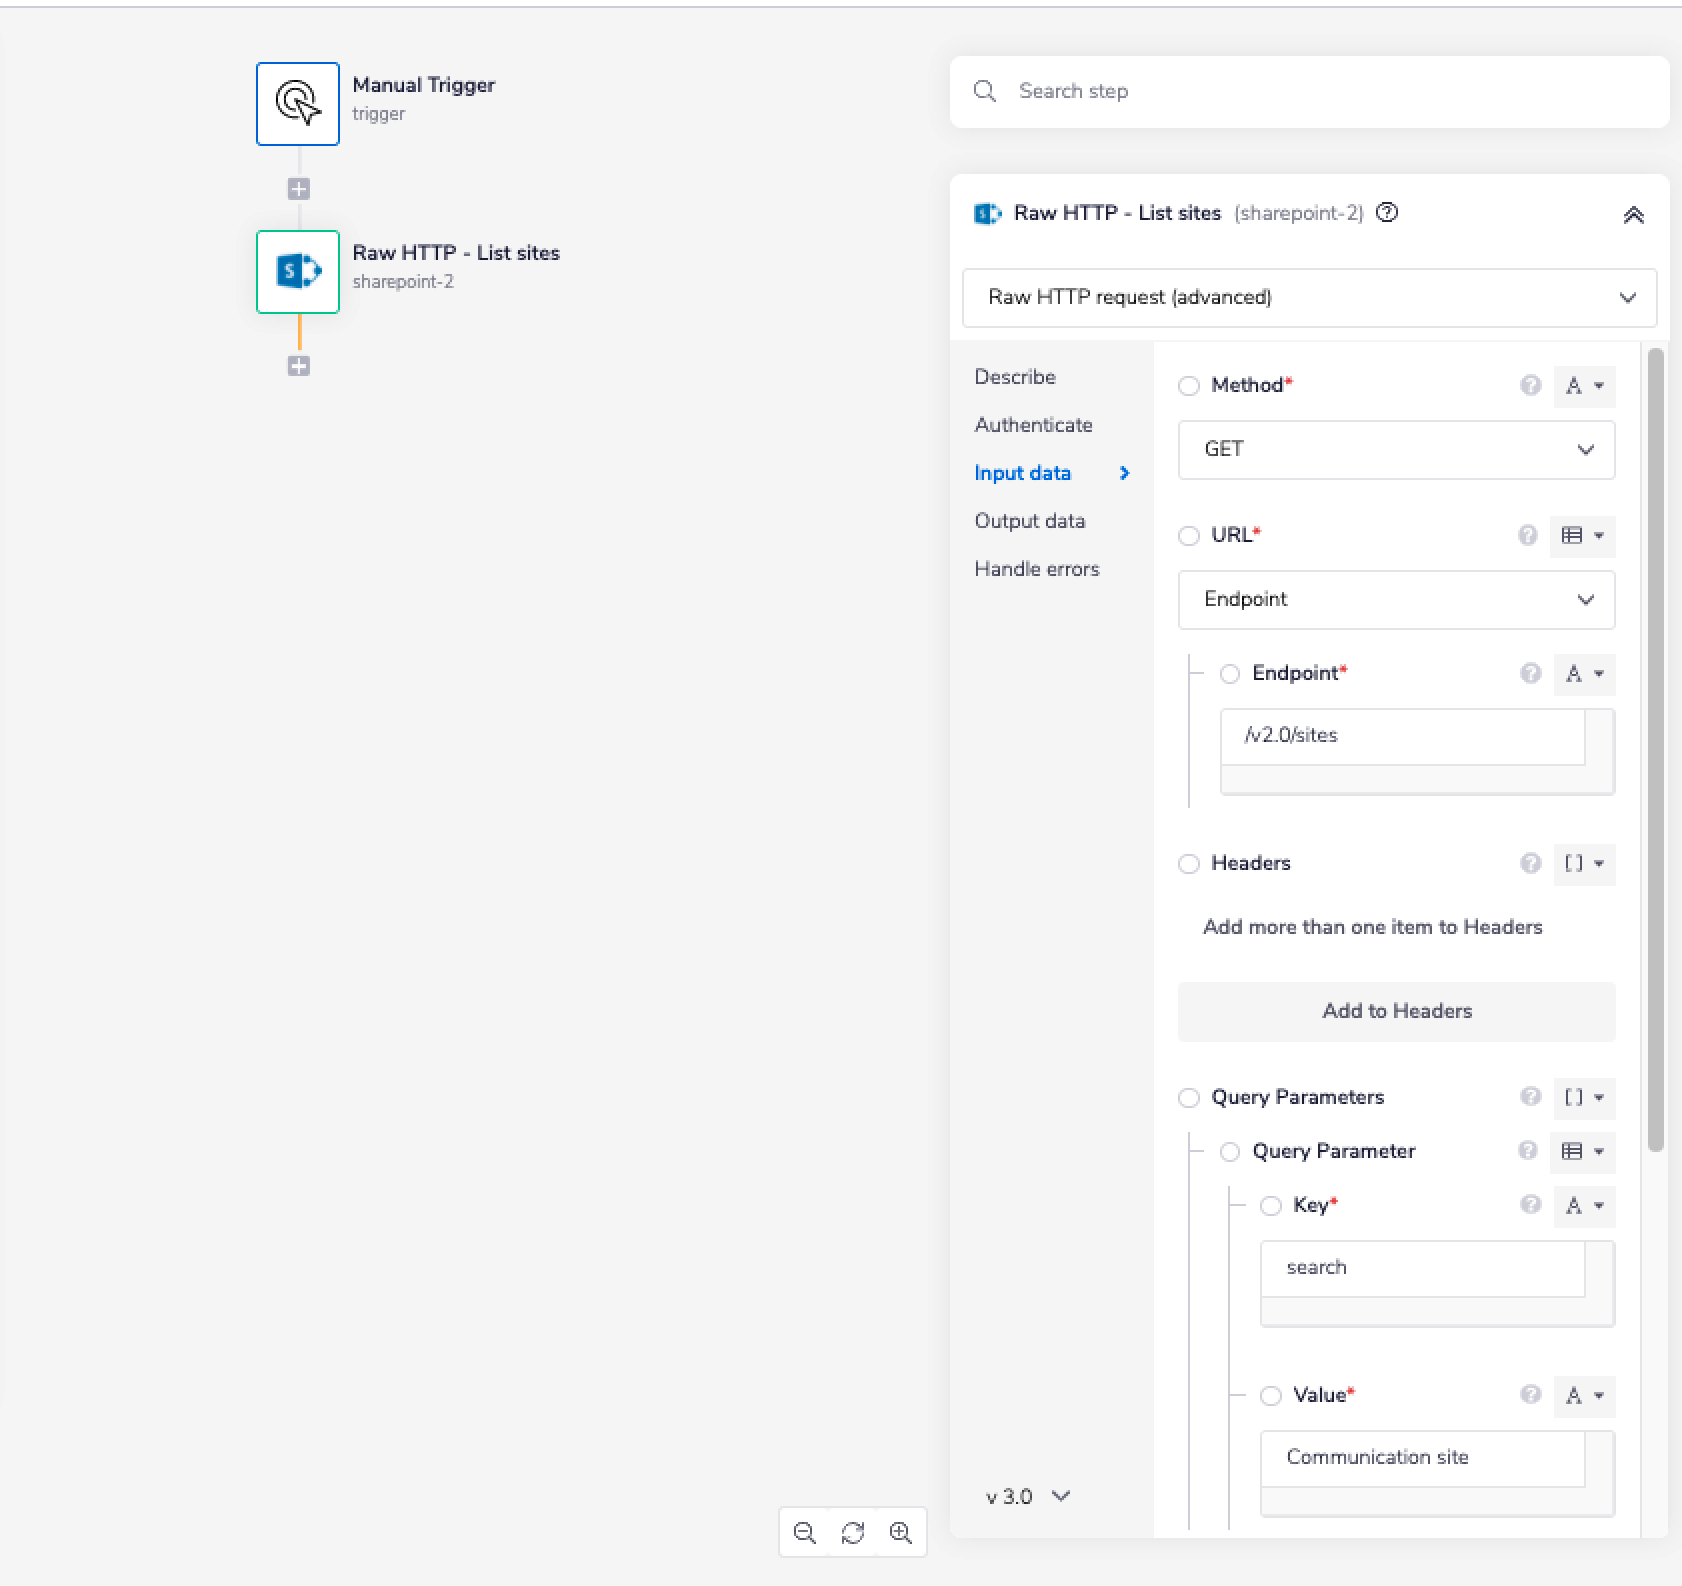
For example, say that the 'List sites' operation did not exist in our SharePoint connector, and you wanted to use this endpoint. You would use the SharePoint API docs to find the relevant endpoint - which in this case is a GET request called: /v2.0/sites.
More details about this endpoint can be found here.


There is also the option to include a query parameter, should you wish to do so. So if you know what your method, endpoint and details of your query parameters are, you can get the site information with the following settings:
Method: GET
Endpoint: /v2.0/sites
Query Parameter: Key: search Value: Communication site
Final outcome being: https://[TENANT-NAME].sharepoint.com/_api/v2.0/sites?search=Communication site