
Trigger
If you wish your workflow to be kicked off by a particular action in Salesforce you can use the Salesforce Trigger.
The Salesforce trigger allows you to receive notifications and trigger workflows when given events occur associated with the selected trigger operation.
AuthenticationCopy
The Salesforce Trigger uses the same authentication process described in the main Authentication sub-section.
Please make sure you read through this carefully as permissions and roles can get complicated.
IMPORTANT! Note that when using the Salesforce trigger, you currently must use a permission set and add it to the User that you will be authenticating with. This permission set must have the 'Modify all Data' and 'Customize Application' permissions.
OperationsCopy
For more information on which operation is classified as a standard or manual event type, review the Trigger event types section.
On Apex trigger (Advanced)
On Custom Flow Formula (Advanced)
On Outbound Message (Advanced)
On Record Create
On Record Create or Update
On Record Field Change
On Multiple Fields Change
On Record Update
Best practice setupCopy
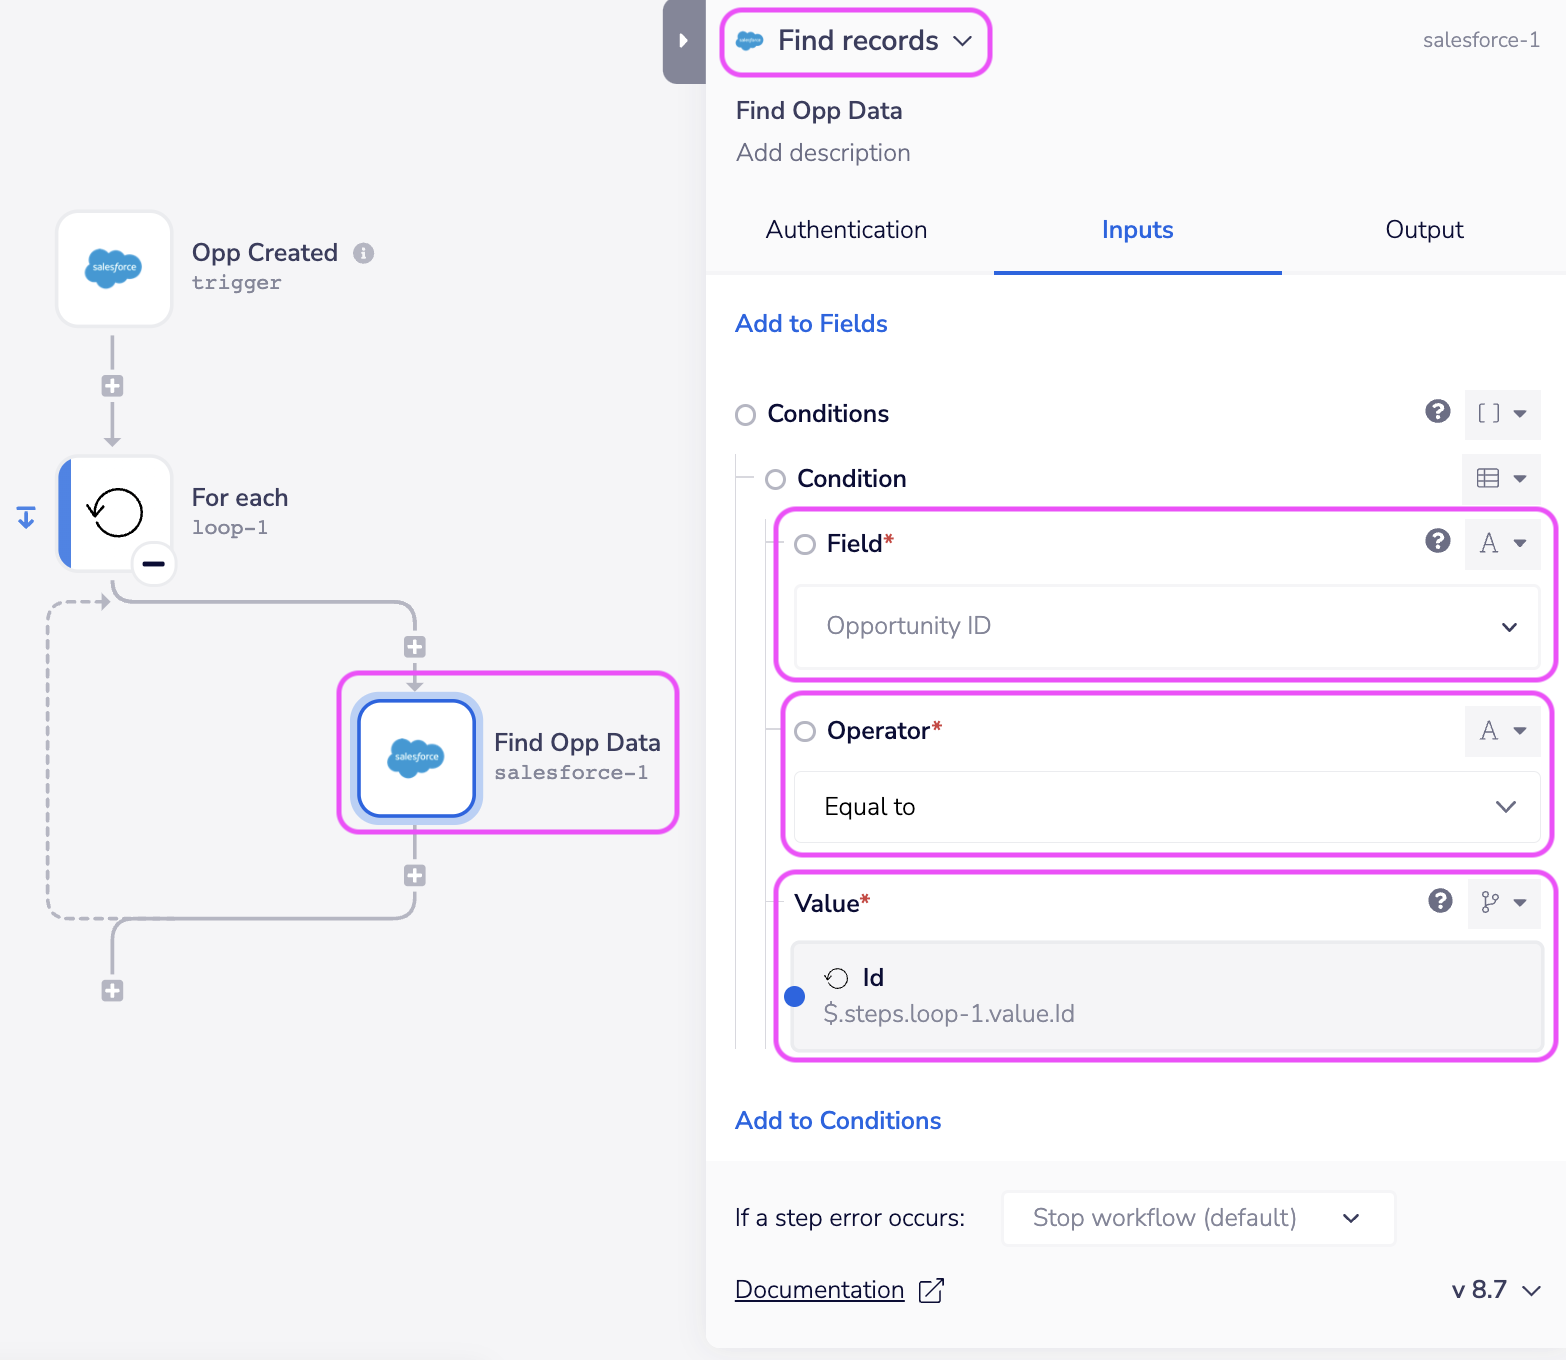
From version 2.7 and above the Salesforce Trigger will receive trigger events as an 'events' array instead of an object (which could be directly queried).
This means that any attempts to directly query an object with a jsonpath such as $.steps.trigger.Id will fail.
It is considered best practice to confirm that each incoming object is verified before continuing with your workflow processing.
When using the trigger incoming Salesforce data will always be retrieved in the form of an array (regardless of operation).
If you are setting up a new Salesforce trigger or updating your trigger from version 2.6 or earlier you will need to build in a loop condition to go through the events array and add an object verification step.
You can go to the Snippet page to get the setup or import (right click and 'save as') here. Be sure to adapt the record/object type it is referring to for your use case requirements.

Trigger event typesCopy
Users should be aware that there are technically two types of trigger events to choose from:
Standard trigger events
Manually created trigger events.
More details on each event type below.
Standard eventsCopy
This is when Tray.io auto-configures a number of possible Salesforce settings. These in turn result in Salesforce sending notifications (when a certain event occurs) to your Tray Workflow.
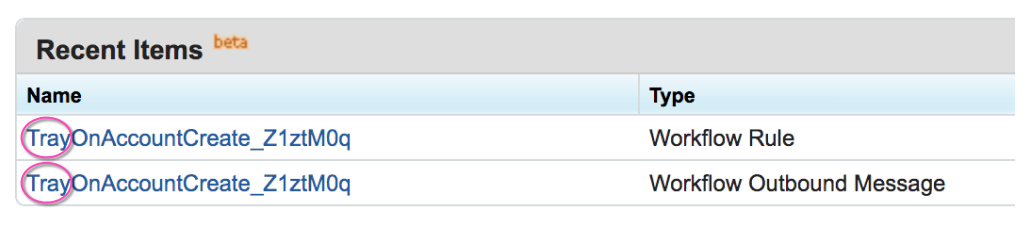
Every time you create a Salesforce trigger, Tray will add a new remote site within your Salesforce account and add your Tray Workflow webhook URL as the target URL for that remote site.
The operations that fall under the standard trigger event category include:
On Custom Flow Formula (Advanced)
On Record Create
On Record Create or Update
On Record Field Change
On Record Multiple Field Changes
On Record Update
Manual eventsCopy
This type of trigger event is when you have to log in to Salesforce and configure a number of Salesforce settings first.
The operations that fall under the manual trigger event category include:
On Apex trigger (Advanced)
On Outbound Message (Advanced)
Important notesCopy
White labellingCopy
Users can white-label their trigger should they chose to do so. This is done by adjusting Salesforce objects with prefixes.
The default behaviour of the trigger is to prefix any newly created objects with the string Tray.

From connector version 2.8 onwards this prefix can be customised using the Object prefix field found within the trigger's property panel Show advanced properties button:


The string provided will then be used as the prefix for objects created in Salesforce.


Salesforce FormulasCopy
In Salesforce, formulas are expressions that perform calculations, manipulate text, or combine data from different fields to create a new result. Formulas can be used in various contexts within Salesforce, such as formula fields, validation rules, workflow rules, and more.
Salesforce uses a formula language that includes functions, operators, and syntax specific to Salesforce objects and fields.
Refer to the Formula Operators and Functions page for the complete list.
On Custom Flow FormulaCopy
If you're using SFDC IDs in your formulas, make sure they're 15 characters. The 18-character IDs will not work.
The "On Custom Flow Formula" operation utilizes Salesforce formulas, enabling you to perform calculations, manipulate text, and combine data from different fields to achieve desired results.
Imagine you want to trigger a celebration on Slack every time an Opportunity in Salesforce reaches the "Closed Won" stage.
To achieve this, create a formula using available Salesforce's operators and functions. In this example, we use the ISCHANGED and ISPICKVAL function.
ISCHANGED(StageName)
&&
ISPICKVAL(StageName, "Closed Won")
This formula checks if the value of the "StageName" field is changed and is equal to "Closed Won."
With this setup, every time the Salesforce trigger is fired due to a Create or Update action and the Opportunity's StageName matches "Closed Won," the defined workflow will be executed.


Below is a more complex example which uses formulas to determine "total pay". The expression calculates regular hours (by a regular pay rate) plus overtime hours which are then multiplied by an overtime pay rate.


IMPORTANT!: Salesforce has changed its structure so that Flows have now replaced Rules. This is one of the reasons why the previous 'On custom workflow formula' operation is no longer available.
Please see the following article for more details. Note that there is a migration tool available to help users convert their previous rules to flows should you wish to keep your previous work.
Salesforce FlowsCopy
Flows can be thought of as Salesforce's "in-house workflows". They automate Salesforce specific tasks within its own service.
You can extend this functionality by integrating your Flows with Tray's Salesforce trigger. This will allow you to further manipulate your Salesforce data, and use it in conjunction with other services (such as HubSpot, Slack etc).
Using Triggers with FlowsCopy
There are three important aspects to be aware when setting up your Salesforce trigger in conjunction with Salesforce Flows:
You must select the On outbound message operation when setting up your Salesforce trigger.
No other trigger operations are designed to work with Salesforce Flows.
You must select the "Record-Triggered Flow" option within the Salesforce Flow UI during the initial setup.
No other available Salesforce options work with the On outbound message trigger operation.
This option is only presented to you when you select "Create new flow" within the Salesforce interface.
If you wish to use an option other than "Record-Triggered Flow" check out Tray's Webhook trigger for more functionality.
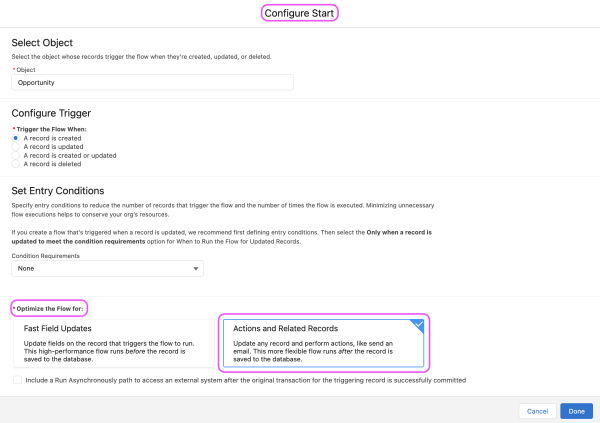
Within the "Start" icon of the Salesforce Flow, set the "Optimise the Flow for" to Actions and Related Records.
Using this setting will mean your Flow will only trigger at the end of the process.
This will reduce the risk of unnecessary Tray workflow runs.


Flow limitationsCopy
All Salesforce Flows must be built within the parameters of the Salesforce Flow Builder. To view their limitations page go here.
Example use caseCopy
On Outbound MessageCopy
This example will explain how to create a Salesforce Flow that will trigger your Tray.io Workflow when an Opportunity's amount field is greater than 20.
Be advised that this is an advanced, manual event type operation, which requires setup within the Salesforce UI to activate the workflow.


1 - Tray SetupCopy
With the operation set to On Outbound Message make sure to copy and save your Public URL for the next step.
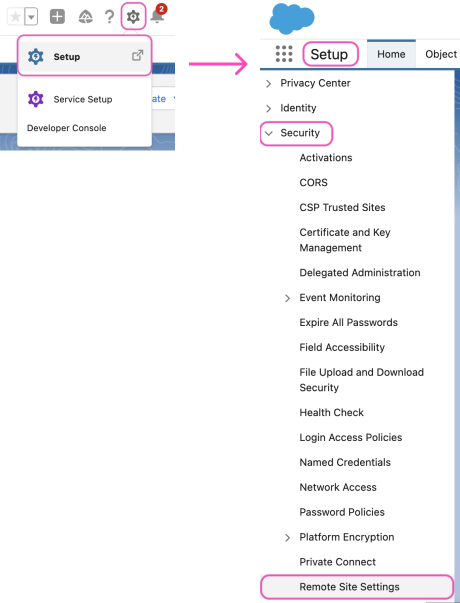
2 - Configure Remote Site SettingsCopy
You need to configure your Remote site settings so that your Tray Workflow is linked to your Salesforce Flow.
Within the Setup dashboard under Security, select Remote site settings and then the New Remote Site button. Paste your Tray.io Public URL into the Remote site URL field.


3 - Configure Outbound MessageCopy
Query the term: Outbound messages within the Salesforce search bar. The correct pathway should be is as follows (ignore the reference within the Environment page):
Platform tools -> Process Automation -> Workflow Actions -> Outbound messages
Your New Outbound Message should be configured in regards to the information you want Salesforce to send to your Tray Workflow. The Endpoint URL is the Salesforce trigger's Public URL.
This use case is based on an Opportunity object type and will be returning the ID, Name, Owner ID and Amount fields. The name of the outbound message has been called On Opportunity Amount Change > 20.


4 - Create a Salesforce FlowCopy
Please be aware that there are a number of "Flow" pages in Salesforce. The only Flow section you need to concern yourself with is the one under Platform tools:
Platform tools -> Process Automation -> Flows
When creating a New Flow select Record-Triggered Flow.
When setting up your Flow please make sure to select Record-Triggered Flow.
This is the only option that will work with Tray Workflows. For more details see the Salesforce Flows section above.


5 - Configure Salesforce FlowCopy
Make sure that Optimise the Flow for is set to Actions and Related Records.
Set up the rest of your Flow in accordance with your needs. The image below shows how to create a Flow which will trigger your Tray.io workflow once an Opportunity object's amount field has been created/updated to more than 20.
When setting up your Salesforce Flow set "Optimise the Flow for" to Actions and Related Records.
This is the only option that will work with the On Outbound message trigger operation. For more details see the Salesforce Flows section above.


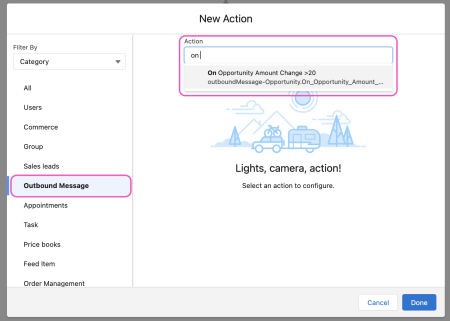
6 - Configure Flow ActionCopy
Choose Action from the Flow node options. Then select the Outbound Message from the left hand menu. The search bar will automatically pull in all your outbound message options.
This is where the outbound message (created earlier in step 3) comes into play, aka On Opportunity Amount Change > 20.
The Action will require you to choose a Label and API Name before proceeding.


7 - Complete Flow SetupCopy
You must make sure to name, save, and Activate your Flow before returning to the Flows home page. If your Flow is not "turned on" then it will not pick up on any opportunity object changes.
Your new Flow will now be listed within your listed Flows home page.


8 - Test your WorkflowCopy
Now when an amount is edited or created within any opportunity record (and is greater than 20) your Salesforce Flow will activate and send an Outbound Message to your Tray workflow.
The fields you selected when you originally built your Outbound Message will be returned to you and visible in the Output panel.

