
HelloSign 3.1
Connect to HelloSign and manage your signature requests.
OverviewCopy
HelloSign allows you to electronically request and add legally binding signatures to any document, from new hire agreements to loans, to NDAs. Tray's HelloSign connector allows you to perform common interactions, referred to as operations, with your HelloSign account, such as creating a new signature request or retrieving a list of signature requests that match search criteria.
API INFO: The Base URL used for the HelloSign connector is https://api.hellosign.com/v3. More information can be found on their main API documentation (v1.0) site.
AuthenticationCopy
Within the workflow builder, highlight the HelloSign connector.
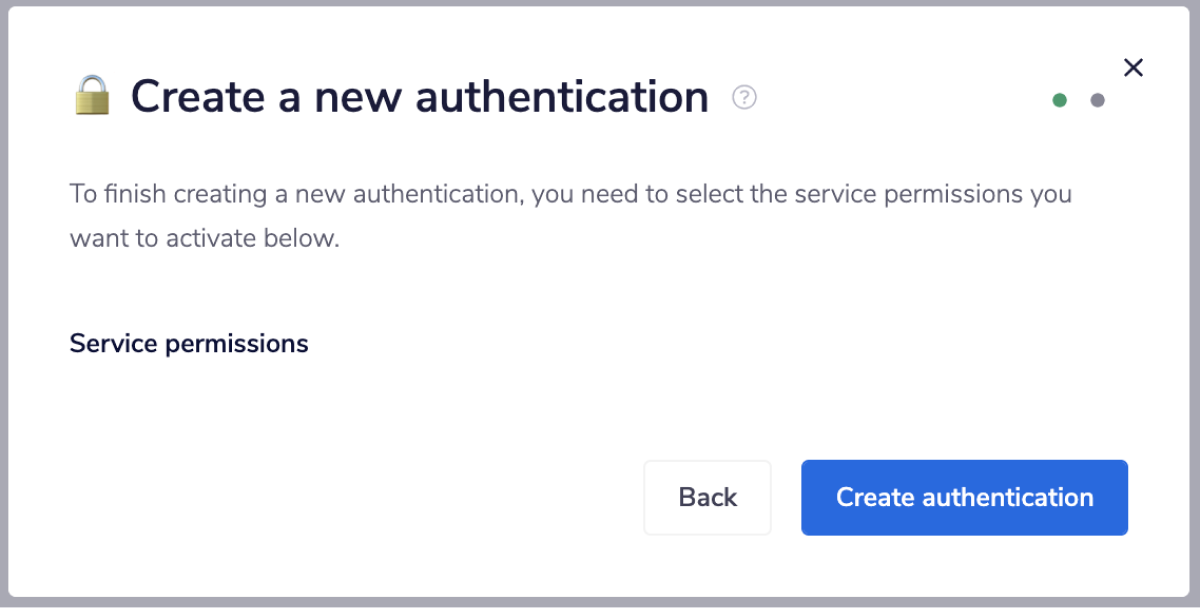
In the HelloSign connector properties panel to the right of the builder, click on the Authenticate tab and the 'New authentication' button. This will result in a Tray.io authentication pop-up modal.


Name the authentication something that will easily identify it in a larger list. For example using the name of the service account, whether it is a Sandbox or Production OAuth, etc.
When choosing between the type of authentication you wish to create ('Personal' or 'Organisational'), consider who and how many people will need access to it.
The second page does not ask you for any credentials. To create a new authentication, click "Create authentication".

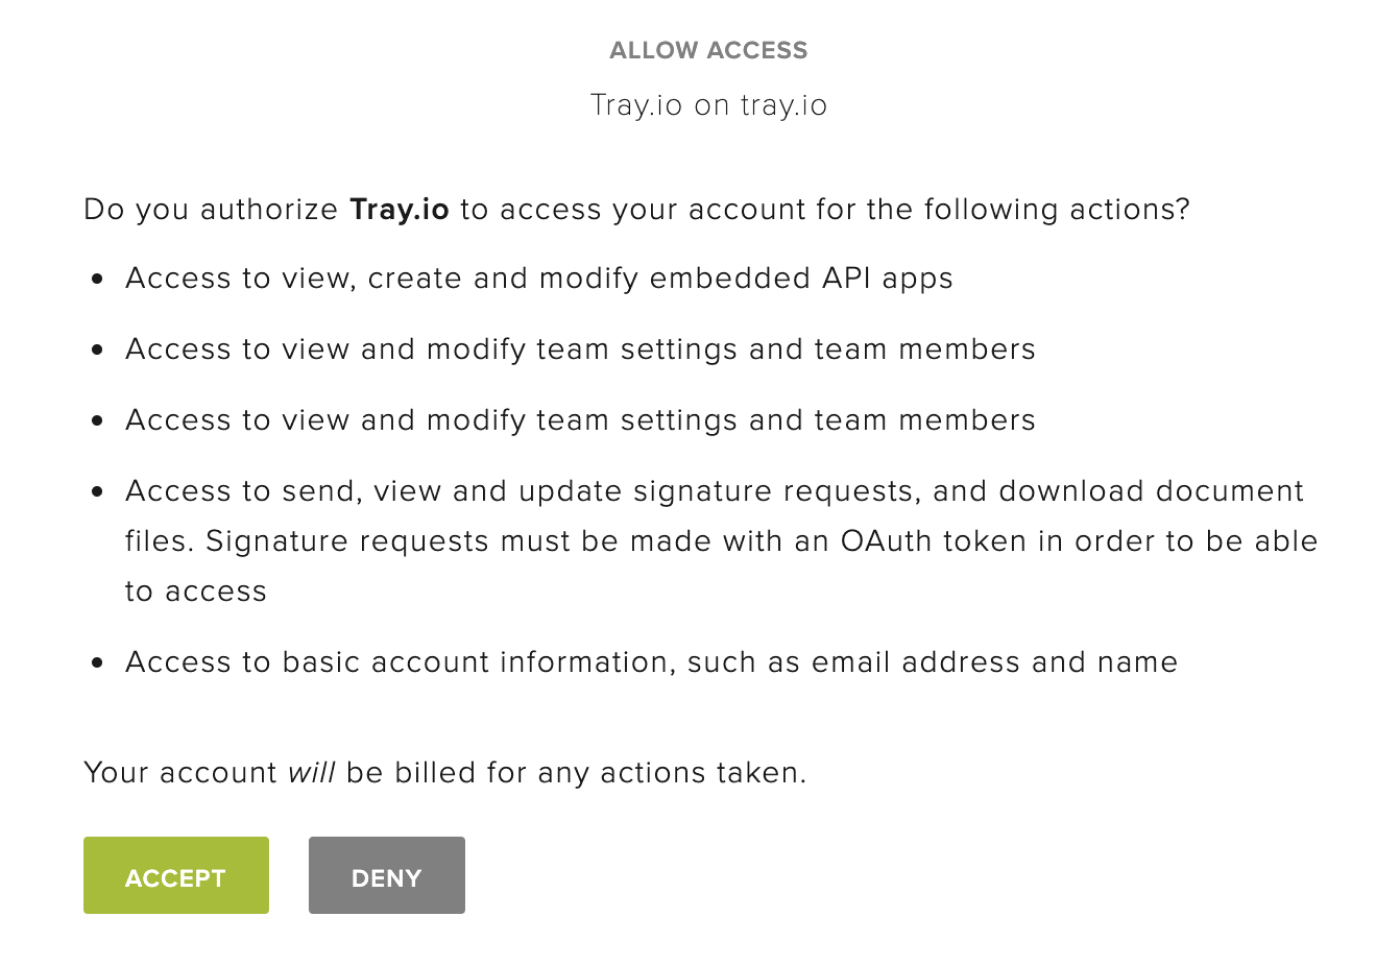
Once done, you will be redirected to the HelloSign login page. Login using HelloSign's 'EMAIL ADDRESS' and 'PASSWORD' credentials and click 'LOG IN'.


Next, you will be redirected to the 'ALLOW ACCESS' page. Click the 'ACCEPT' button to allow Tray.io to access your HelloSign account.

Go back to your settings authentication field (within the workflow builder properties panel), and select the recently added authentication from the drop-down options now available.
Your connector authentication setup should now be complete.
Available OperationsCopy
The examples below show one or two of the available connector operations in use.
Please see the Full Operations Reference at the end of this page for details on all available operations for this connector.
Example UsageCopy
TRAY POTENTIAL: Tray.io is extremely flexible. By design there is no fixed way of working with it - you can pull whatever data you need from other services and work with it using our core and helper connectors. This demo which follows shows only one possible way of working with Tray.io and the hellosign connector. Once you've finished working through this example please see our Introduction to working with data and jsonpaths page and Data Guide for more details.
Below is an example of a way in which you could potentially use the HelloSign connector to list all available signature requests and then get a file for each Signature.
The steps will be as follows:
Setup using a manual trigger and list all the available signatures.
Get a file for all the available signatures.
Your completed workflow should look similar to this:


1 - Setup Trigger & list signaturesCopy
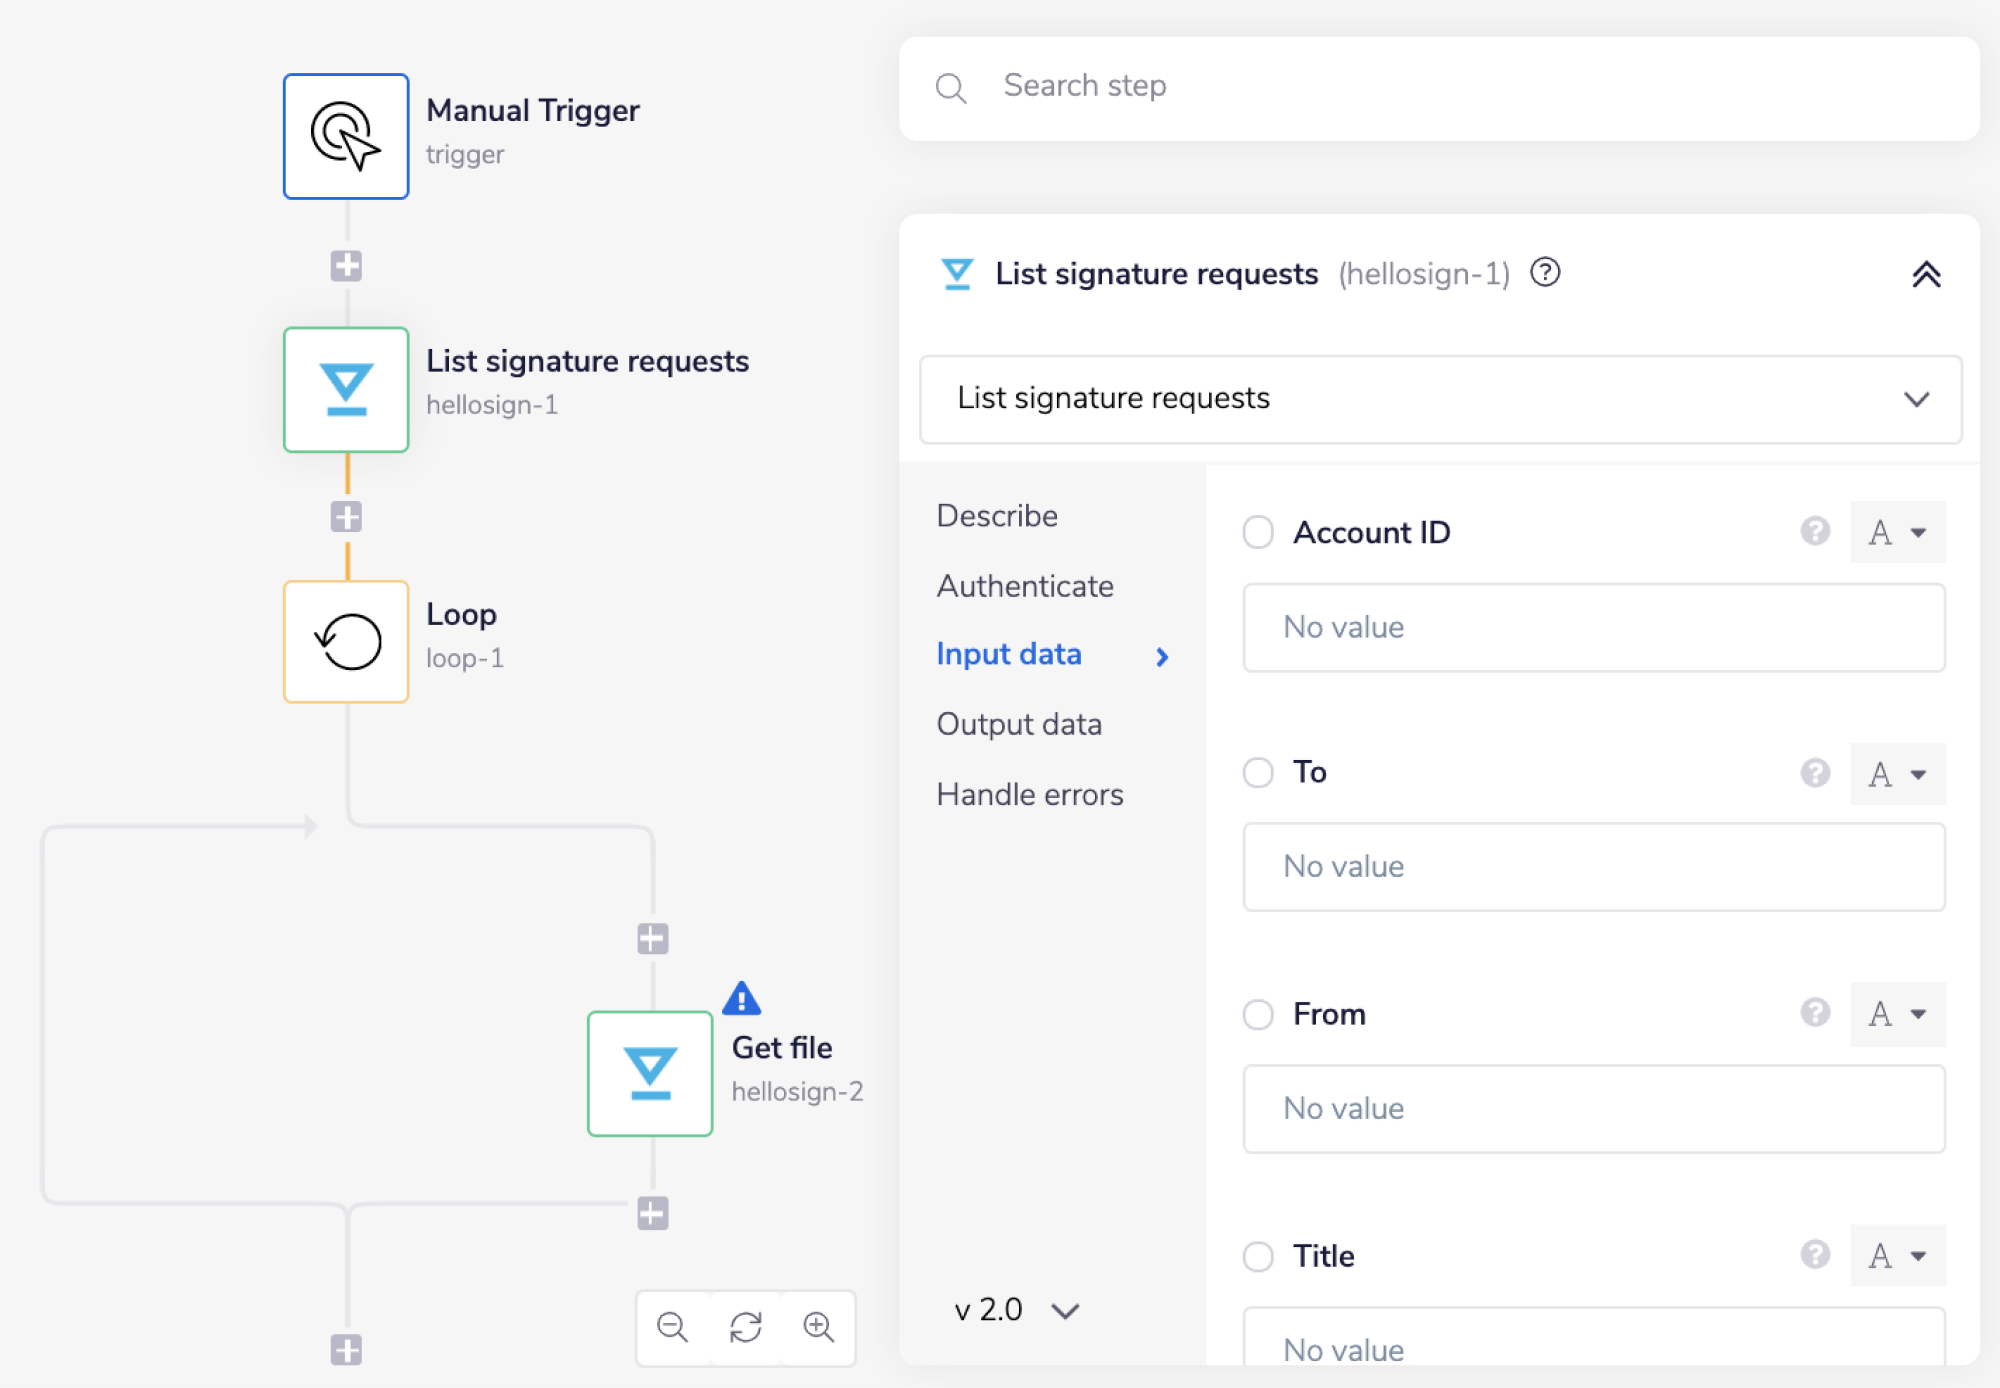
With your trigger in place (be it Manual, Scheduled, Callable etc) add a HelloSign connector. Set the operation to 'List signature requests'. The only required fields for this operation are "Page" and "Page size" which you can find by scrolling to the bottom of the property panel.

Feel free to re-name your steps as you go along to make things clearer for yourself and other users. The operation names themselves often suffice.
We have now configured a request to get a list of all the signature requests in your HelloSign account.
2 - loop the data and get signature filesCopy
Next, search for the Loop connector within your connector panel, and drag it into your workflow as your next step. Set your operation to 'Loop List'.
The Loop connector allows you to iterate through a list of results. In this example, we will use it to iterate through the data found within the previous List signature requests step.
In order to specify the list, you want to loop through, start by using the list mapping icon (found next to the list input field, within the properties panel) to generate the connector-snake.
While hovering over the 'List' field in the List signature requests step (with the tail end of the connector-snake), select signature_requests from the list of output properties displayed. This will auto-populate a jsonpath ($.steps.hellosign-1.signature_requests) within your list input field, and update the type selector to jsonpath.
For more clarification on the pathways you have available, open the Debug panel to view your step's Input and Output.
JSONPATHS: For more information on what jsonpaths are and how to use jsonpaths with Tray.io, please see our pages on Basic data concepts and Mapping data between steps
CONNECTOR-SNAKE: The simplest and easiest way to generate your jsonpaths is to use our feature called the Connector-snake. Please see the main page for more details.


The last step is to drag a HelloSign connector inside the Boolean connector step itself. Set the operation to 'Get file'. As you can see, the 'File name', 'Signature request ID', and 'File type' fields are required.
'File name' could be any name of your choice.
Using the connector-snake find the jsonpath for the 'Signature request ID' field from the Loop step. It should appear simillar to $.steps.loop-1.value.signature_request_id.
Choose a 'File type' of your choice from the available drop-down options.


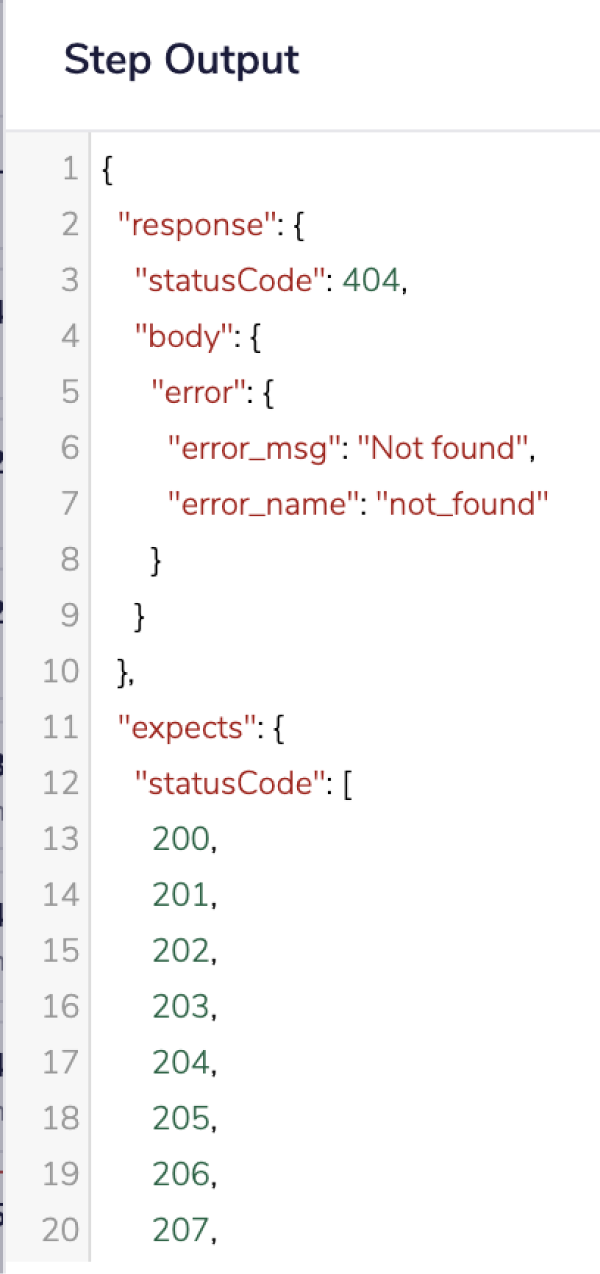
At this final stage, if a file is not available, the workflow will return an error.

In this case, we need to use the Error Handling method.
To do so for the HelloSign connector in the properties panel, click 'Handle errors' and set the error handling to Continue workflow.

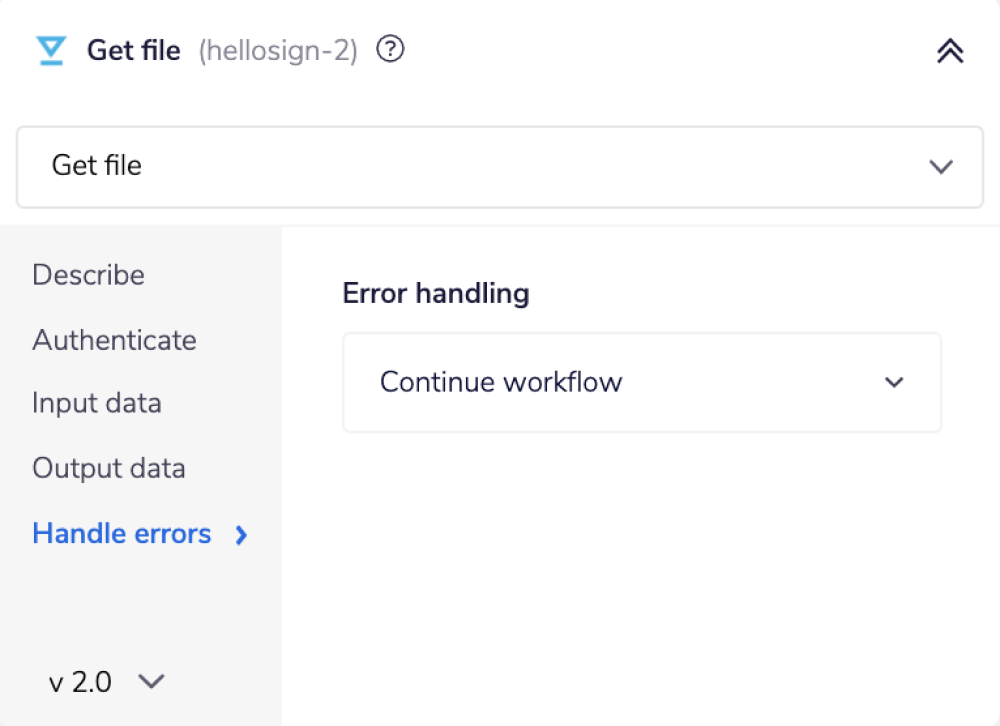
Doing this will tell the connector to continue with the further process even if the file for any of the signature requests is not available.
As you can see in the image below, the debug panel shows a failed 'Get File' step. Even though a single step has failed, the workflow continued further.


Output for a successful Get File step should look like this:


BEST PRACTICES: Whenever you do decide to create your own workflow, be sure to check out some of our key articles such as: