What is an error?
Tray has a set of tools that enable you to reliably deal with errors coming from 3rd party services.
However it is important to note that there are essentially two types of errors to look out for:
Tray errors
3rd party service errors
Tray errorsCopy
Tray errors tend to come from mis-configured workflow steps - e.g. you mis-configured a jsonpath to use $.steps.trigger.data.bod.email instead of $.steps.trigger.data.body.email
In this case the logs will return an error such as "message": "Reference: $.steps.trigger.data.bod.email in property: 'conditions[].value' did not resolve to any value."
Jsonpaths can be referenced by both 3rd party service connectors and Tray core and helper connectors.
These errors will always be picked up by alerting workflows which can help you make sure that no jsonpaths go 'out of date' with the source data they are pulling from (e.g. if a webhook payload suddenly changes from returning 'account_name' to just 'name')
It is important to note that these errors cannot be handled manually at the connector level as can 3rd party service errors. Therefore make use of alerting workflows to monitor them.
When developing and testing your workflows you should respond to any of these errors and make sure that all your workflow config is set correctly.
3rd party errorsCopy
3rd party errors can happen for a number of reasons
One possible reason is that the service may occasionally fail and return e.g. a 500 or 503 status.
Another possible reason is that you have attempted to retrieve a record which doesn't exist and the service returns a 404.
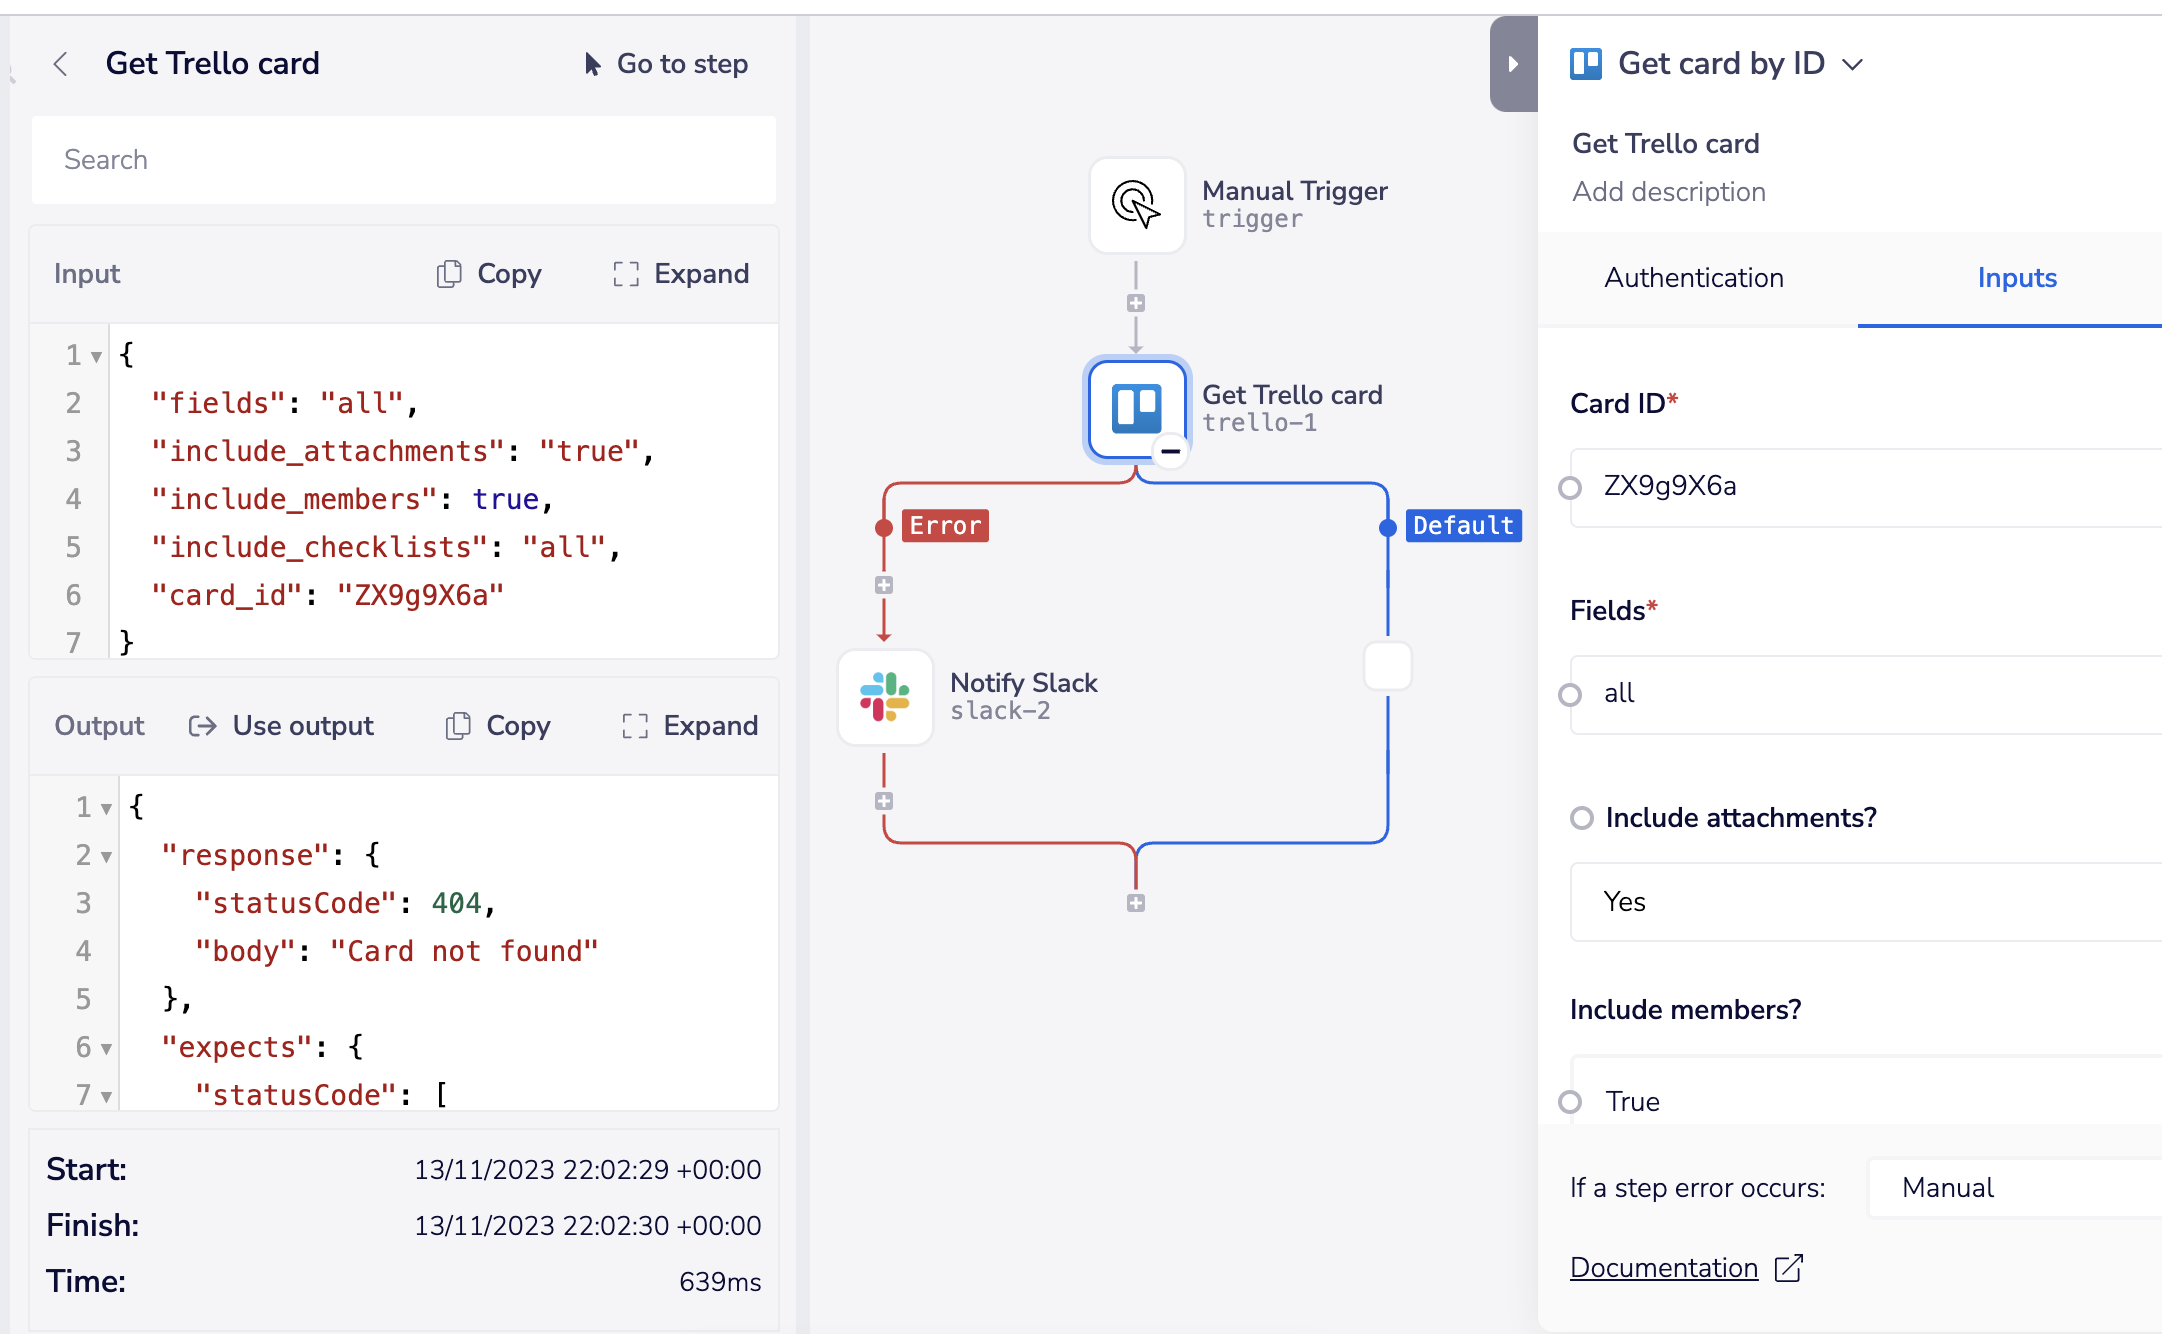
For example you may try and retrieve a non-existent card in Trello
(This screenshot shows an example of using the 'manual' error-handling option which can be set for 3rd party connectors. Note that you can still use the default 'stop workflow (alerting)' option):

It is important to note, however, that 3rd party services will have their own policies on what is considered an error.
For example, when trying to retrieve a non-existent record in Salesforce, the Salesforce API will not return a 404 error.
Rather, it will return an empty array.
In this case we can use a boolean condition to check for an empty array and then take whatever action we feel necessary.
We could send an alert via email or to a Slack channel:

Or we could force an error as explained below:
Forcing errorsCopy
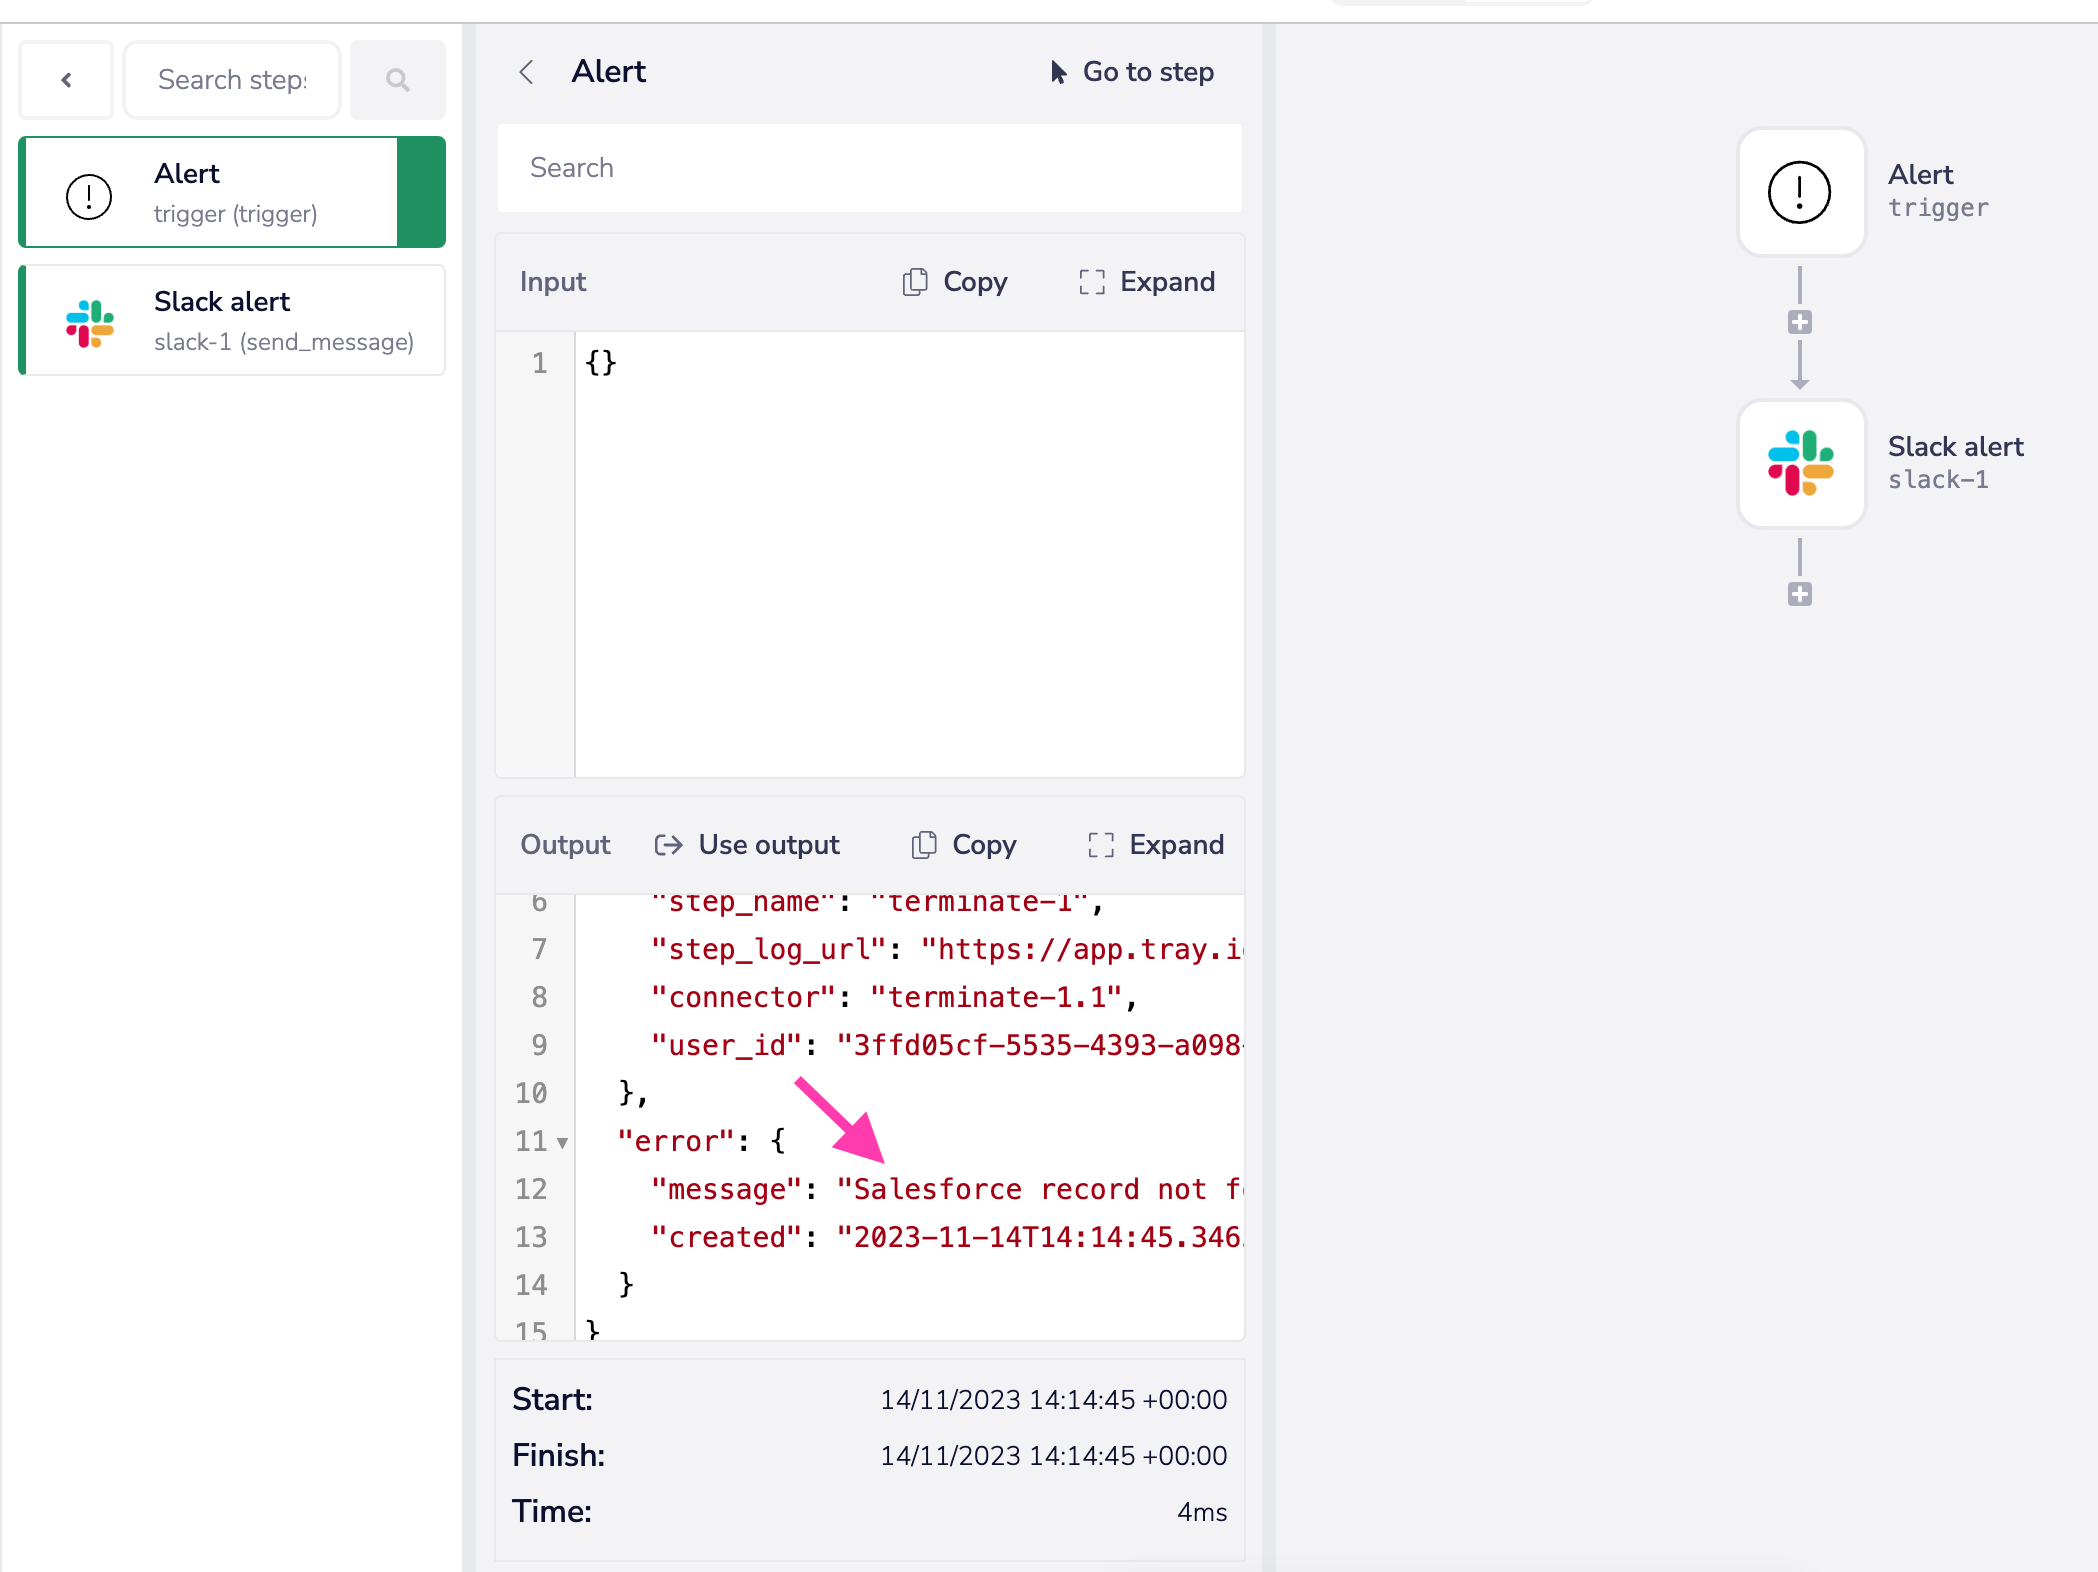
In the example above you could force an error using the Terminate connector 'fail run' operation:


This would trigger a run of an alert-triggered workflow and pass on the message you have set:

Fallback values as an alternative to errorsCopy
Note that, rather than allowing a workflow to error, you can also potentially make use of Fallback values to use e.g. empty strings, null values or default email addresses, phone numbers etc.