
BambooHR 3.0
BambooHR is a cloud-based human resources (HR) software service for small and mid-size businesses.
- On this page
- BambooHR
- Overview
- API Information
- BambooHR templates
OverviewCopy
BambooHR is an American technology company that provides human resources software as a service. BambooHR's services include an applicant tracking system and an employee benefits tracker.
API Information Copy
The BambooHR connector has the following Base URL: XXXXXX. More information can be found on their main API documentation (v1) site. Details regarding their API limitations can be found here.
BambooHR templatesCopy
Please note that we have the following BambooHR templates available:

Upload list of employees to Bamboo
Adds new employees from a Google Sheet to BambooHR
These will give you pre-configured best practice ways of working with BambooHR and integrating it with other connectors.
However, please continue to at least read the Authentication setup instructions on this page to enable you to get started with using BambooHR.
AuthenticationCopy
Within the builder, click on the BambooHR connector to display the connector properties panel. Select the Auth tab and click on the New authentication button.
In the Tray.io authentication pop-up modal name your authentication in a way that will quickly identify it within a potentially large list. For example whether it is a Sandbox or Production auth, etc.
Consider who/ how many people will need access to this authentication when choosing where to create this authentication ('Personal' vs 'Organisational').
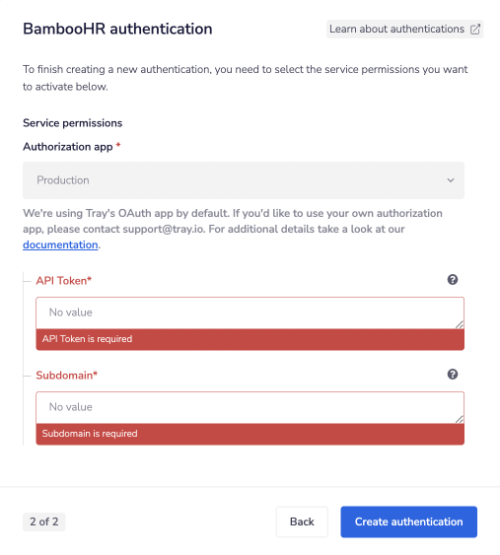
The next page asks you for your API Token and Subdomain.

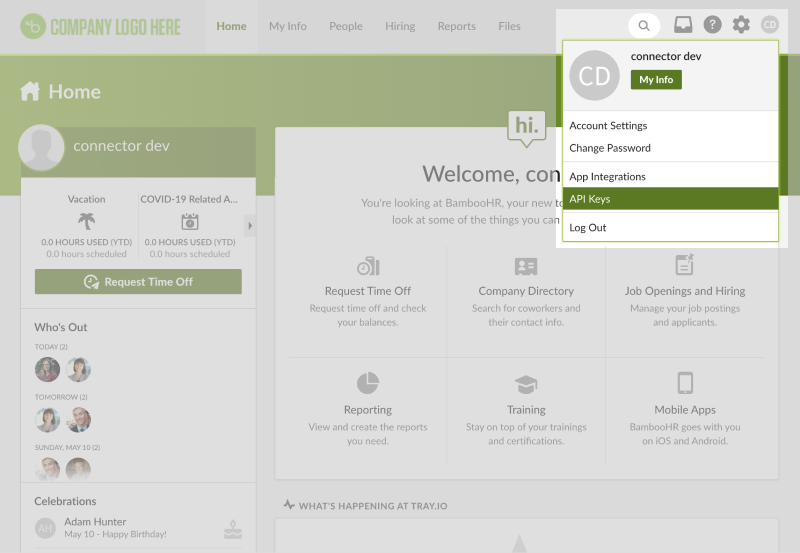
To generate an API key you need to log in and click your name in the upper right-hand corner of any page. If you have sufficient permission there will be an 'API Keys' option displayed in the menu.

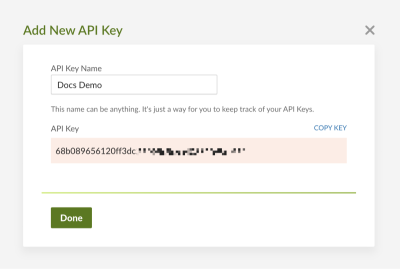
Generate a new API key. Make sure to copy it carefully as viewing it again (for security reasons) will not be possible.

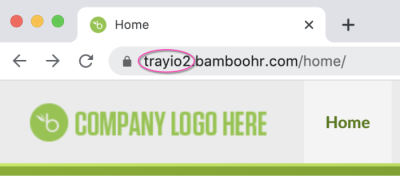
Your subdomain can be found within the first section of your BambooHR URL:

Once you have added these fields to your Tray.io authentication pop-up window click the Create authentication button.
Your connector authentication setup should now be complete. Please run the simplest operation available to test and make sure you can retrieve data as expected.
Available OperationsCopy
The examples below show one or two of the available connector operations in use.
Please see the Full Operations Reference at the end of this page for details on all available operations for this connector.
Example usageCopy
TRAY POTENTIAL: Tray.io is extremely flexible. By design there is no fixed way of working with it - you can pull whatever data you need from other services and work with it using our core and helper connectors. This demo which follows shows only one possible way of working with Tray.io and the BambooHR connector. Once you've finished working through this example please see our Introduction to working with data and jsonpaths page and Data Guide for more details.
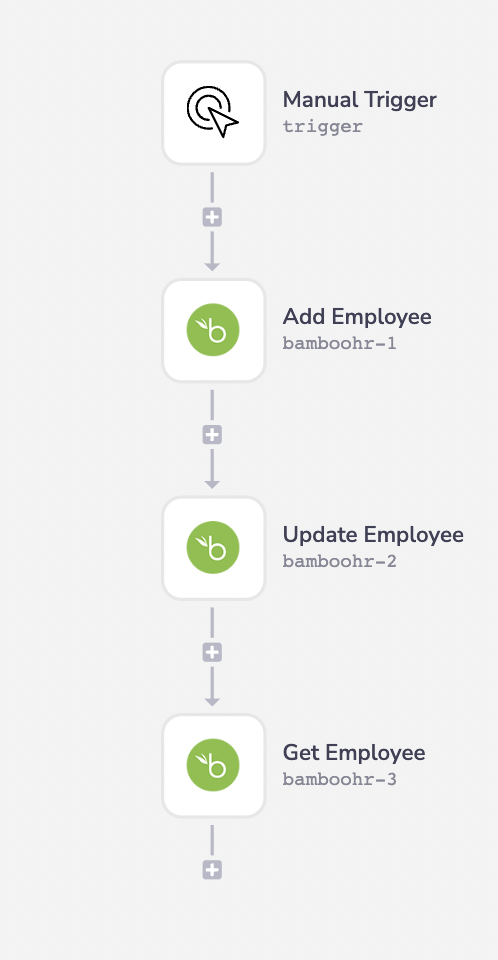
The instructions below will take you through how to add, update and get an employee using the BambooHR connector.
The workflow logic is as follows:
Setup using a manual trigger and use the first BambooHR connector to add a new employee.
Use the next step to update said employees details.
Get the newly updated details of said employee.
The final outcome should look like this:

BEST PRACTICES: Whenever you do decide to create your own workflow, be sure to check out some of our key articles such as: