
AWS Cloudfront 1.0
A fast, highly secure and programmable content delivery network (CDN).
OverviewCopy
AWS CloudFront is a fast content delivery network (CDN) service that securely delivers data, videos, applications, and APIs to customers globally with low latency, high transfer speeds, all within a developer-friendly environment.
AuthenticationCopy
When using the AWS CloudFront connector, the first thing you will need to do is go to your Tray.io account page, select your workflow. Once in the workflow dashboard itself select and drag the AWS CloudFront connector from the connectors panel (on the left hand side) onto your workflow.
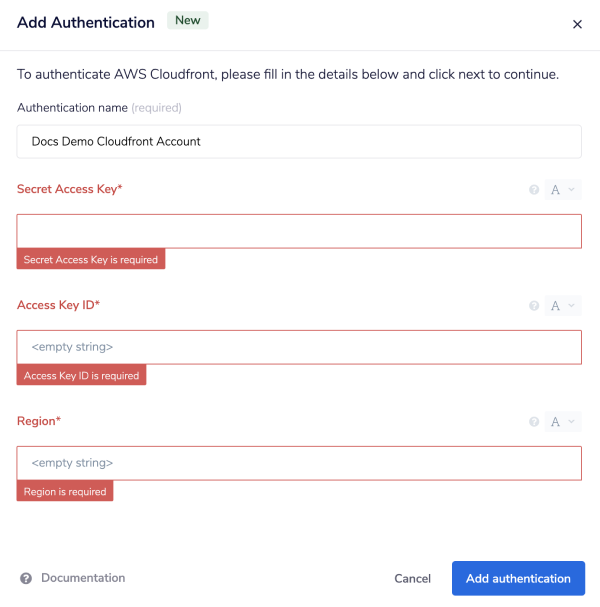
With the new connector step highlighted, in the properties panel on the right, click on 'New Authentication' under the 'Settings' heading.
This will result in a Tray.io authentication pop-up window that should look something like this ():

From here you will need to head to your AWS Management Console.
IMPORTANT!: It's important to note that** in order to use the CloudFront connector, you will need programmatic access to your AWS CloudFront account**so that you can get your Access/Secret Key pair.
As such we have outlined the following to help you navigate through your AWS account
AWS CredentialsCopy
Once you are logged into your AWS Console, click on your account name in the top-right corner, and select 'My Security Credentials'.
There are two types of user access that can view and create the Access / Secret Key pair:
IAM Account AccessCopy
If you are using an IAM account - which is the more likely scenario - this is the view you will see.
Under 'Access keys for CLI, SDK, & API access', click 'Create access key':


Root AccessCopy
If you are using root credentials, the below page is what you will see.
Click on the 'Access keys (access key ID and secret key)' option and then select the 'Create new access key' button:


Regardless of your access rights, Under In the window that appears, click Download key file (or Download .csv file for IAM users) to retrieve your AWS secret key
IMPORTANT!: Please note that you can't download this file/ AWS secret key again at a laterdate so make sure you keep this information safe. You will however be able to create moreaccess/secret key pairs should you make an error.
PermissionsCopy
As stated previously, you will most likely you'll be creating an IAM user account that will be attached to your CloudFront service, rather then directly generating an Access / Secret Key pair via root. The way access to the service and relevant permissions can be controlled on a user by user basis.
To create an IAM user account and subsequently an Access / Secret Key pair,
After clicking on 'My Security Credentials', navigate to 'Users' (look in the LHS panel under 'Identity and Access Management (IAM)' > 'Access management' > 'Users').
Here you can add a user by clicking the blue 'Add user' button which will take you yo the following page:

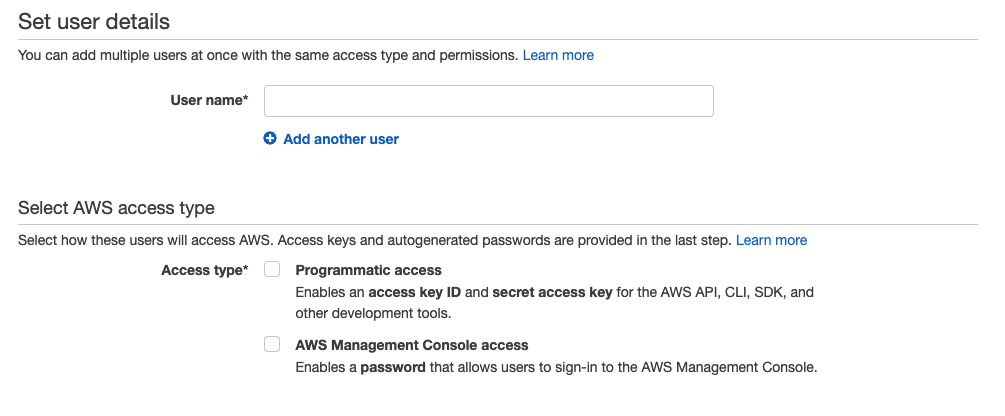
You will need to assign the IAM user a 'username' and tick 'Programmatic access' where it says 'Access type'.
Click 'Next' and you'll be taken to a page where you can attach selected permissions to the user. This is so they can create/ read/ edit/ delete a CloudFront resource via the Tray Workflow builder depending on the settings you give them.
For example if you select 'Add user to group' > click 'create group', and the following modal will pop up:

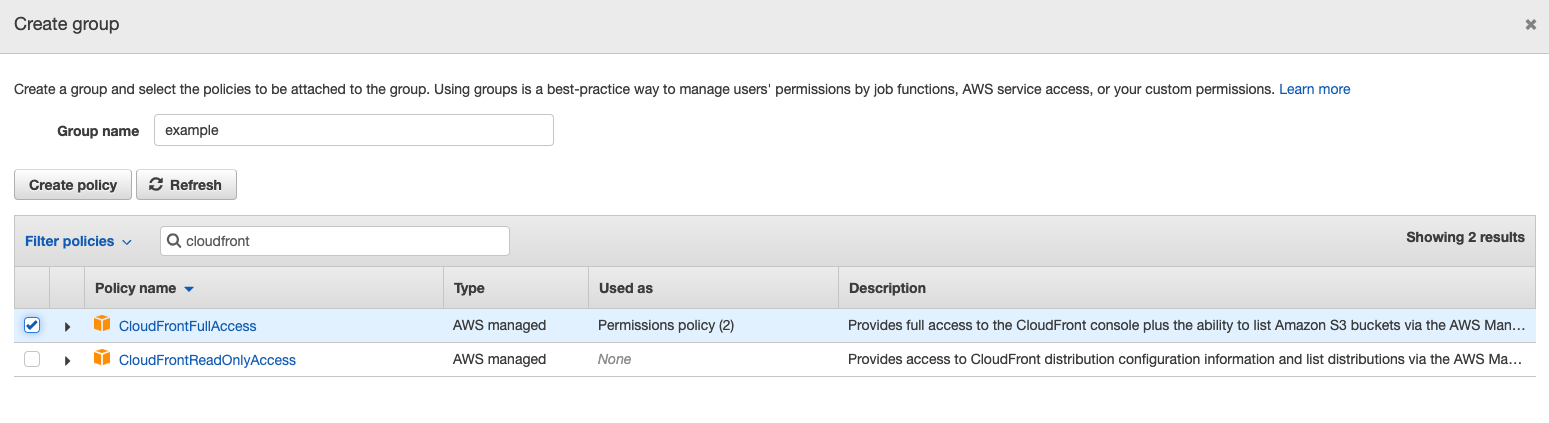
As you can see, you can search for specific AWS services and related policies. Here we will select 'Cloudfront Full Access' and by doing so, we're assigning that policy to the group (and in turn the user, whom we are adding to the group).
Additional policies may need to be added. More information please check the AWS docs found here.
Once you have completed the above, head back to your Tray.io authentication popup window and paste in your credentials into the appropriate fields - make sure you specify your region as well.
Available OperationsCopy
The examples below show one or two of the available connector operations in use.
Please see the Full Operations Reference at the end of this page for details on all available operations for this connector.
Note on Operations usageCopy
CloudFront's operations allow you to create, fetch, edit and delete a distribution. However, there are certain usage best practices that you need to be aware of to get the expected behaviour from each operation.
Create distribution vs Update distributionCopy
When you create a distribution you will typically be creating it with other AWS resources. For example, one of the the required fields 'Target origin id' takes a string that references an S3 bucket in your AWS account - this is something that you will need to create before creating a distribution.
The main difference between create and update is update has many more required fields.
Status delaysCopy
When you change the status of a CloudFront distribution e.g. from enabled to disabled it usually takes some time (approx 10-15min) for the status to be updated on your CloudFront account as highlighted below.


This has an impact on how you use other operations.
For example to delete a distribution on AWS it must first be disabled via the update operation. Hence you cannot run the delete operation until the 'state' is 'disabled' (see above).
Updating and DeletingCopy
An important field when updating and deleting a distribution is the 'if match' (Etag) input field.
After a distribution has been created and deployed i.e. it's status is 'enabled' the 'if match' input needs to be re-fetched using the 'Get distribution config' operation since it can become invalidated, you'll know this if you ever get an error which states preconditions in the request-header have not been met.