
Rejoiner 2.0
Rejoiner is an eCommerce email marketing tool designed to improve customer conversion rates.
OverviewCopy
Rejoiner is a lifecycle email marketing software designed specifically to help online retailers and eCommerce companies reduce their cart abandonment rate.
AuthenticationCopy
When using the Rejoiner connector, the first thing you will need to do is go to your Tray.io account page, and select the workflow you wish to work on. Once in the workflow dashboard itself, search and drag the Rejoiner connector from the connectors panel (on the left hand side) onto your workflow.
With the new Rejoiner connector step highlighted, in the properties panel on the right, click on 'New Authentication' which is located under the 'Settings' heading.

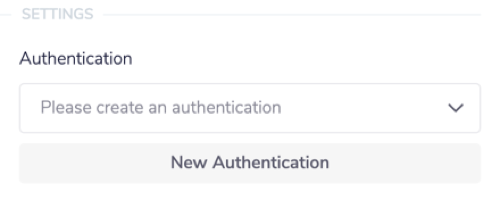
This will result in a Tray.io authentication pop-up window, that should look like this:


As you can see, besides from naming your authentication appropriately, you will need your API Key and Site ID.
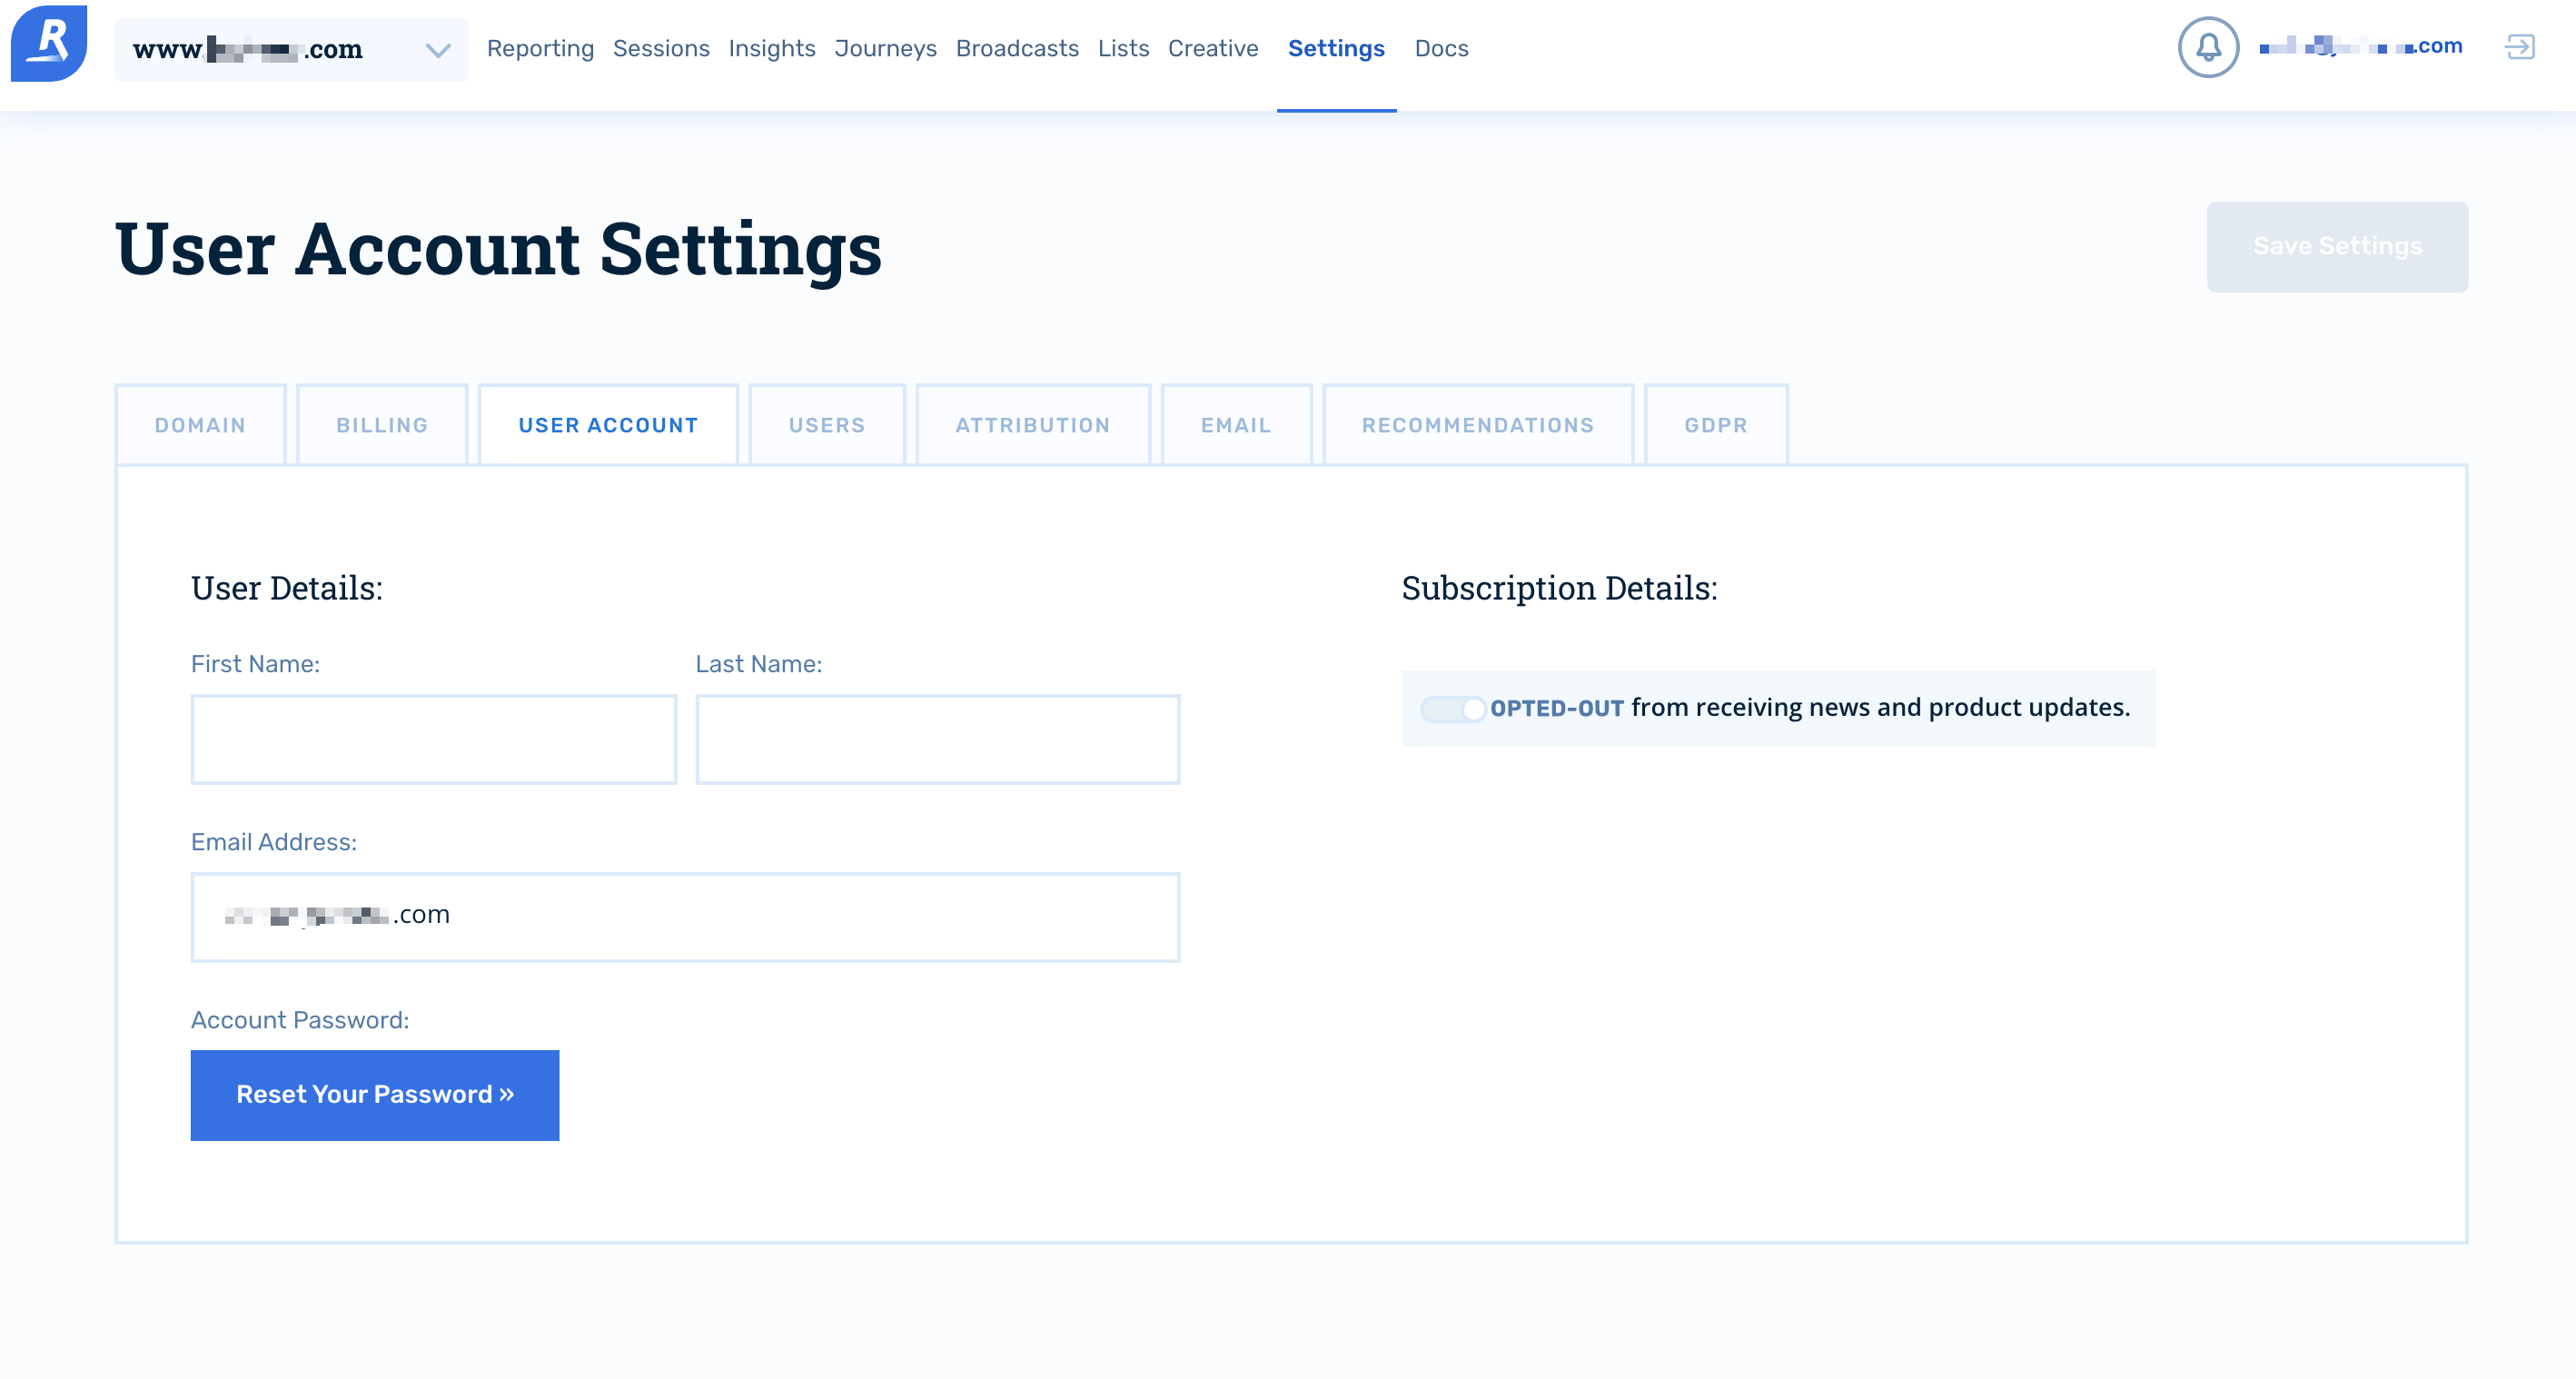
In order to get these fields, head to Rejoiner, login and click on the your email address in the top right corner. This will take you to your Rejoiner dashboard which should look something like this:

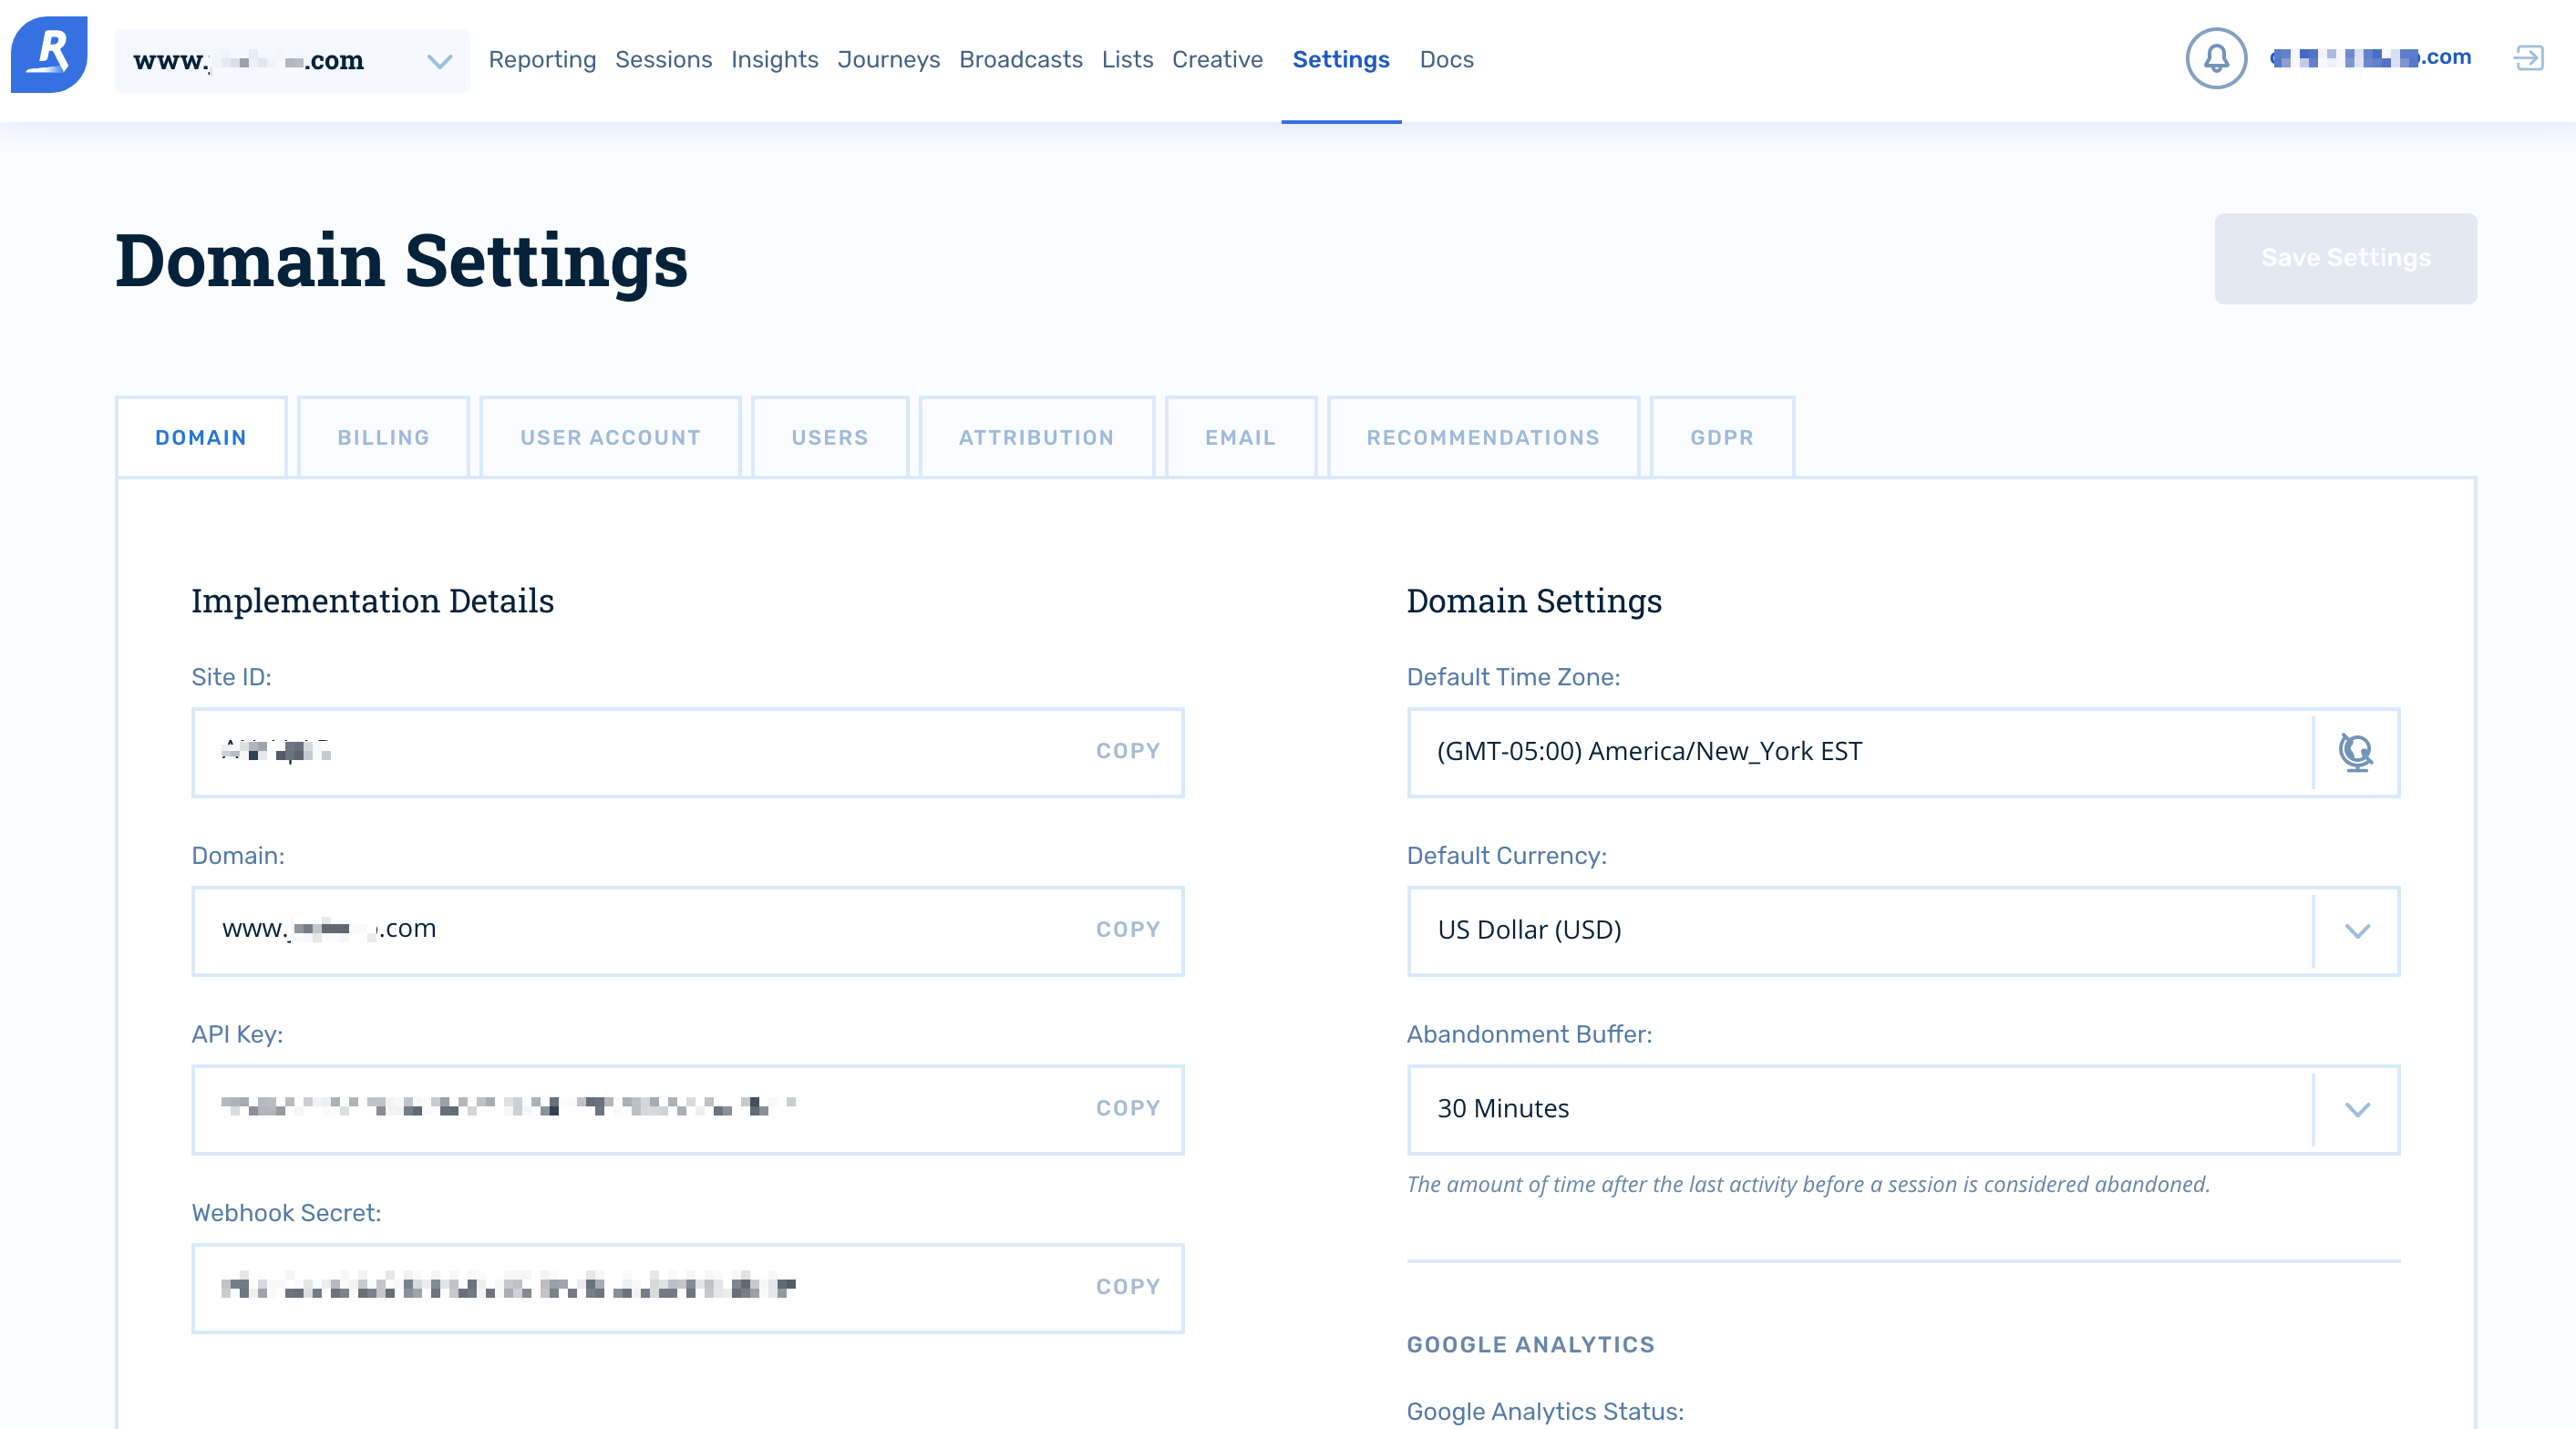
To get your API Key and Site ID, click the 'Domain' tab. On this page you can find the Site ID and API Key as shown below:

Once you have clicked the 'Add authentication' button, go to back to your authentication field (within the workflow dashboard properties panel from earlier), and select the recently added authentication from the dropdown options now available.
Your connector authentication setup should now be complete.
Available OperationsCopy
The examples below show one or two of the available connector operations in use.
Please see the Full Operations Reference at the end of this page for details on all available operations for this connector.
Using the Raw HTTP Request ('Universal Operation')Copy
As of version 1.0, it is now possible to effectively create your own operations.
This is a very powerful feature which you can put to use when there is an endpoint in Rejoiner which is not used by any of our operations.
To use this you will first of all need to research the endpoint in the Rejoiner API documentation v1.0, to find the exact format that Rejoiner will be expecting the endpoint to be passed in.
IMPORTANT!: Please note that in order to access the Rejoiner API documentation (v1.0), youwill need to use the following URL: https://rj2rejoiner.com/[Site_ID]/docs/api/. Make sure yourreplace Site_ID with the same 'Site ID' you used for the authentication process mentioned above,in order to access them.
Note that you will only need to add the suffix to the endpoint, as the base url will be automatically set (the base url is picked up from the value you entered when you created your authentication).
The Rejoiner base url is in the format of https://rj2.rejoiner.com/api/v1/{Site_ID}/
For example, say that the 'List email lists' operation did not exist in our Rejoiner connector, and you wanted to use this endpoint, you would use the Rejoiner API docs to find that the 'List email lists' endpoint is a get request at the following url:

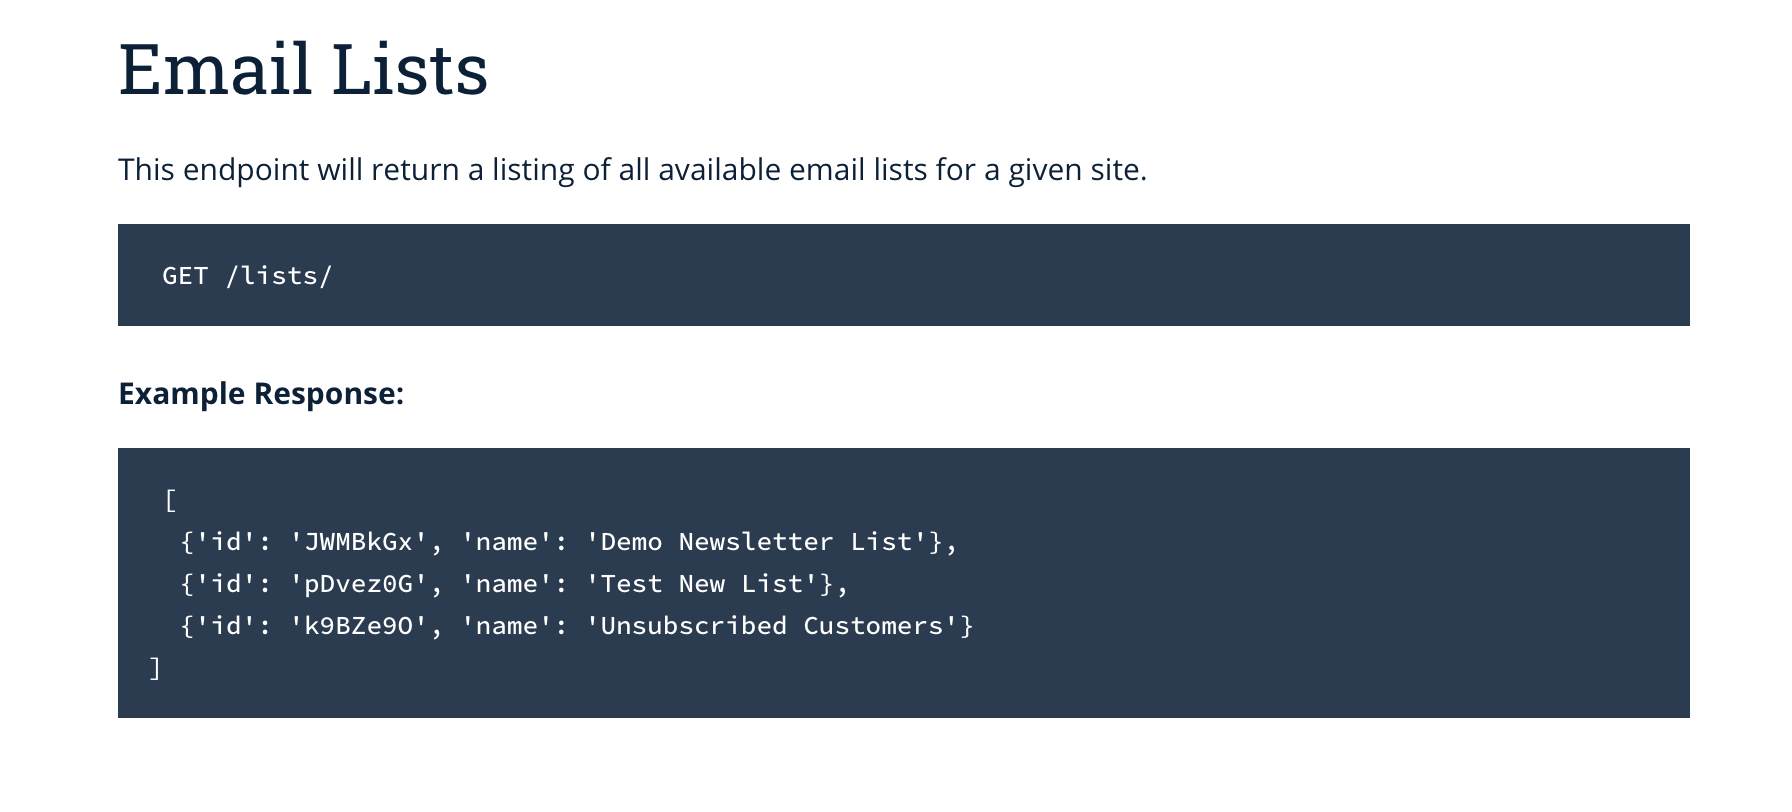
/lists/
So you can get the a list of your email lists with the following settings:

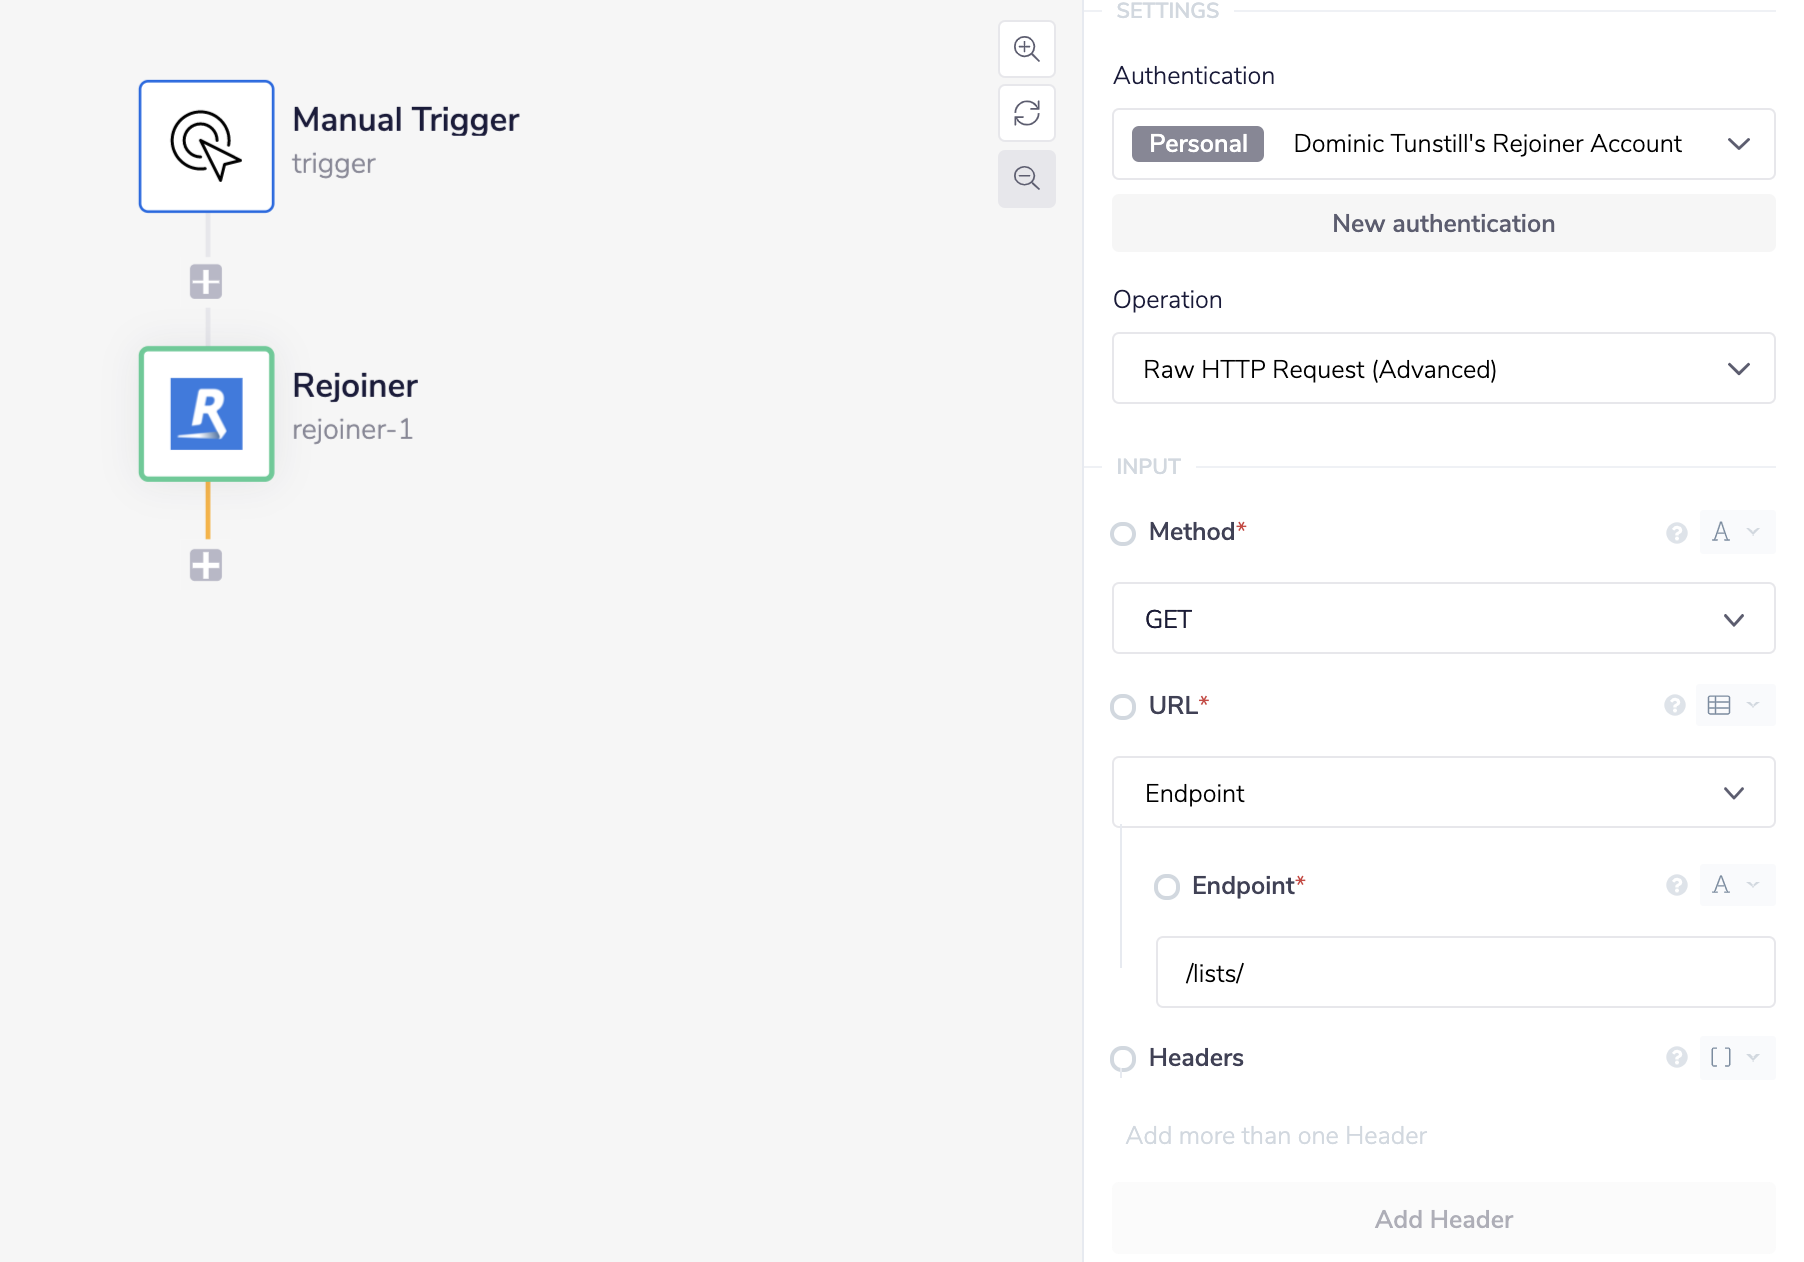
Final outcome: https://rj2.rejoiner.com/api/v1/{Site_ID}/lists/
As a result, this will return a list of email lists associated with your Rejoiner account details.
Example usageCopy
Below is an example of a way in which you could potentially use the Rejoiner connector, to record customer's consent on your Rejoiner account using the 'Record customer opt in' operation.
The steps will be as follows:
Create a new workflow with a manual trigger and create a list of email addresses.
Add and configure a connector to return a list of email addresses which you want to record as opted in on your Rejoiner account.
Add and configure a loop collection connector to loop through the list of email addresses.
Add and configure a Rejoiner connector to record each customer opt in.
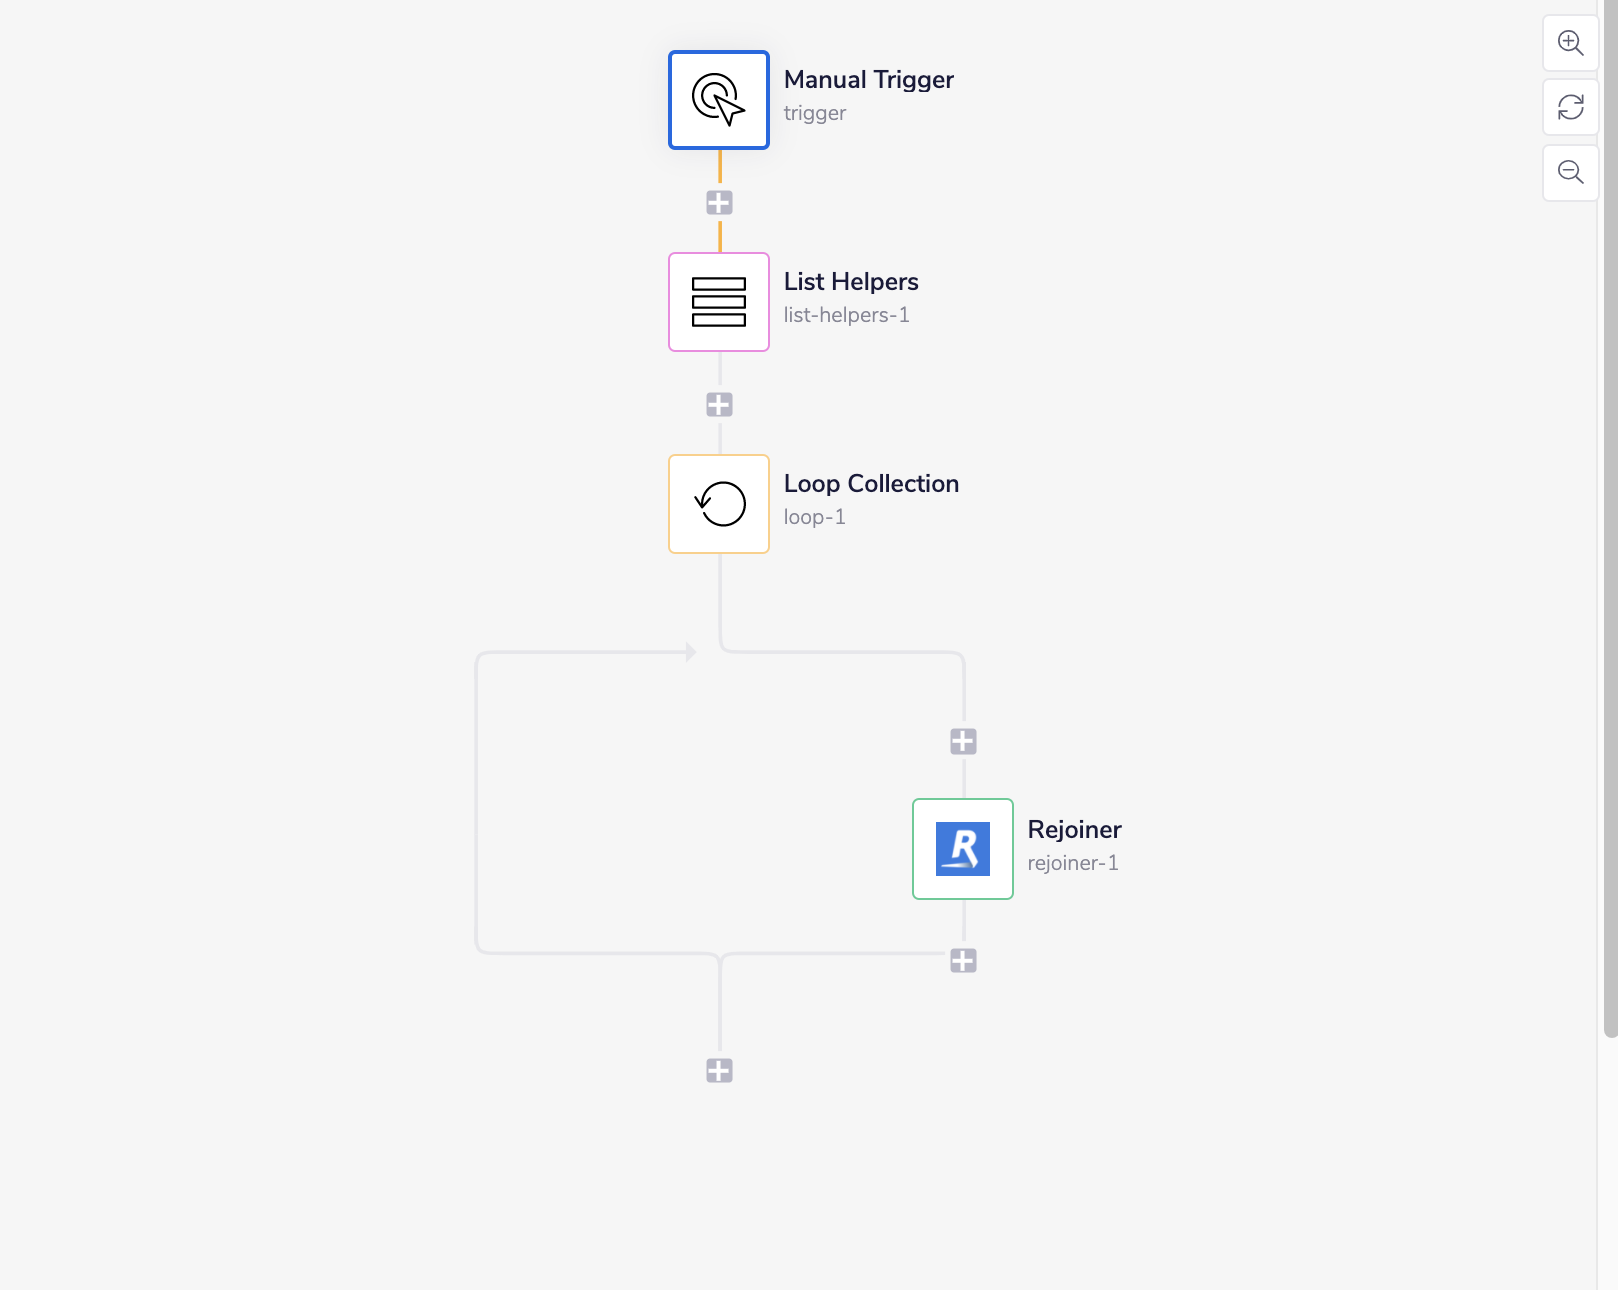
The final outcome should look like this:

1 - Setup trigger & Create ListCopy
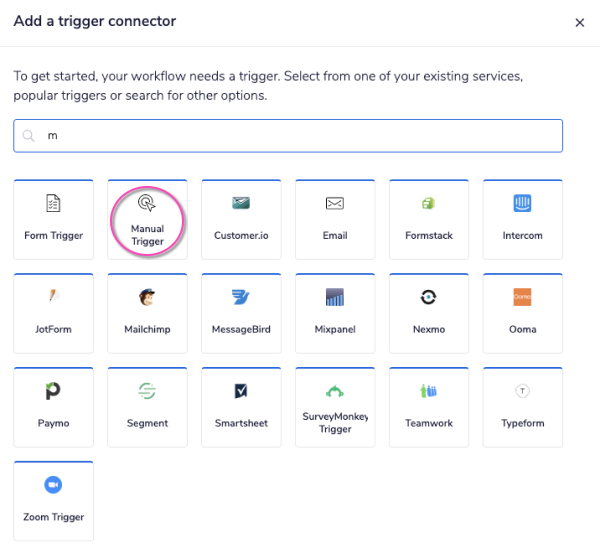
Once you have clicked 'Create new workflow' on your main Tray.io dashboard (and named said new workflow), select the Manual trigger from the trigger options available:

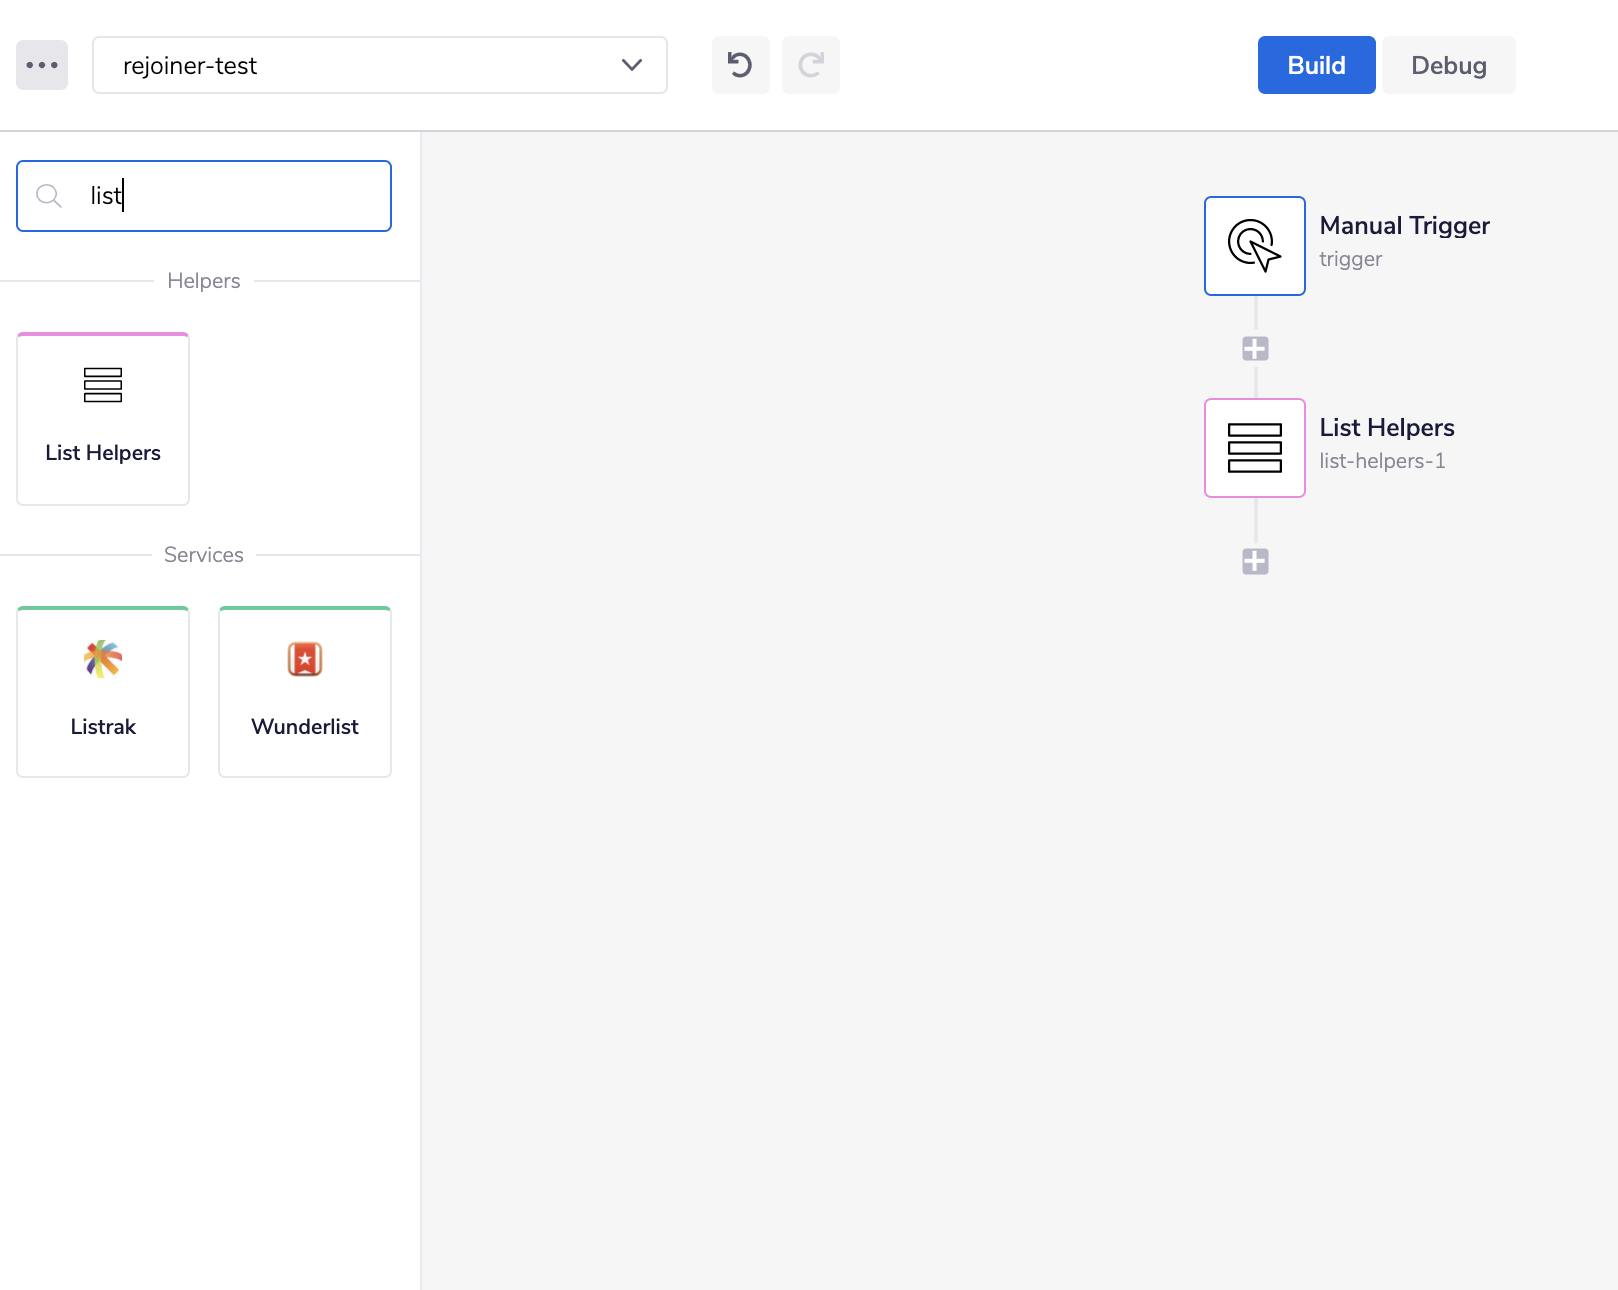
Once you're in the workflow builder dashboard, drag and drop in a connector that will return a list of email addresses. In our example we are going to use the List Helper connector and manually add some email addresses to a list, but in theory this could be any connector, so long as that connector returns a list of email addresses. Search the connector panel by name for the List Helper connector (displayed in the image below).
Once the connector is added to the workflow, in the workflow builder click on the List Helper step you created. Once highlighted, the input panel for this step will appear on the right hand side of the workflow builder.
In the input panel, select 'Simple sort' from the drop-down options in the 'Operations' menu and configure the operation by adding email addresses to the list and selecting a sort order (for more information on the List Helper connector see below).
LIST HELPER: This is just one example of how the List Helper can be utilised. For more ways and uses regarding the List Helper connector, please see the main docs page for more details.
2 - Loop through email addressesCopy
The next step is to add and configure a Loop collection connector, to go through each one of the email addresses created earlier.
Again once the connector is added to the workflow, in the workflow builder click on the Loop collection step you created to reveal the input panel for that step. Now using the connector-snake, drag from the 'List' input in the input panel, over to the List Helper step of the workflow.
CONNECTOR-SNAKE: The simplest and easiest way to generate your jsonpaths is to use our feature called the Connector-snake. Please see the main page for more details.

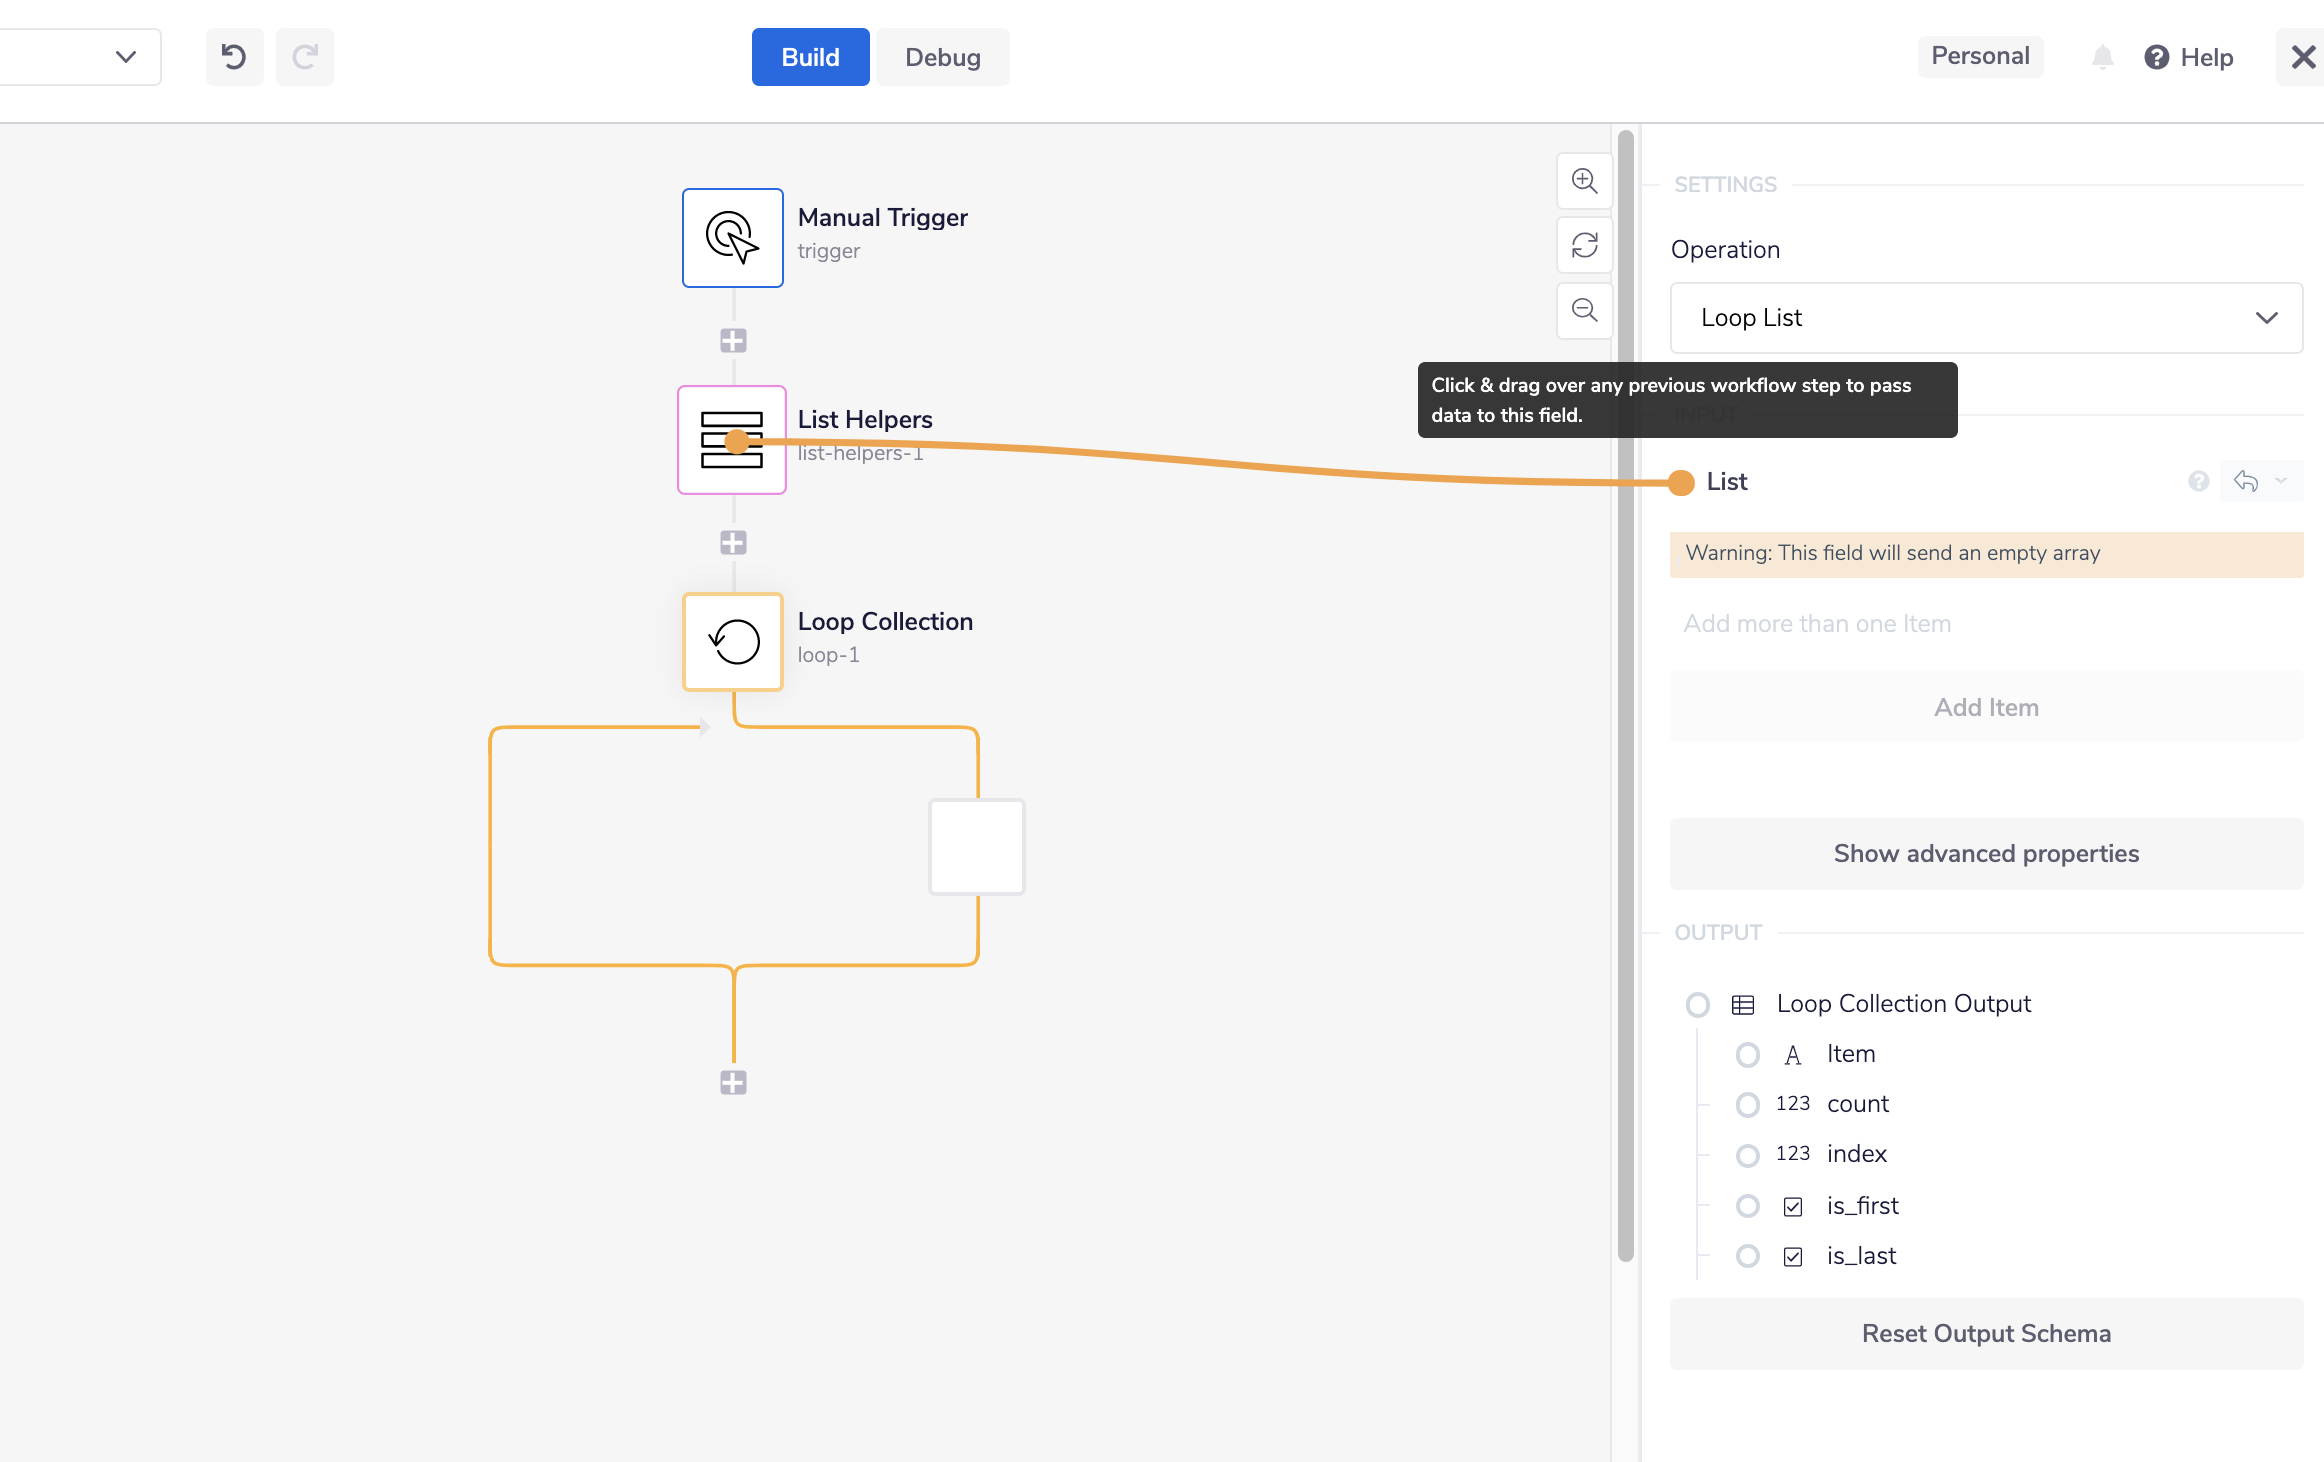
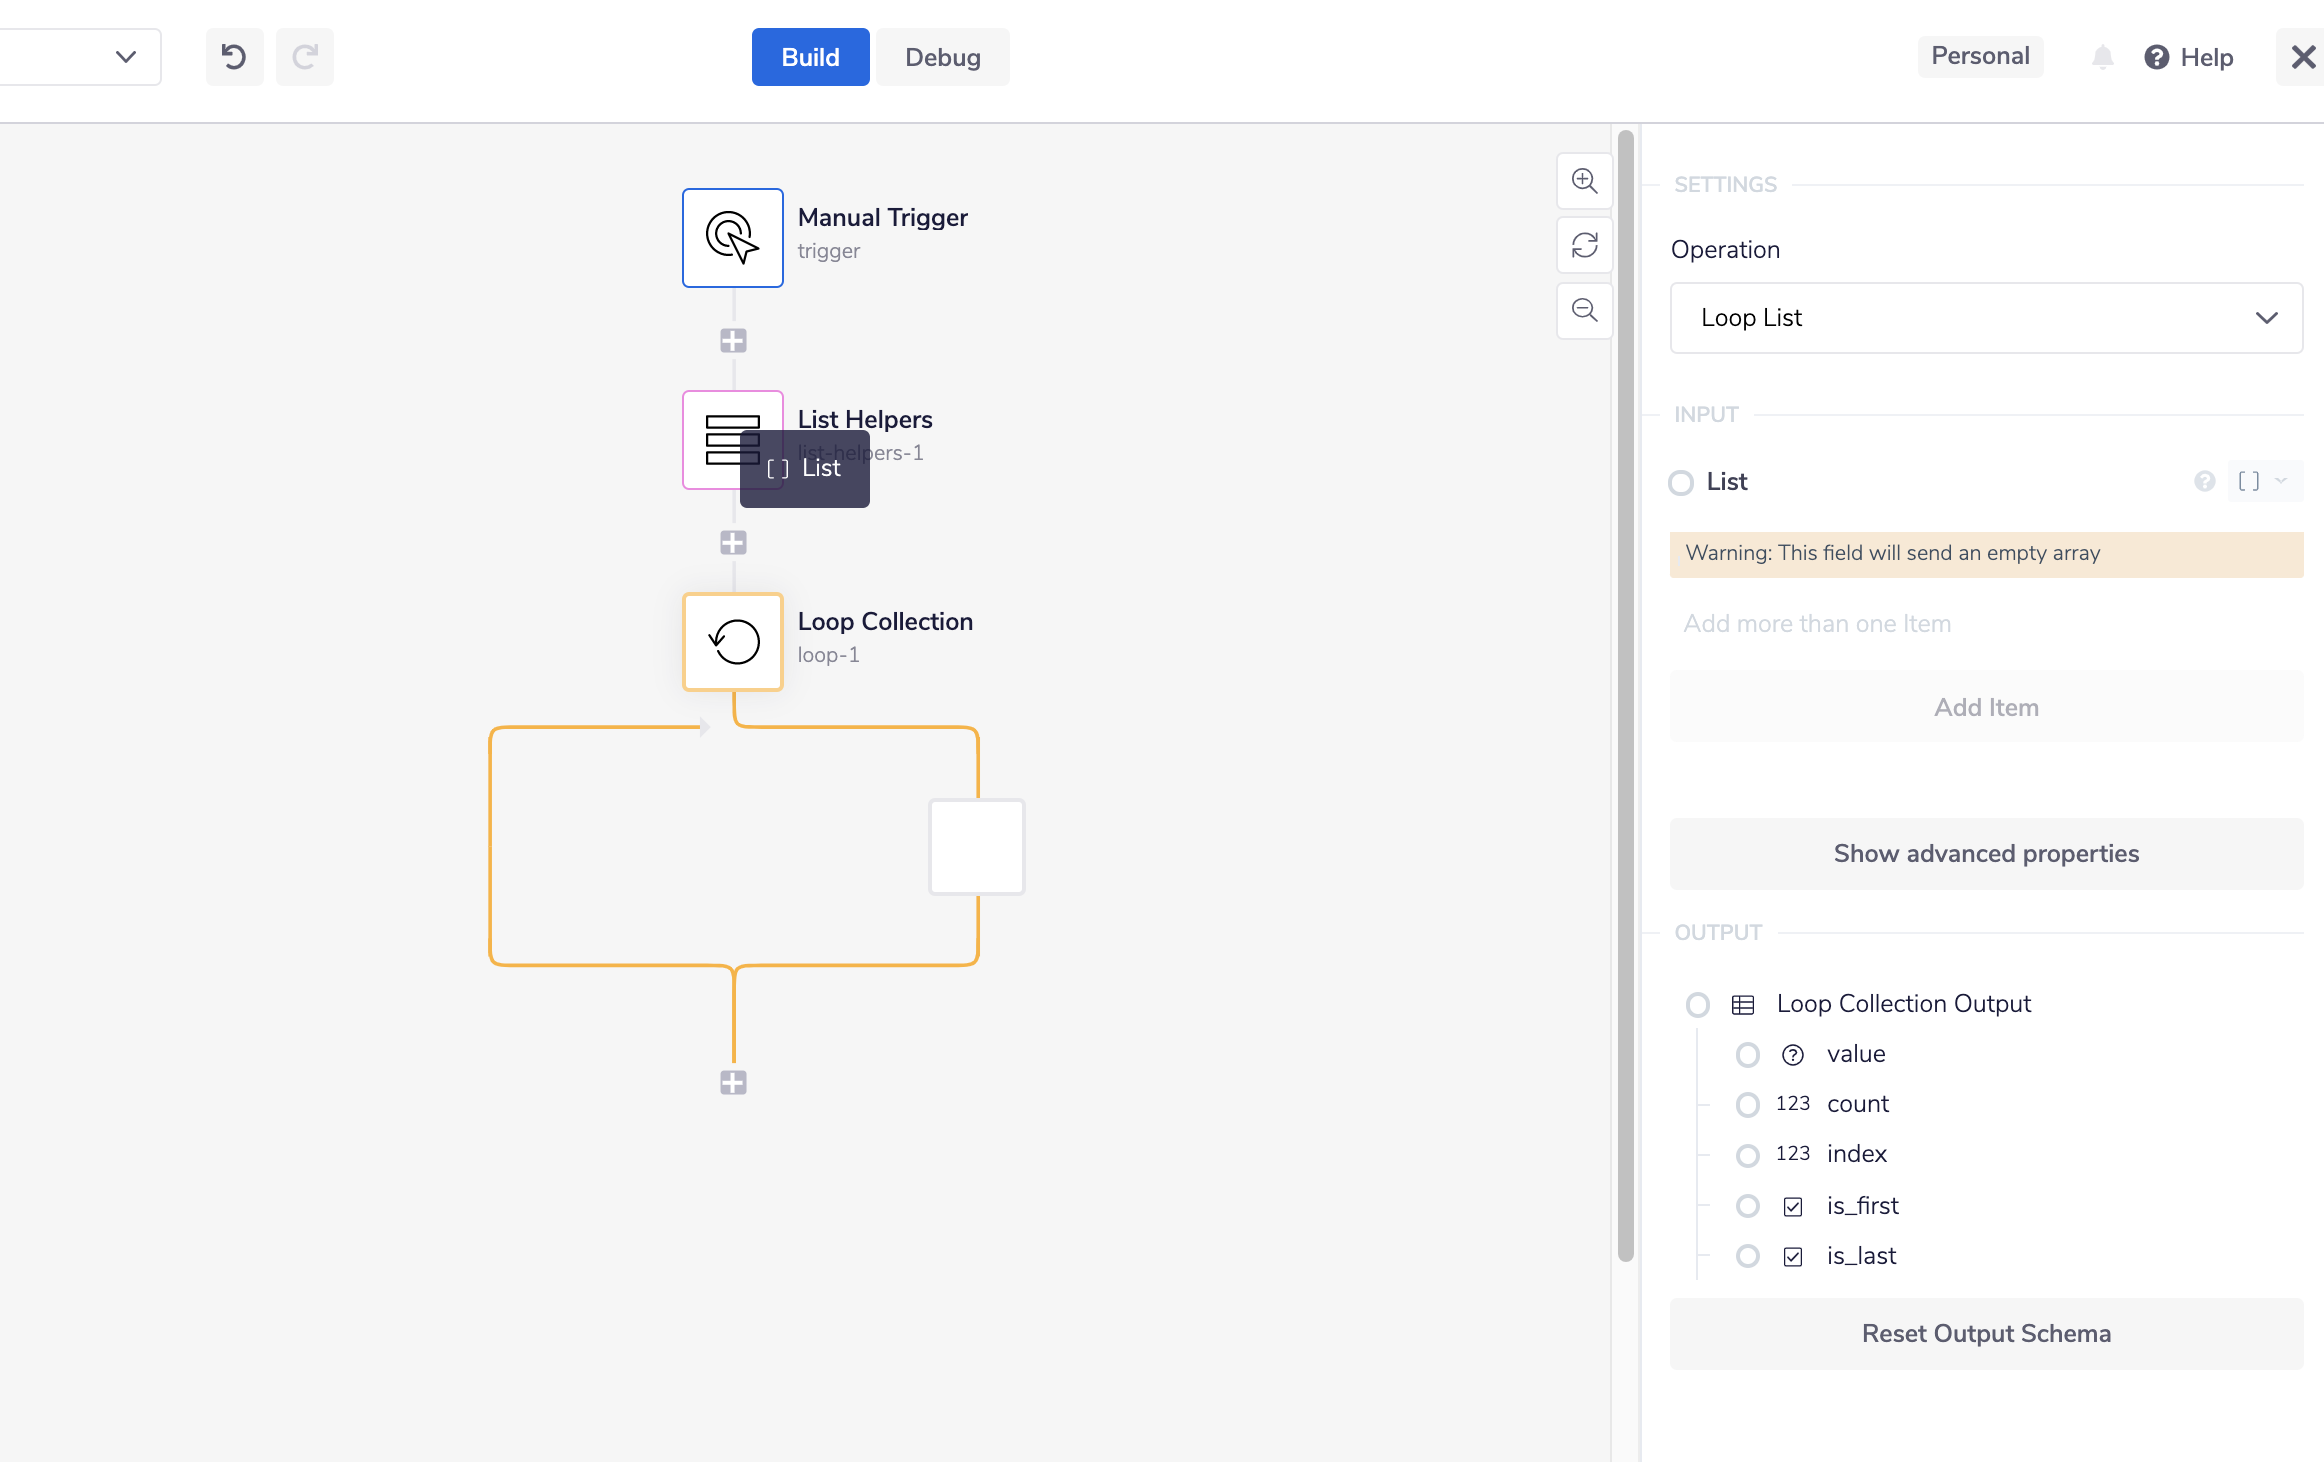
A grey box will now appear which gives you a choice as to which list from the List Helper step the Loop collection should look for (displayed in the image below). Lists are represented by '[]' within the tray.io platform. Select the 'List' from the selection box, this will setup the jsonpath of the list input for the Loop Collection. This can now be seen in the input panel for this step.
JSONPATHS: For more information on what jsonpaths are and how to use jsonpaths with Tray.io, please see our pages on Basic data concepts and Mapping data between steps
3 - Add & Record each Customer "opt in".Copy
The final step is to add a Rejoiner connector, in order to record whether each customer has "opted in" on your Rejoiner account.
Select 'Record customer opt in' from the drop-down options available within the 'Operations' menu.
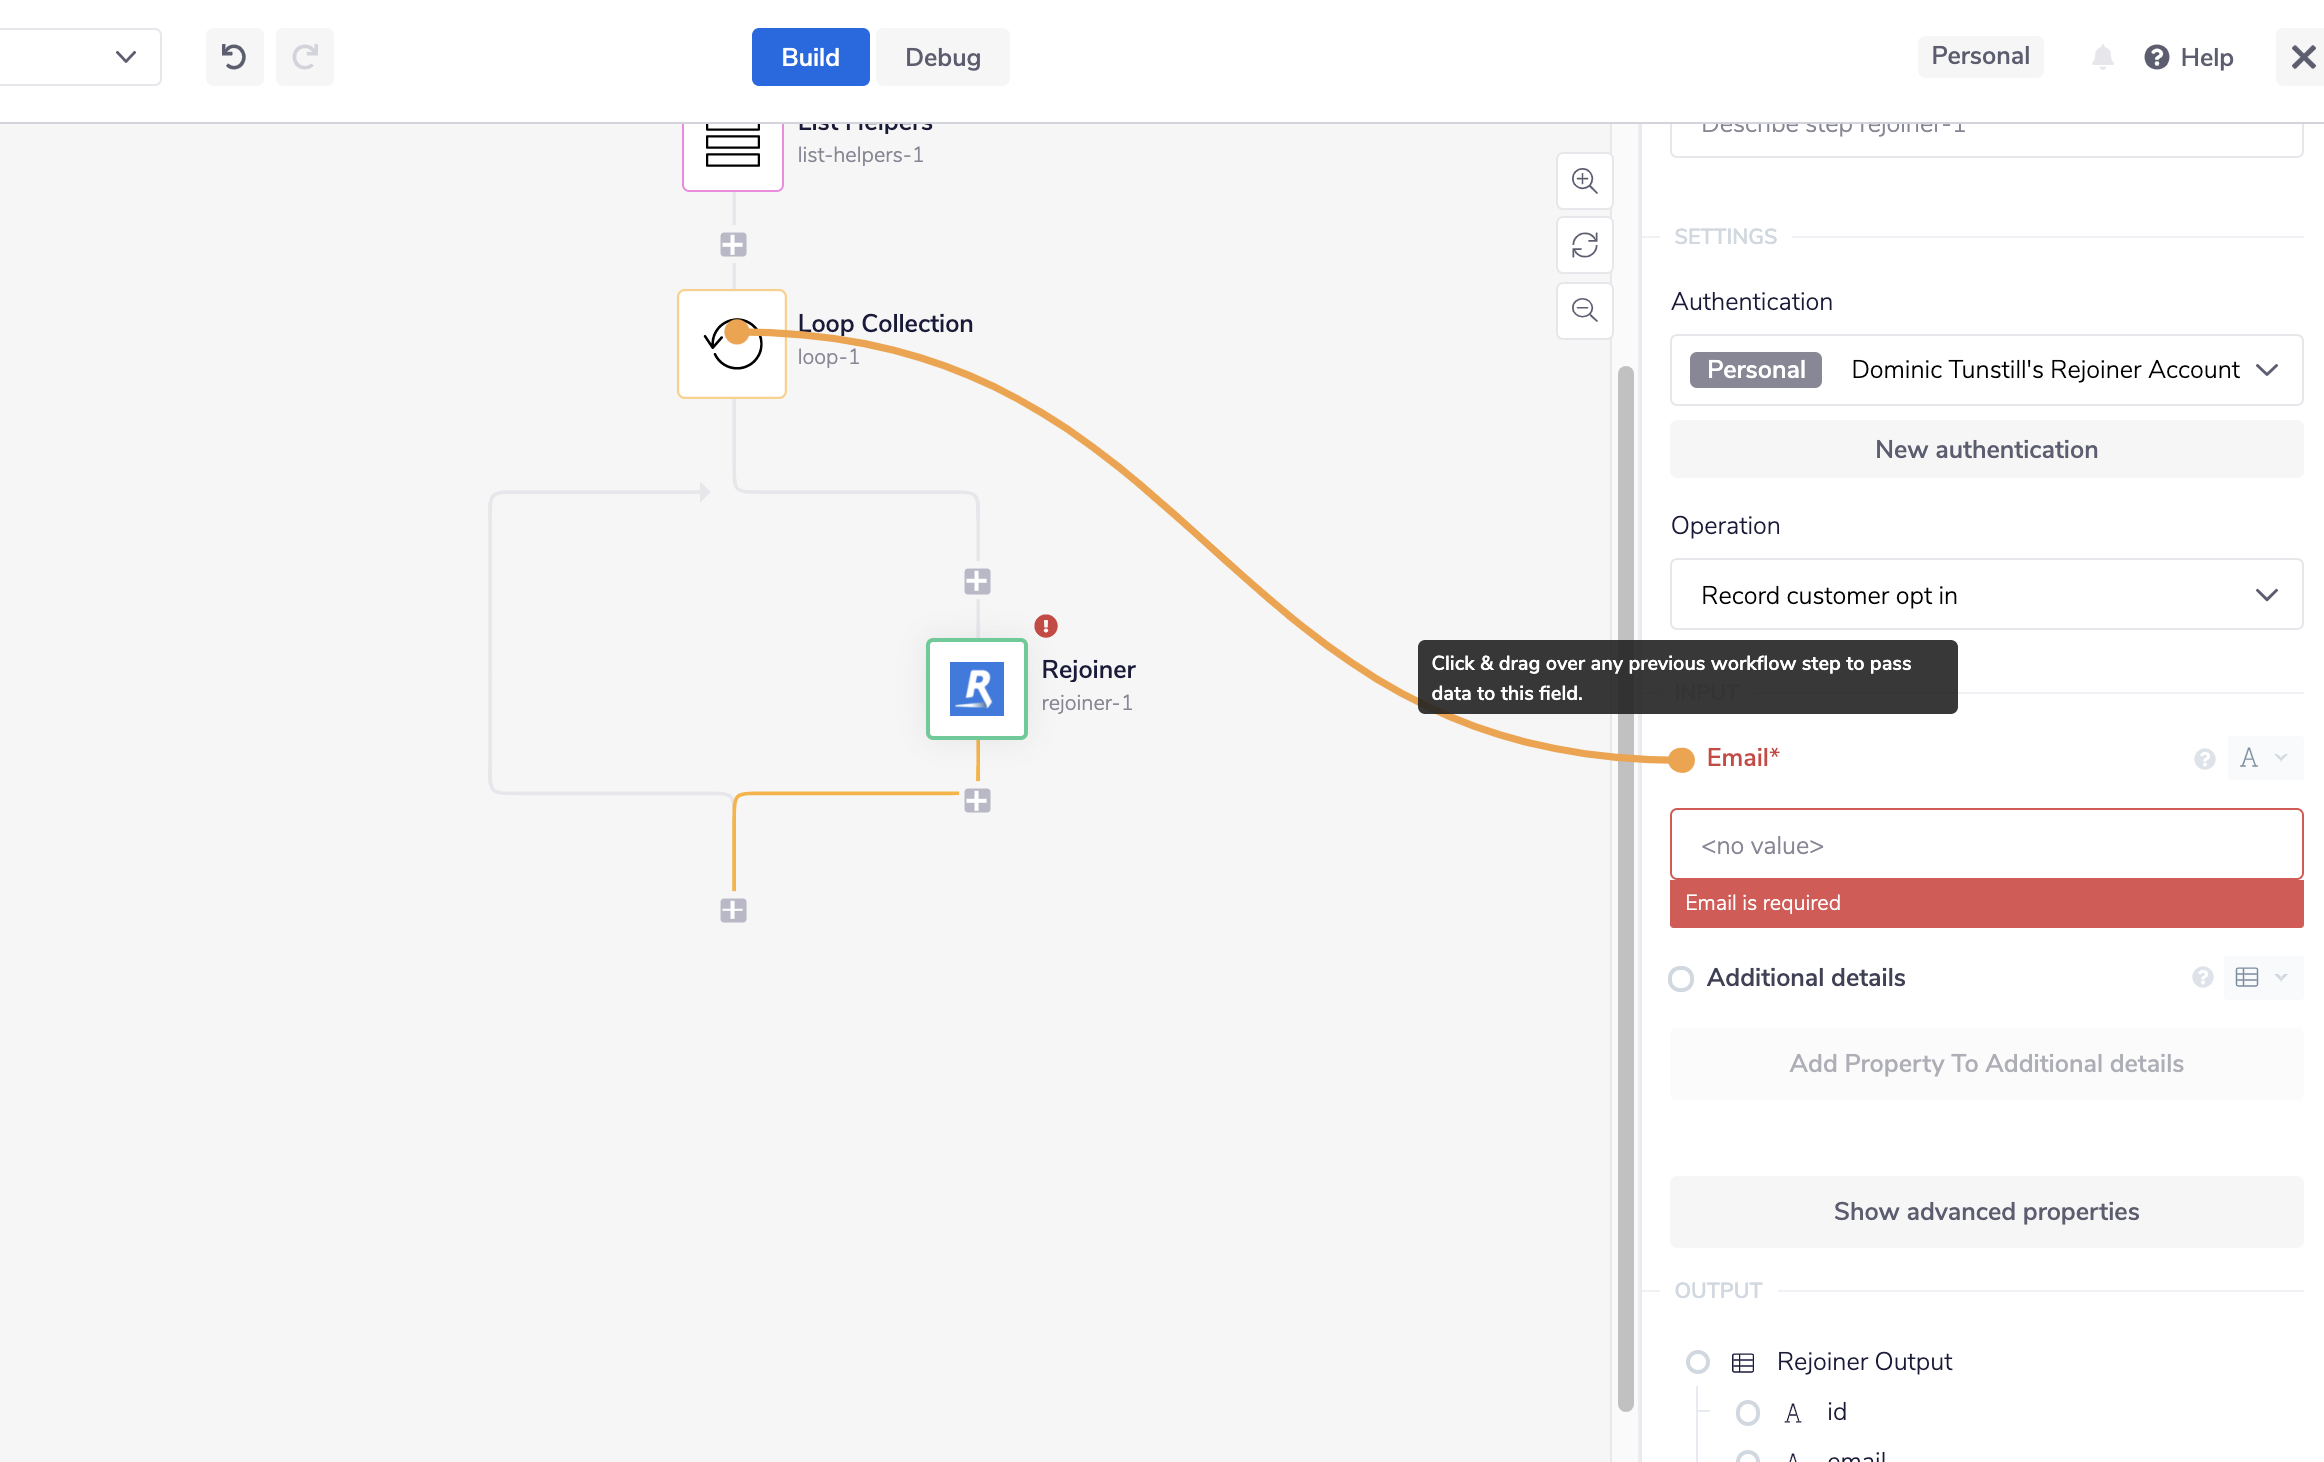
This operation has one required input field, 'Email'. Using the connector snake, drag from the 'Email' input field to the Loop Collection step and select the 'Item' field from the selection box that appears to setup the jsonpath for this input.
There is a further optional input field called 'Additional details'. Additional details can be added for reference regarding the record of each customer's consent.
Once the operation is fully configured, the workflow is setup and ready to go! You can now click 'Run workflow' and check the output in the 'Debug' panel to see the result of the workflow.
If the step executes correctly, each customer returned by the List Helper connector will now be set as 'opted-in' on your Rejoiner account and all steps within the 'Debug' panel will show as green.
BEST PRACTICES: Whenever you do decide to create your own workflow, be sure to check out some of our key articles such as: