Basic workflow alerting - Step 1: Real-time alerts for workflow errors


In this two-part series, I’m going to walk through how our growth ops team has set up our workflow alerting processes. This first post focuses on the basic step of setting up real-time alerts for workflow errors. If you have just a handful of lower-volume workflows, this should be a good start - read the 2nd post in the series for a deeper dive on more-advanced workflow monitoring.
While I'm currently heading up growth for Tray.io, my little romance with the Tray Platform started while I was still working at New Relic, building beefy workflows to power our personalized lifecycle programs. At New Relic, we realized we needed a General Automation Platform to build a number of large workflows pulling customer segments (which we created using data warehouse queries) and adding/removing them from marketing automation campaigns in a few different systems. (Read more about what we built in this New Relic case study.)
One of the biggest issues we faced in maintaining the workflows was staying on top of errors as we scaled up the workflows themselves for more lifecycle use cases. Periodically checking endless streams of logs (on multiple workflows) just wasn’t a scalable or effective way to make sure things were working smoothly. Then, I discovered alerting workflows. I could now send myself a notification every time an error occurred in real-time, which was amazing and easy.
All we need for this solution is:
- A Tray Alerting Workflow: Which captures errors across your production workflows
- A Slack Channel: To monitor error alerts in real time
Real-time workflow alerts in Slack
Our first step is to create a Slack channel where we’ll send alerts (we use a private channel called “growthops-notifications”):
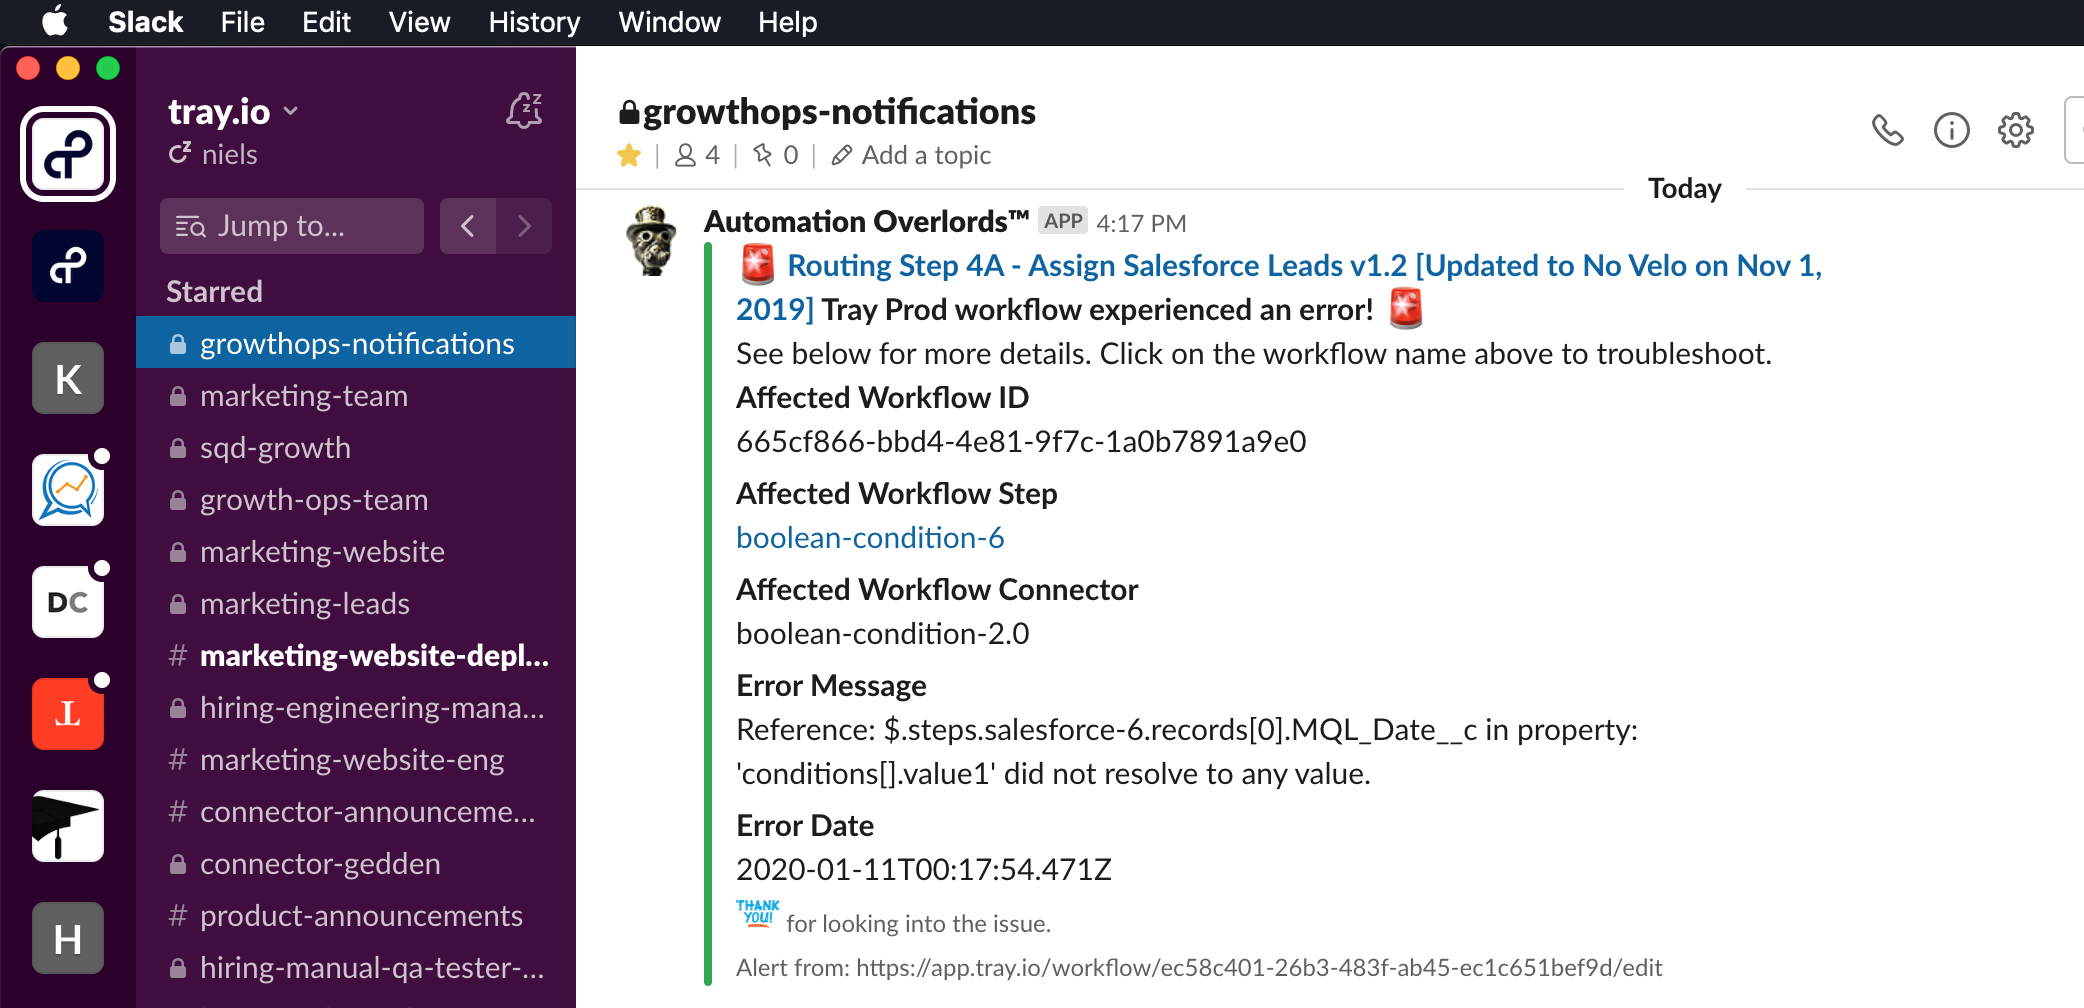
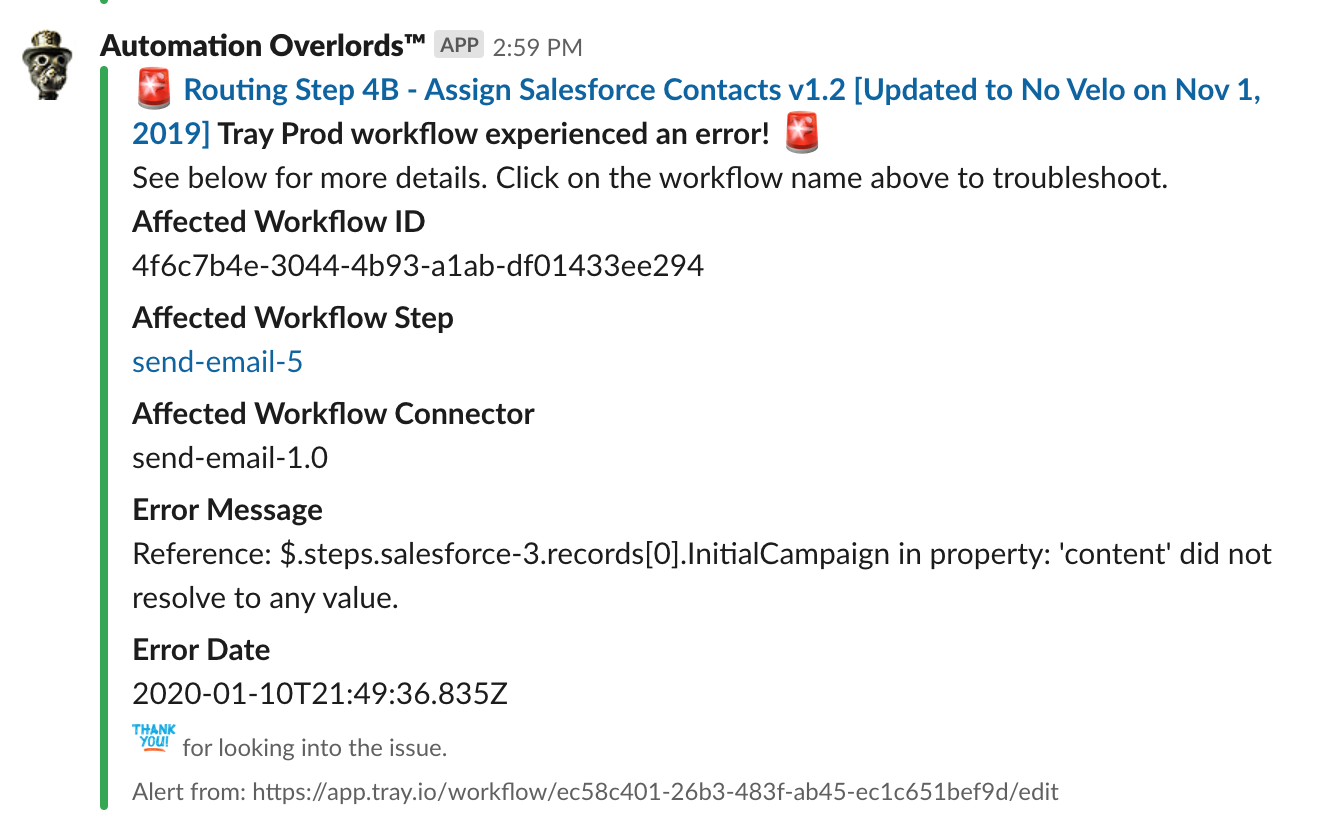
Notice there’s lots of useful information in the example above:
- The workflow name which, assuming we have good workflow hygiene by using clear naming conventions, makes it easy to see what the workflow does (It also links to the workflow URL so you can easily check the error logs)
- The name of the failed step and connector type
- The error message, which tells us why the error occurred
Getting this type of message in our newly-created Slack channel is easy with an alerting workflow like this...
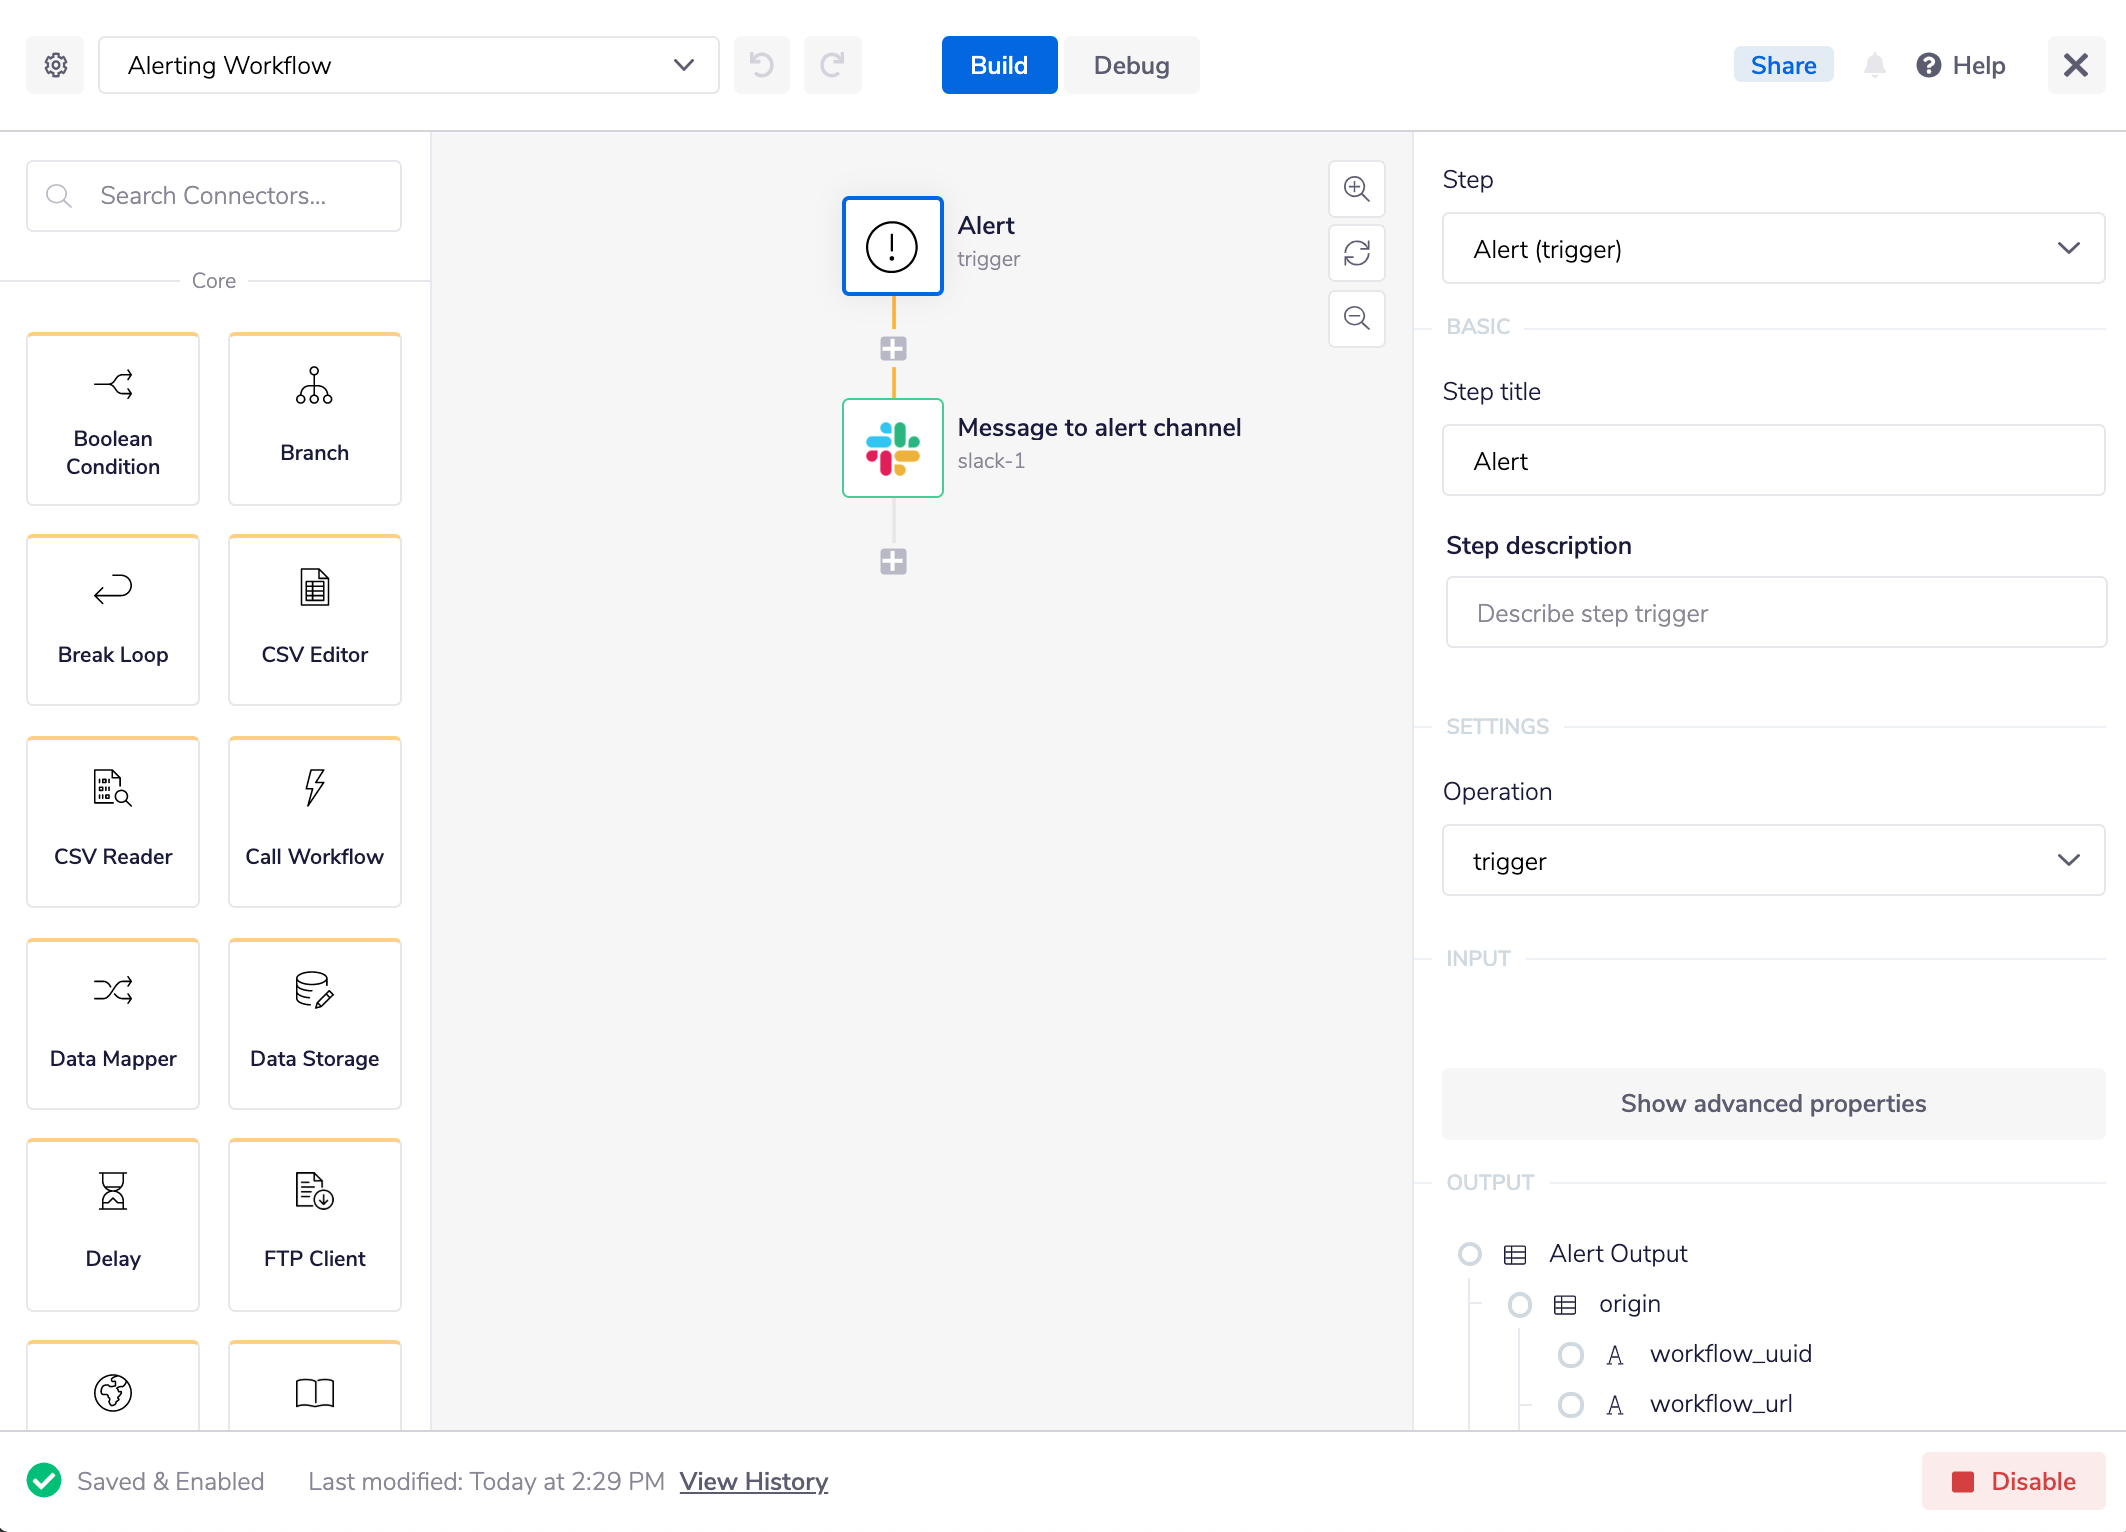
...when we build a basic workflow with an “Alert” Trigger, followed by a “Send Message” operation via the Slack connector. Before getting into the configuration details for the Slack step, let’s quickly review how we send errors to this workflow.
To send errors from a production workflow to our alerting workflow, open the config settings on each workflow for which we need alerts using the gear icon at the top left. We can choose our alerting workflow at the bottom of the General Settings pane (the alerting workflow must be “enabled” to show up in the menu):
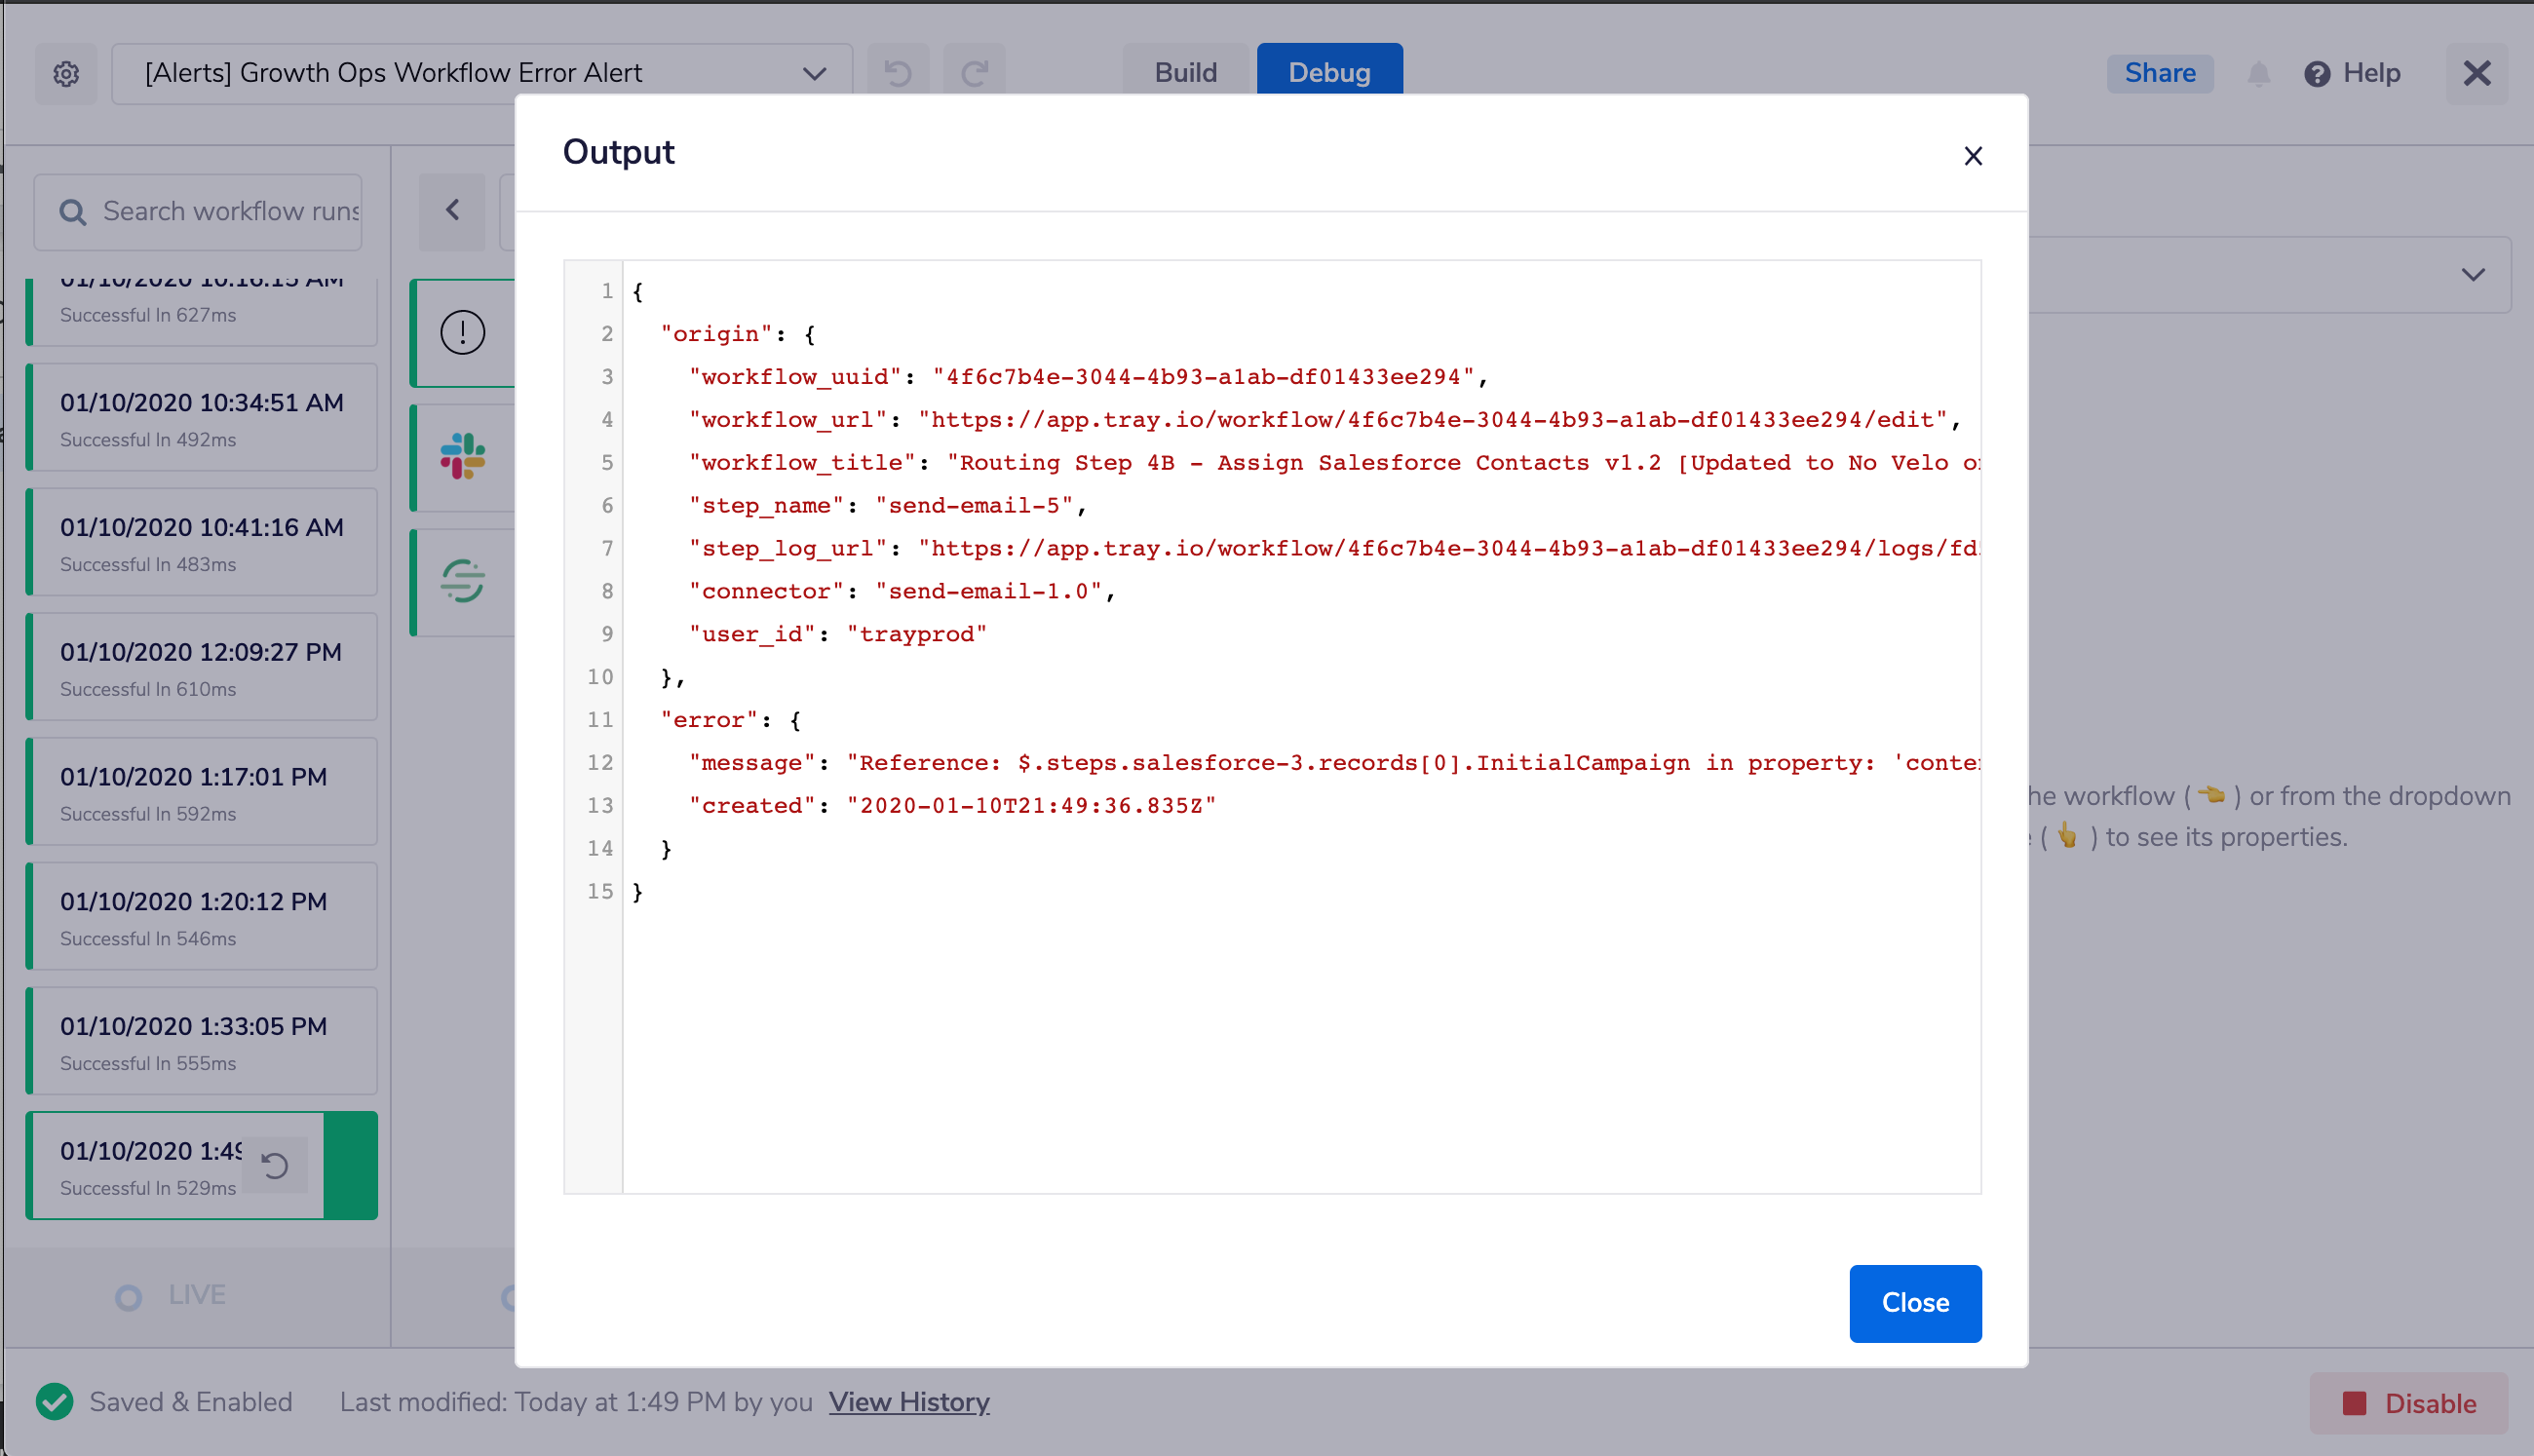
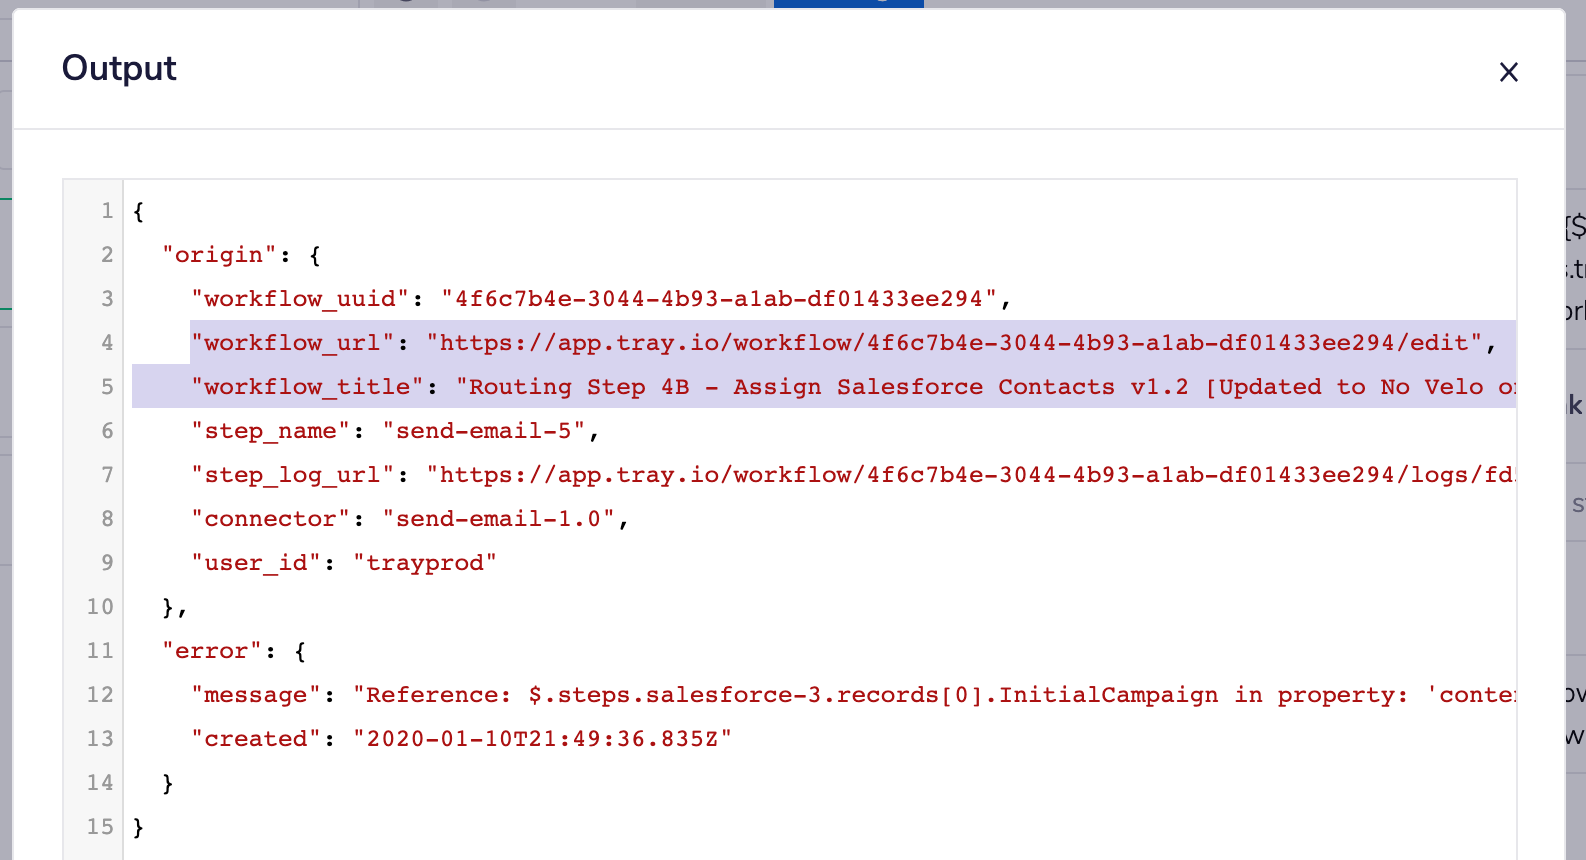
It will now send the useful data we saw in the example Slack message as a JSON object to the alerting workflow’s trigger output.
Here’s an example, which is found by looking at the debug logs of the alerting workflow:
 Moving back to the Slack connector setup, we need to map the error data from the trigger output to a few different fields of the config panel so we can format a message like this:
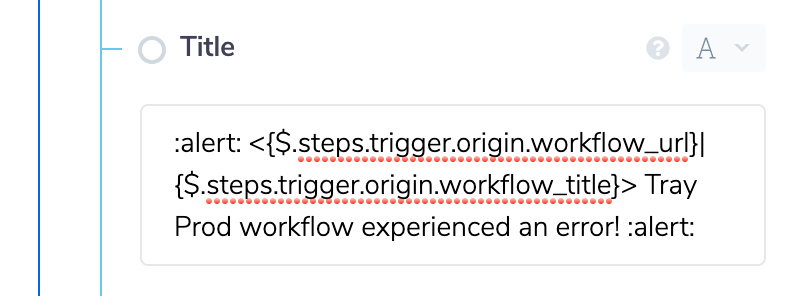
The first field to configure is “Title” (which is enclosed by the red siren icons in the above image - it displays our workflow name and links to it). We can use Slack’s API message syntax along with the Tray platform's JSON path syntax to make this work.
Let’s look at the Slack syntax first:
- Slack emojis - Easiest to find it in Slack to see the name of each one. In this case, the emoji is
:alert: - Hyperlinks - Two parts, the URL and hyperlink text:
<https://url.com/path|Hyperlink Text>
To put the workflow name and URL together as a hyperlink, we need to pass the two variables from the trigger output to the title field on the Slack connector. The trigger output contains an origin object, which contains both the workflow_url and workflow_title properties:
To pass this variable data into the title field, we need the JSON path to these properties:
- $.steps.trigger.origin.workflow_url
- $.steps.trigger.origin.workflow_title
Because we’re combining these variables with Slack syntax, we need to use a string data type on the field (the “A” shown in the upper right-hand dropdown below), wrapping our JSON path variables in curly brackets:
 Here’s a cleaner look at the syntax (without emojis or other text):
<{$.steps.trigger.origin.workflow_url}|{$.steps.trigger.origin.workflow_title}>
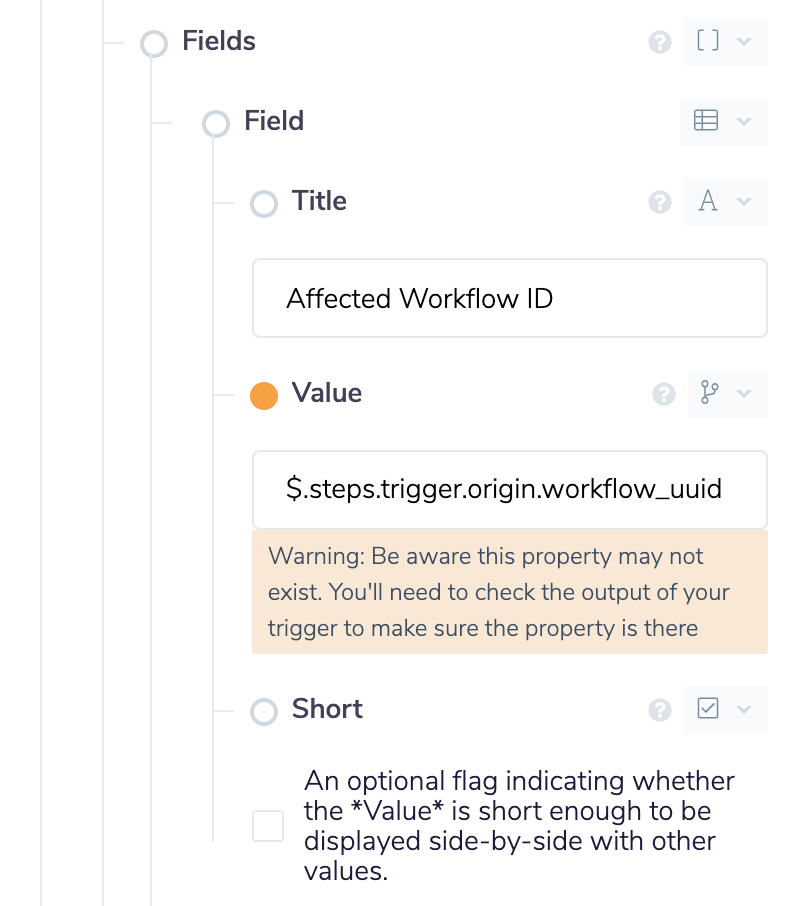
Next, we set up a handful of “fields” on the message for the data points we wish to include (such as Affected Workflow ID or Affected Workflow Step). I’ll just show you one here, but they’re all done the same way:
 What it looks like in the message:

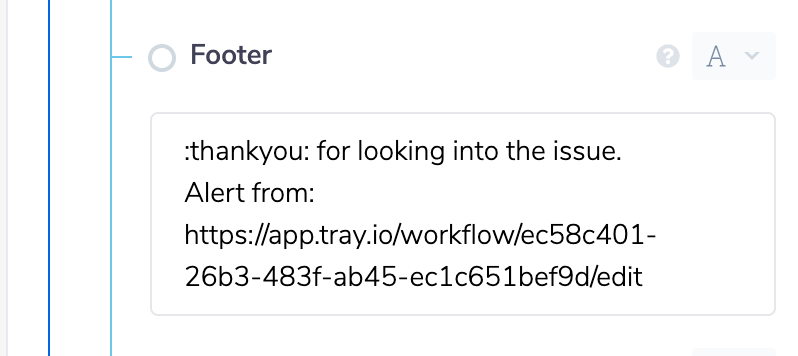
If we like, we can add a link to the alerting workflow as a footnote in the message, which might be helpful if we have multiple alerting workflows:
 We can do this in the “Footer” field like this:
If you do nothing else with alerting, do yourself a favor and do the above, it’s a good start!
If and when your Slack channel becomes a bit harder to keep up with, level up by reading our companion post to better monitor and analyze your errors using a dashboard. To see more use cases for automation, sign up for a weekly demo.