


Employee Directory Callable Lookup
This is a 'Project' template which means that it contains a group of workflows that work together to achieve a particular aim
Employee Directory Project Setup DocumentationCopy
The first step to getting your employee directory lookup working is to setup the directory build workflow, which sources employee data from the various systems that you’ll include in each employee’s entry, like their email and Slack user ID.
The following diagram gives a basic explanation of how the directory build workflow works:


Initial Project SetupCopy
Before diving into setting this workflow up, you’ll need to set the following project config variables:

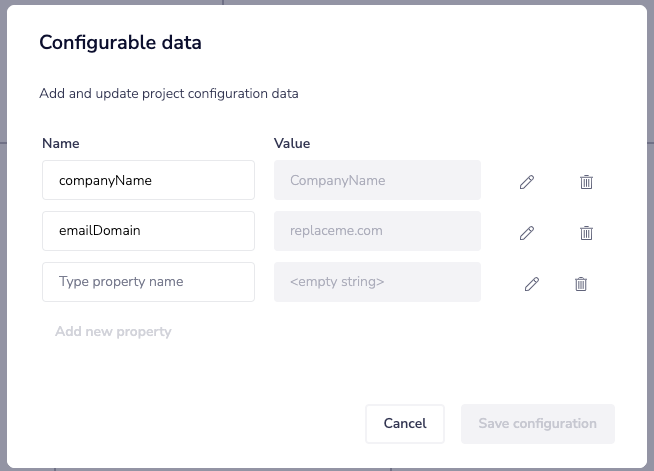
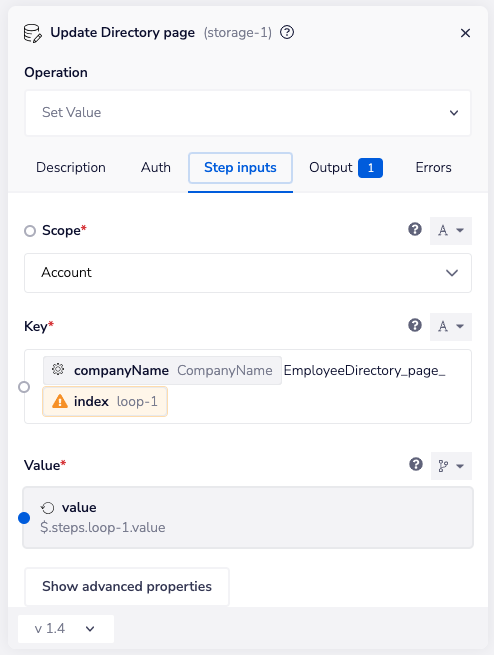
The company name variable will be used as part of the name of your directory lookup tables in data storage:

The email domain can be used as an optional filtering parameter in your data sourcing workflows to remove people who don’t have a company email (an example of this is setup in the Slack user sourcing template provided with the project).
Determine your initial list data sourceCopy
Your next step is to determine what your initial data source for all employee’s will be. If the initial list is missing an employee, it won’t matter if they’re found in other lists you’re joining in since there would be nothing to join those users to in the initial list.
We use Slack as our data source for our initial list, but this could be any source you choose. We’ve included a template to get all your Slack users for the initial list with the project, so feel free to use this if you like.
The directory building workflow is setup with an example initial list containing dummy data which you can use to test with and get a sense for how things function:


In this example setup, we only have one data source in our build workflow, which is mapped to the formatting script:


Joining other data to the initial listCopy
It’s likely you’ll want to have more than just the initial data set, for example when you want to include a variety of system IDs or other data not found in your initial list. For those cases, you’ll need to setup a sourcing workflow to get the user data from that system, then join that data to your initial list.
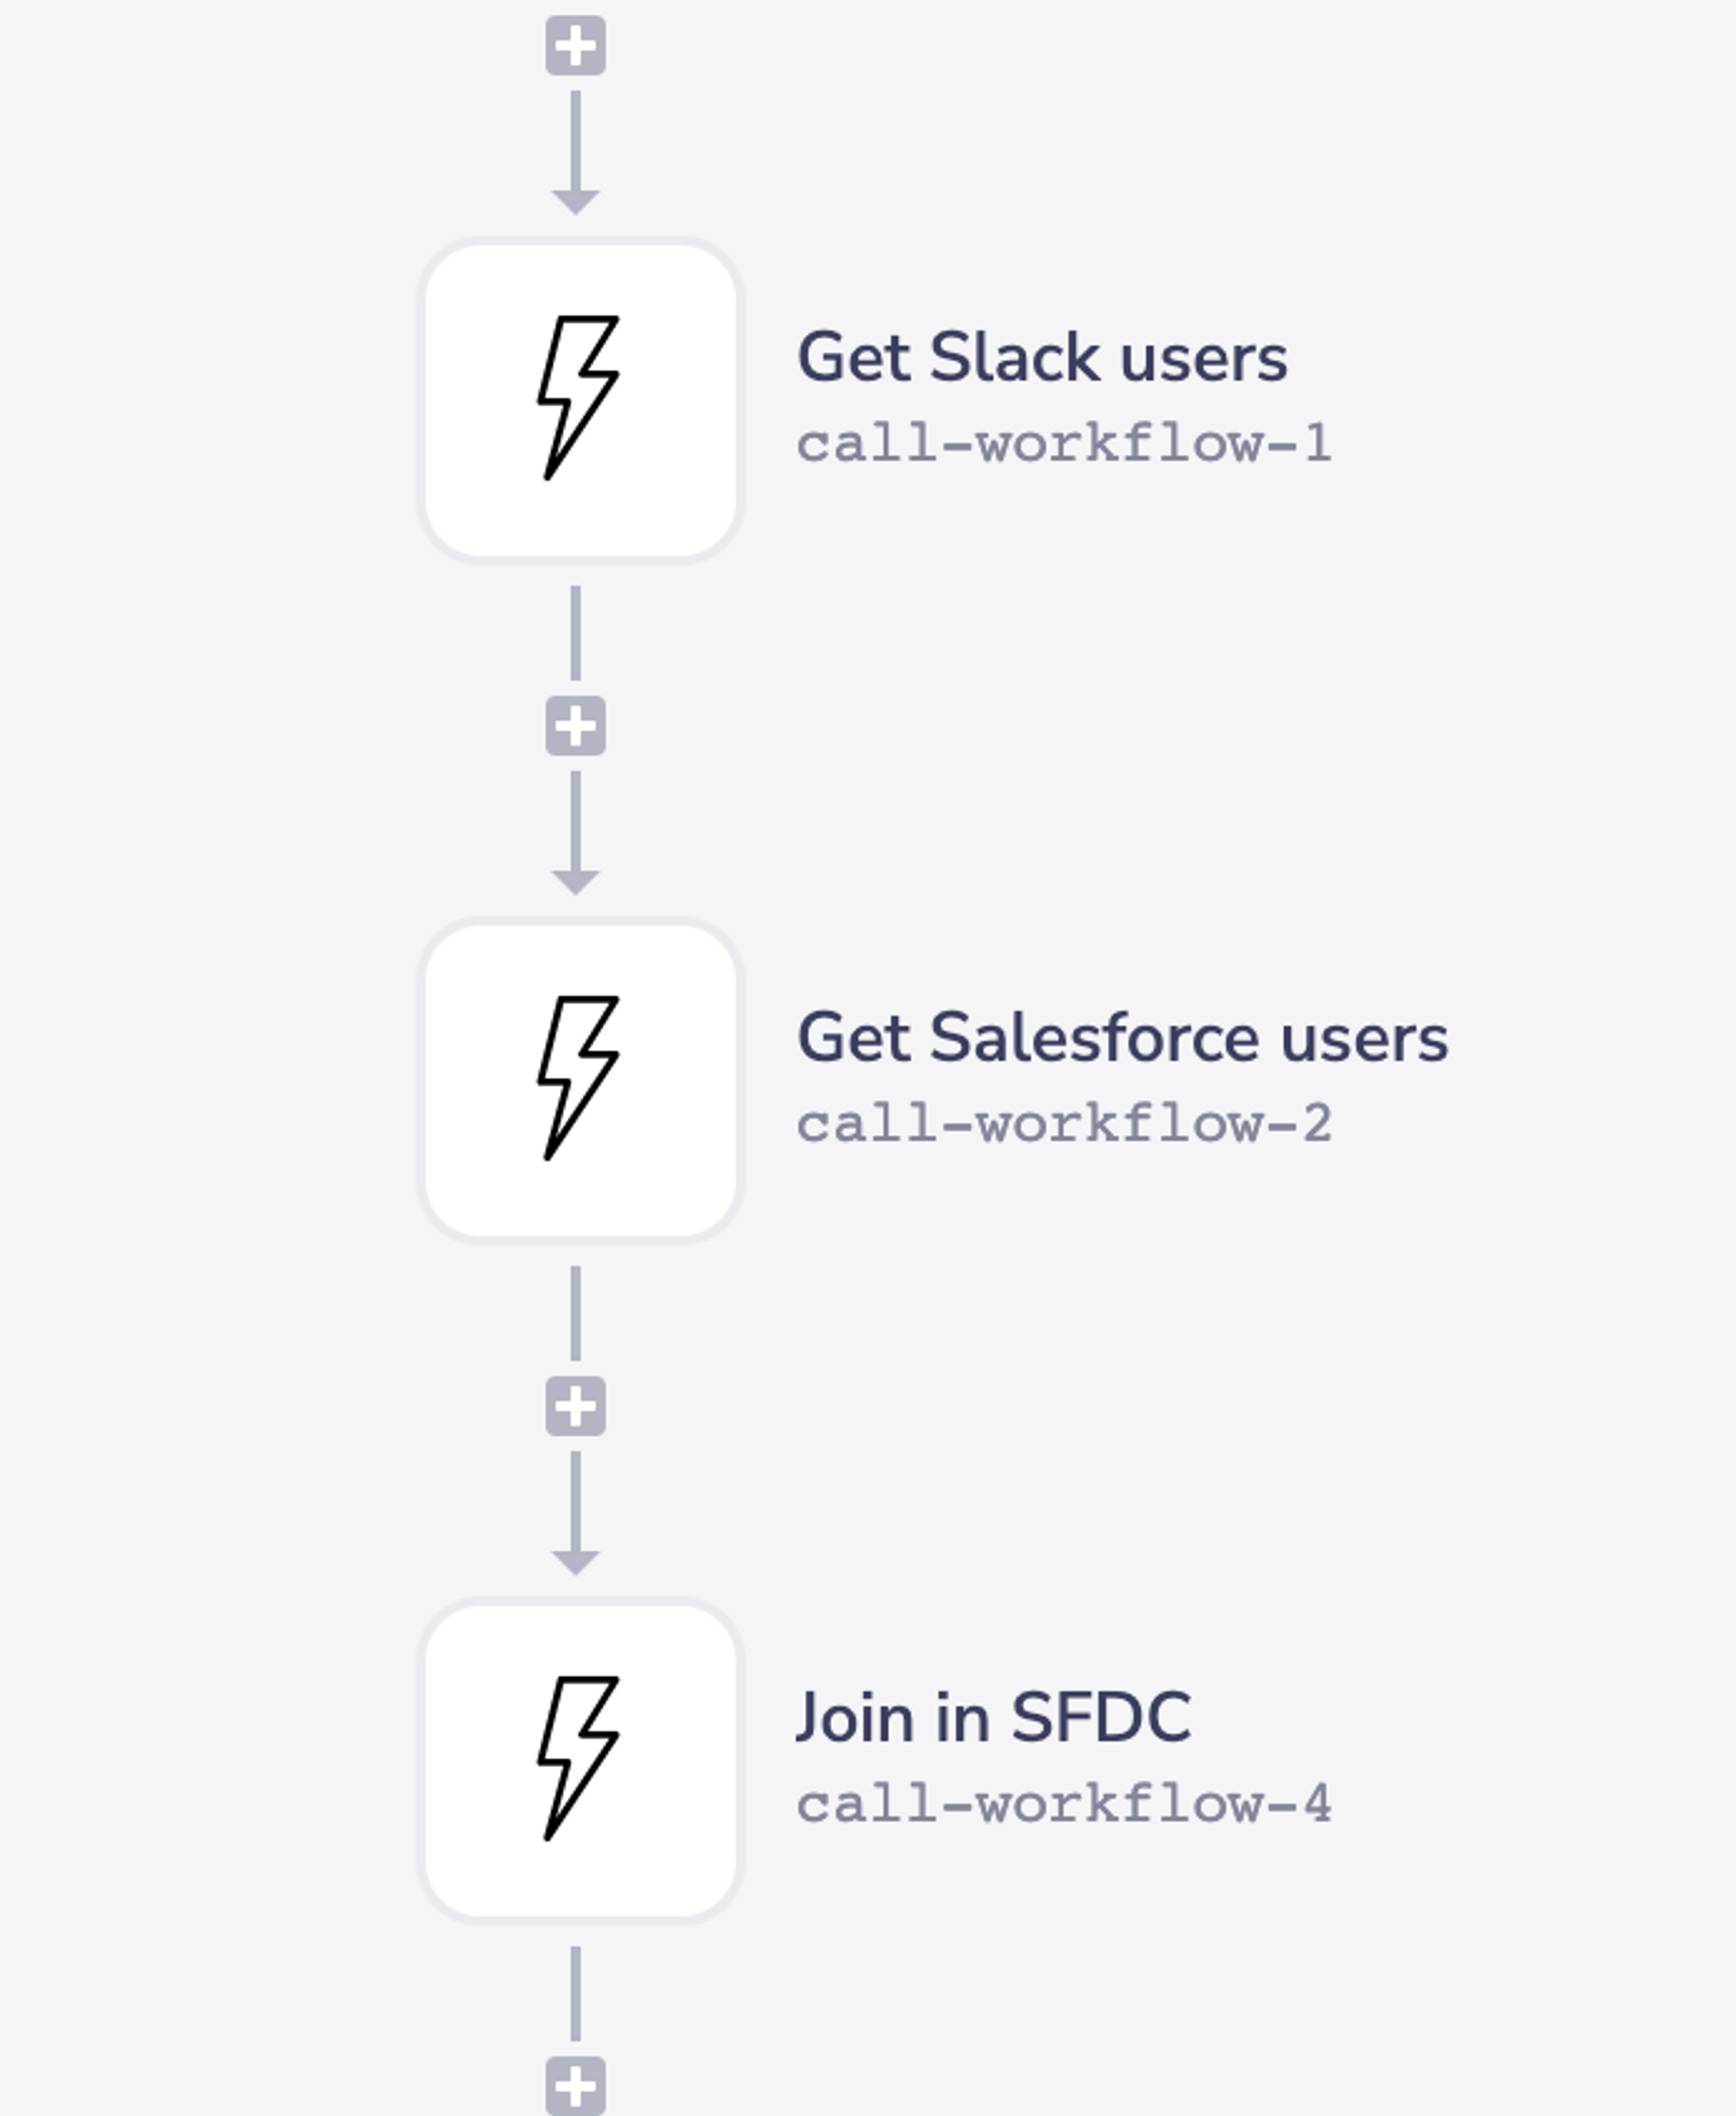
For us, we start with Slack as our initial list, then add in Salesforce user IDs next:

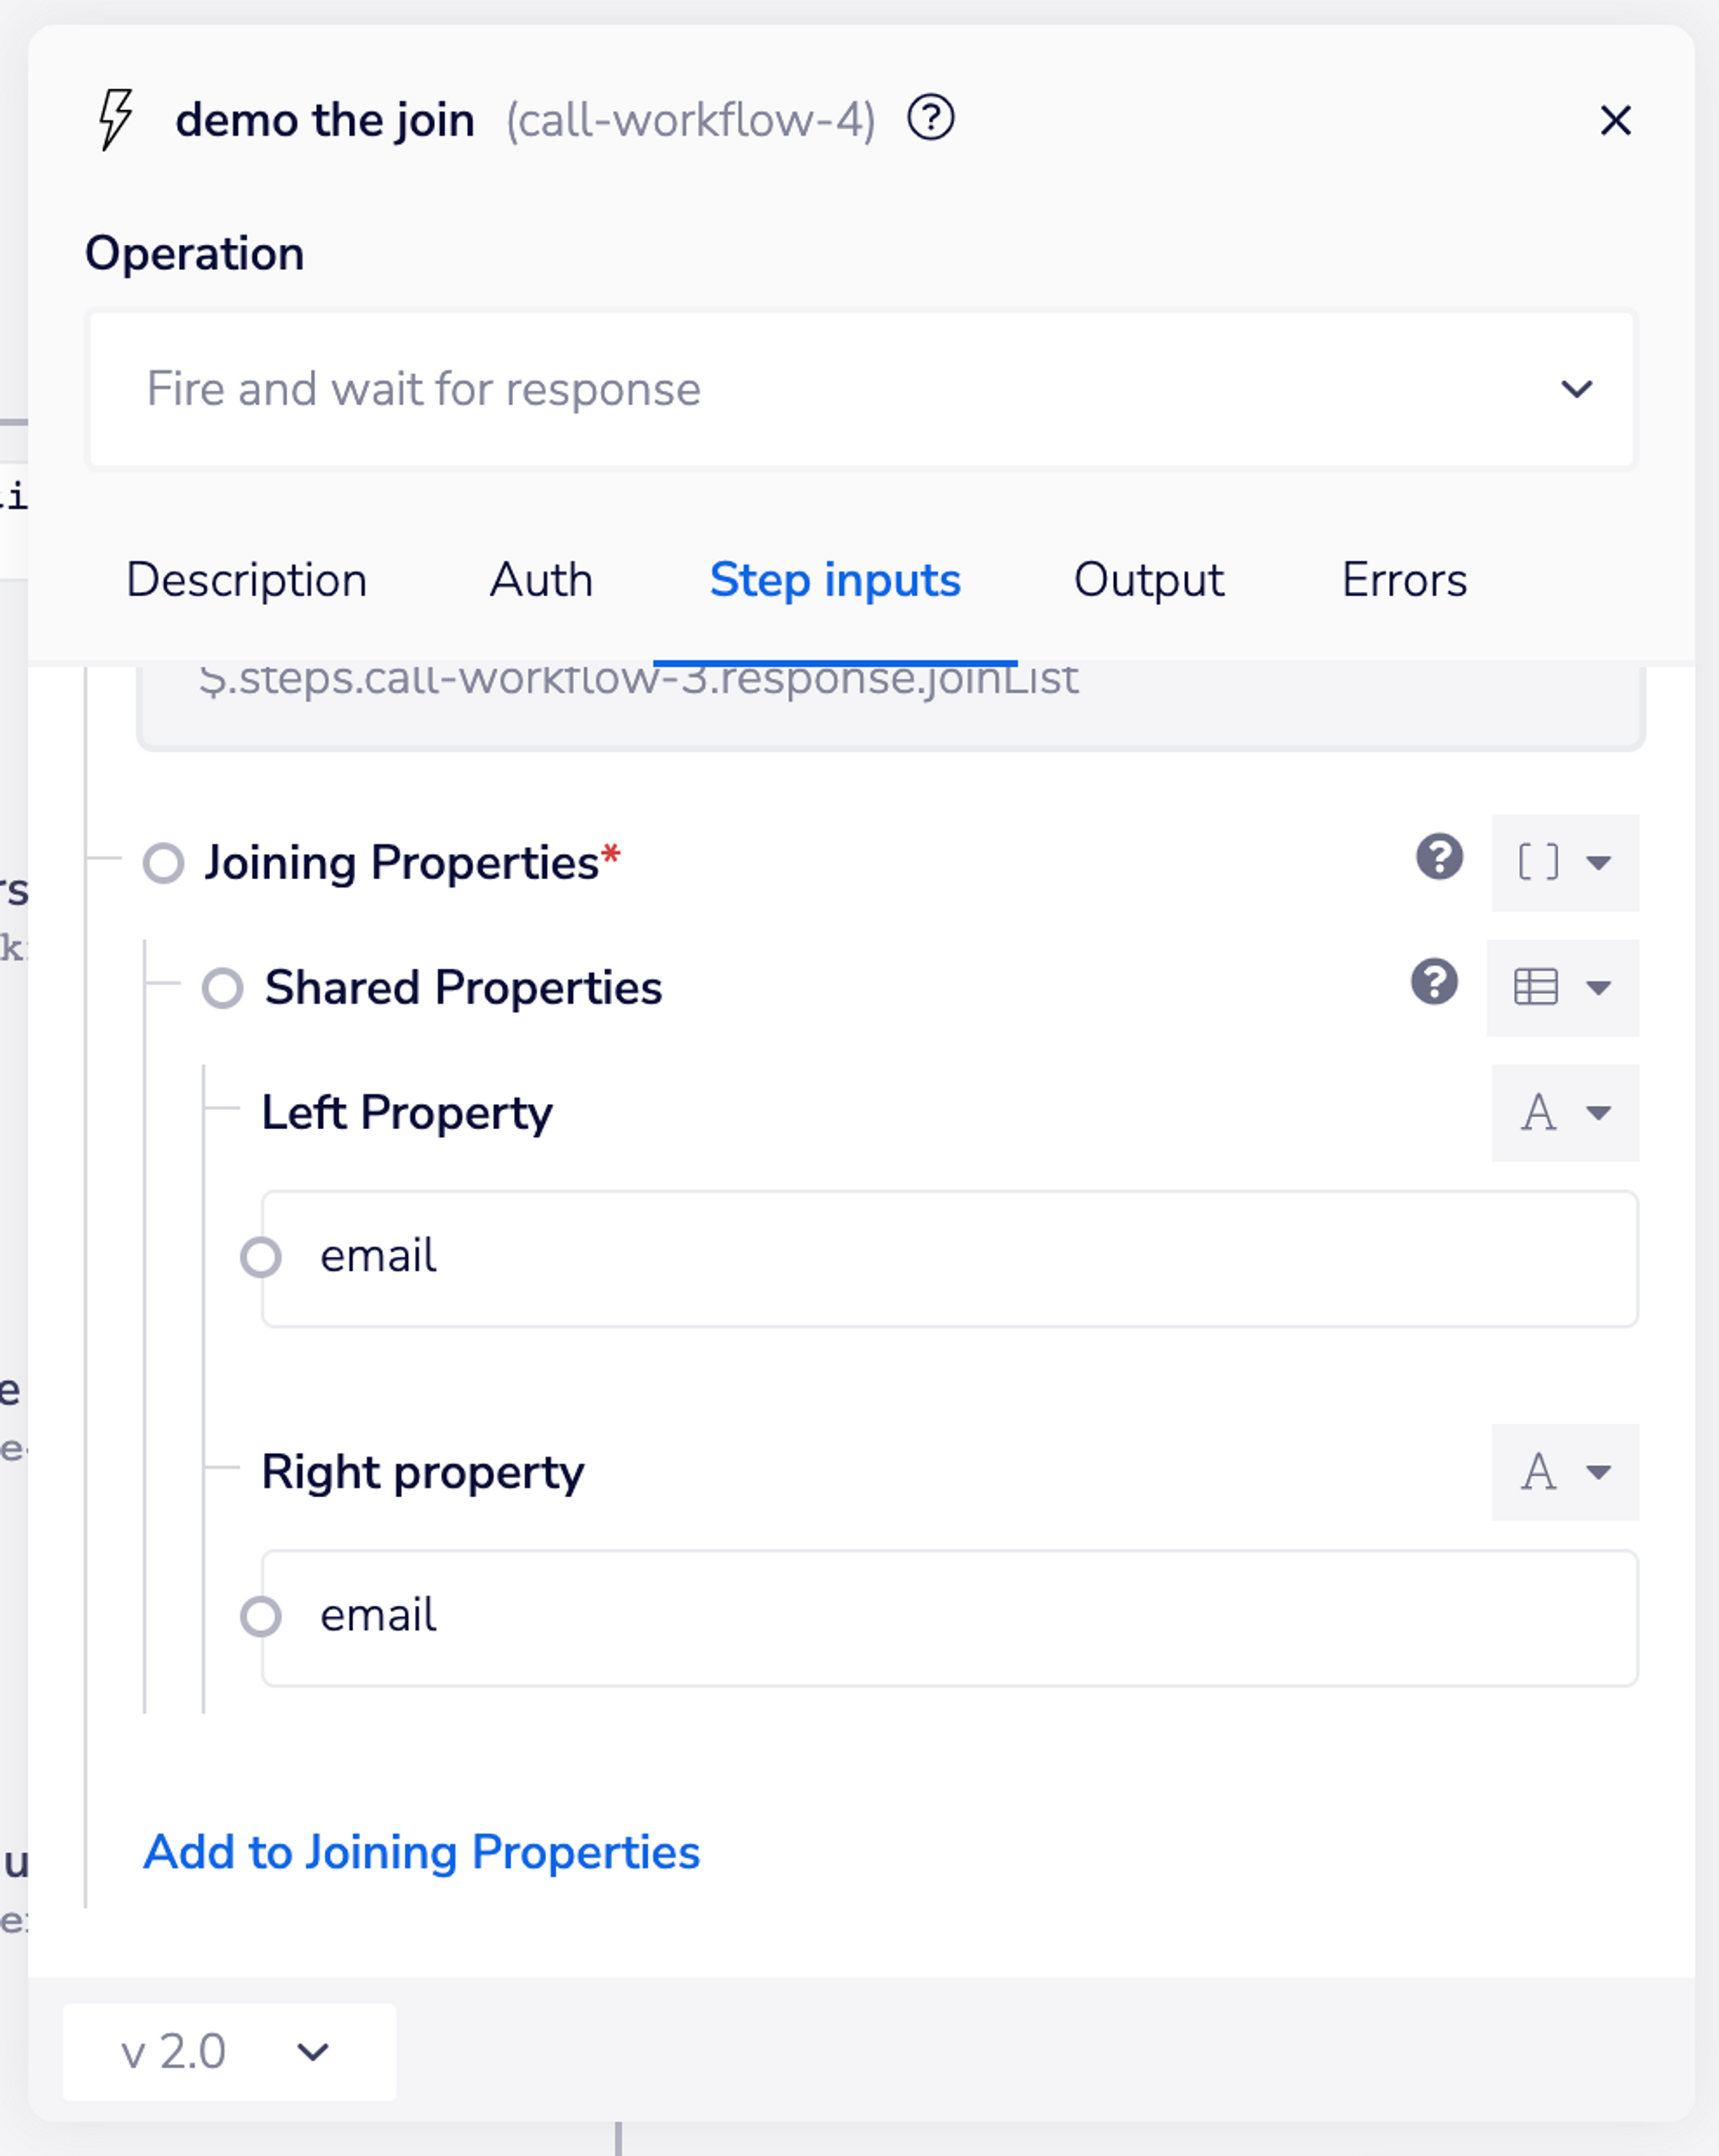
We’ve made it quite easy to join the lists together using a template found in the project which conducts a “left join” of two arrays/lists of data:


The join logic works by specifying at least one shared key between the two lists, most commonly an email address:

For each system you wish to source data from, you’ll follow the pattern of:
Sourcing data for your initial list
Sourcing data from another system
Joining the data to the initial list
Sourcing data from another system
Joining the data to previously joined list
Repeating 4 & 5 for each system you’ll source data from
Passing the final joined list to the formatting script step in the build workflow
Testing the processCopy
If you’d like to play with the basic setup before using real data, we have the initial build workflow pre-configured to work out of the box with dummy data. Here’s a demo video of an initial setup with dummy data that you can get running in less than 5 minutes.
Building a sourcing workflowCopy
Now that you have a good sense of how the process works, the next step is to create each of your data sourcing workflows. These would be the processes that source data from the various systems you plan to include as data points in your directory entries.
The sourcing workflows are setup as “fire and wait for response” callable workflows which are called from the parent “build” workflow, sending the entire set of results from each system back to the parent once complete.
If you take a look at the example sourcing workflows in the project template, you’ll see a common design pattern where the sourcing workflow is getting all user data from a given system using a pagination “forever loop”. The pagination loop is setup to loop through all possible pages of results and then break the loop on the last page of results.
In addition to the prebuilt sourcing workflows we’ve include a generic pagination template you can use for any other systems you may come across. Here’s a video of how we used this template to setup the Outreach sourcing workflow.
Final setup stepsCopy
Once you have each of your sourcing workflows working successfully, you’ll be ready to round out the setup with the following steps:
Complete your directory build workflow by adding each of the sourcing workflows
Updating the workflow that searches the directory to include any properties you wish to search with (e.g., email, Slack ID)
Setting up your triggers to rebuild the directory