

Extract Salesforce records and email as CSV
This is a 'Workflow' template which means that it is a single standalone workflow.
Some workflow templates can be modified to work with other workflow templates - e.g. to convert a data sync between two services from uni-directional to bi-directional
OverviewCopy
This template demonstrates how you can create a CSV file and then store records fetched from Salesforce into this file.
When working with Salesforce, you will likely be dealing with large amounts of data.
This workflow template uses pagination to divide these records into manageable chunks to be processed later.

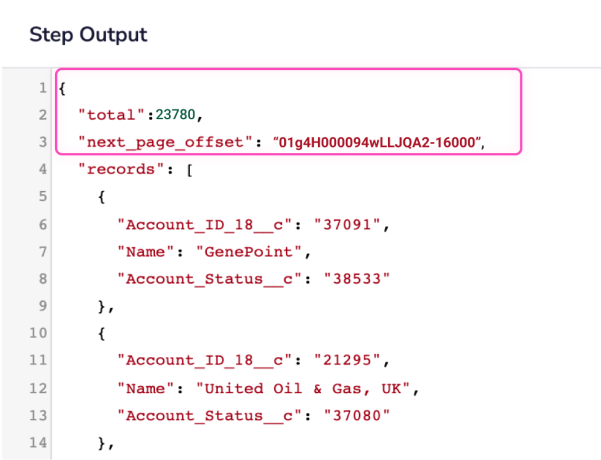
The above screenshot demonstrates a Salesforce Find Records call Step Input log in which the results set exceeds 2,000 records.
When this happens, the Salesforce API response contains a next_page_offset parameter.
This template demonstrates how to make a CSV report out of a large set of Salesforce records using the Tray CSV Editor, and then email it to a desired email address.
Connectors UsedCopy
The following connectors are used in this template. This is mostly provided for reference only - there is no need to read through the linked connector pages. All you need to know for this template is explained here, although you will likely need to look up service authentication instructions:
End ResultCopy
After successfully executing the workflow, a CSV file is created and sent to the selected email address.


PrerequisitesCopy
This workflow assumes the following:
You have a Salesforce instance and can authenticate as an API user.
Workflow logicCopy
The following screenshot illustrates the stages in the process of paginating long Salesforce records lists:

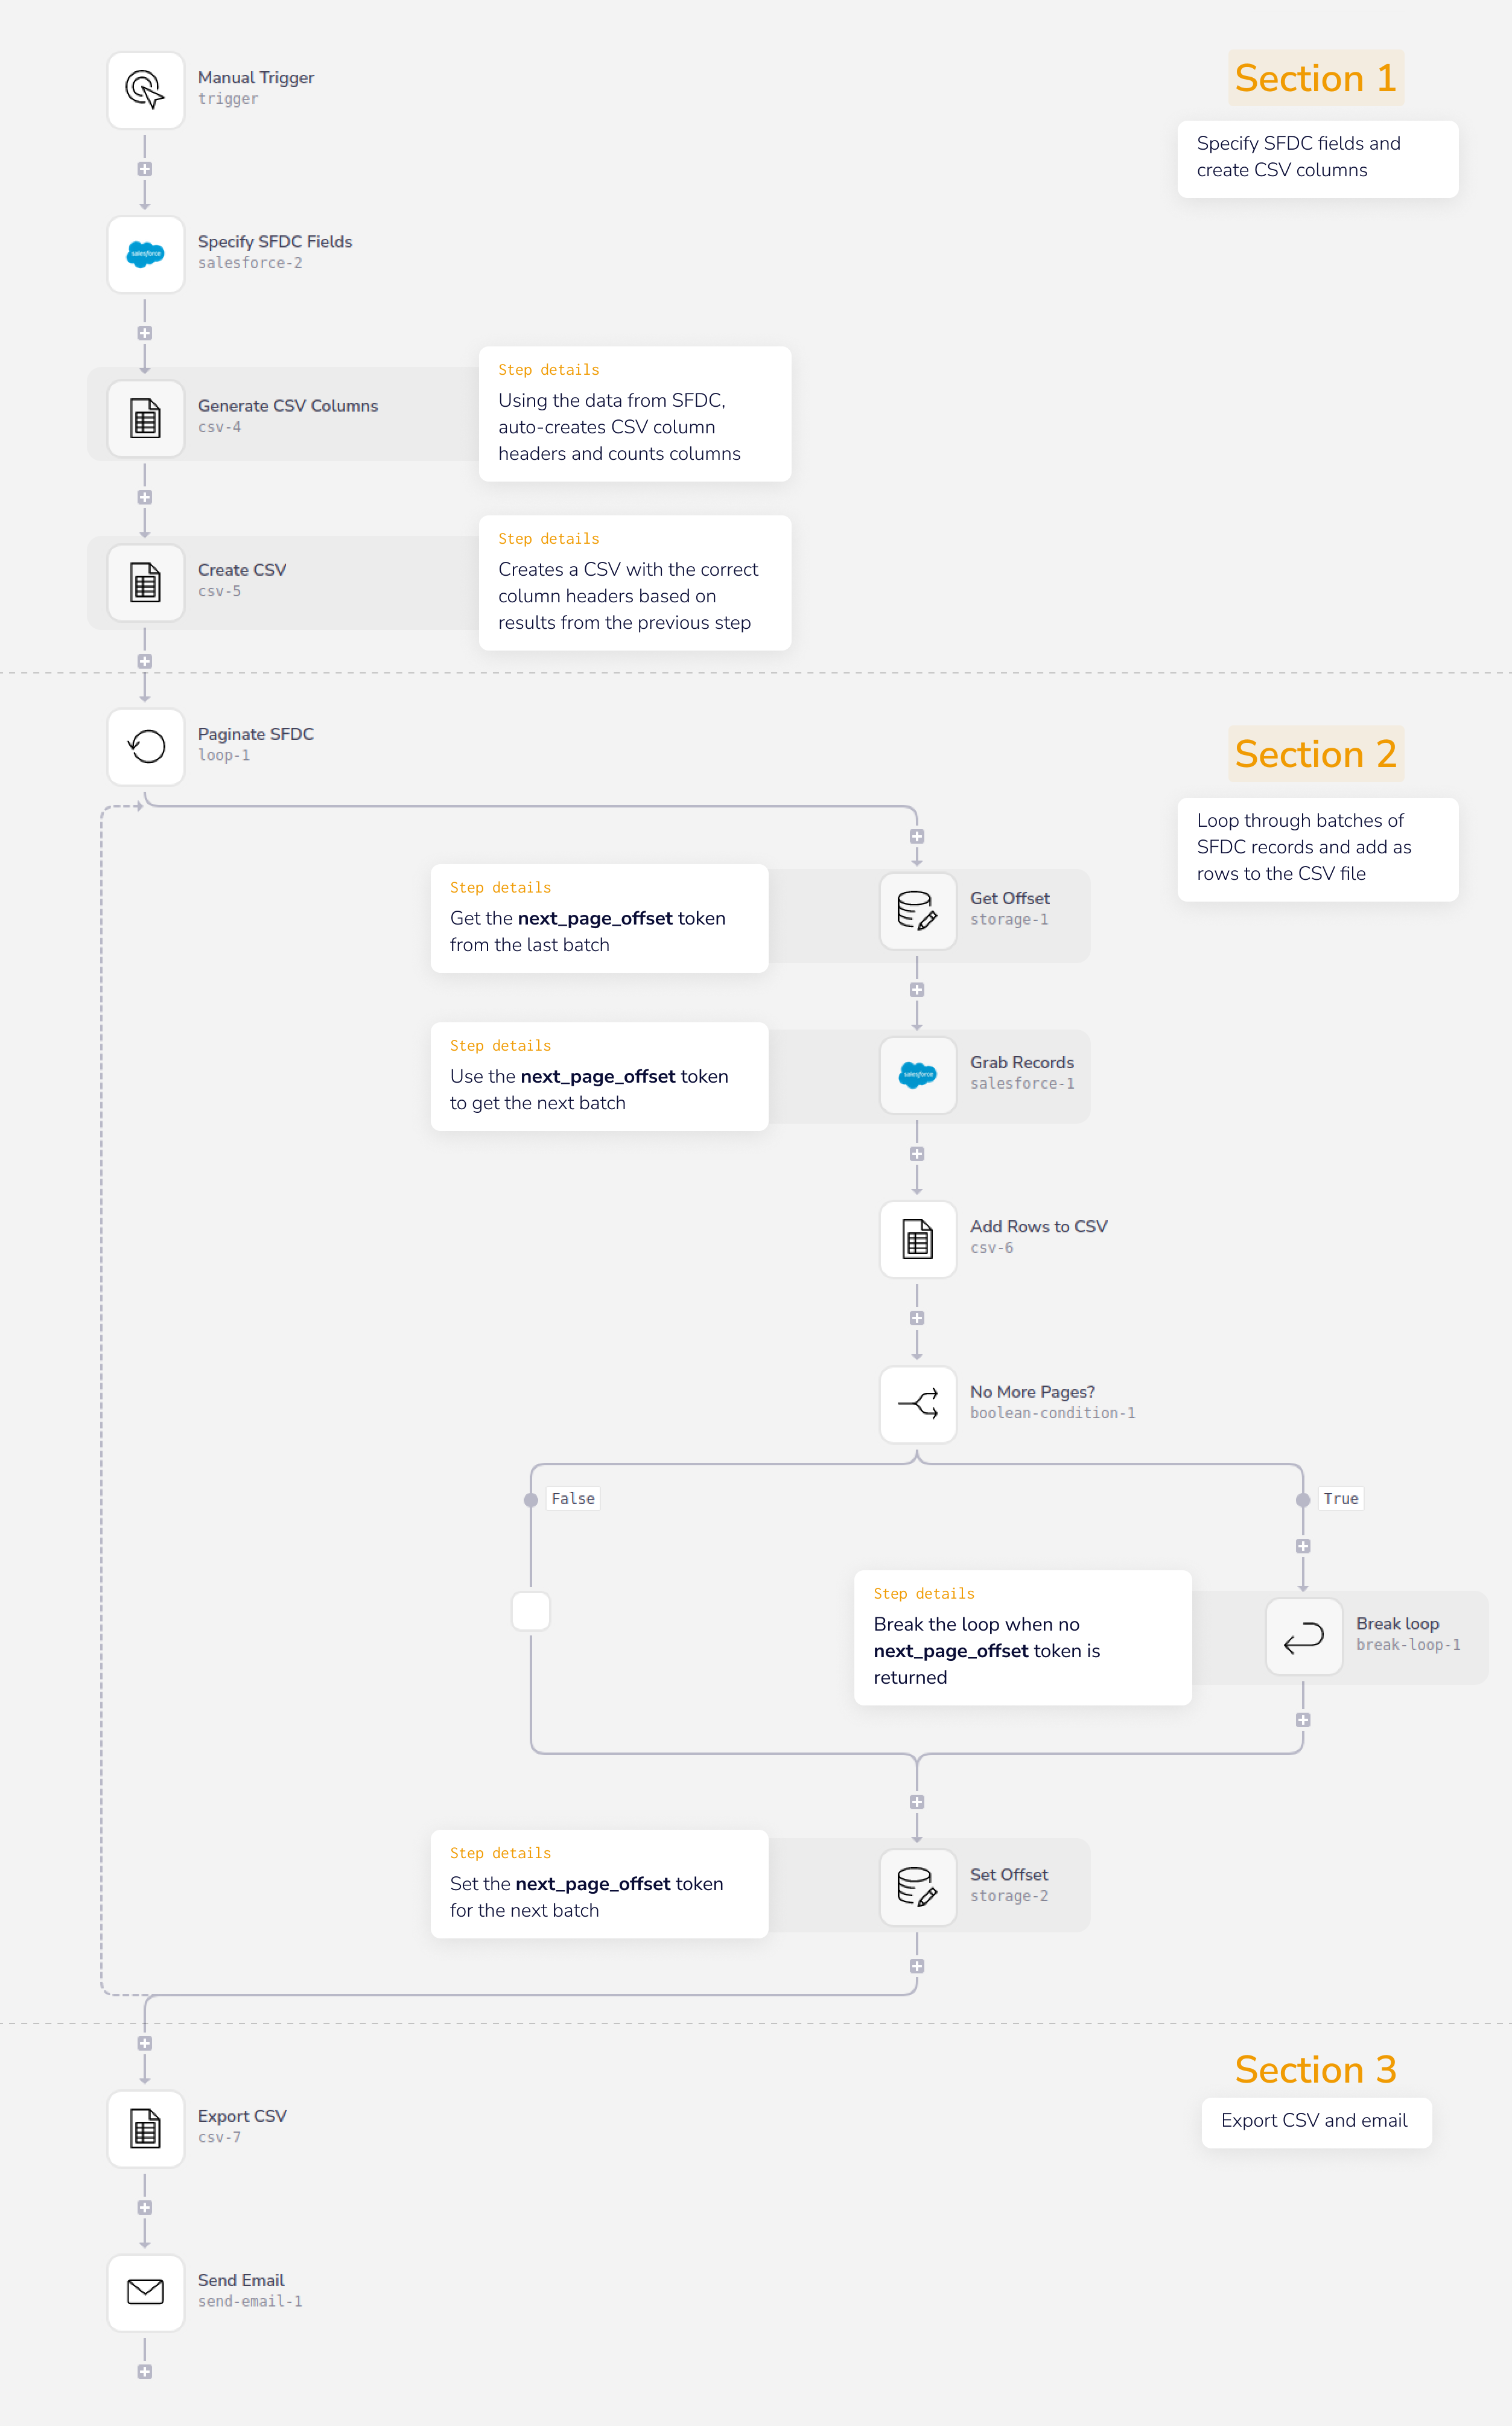
The workflow is triggered manually in this example. This concept can be pulled into any situations where a Salesforce call may result in a list of over 2,000 records.
Getting liveCopy
The following steps will configure this template to meet your needs.
The main point here is that you specify the records and fields to be returned in both Salesforce steps, and the CSV steps will automatically create the CSV for you, and add rows using the pagination loop:
Once these steps are completed, you can click Run workflow at any time to create your CSV!
(Or Enable if you have chosen a scheduled, webhook or service trigger)
For educational purposes the rest of this page will take you through how the workflow template is built to acheive the desired results.
This will help deepen your understanding of Tray.io and will give you the power to maintain and edit your workflow as necessary.
Implementation notesCopy
Creating the CSVCopy
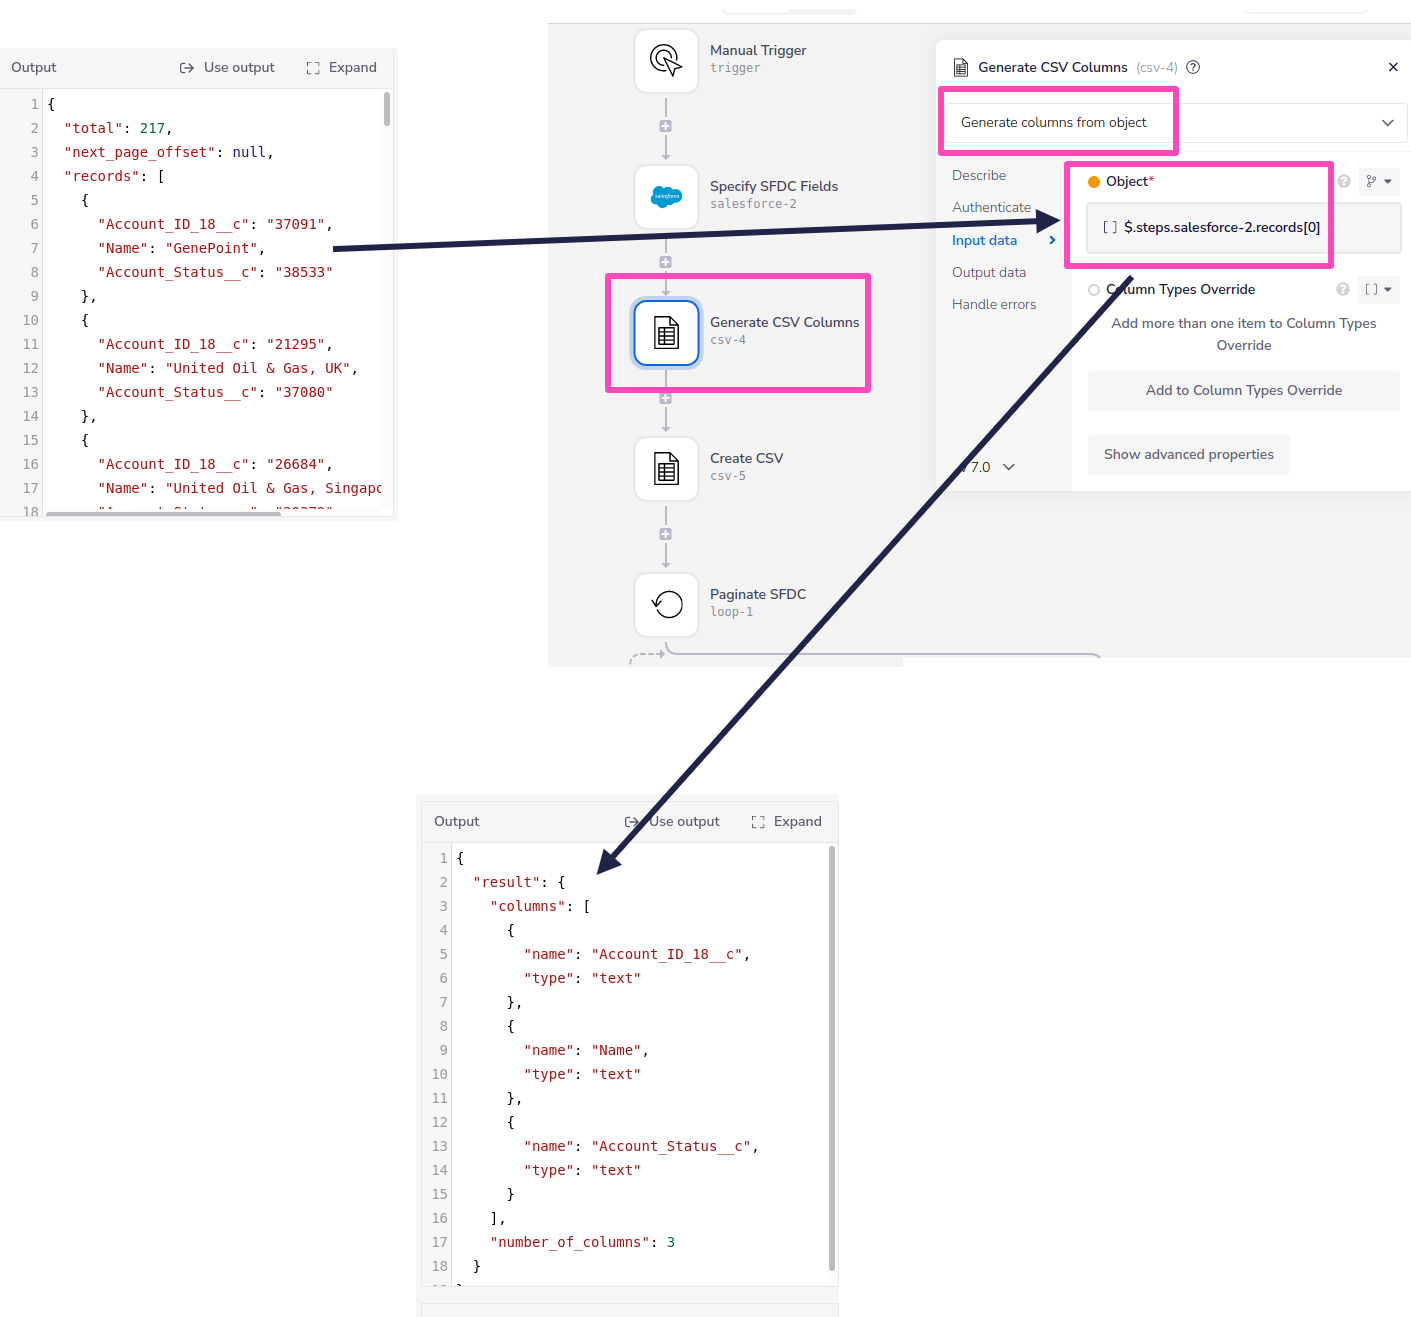
The standard way to create a CSV from a list of records is to use the CSV Editor 'Generate columns from object' operation.
This takes an object from a list of results and auto-generates CSV column headers:

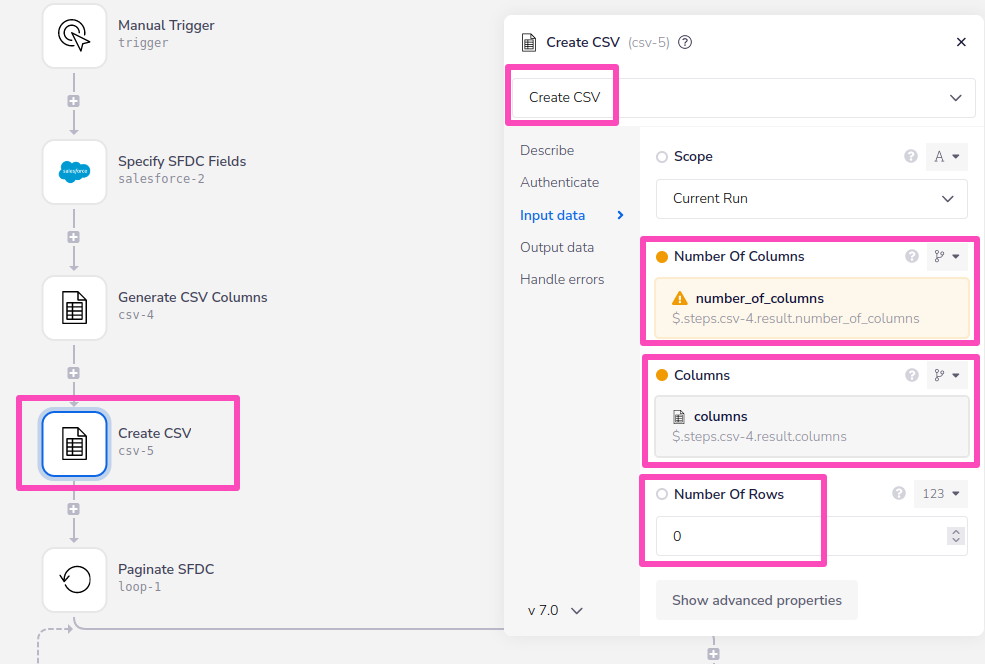
This can then be used to feed the column names and number of columns into a CSV Editor 'Create CSV' step:

Step-by-step ExplanationCopy
You will see that the steps below have both a step name (Specify SFDC fields, Create CSV etc.) and a programmatic name (salesforce-1, storage-1 boolean-condition-1 etc.)
The programmatic name is what enables the use of jsonpaths such as $.steps.storage-1.value to pull data from previous steps in your workflow.
Please note that the numbering of these may appear to be out of sequence in your workflow. This is because your workflow may contain nested loops, multiple branches, booleans etc. which means that a strict top-to-bottom sequence of steps does not always occur.
Steps may also be moved or deleted after they have been created.
Section 1 - Specify SFDC fields and create CSV columnsCopy
Section 2 - Loop through batches of SFDC Records and add to CSVCopy
This is a 'Loop forever' loop which breaks when no more batches are to be processed, as indicated by a null 'next_page_offset':