

Sync HubSpot contacts to Salesloft people
This is a 'Workflow' template which means that it is a single standalone workflow.
Some workflow templates can be modified to work with other workflow templates - e.g. to convert a data sync between two services from uni-directional to bi-directional
OverviewCopy
This workflow synchronizes the creating and updating of contacts in Hubspot and Salesloft. It is triggered by any changes occurring in Hubspot, which are then synced to Salesloft.
The Hubspot trigger is fired every time an action occurs in Hubspot.
If the change that fired the trigger includes actions such as creating a new contact, updating details of an existing contact, or deletion of a contact, then that change will be made to the corresponding contact in Salesloft.
Connectors UsedCopy
The following connectors are used in this template. This is provided for reference only - there is no need to read through the linked connector pages, as all you need to know for this template is explained here:
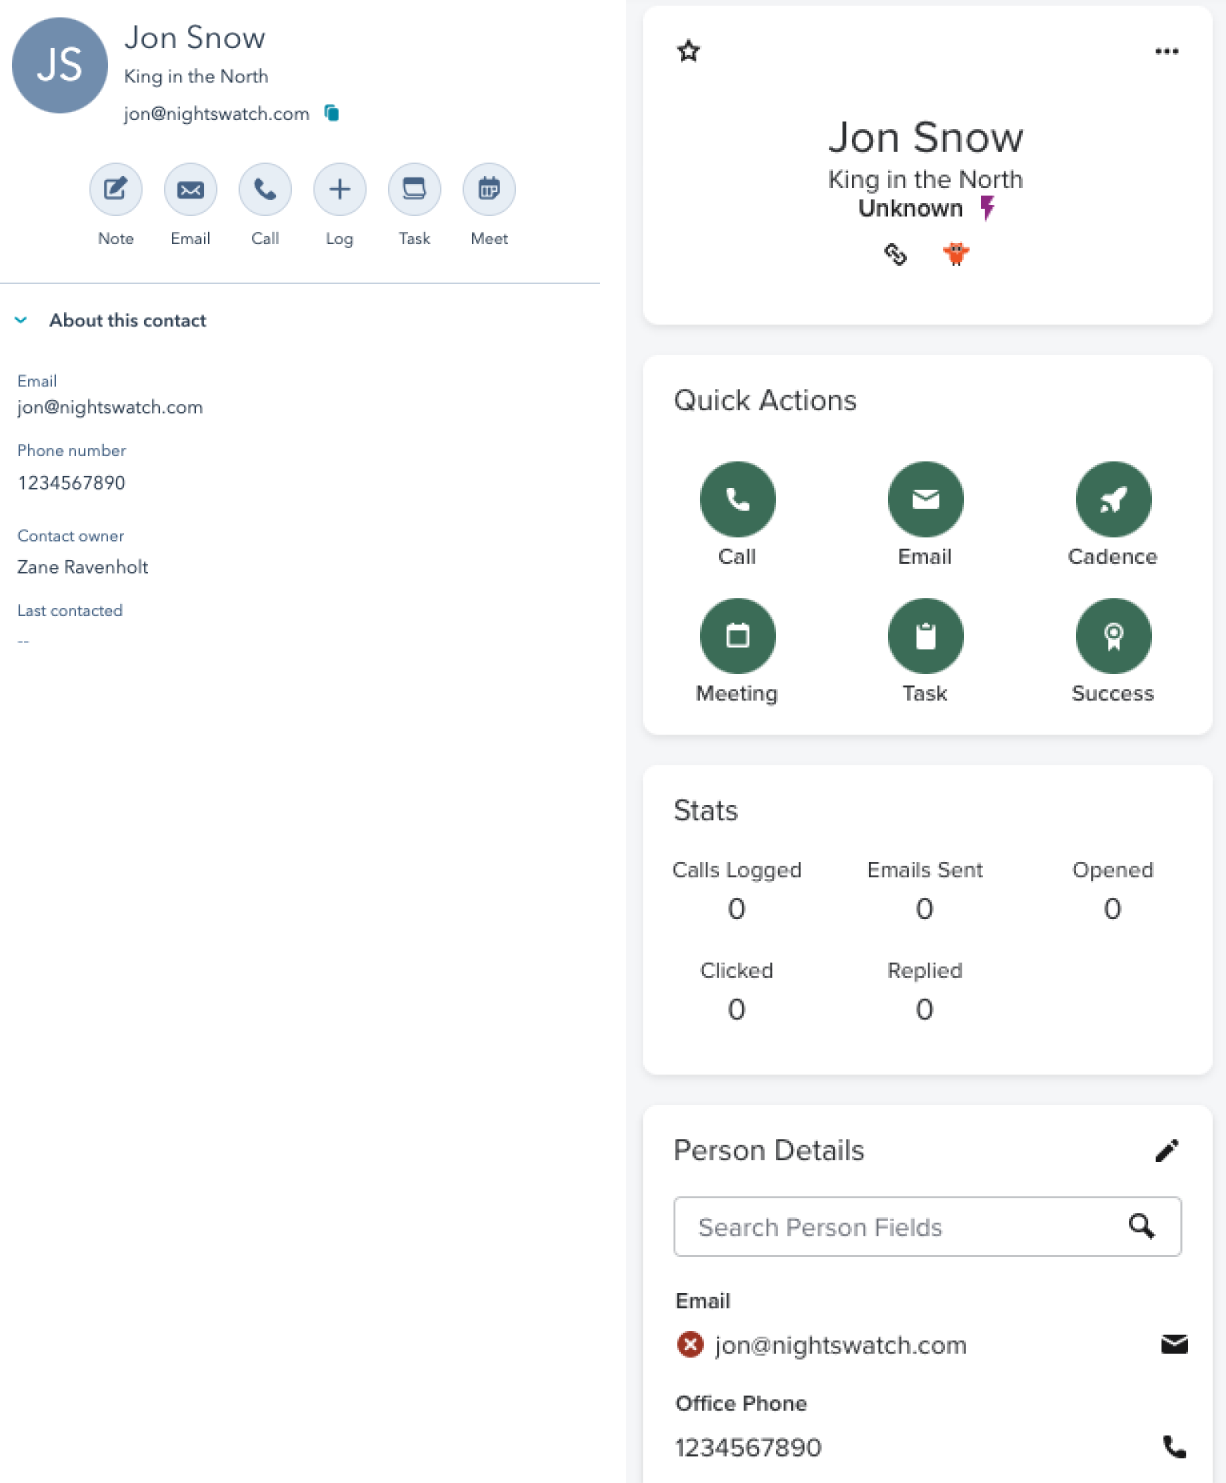
End ResultCopy
The image below shows a synced contact in Hubspot and Salesloft:

PrerequisitesCopy
This workflow assumes the following:
You have API Credentials for Hubspot and Salesloft.
You have added a custom “Hubspot Id” field to Salesloft, to act as a unique identifier which links the accounts (as explained in the
<Content type in custom component span TBD>
).
Getting LiveCopy
In order to configure this workflow for use:
Add authentications for Hubspot and Salesloft.
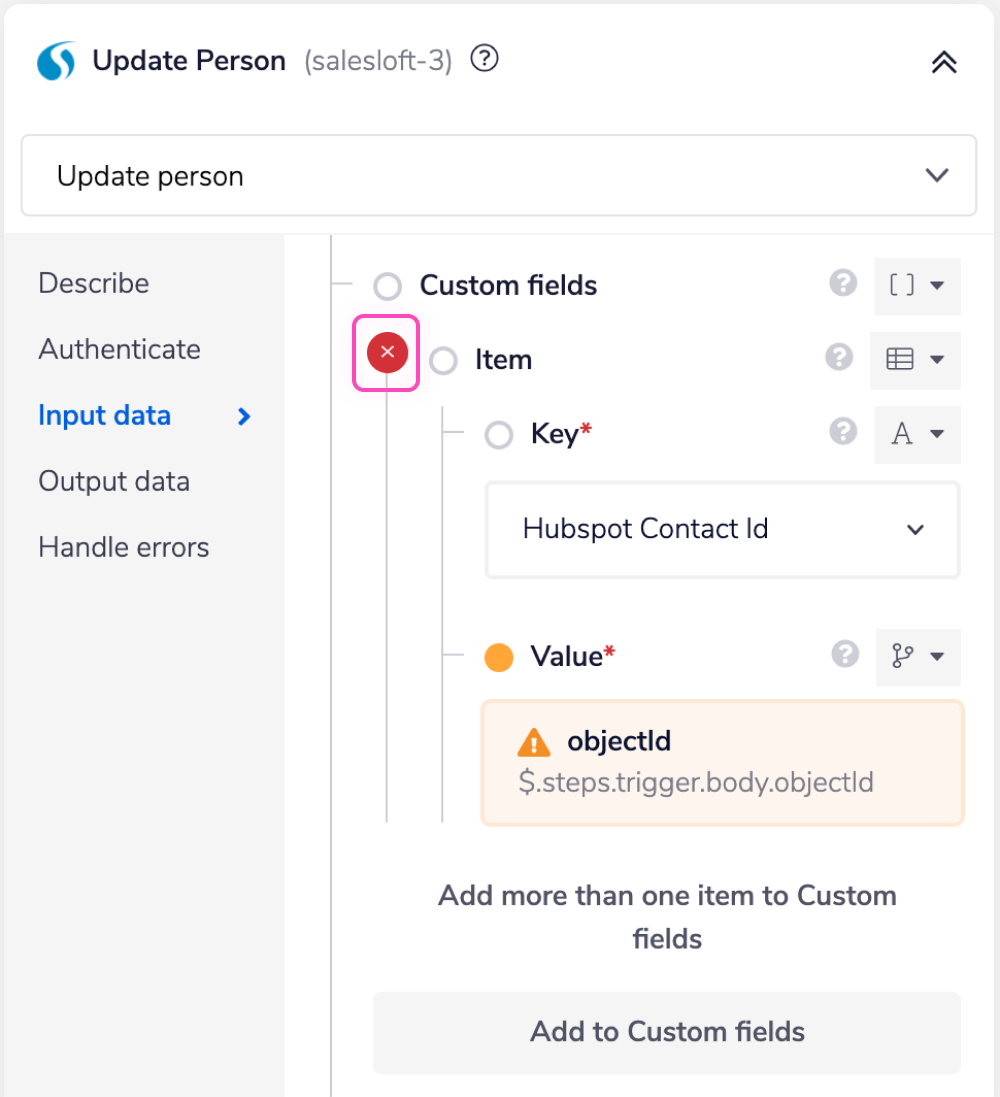
Decide if you want to support deletions or not. Deletion can only be supported by adding a custom 'Hubspot Id' field in Salesloft because we get notified of a contact's deletion in Hubspot after the data is already deleted, so we cannot get any information about the contact (i.e. their domain) from Hubspot, except the initial Id that is presented with the deletion.
If you do want to support deletion, login to your Salesloft account and add a custom field called 'Hubspot Id' to the account object (as explained in
<Content type in custom component span TBD>
).
If you do not want to support deletion, simply remove the custom field section of the Create Account and Update Account steps in your Tray workflow. Then change the Delete?(boolean-condition-3) step to a Terminate step.
Enable the workflow. This will set up the necessary webhook within Hubspot automatically if you have authenticated correctly. Once enabled, test creating/updating a new person within Hubspot; you should see their information enter the debug log and go through the flow to Salesloft.

For educational purposes the rest of this page will take you through how the workflow template is built to acheive the desired results.
This will help deepen your understanding of Tray.io and will give you the power to maintain and edit your workflow as necessary.
Workflow LogicCopy
The overall logic of the workflow is:
The trigger waits for Hubspot to notify Tray of contact creations, updates, or deletions.
The workflow determines whether the change is a create/update of a contact or a deletion of a Contact.
For creation and updating, Tray collects personal information on that contact from Hubspot. That data is then sent over to Salesloft.
For deleting (if set up), when a Hubspot contact is deleted, Salesloft looks for the account with a matching Hubspot ID and deletes that person.

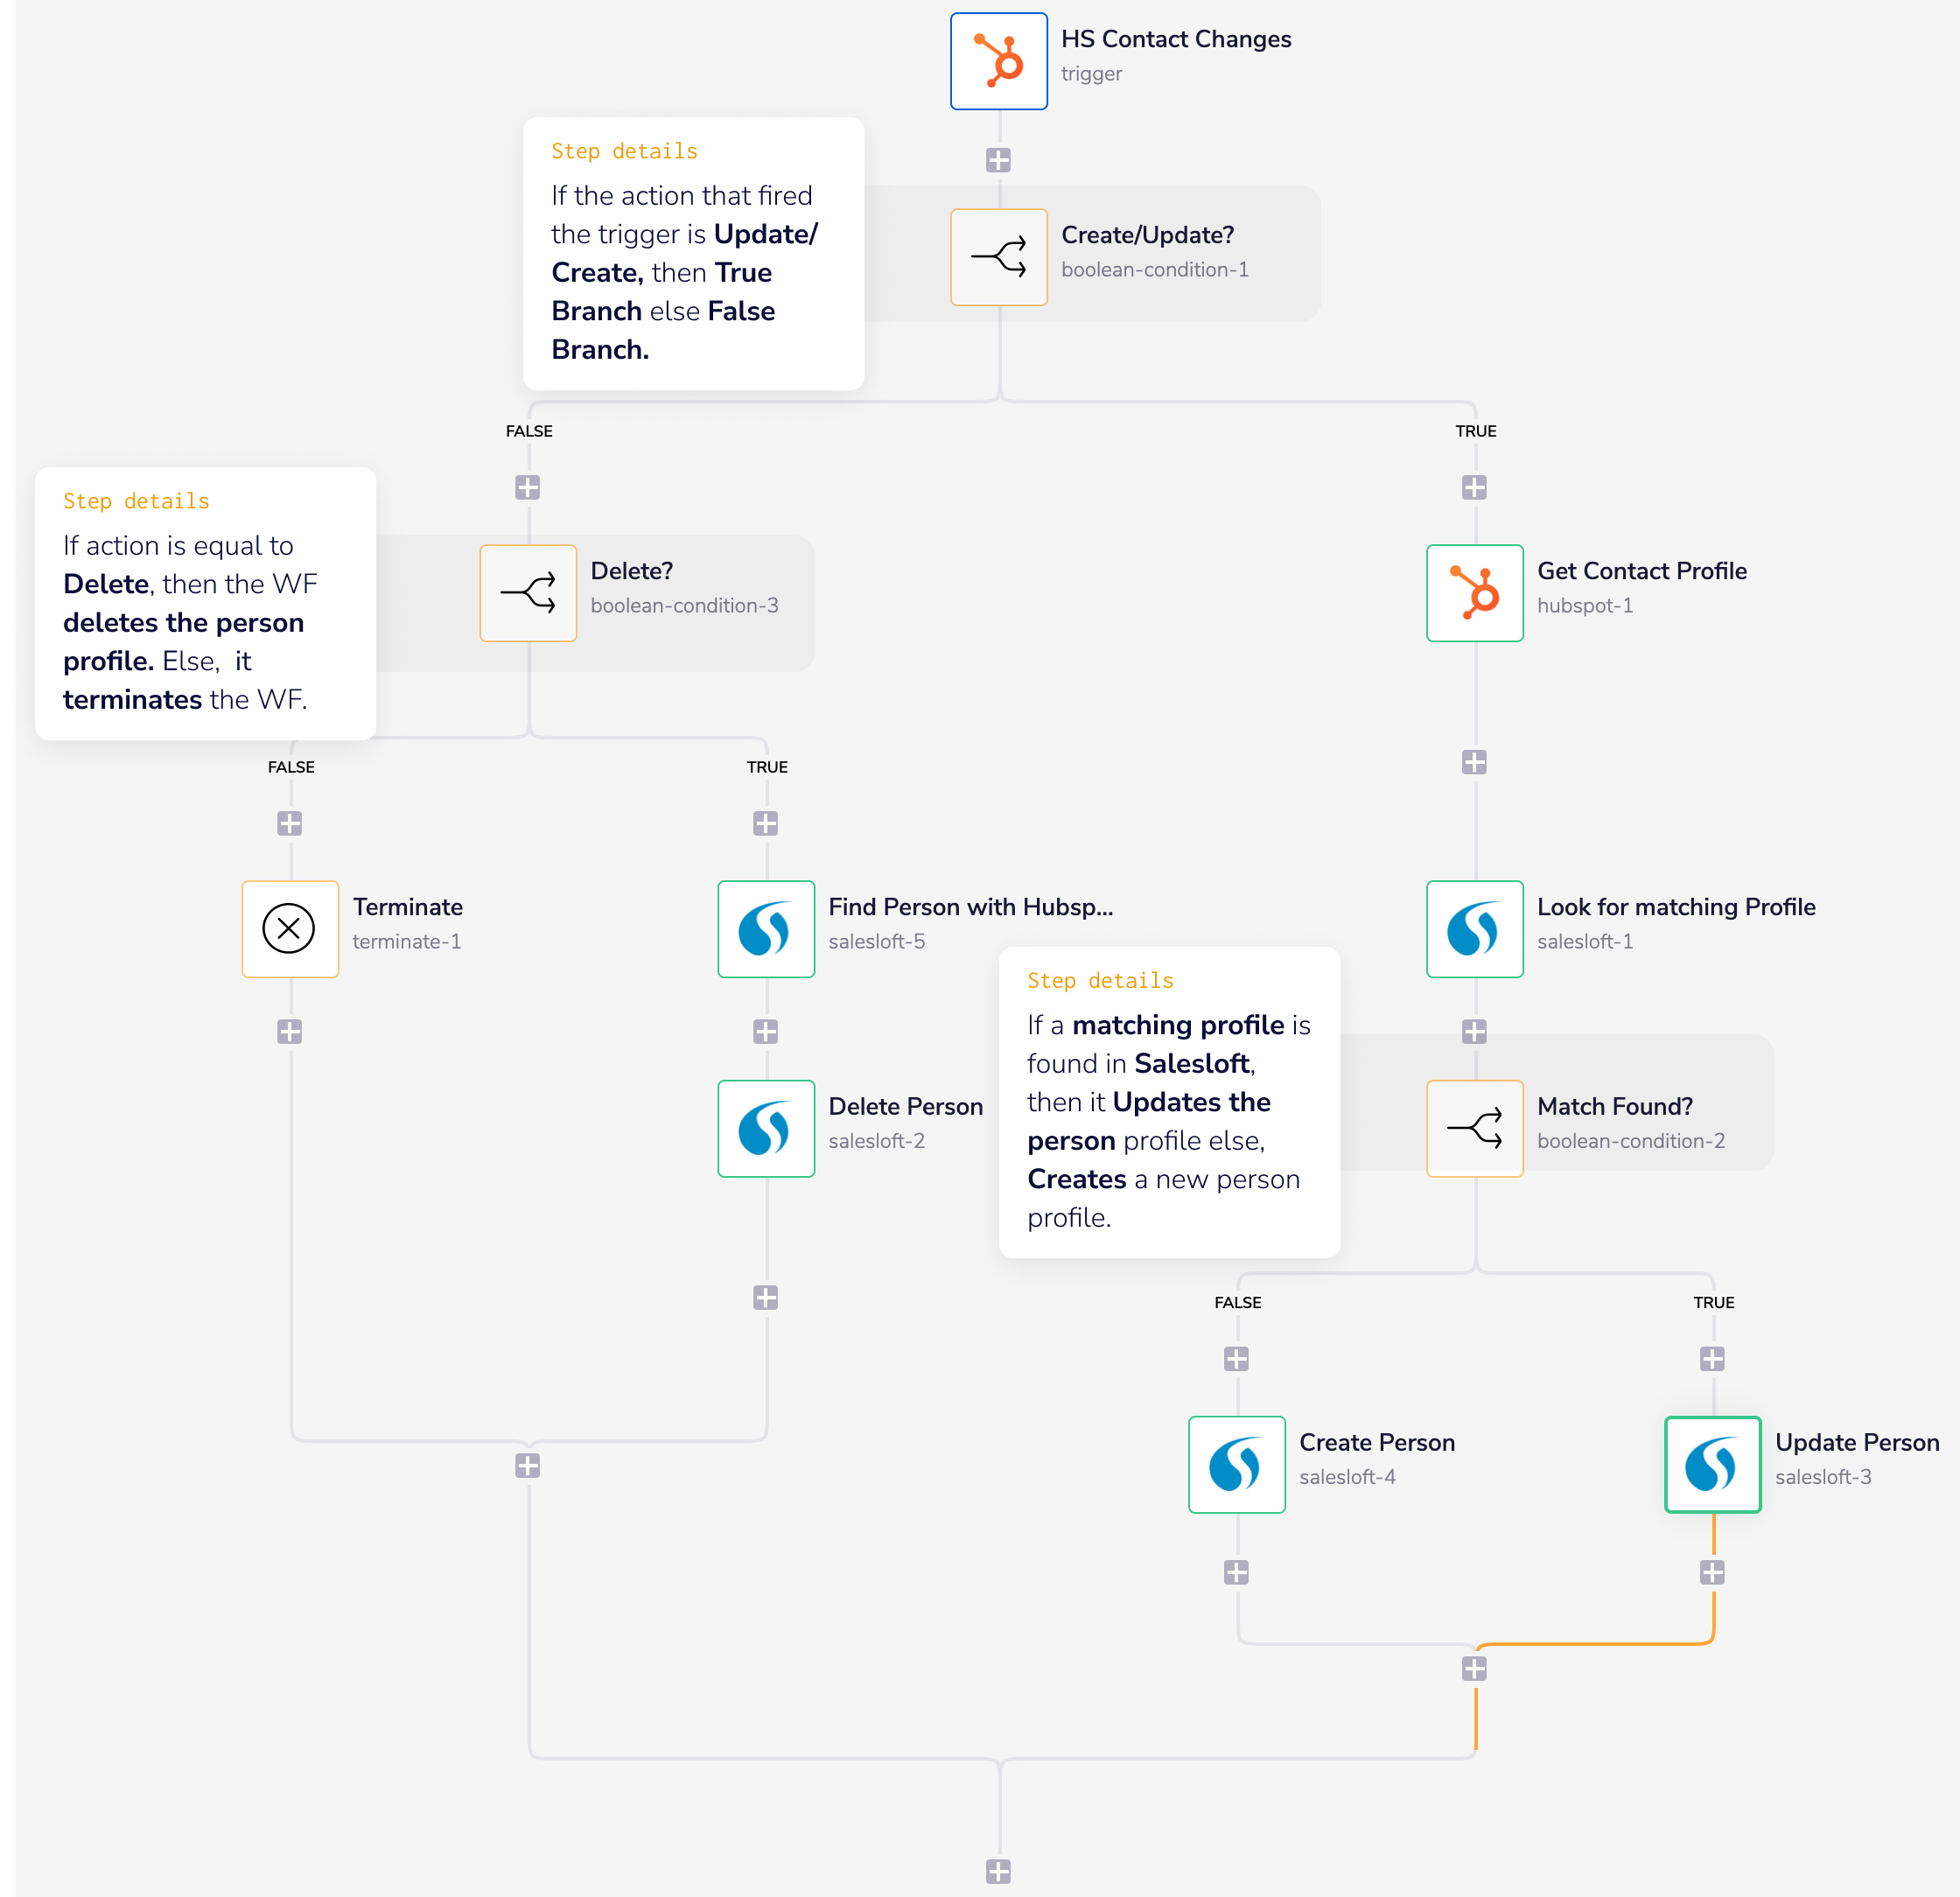
Step-by-step ExplanationCopy
You will see that the steps below have both a step name (Create/Update?, Get Company Profile etc.) and a programmatic name (boolean-condition-1 salesloft-5 etc.)
The programmatic name is what enables the use of jsonpaths such as $.steps.boolean-condition-1.result to pull data from previous steps in your workflow.
Please note that the numbering of these may appear to be out of sequence in your workflow. This is because your workflow may contain nested loops, multiple branches, booleans etc. which means that a strict top-to-bottom sequence of steps does not always occur.
Steps may also be moved or deleted after they have been created.