

Migrate Salesforce contacts to Mailchimp
This is an 'Embedded Solution' template which means that it contains 'Config Slots' that allow End Users to configure it for their own use
For more details please see our Tray Embedded documentation
Please note that you will be unable to use this template if you do not have an Embedded account


OverviewCopy
When a new Salesforce contact is created, manually updating the contact details in your marketing platform like Mailchimp is a time-consuming process.
Relying on manual data entry leaves space for human errors.
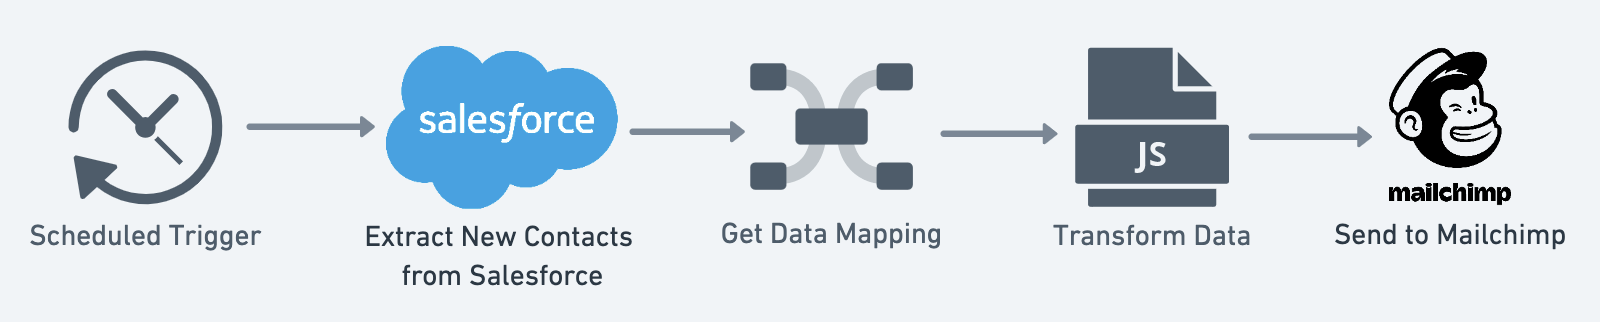
This template automates the process and eliminates any errors that might occur, by:
Checking for new contacts in Salesforce every day
Cleaning and transforming the data to be inserted into Mailchimp
Inserting the contact into Mailchimp

End User experienceCopy
Once you have published your Solution, the following diagram illustrates the process from an End User point of view:

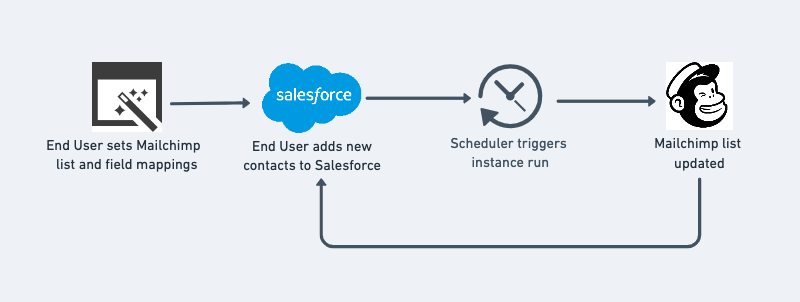
Via the Config Wizard, this Embedded template allows End Users to specify:
Once their Solution Instance is configured they can:
Add new contacts to their Salesforce organization
Use the new contacts in Mailchimp next day
Connectors UsedCopy
The following connectors are used in this template. This is provided for reference only - there is no need to read through the linked connector pages, as all you need to know for this template is explained here:
PrerequisitesCopy
This workflow assumes the following:
You can authenticate with Salesforce
You can authenticate with Mailchimp
You have a Mailchimp list for cohorts to be assigned to
Installing and testingCopy
Since it's a scheduled trigger, the easiest thing for testing the solution is to replace the trigger with a webhook trigger.
This way, you will be able to trigger the instance by just hitting the workflow url in your browser and won't have to wait for the time interval to expire for running the instance. You can replace the webhook with the scheduled trigger when you are happy with the testing.
1. Import the project by clicking on 'Use Template'.
2. Add auths for services (Mailchimp and Salesforce)
3. Make any necessary text edits etc. in the Config Wizard (Optional)
4. Publish the solution
5. Test the solution:
Going to productionCopy
You can follow the Integration Walkthrough to build an end user experience using Embedded APIs.
After the initial run of their instance, any time an End User wants to change the Mailchimp audience list or the targeted Salesforce org you can let them:
Edit their Instance where they re-run the Config Wizard and can specify a new channels or provide a new auth for Salesforce or a new slack auth.
Solution SlotsCopy
In order to allow your End Users to configure the integration for their own use, the following auth slots are available in the template project.
Salesforce
Mailchimp
Plus the following config slots:
This means that, via the Config Wizard, End Users will be asked to authenticate with Salesforce and Mailchimp.
And they will be asked to select the Salesforce object to migrate to, decide field mappings and what fields to send, the mailing list contacts would be added to in Mailchimp and the subscription status of the new contacts that would migrate.
If required, you could set other fields as config values, e.g.
- The Scheduled Trigger interval to allow End Users to choose the time intervals (eg. once every day, once every hour etc.) they want their instance to run
Workflow LogicCopy
There are 3 main sections in the workflow:

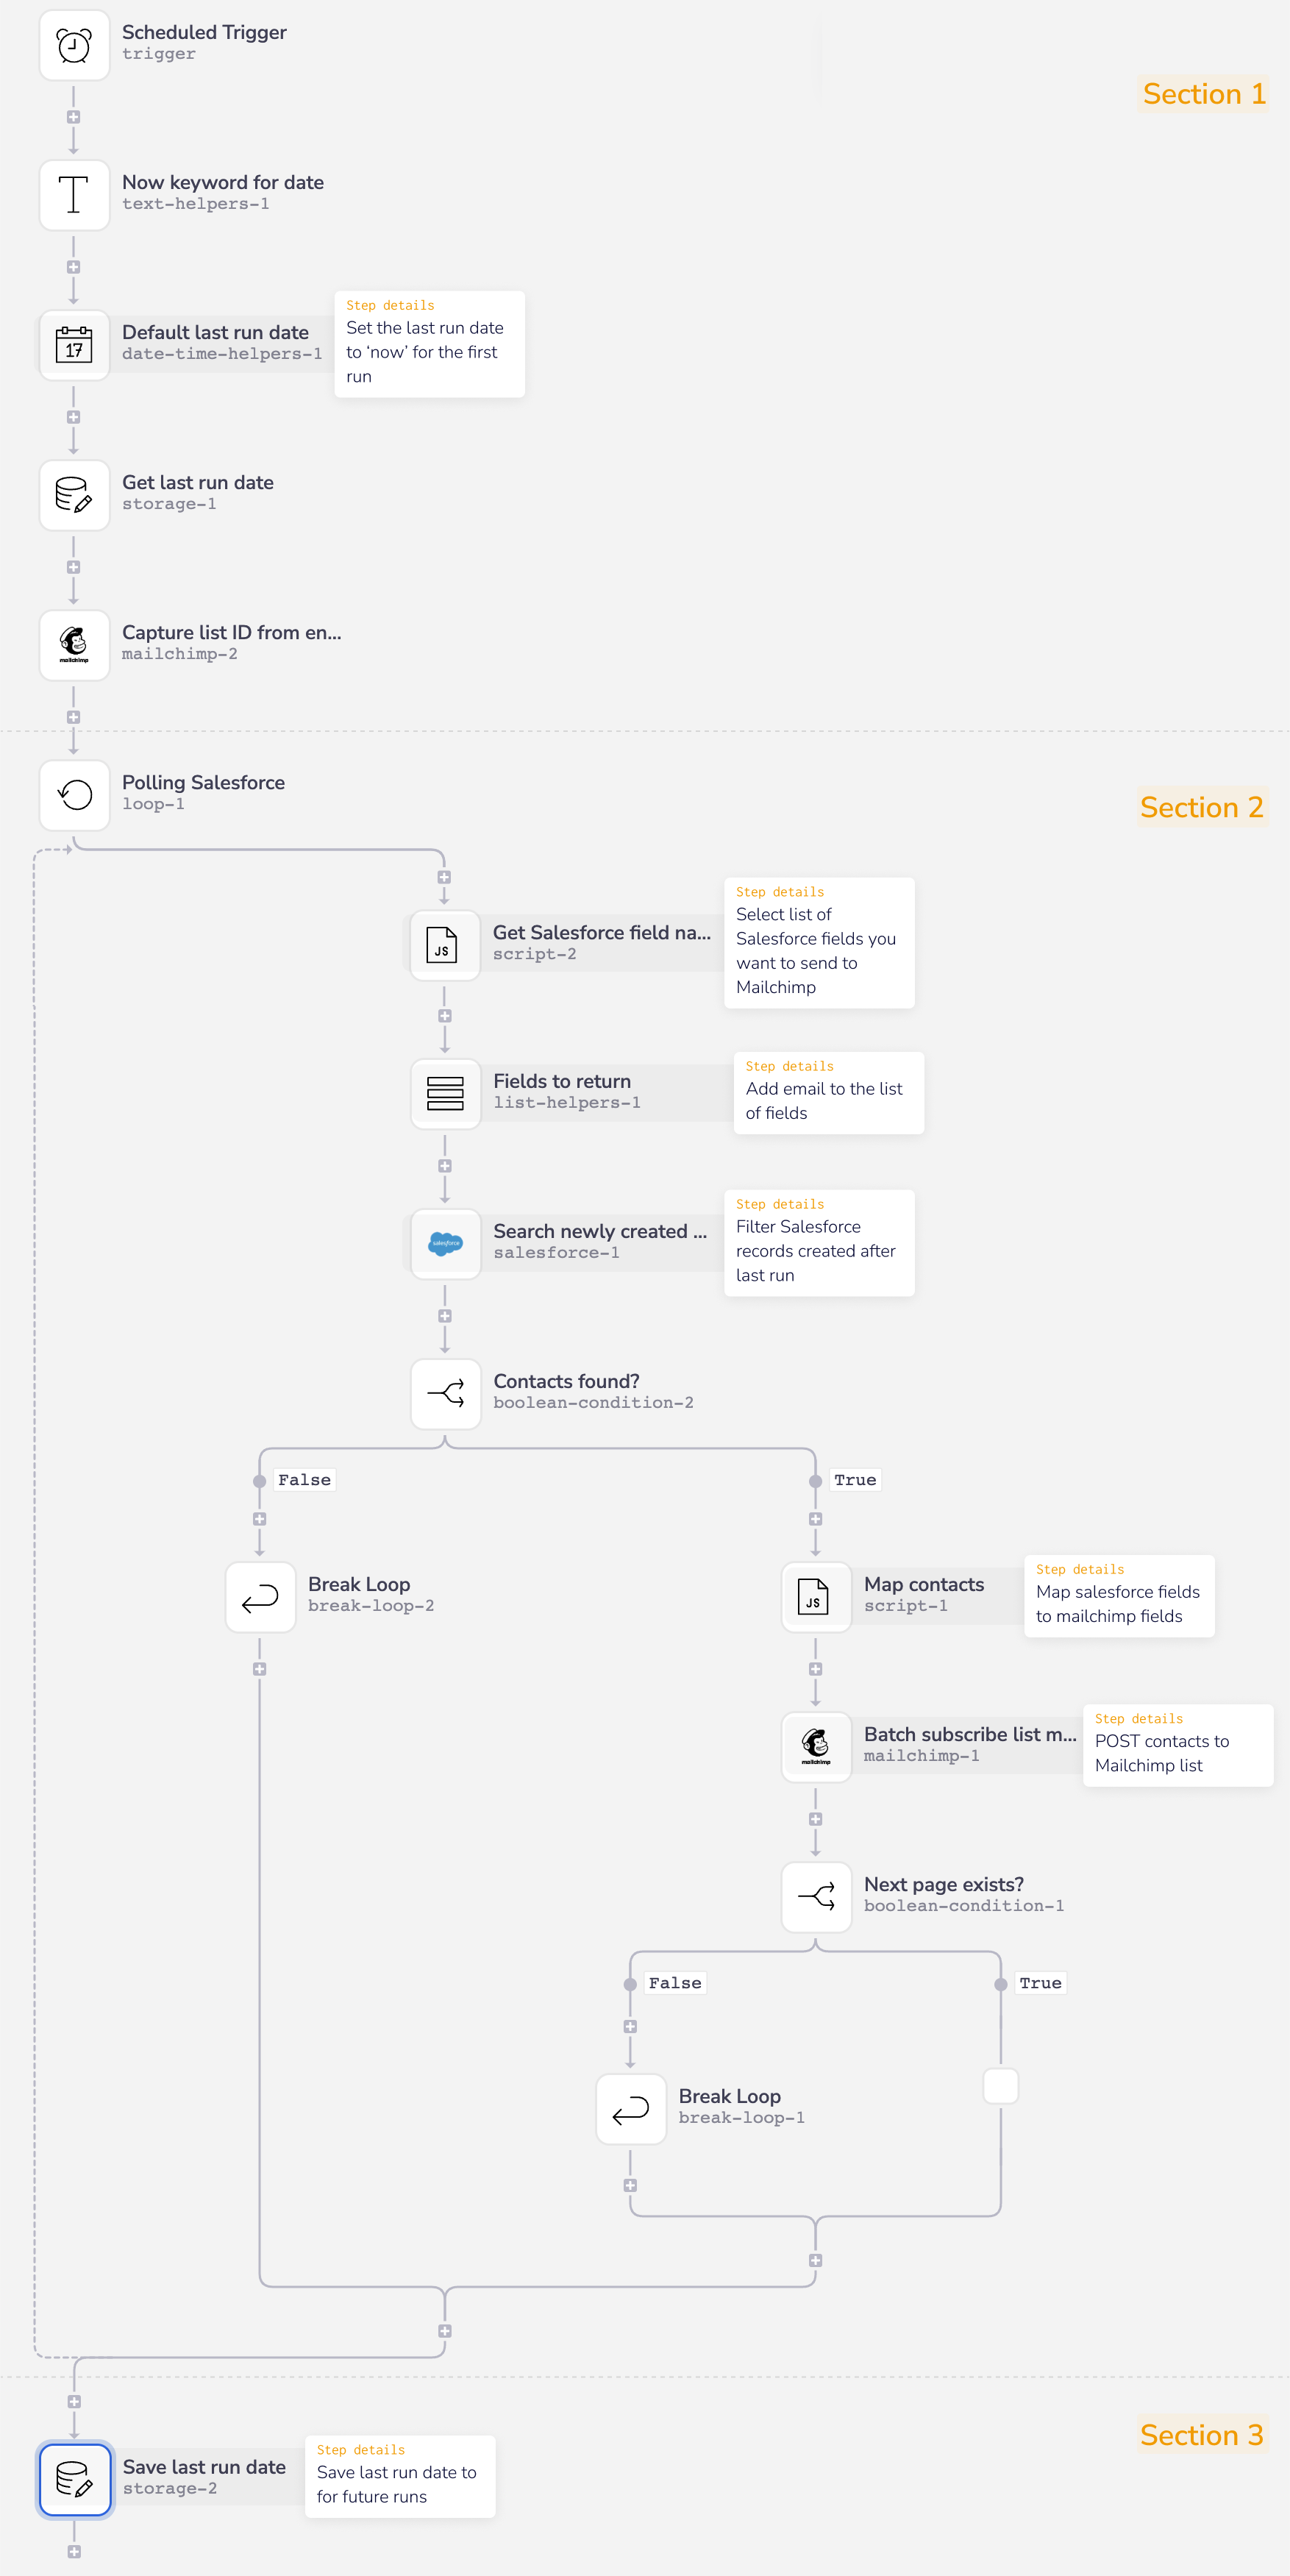
Section 1 Collects information about when the last workflow run, and gets the Mailchimp list ID that you want to interact with from the Config section of the Solution.
Section 2 A loop goes through every page of Contacts in Salesforce, only grabbing Contacts that were created since the last workflow run. The Contact data is cleaned and transformed, then the processed data is uploaded in bulk to Mailchimp. This section keeps repeating itself until all pages have been migrated.
Section 3 Marks the time of this run and saves it to be the “last run date” for the next workflow run.