
ProdPad 2.3
The tray.io ProdPad connector allows you to manage ideas in ProdPad.
- On this page
- ProdPad
- Overview
- Authentication
- Example
OverviewCopy
AuthenticationCopy
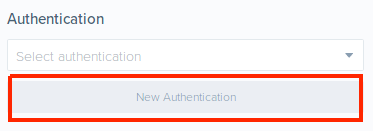
When using the ProdPad connector, the first thing you will have to do is click on 'New Authentication' in the step editor:

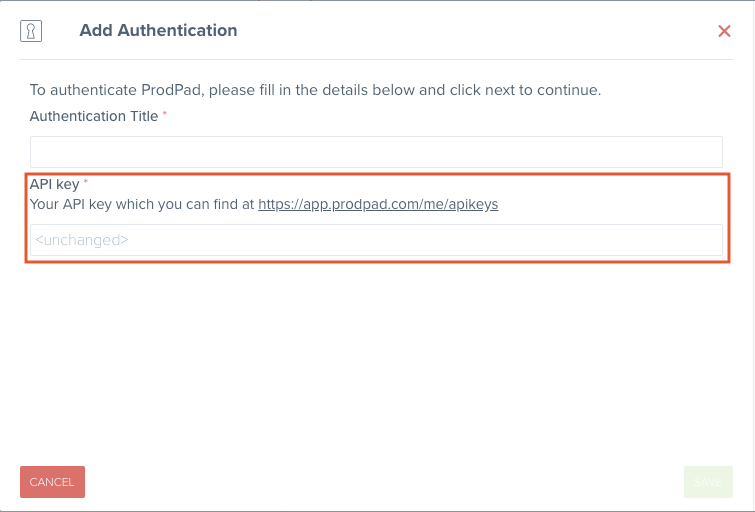
On the following page enter the API key for your account, which you can find at https://app.prodpad.com/me/apikeys:

ExampleCopy
In this example we will create a new idea, retrieve different properties from the idea and then change the status of the idea.
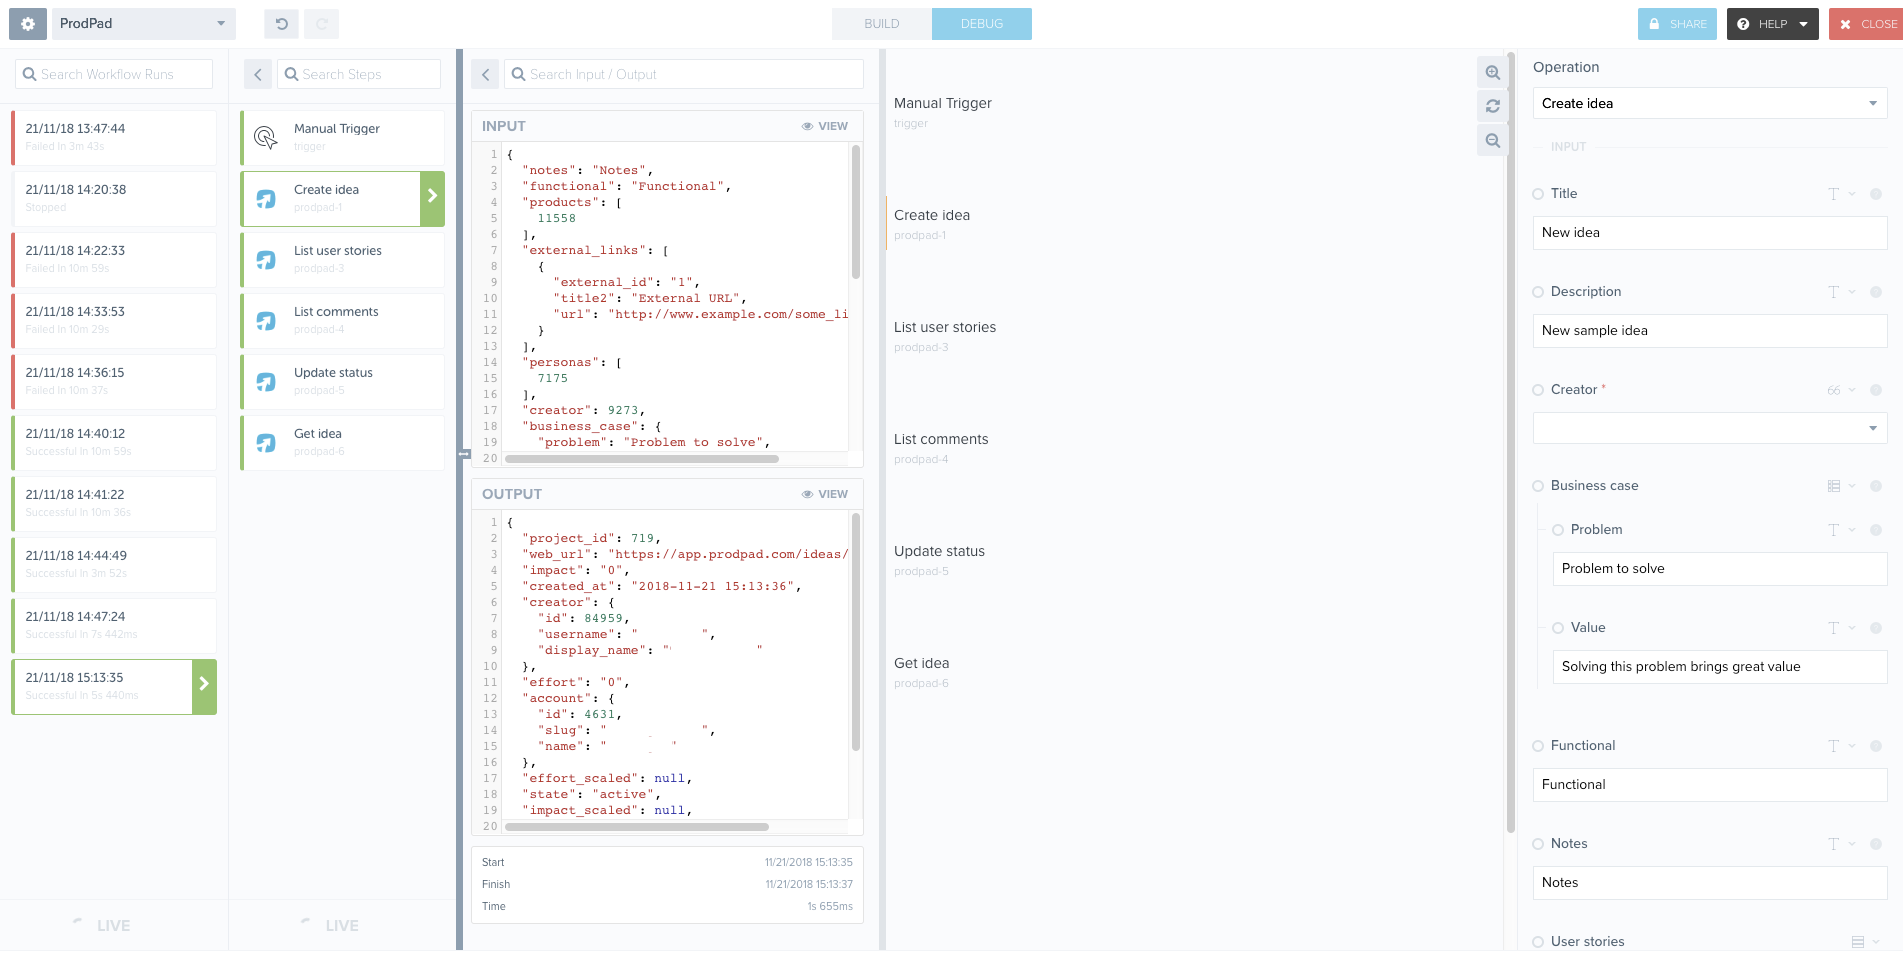
The first step is to create a workflow with a Manual Trigger, and then add our first operation from the ProdPad connector, which is the Create idea operation. In the input panel, you can input the following as an example:
Title: "New idea"
Description: "New sample idea"
Creator: [Select one from the dropdown]
Business case:
Problem: "Problem to solve"
Value: "Solving this problem brings great value"
Functional: "Functional"
Notes: "Notes"
User stories: [Add Story with Story: "User Story"; Acceptance criteria: "Acceptance criteria"]
Comments: [Add Comment with Comment: "Comment to be assigned to user"; User ID: [Select one from the dropdown]]
Products: [Add Product with Product: [Select one from the dropdown]]
Personas: [Add Persona with Persona: [Select one from the dropdown]]
Tags: [Add Tag with Tag: [Select one from the dropdown]]
External links: [Add Link with External ID: 1, Title: "External URL", URL: "http://www.example.com/some_link"]
Status: [Select one from the dropdown. We choose "Queued for Dev" for the purpose of this example]
State: [Select one from the dropdown]:

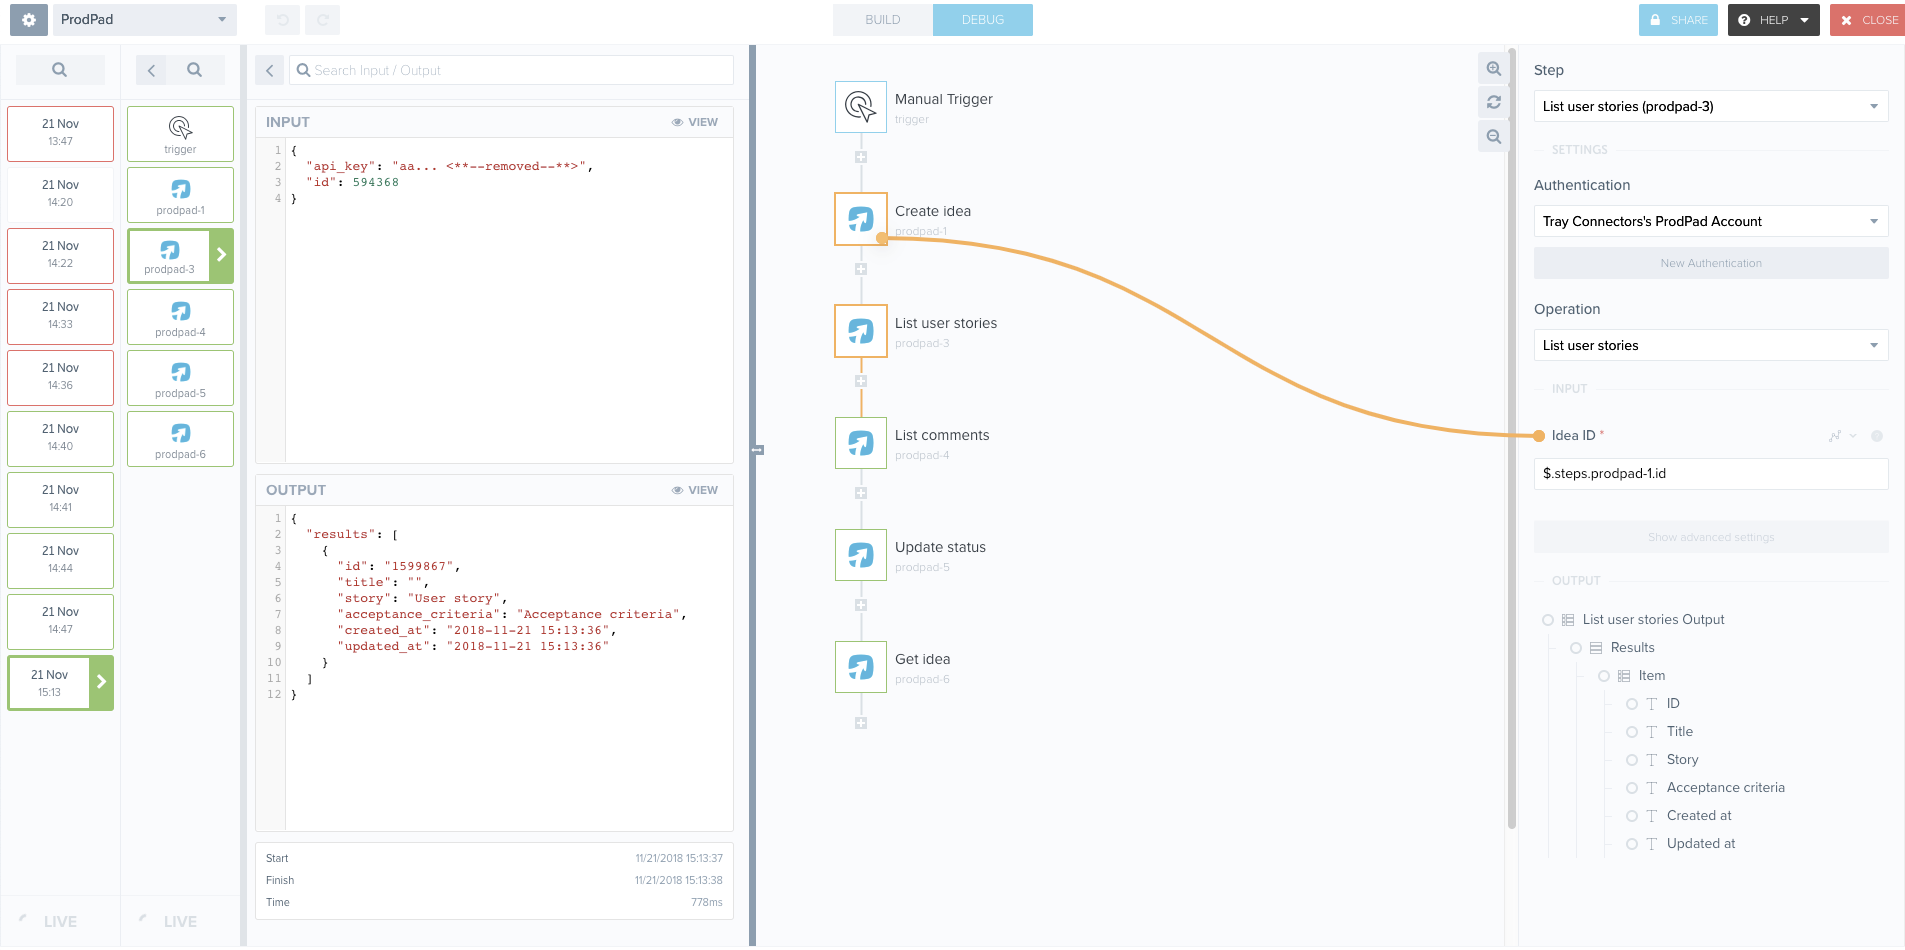
Next we use the List user stories operation to retrieve the user stories we have associated with the idea. We set the Idea ID to the ID returned by the Create idea operation and in the output we see the user story/ stories we assigned to the idea when we created it:

We can do the same for the Comments, using the List comments operation and we retrieve the comment(s) we assigned to the idea in the previous step.
Next, we use the Update idea status operation to change the status of the idea. We set the Idea parameter to the ID returned by the Create idea operation, we set the Status parameter to a different value than what we assigned initially, for example "in Development". We select a user from the dropdown, and write a comment. The output will show the ID of the new status as well as the comment we have assigned to the status update:

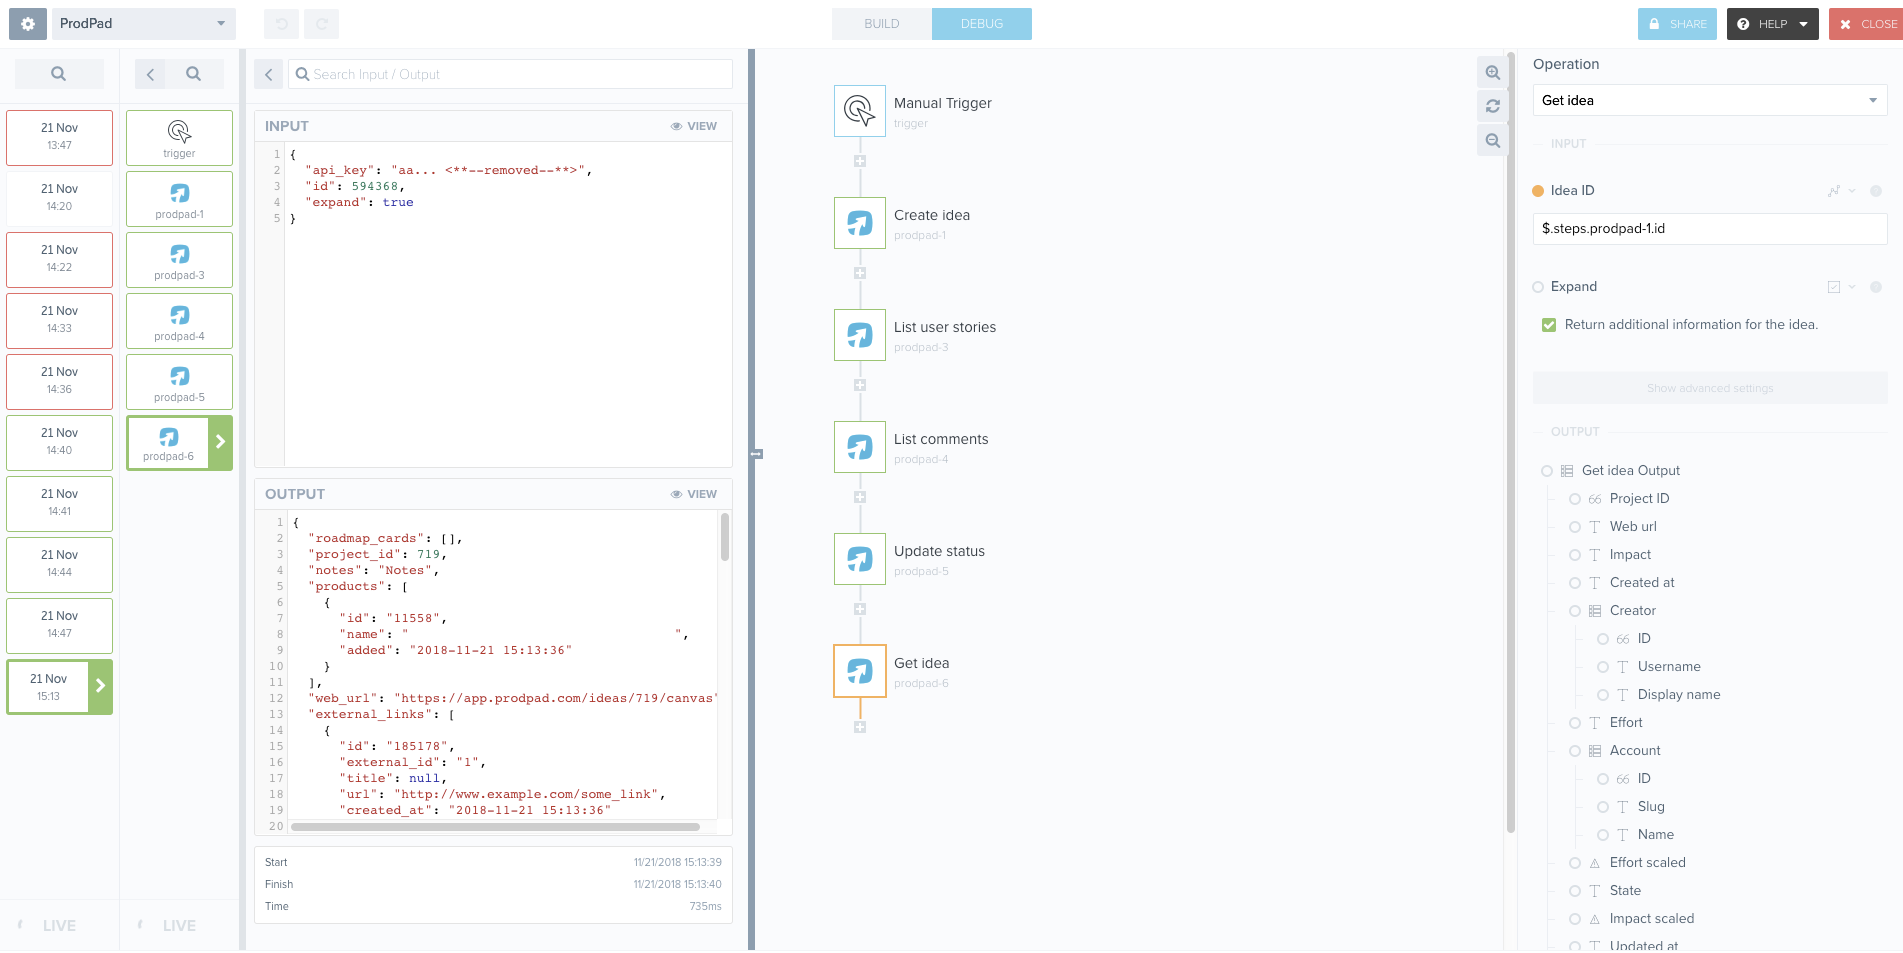
Finally, we use the Get idea operation to retrieve the entirety of the idea we generated in the second step of the workflow (Create idea). We tick the Expand parameter to retrieve the complete contents of the idea:
Prodpad TriggerCopy
The Prodpad trigger allows you to receive notifications and trigger workflows when given events occur associated with the selected trigger operation.
Trigger Operations available:Copy
Webhook
Webhook SetupCopy
Select the Prodpad trigger. This can be done at the create new workflow stage or updated within the workflow builder itself.
Highlight the Prodpad trigger. In the Prodpad trigger properties panel to the right of the builder, click on the Auth tab and the 'New authentication' button.


This will result in a Tray.io authentication pop-up modal. The first page will ask you to name your authentication and select the type of authentication you wish to create ('Personal' or 'Organisational').
The next page asks you for your 'API key' and 'Environment' Prodpad credentials.


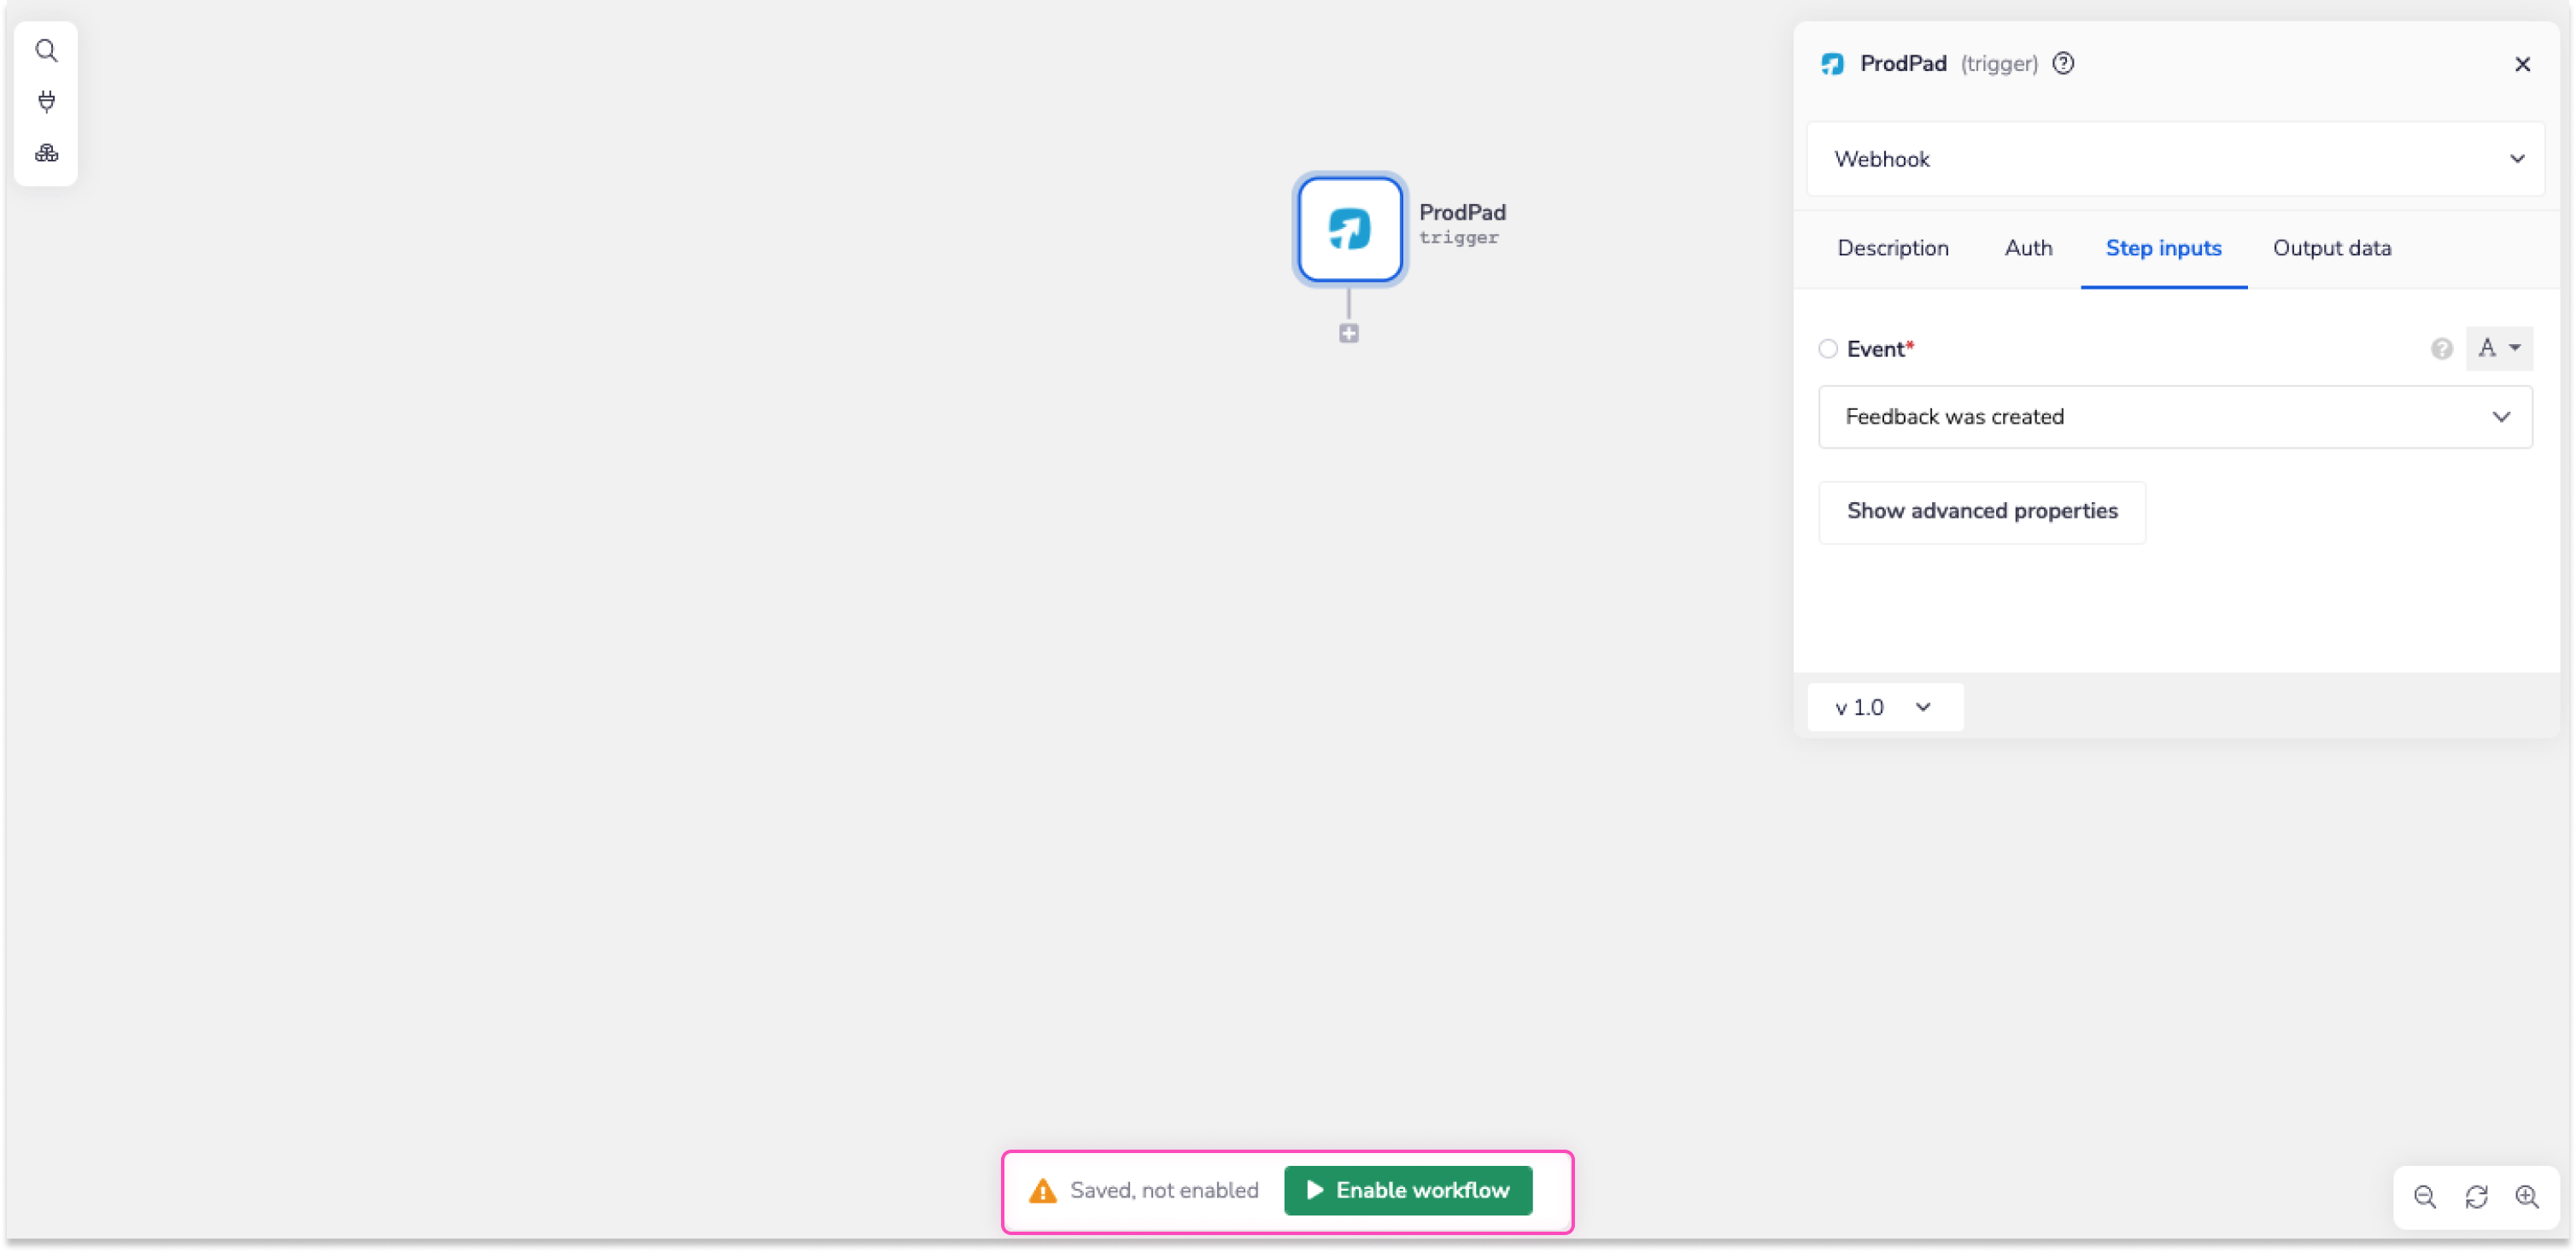
Follow the instructions above to authenticate your trigger. Select 'Webhook' as the operation you wish your trigger to listen to in order to set off the workflow itself.


WEBHOOKS: As this uses a webhook as its operation type, you will need to set the webhook in your Prodpad admin UI.
The webhook operation has a field called 'Event' which has a dropdown list of various events that can be used to trigger the workflow. To finish setting up the trigger you need to select the event you want to listen to for notifications.
Finally, once everything is set up you can enable your workflow by clicking the Enable button at the bottom of the workflow.

Assuming everything is set up correctly the workflow should initialize and the workflow will now trigger when relevant events occur.