
Google BigQuery 3.6
A web service that enables interactive analysis of massively large datasets.
OverviewCopy
Google BigQuery is Google's serverless, highly scalable enterprise data warehouse and is designed to make data analysts more productive.
AuthenticationCopy
IMPORTANT!: Before authenticating with this Google connector,
Please follow the instructions here before continuing with the authentication process. Note that Tray.io also recommends that its users select the JSON format when generating their individual private keys. For more details on the latter, see the 'Create key' section below for more details.
Version 3.0 +Copy
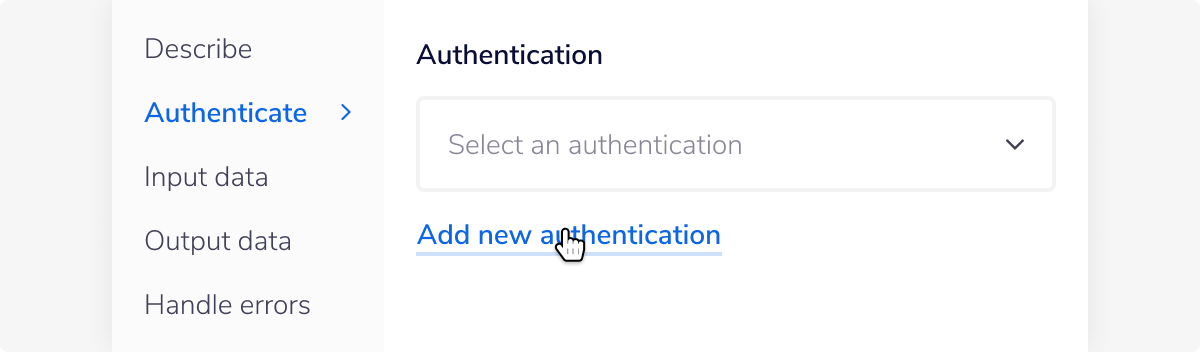
Within the workflow builder, highlight the BigQuery connector.
In the BigQuery connector properties panel to the right of the builder, click on the Authenticate tab and the 'Add new authentication' button.

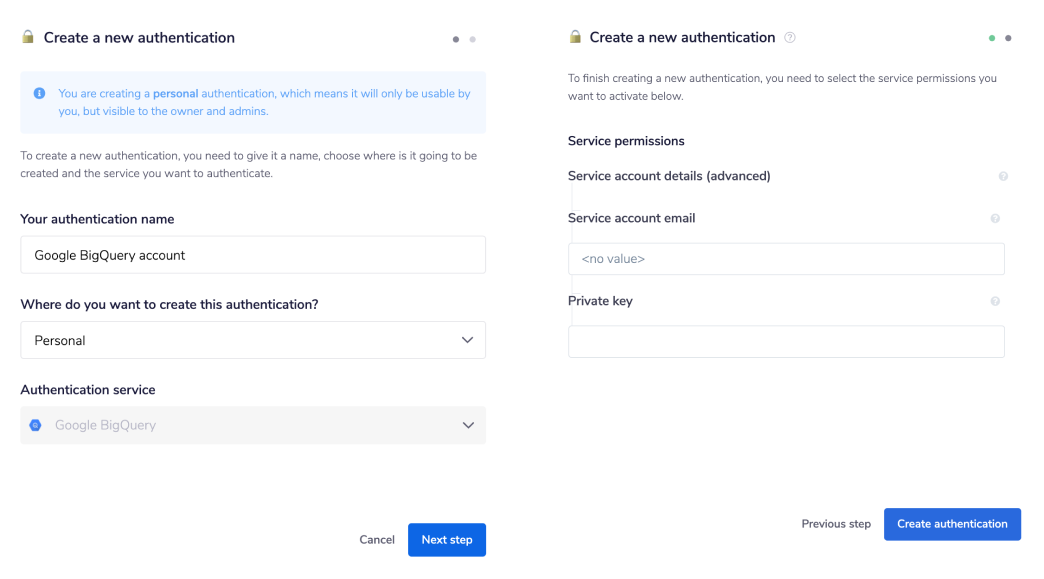
This will result in a Tray.io authentication pop-up modal. The first page will ask you to name your authentication and select the type of authentication you wish to create ('Personal' or 'Organisational').
There are two ways to authenticate the Google BigQuery connector:

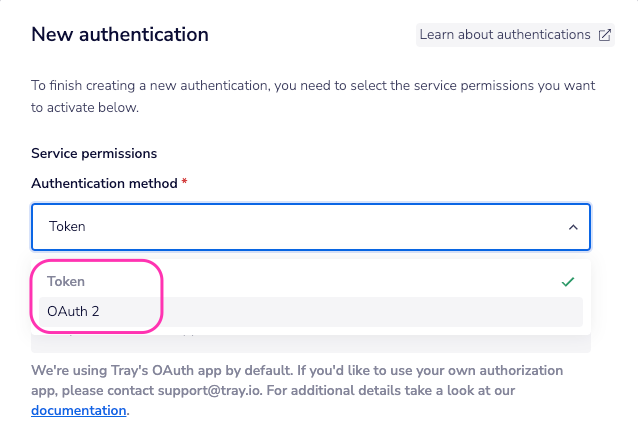
Token AuthenticationCopy
Token authentication requires 'Service account email' and 'Private key' credentials.

In order to claim your 'Private key', you will need to first have a good understanding of what it entails and how Google service accounts are managed. See below for more details.
- Google service accountsCopy
A service account is a special type of Google account intended to represent a non-human user that needs to authenticate (and be authorised) to access data in Google APIs.
For more details regarding the above, please see Understanding service accounts.
In order to find your 'Private Key', log into your Google BigQuery account main page.
From here you will have the option to '+ CREATE CREDENTIALS', under which the option for a Service account should present itself.

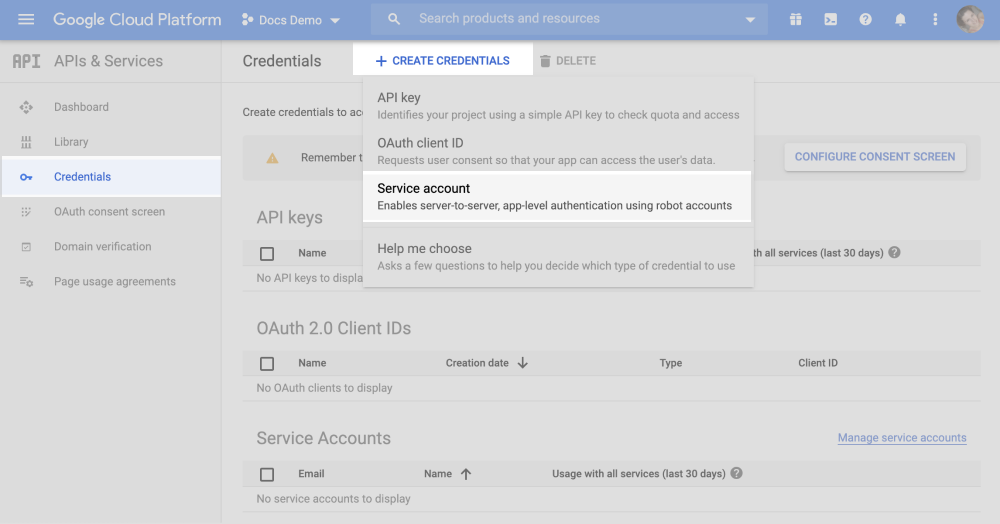
Follow through setting up the first stage of your service account details and then click 'CREATE'.

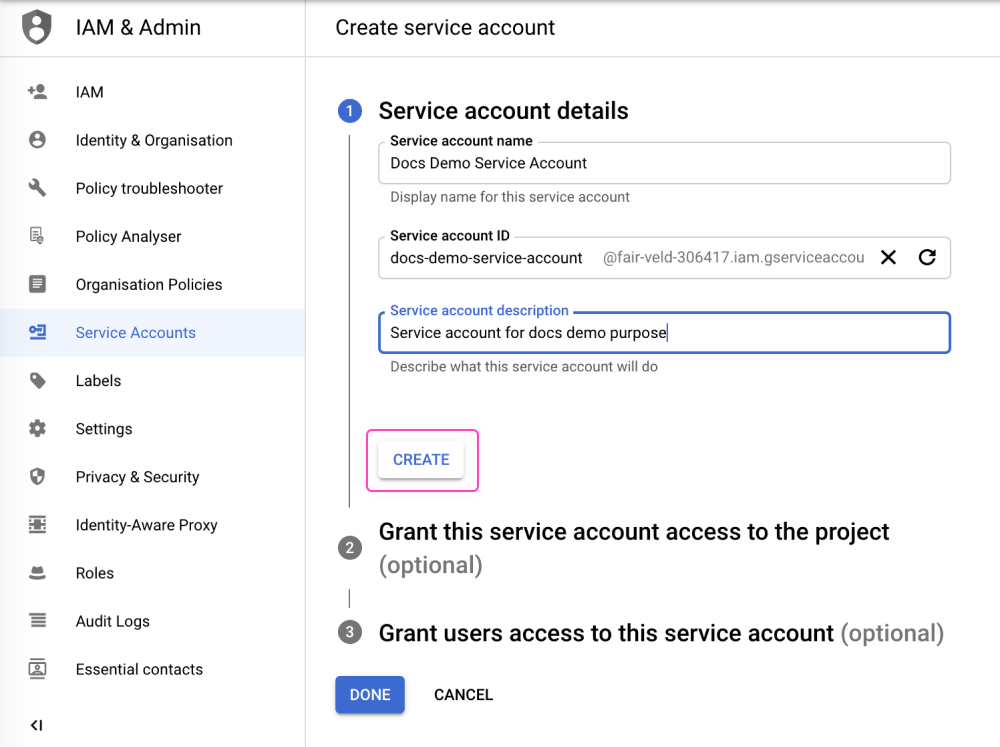
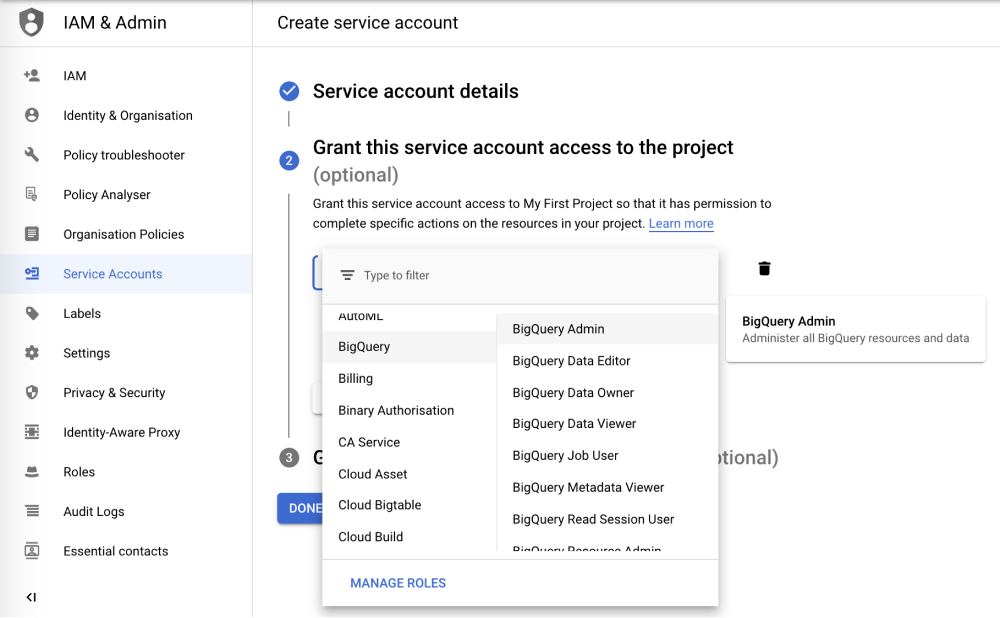
The next page will be about access permissions for your service account. Make sure to manage your roles carefully and use the Creating and Managing Google BigQuery Service Accounts documentation guidelines as explained.
This is a complex process and must be managed carefully. So please make sure your scopes are set up correctly as per your project needs.

Once done, click 'CONTINUE'.
On the final page, you have the option to grant users access to said service account.
Once you have granted the user access, click 'DONE'.
Next, you will need to generate a file that will hold your private key.
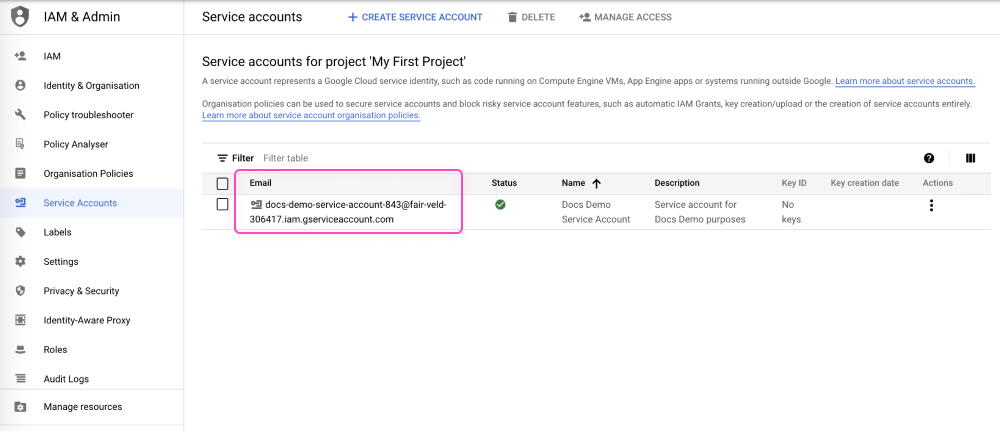
To generate this file navigate to 'Home' -> 'IAM & Admin' -> 'Service Accounts' section.
On the Service Accounts page, click the service account's email address that you want to create a key for. Doing so will redirect you to the 'Docs Demo Service Account' page.

On the 'Docs Demo Service Account' page, select the 'KEYS' tab and then click 'ADD KEY' -> 'Create new key'.

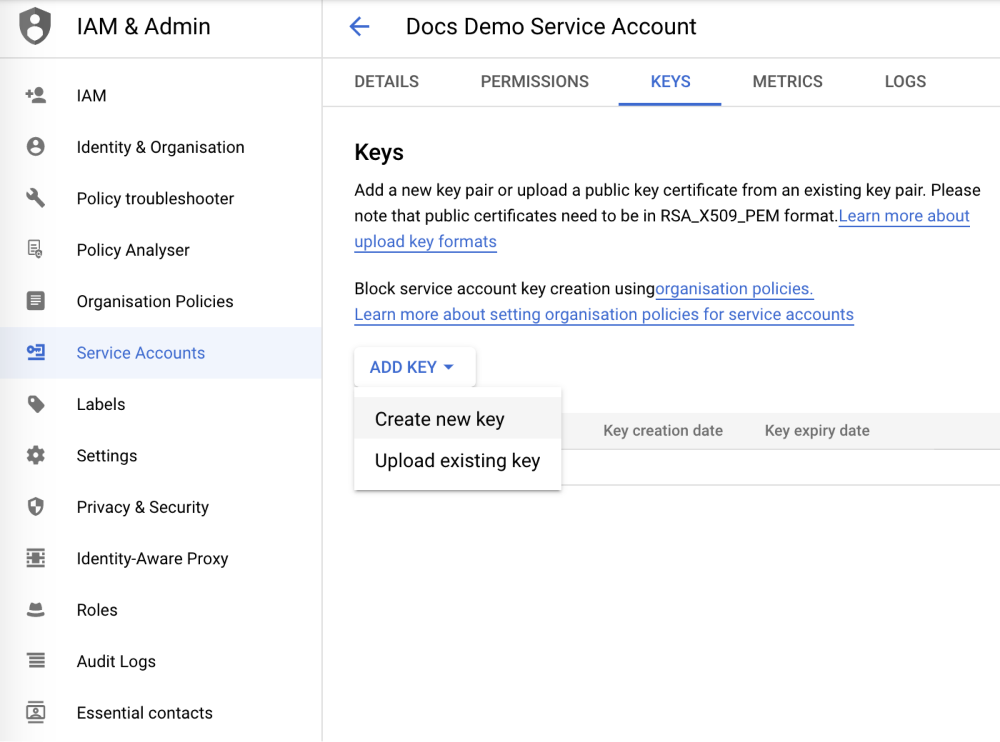
A dialog box will appear on the screen that will allow you to select the key type. At this step, select 'JSON' and then click the 'CREATE' button.

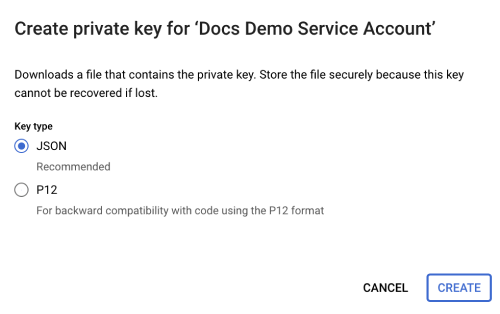
IMPORTANT!: Both Google Cloud Platform and Tray.io recommend that customers use the JSON format when exporting the service account. The alternative P12 format is a legacy format that is only provided by Google for legacy systems and is not compatible with the Tray.io Google BigQuery connector. If you do not choose to use the JSON format, please be aware that any/all new line breaks \n within your key will have to be manually inserted.
Your browser will then download a file with .json extension. Once the file has been downloaded, locate the file on your computer and open it.
IMPORTANT!: It is HIGHLY recommended that you open this file with a plain text or code editor (e.g., Notepad on Windows, Text Edit on Mac OS, Vim on UNIX-based systems, etc.) so as not to corrupt the information within the file itself.
The contents of your key file will look as follows:
1{2"type": "service_account",3"project_id": "project-id",4"private_key_id": "key-id",5"private_key": "-----BEGIN PRIVATE KEY-----\nprivate-key\n-----END PRIVATE KEY-----\n",6"client_email": "service-account-email",7"client_id": "client-id",8"auth_uri": "https://accounts.google.com/o/oauth2/auth",9"token_uri": "https://accounts.google.com/o/oauth2/token",10"auth_provider_x509_cert_url": "https://www.googleapis.com/oauth2/v1/certs",11"client_x509_cert_url": "https://www.googleapis.com/robot/v1/metadata/x509/service-account-email"12}
The two values you require from this file are the client_email (which is your Service account email) and the private_key. You can copy and paste these values as-is and fill in the appropriate fields in the Tray.io authentication pop-up window.
IMPORTANT!: You will need to copy the complete value exactly as it appears in the JSON file (values inside the quotes). This includes the \n string literals which, if you are not familiar with how Google Cloud Platform exports RSA keys, may initially be confusing. However, the Tray.io Google BigQuery connector has been designed to automatically process this type of RSA token export. No further editing of this value is required when pasting it into the authentication pop-up window, and you can safely copy the value as is.
Once you have added both your 'Private Key' and 'Service account email' fields to your Tray.io authentication pop-up window, click on the 'Create authentication' button.
OAuth 2.0Copy
For your OAuth 2.0 authentication, you will need to select your scopes.
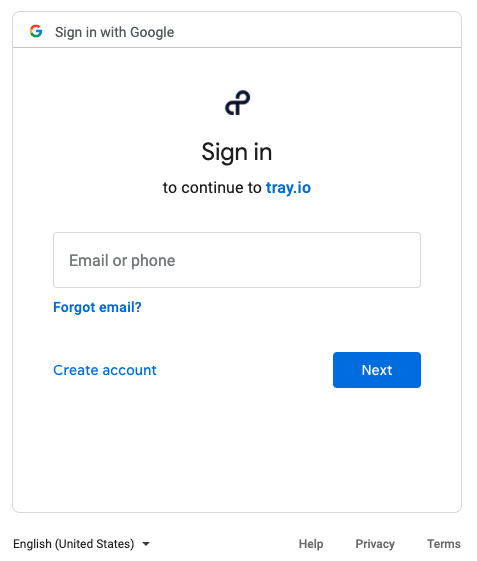
Once you have clicked the 'Create authentication' button, you will be redirected to Google to sign in to your account.

Go back to your settings authentication field (within the workflow builder properties panel), and select the recently added authentication from the dropdown options now available.
Your connector authentication setup should now be complete.
Version 1.4 and earlierCopy
When using the BigQuery connector, the first thing you will need to do is go to your Tray.io account page, and select the workflow you wish to work on. Once in the workflow builder itself, search and drag the BigQuery connector from the connectors panel (on the left hand side) onto your workflow.
With the new BigQuery connector step highlighted, in the properties panel on the right, click on 'New Authentication' which is located under the 'Settings' heading.
This will result in a Tray.io authentication pop-up window. The first page will ask you to name your authentication, and state which type of authentication you wish to create ('Personal' or 'Organisational').
As you can see, The next page will ask you to select some scopes.
Once you have clicked the 'Create authentication' button, you will be redirected to Google to sign in to your account.
This is a complex process and must be managed carefully. So please make sure your scopes are set up correctly as per your project needs.


PLEASE NOTE: Pre-selected scopes are required for access permission to work between Tray.io and Google.
Once you have clicked the 'Create authentication' button, you will be redirected to Google to sign in to your account.
Once logged in, you can go to back to your authentication field (within the workflow dashboard properties panel from earlier), and select the recently added authentication from the dropdown options now available.
Your connector authentication setup should now be complete.
Available OperationsCopy
The examples below show one or two of the available connector operations in use.
Please see the Full Operations Reference at the end of this page for details on all available operations for this connector.
Note on Operations usageCopy
Run QueryCopy
When using the Run Query operation be sure to leave out
\\the in your query.
For example a query should be just SELECT * FROM trainee_trials.trainee_candidates, there is no need to enclose trainee_trials.trainee_candidates in \\.
The Run Query operation by default uses Legacy SQL.
To run Standard SQL commands (such as UPDATE or DELETE statements), you will need to add #standardSQL to the first line of your query. More on the different SQL dialects can be found here.
Prefixing Query StatementsCopy
Depending on the type of query you run, prefixes should be used to resolve the SQL format: #standardSQL (or on the VERY rare occasion, even: #legacySQL).
If you do not use the #standardSQL prefix, the execution will fail.
For more details please reference the Switching SQL dialects page.
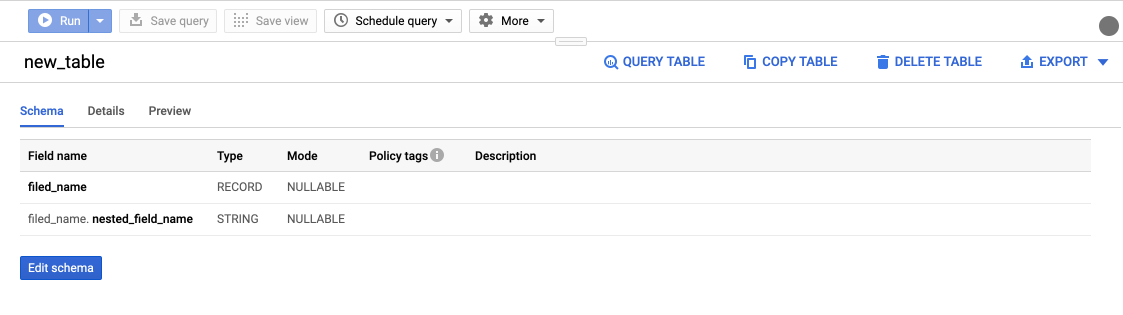
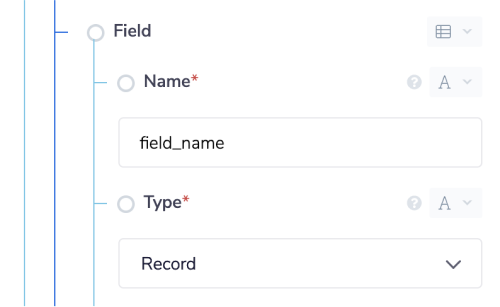
Create Table Schema FieldsCopy
As of version 2.0 you can now use the 'Create table' operation.
This operation has a property called 'Schema' that shapes the architecture of your desired table. Within 'Schema' you can add multiple 'Fields' that have properties including 'Name', 'Type', 'Description', etc.

For example, when adding just the required properties (field 'Name' and 'Type'), the table will look like this:


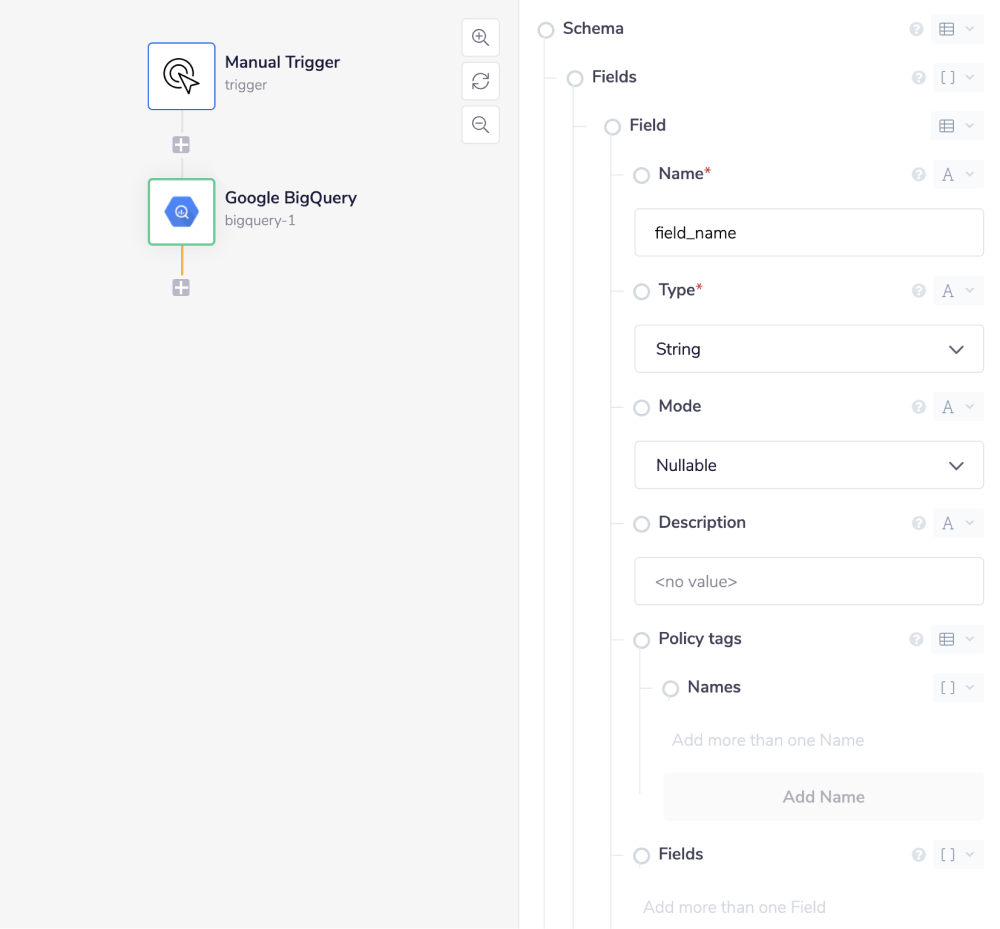
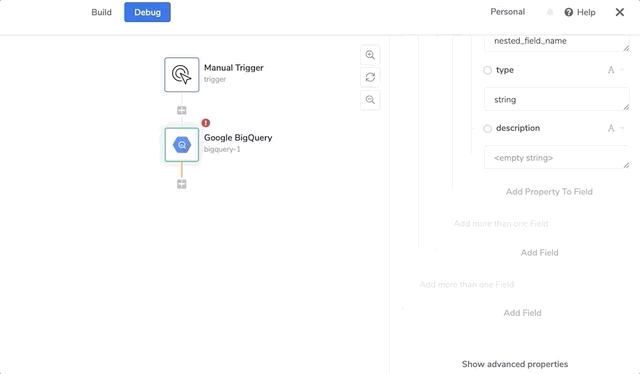
Nested FieldsCopy
You also have the ability to add nested fields, within the parent field.
An example of a nested field (with the name 'nested_field_name') looks as follows:

For this you would need to click on the greyed out 'Add Field' button, found inside of the fields property itself.


You would also need to change the 'Type' property to 'Record'.

The other keys beyond the mandatory ones include: 'Name', 'Type', 'Mode' 'Description' and 'PolicyTags'.


Key PropertiesCopy
You must use only lower case letters to when adding keys, though they can also begin with an underscore if need be, eg: '_name'.
The maximum length is set at 128 characters.
The value of the Name key can only contain letters (a-z, A-Z), numbers (0-9), and/ or underscores (_).
The PolicyTags key must be an object, with a key called 'names' that is an array.
The accepted values for the Type key are:
String
Bytes
Integer
Float
Boolean
Timestamp
Date
Time
Datetime
Record
The accepted values for the Mode key are:
Nullable
Required
Repeated

Inserting Rows & the Streaming BufferCopy
If you use the Insert Rows operation to add rows to a BigQuery table, they will exist as part of a streamingBuffer.
BigQuery’s insertAll API method creates a streamingBuffer with an associated partition time. Within that partition time, the data cannot be updated, deleted, or fully exported. Only after the time has elapsed (up to 90 minutes according to BigQuery’s documentation); can you perform operations.
If you attempt an UPDATE or DELETE statement on rows while in the streamingBuffer, you will get an error of UPDATE or DELETE statement over table datasetName - note that tableName would affect rows in the streaming buffer, which is not supported.
If you are using the Insert Rows operation and would like to update rows that may still be in the streamingBuffer, you can build custom retry logic into your workflow to continue to attempt to update or delete the rows, until the streamingBuffer has lifted. To do this, our suggestion would be to use a Loop Forever option with a Delay.
You can avoid the streamingBuffer if you write a Raw Query to insert data, using the Run Query operation in the Tray Platform. If you insert data with the Insert Rows operation (which is a separate API endpoint), it will incur the streaming buffer.
Downloading FilesCopy
As the Google Drive connector holds most of the permissions available for downloading Google files (regardless of type) - it is recommended to try revising your workflow to include this connector, should you face any Google file downloading issues.
Example - Insert multiple rows to a tableCopy
As long as your data is in the format of an array of objects containing the required set of fields, you can directly feed this array as the 'Rows' in an 'Insert Rows' operation
The following shows the required BigQuery input schema which requires you to send a rows array of data objects:
1{2"rows": [3{4"data": {5"field1": "xxxxx",6"field2": "xxxxxx",7"field3": "xxxxxxx"8}9},10{11"data": {12"field1": "xxxx",13"field2": "xxxxxxx",14"field3": "xxxxxxxx"15}16}17]18}
Please also see our Data Transformation Guide, Guide to ETL and Using Callable Workflows pages for more guidance on working with data:

