
Freshdesk 3.0
Freshdesk helps your team focus on what matters the most - delivering great support.
OverviewCopy
Freshworks, formerly Freshdesk, is a software as a cloud-based, customer service engagement company and helpdesk solution. It is designed to help you & your agents manage incoming requests through some automation options and respond to your customers.
AuthenticationCopy
When using the Freshdesk connector, the first thing you will need to do is go to your Tray.io account page, and select the workflow you wish to work on. Once in the workflow builder itself, search and drag the Freshdesk connector from the connectors panel (on the left hand side) onto your workflow.
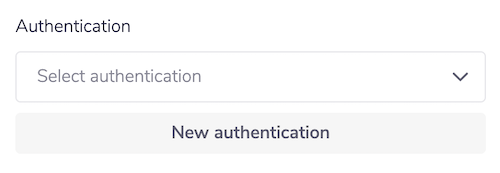
With the new Freshdesk connector step highlighted, in the properties panel on the right, click on 'New Authentication' which is located under the 'Settings' heading.

This will result in a Tray.io authentication pop-up window. The first page will ask you to name your authentication, and state which type of authentication you wish to create ('Personal' or 'Organisational').


As you can see, the next page asks you for your 'Domain' and login credentials. Depending on your use case, you will see two different secondary page options. 'Email and Password' requires a combination of your account login details, whereas 'API' needs only the an 'API Key'.

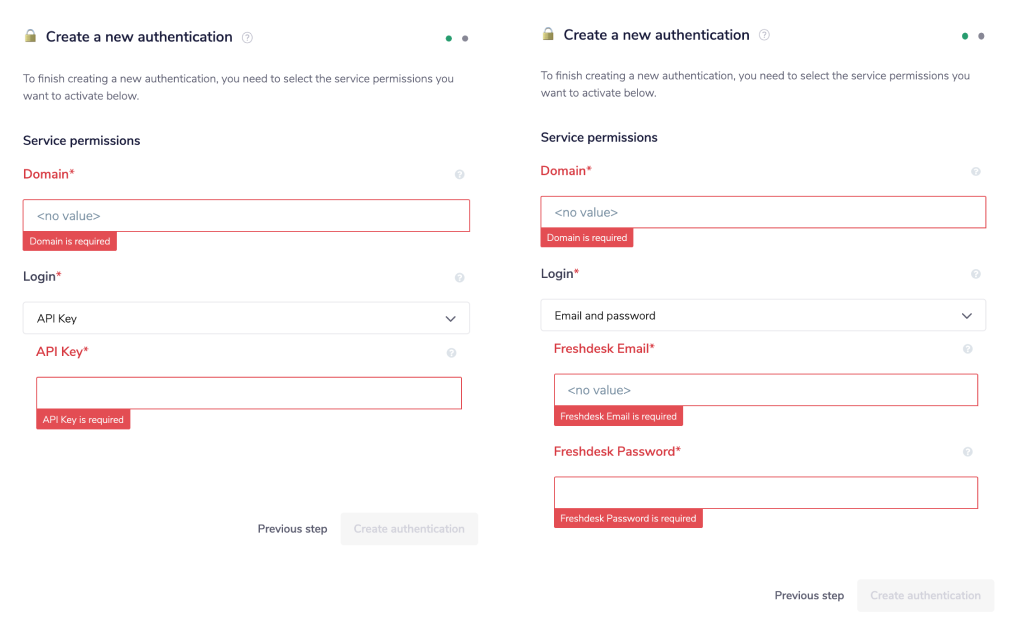
The 'Domain' is the subdomain of the of your Freshdesk dashboard when you login. For example, if your dashboard is located at mydomain.freshdesk.com, your domain would be mydomain.
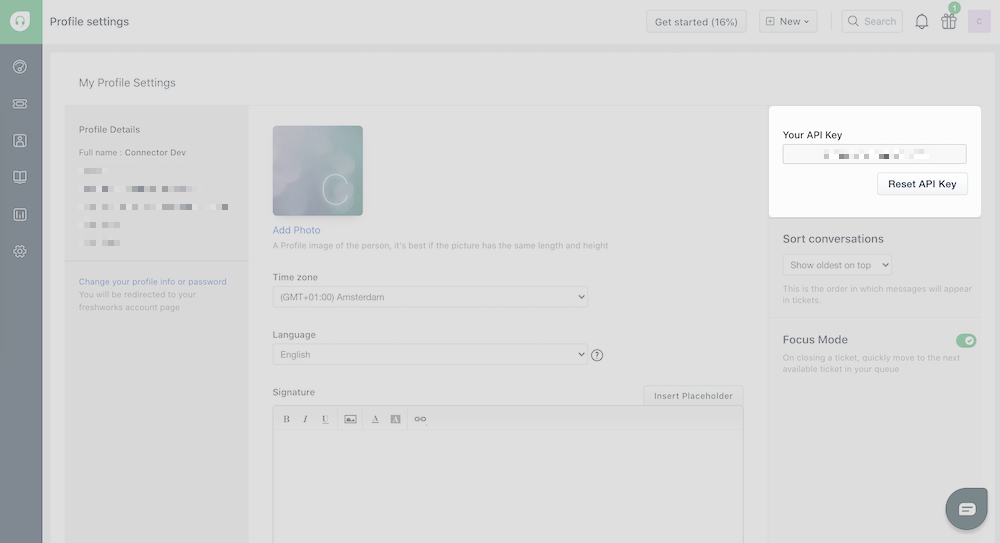
If you choose to login using an API Key, navigate to your Freshdesk dashboard and click on your profile picture in the top-right corner. Click 'Profile settings':


On the next page, you will see a box called 'Your API Key' in the top-right, which will contain your API Key.
Once you have added these fields to your Tray.io authentication popup window, click on the 'Create authentication' button. Go back to your settings authentication field (within the workflow builder properties panel), and select the recently added authentication from the dropdown options now available.
Your connector authentication setup should now be complete.
Available OperationsCopy
The examples below show one or two of the available connector operations in use.
Please see the Full Operations Reference at the end of this page for details on all available operations for this connector.
Example UsageCopy
TRAY POTENTIAL: Tray.io is extremely flexible. By design there is no fixed way of working with it - you can pull whatever data you need from other services and work with it using our core and helper connectors. This demo which follows shows only one possible way of working with Tray.io and the Freshdesk connector. Once you've finished working through this example please see our Introduction to working with data and jsonpaths page and Data Guide for more details.
Short summary of what the example below will work through, followed by a numbered list of steps with a brief description of each section. Your steps will essentially become your navigation list on the right hand side.
The steps will be as follows:
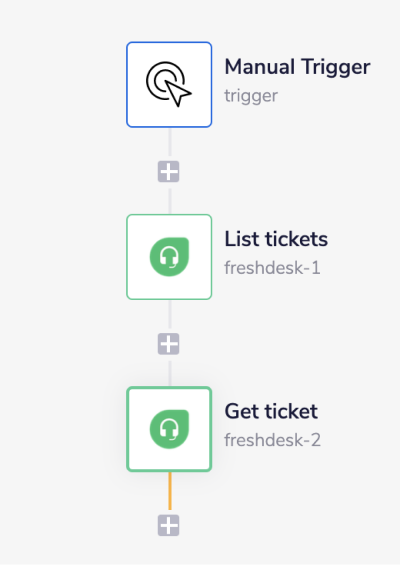
Setup manual trigger and list your Freshdesk tickets.
Add your second connector to get the ticket ID's.
The final outcome should look like this:

1 - Setup triggerCopy
Once you have created and named your new workflow, and selected the 'Manual Trigger' as your trigger option, add a 'Freshdesk' connector in your second step from the connectors panel on the left.
Set the operation to 'List tickets'. You will notice that there are several 'Filter by' and 'Sort by' options if you wish to be more specific (such as 'Requester ID', 'Email', 'Company ID' etc).

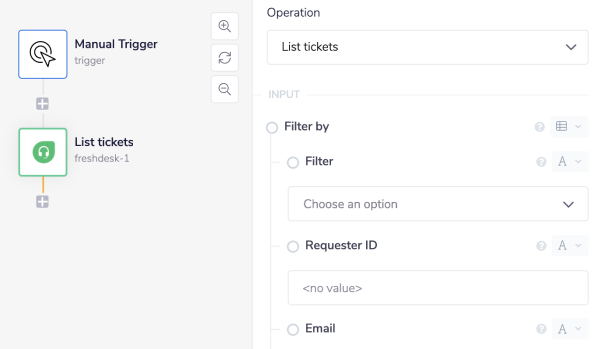
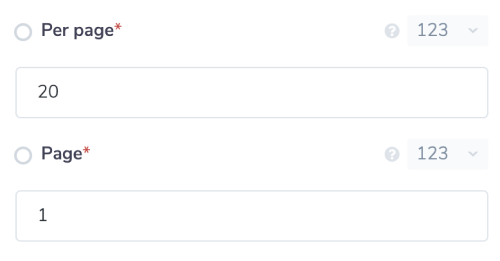
There are also two mandatory fields right at the bottom of the input options. Your 'Per page' field should be pre-populated for you (set at 20), but feel free to change it as you see fit. as with the 'Page'
We recommend you update any calls to use pagination as standard.

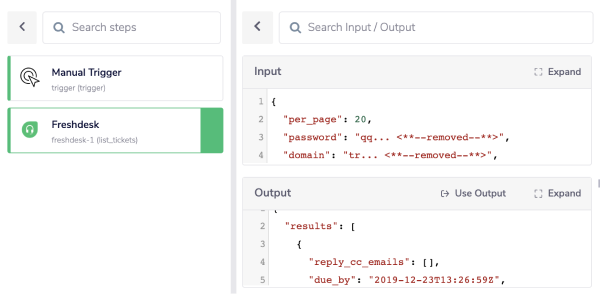
Your output should look similar to this:

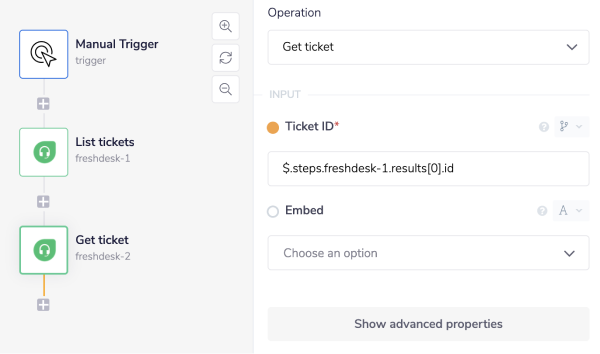
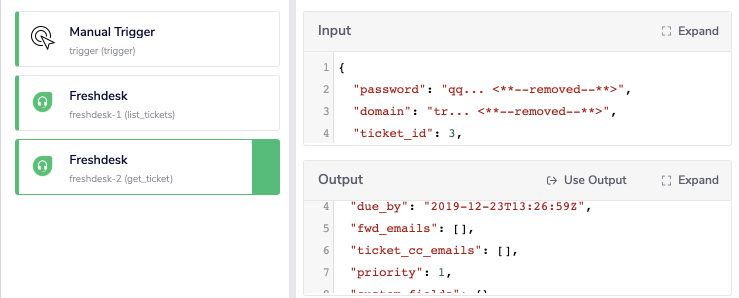
2 - Get ticketCopy
Add another step to the 'Freshdesk' connector, set the operation to 'Get ticket'. Set the 'Ticket ID' to the ID of one of the projects, by using a JsonPath as shown in the example: $.steps.freshdesk-1.results[0].id.
JSONPATHS: For more information on what jsonpaths are and how to use jsonpaths with Tray.io, please see our pages on Basic data concepts and Mapping data between steps

Click 'Run Workflow'. Open the Debug tab and you should be able to see the successful output with information about your chosen profile displayed like in the example below:

BEST PRACTICES: Whenever you do decide to create your own workflow, be sure to check out some of our key articles such as: