Facebook 13.0
Connect to Facebook and utilize marketing tools they provide.
- On this page
- Overview
- API Information
- Authentication
OverviewCopy
The Facebook connector allows you to view adverts, list generated leads from ads as well as create and update custom audiences.
API Information Copy
The Base URL used for the Facebook connector is https://graph.facebook.com/v15.0. More information can be found on their main API documentation (v15) site.
IMPORTANT!: The Facebook Marketing API is only available until the 25th of January 2023.
Users will need to upgrade to the latest connector version otherwise operations that deal with Adverts will fail.
AuthenticationCopy
Within the builder, click on the Facebook connector to display the connector properties panel. Select the Auth tab and click on the New authentication button.
In the Tray.io authentication pop-up modal name your authentication in a way that will quickly identify it within a potentially large list. For example whether it is a Sandbox or Production auth, etc.
Consider who/ how many people will need access to this authentication when choosing where to create this authentication ('Personal' vs 'Organisational').
Before continuing with your setup and adding your Client ID, Client Secret and Scopes, please look at the authentication subsections below. They will help you avoid common pitfalls
Pre-requisitesCopy
IMPORTANT!: You must have a Facebook developer account before continuing your setup. More information can be found on the Facebook for Developers page.
IMPORTANT!: You need to either know how to create or already have an application setup within the Facebook developer portal before continuing.
PLEASE NOTE: When creating your Facebook Application you must first check if a webhook can be added before trying to sync it with Tray.io.
This is because the app type determines if a webhook can be added. Consumer, Business and Instant Games application types can all have webhooks.
For more information please see Facebooks App Types page.
Once you have confirmed the above points please make sure your application is setup correctly before continuing. This will mean it should have the following:
Client side SetupCopy
Select the Facebook trigger. This can be done at the create new workflow stage or updated within the workflow builder itself.
Highlight the Facebook trigger. In theFacebook trigger properties panel to the right of the builder click on the Authenticate tab and the Add new authentication button.
Once logged in head to the main Facebook App Dashboard. Either create a new application or select one.
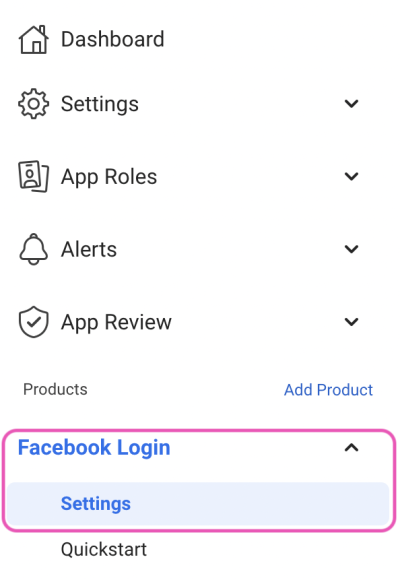
Either way make sure that you have a Facebook Login product already added to your application. You have to click on this feature in order to navigate to the correct Settings option.

It is through this section that you will find the Valid OAuth Redirect URIs field. You will need to fill this in with Tray.io's OAuth 2 settings URI before continuing.

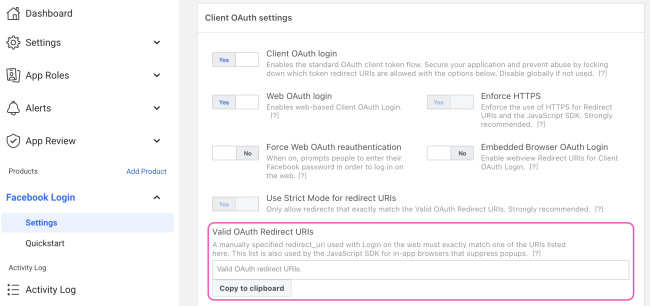
To get the Tray.io's OAuth 2 settings URI head to Tray.io's app platform. Navigate through (within your Personal workspace) Services -> Add service -> OAuth 2 settings.
Tray.io OAuth 2 URI: https://auth.tray.io/oauth2/token


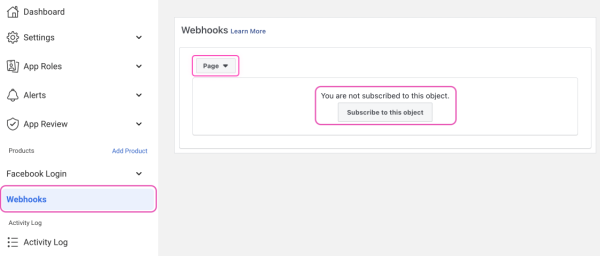
Head back to your Facebook application's dashboard. In the left hand menu select the Add products option. Choose Webhooks.
Change your object type to Page - it will be set to User by default.
Once you are in the main Webhooks section click on the Subscribe to this object button.

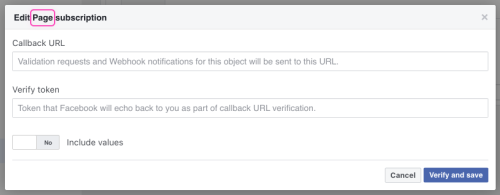
Note that the Callback URL and the Verify Token has been setup for you on the Webhooks proxy repository already. So please use the following:
Callback URL:
https://webhooks.tray.io/production/webhooks/facebook/2Verify Token:
facebook-trayio-test

After the subscription is verified your dashboard page should look similar to this:

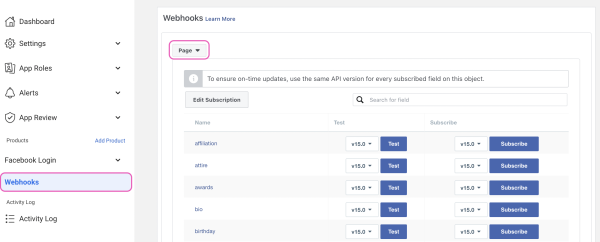
Next you will need to make sure you have subscribed to the leadgen option.
Do this by scrolling down and clicking Subscribe:


You will now need a Facebook page and lead generation form for your application.
Please follow the steps below for more details on how to do this if you don't already have one to use.
Head back to the application you are working on and select Settings from the left hand navigation bar. Choose Basic from the available options. You should be able to view your App ID and App Secret.
Copy them and put them somewhere safe for the time being. You will need to paste them later on in the Tray.io authentication builder.


ScopesCopy
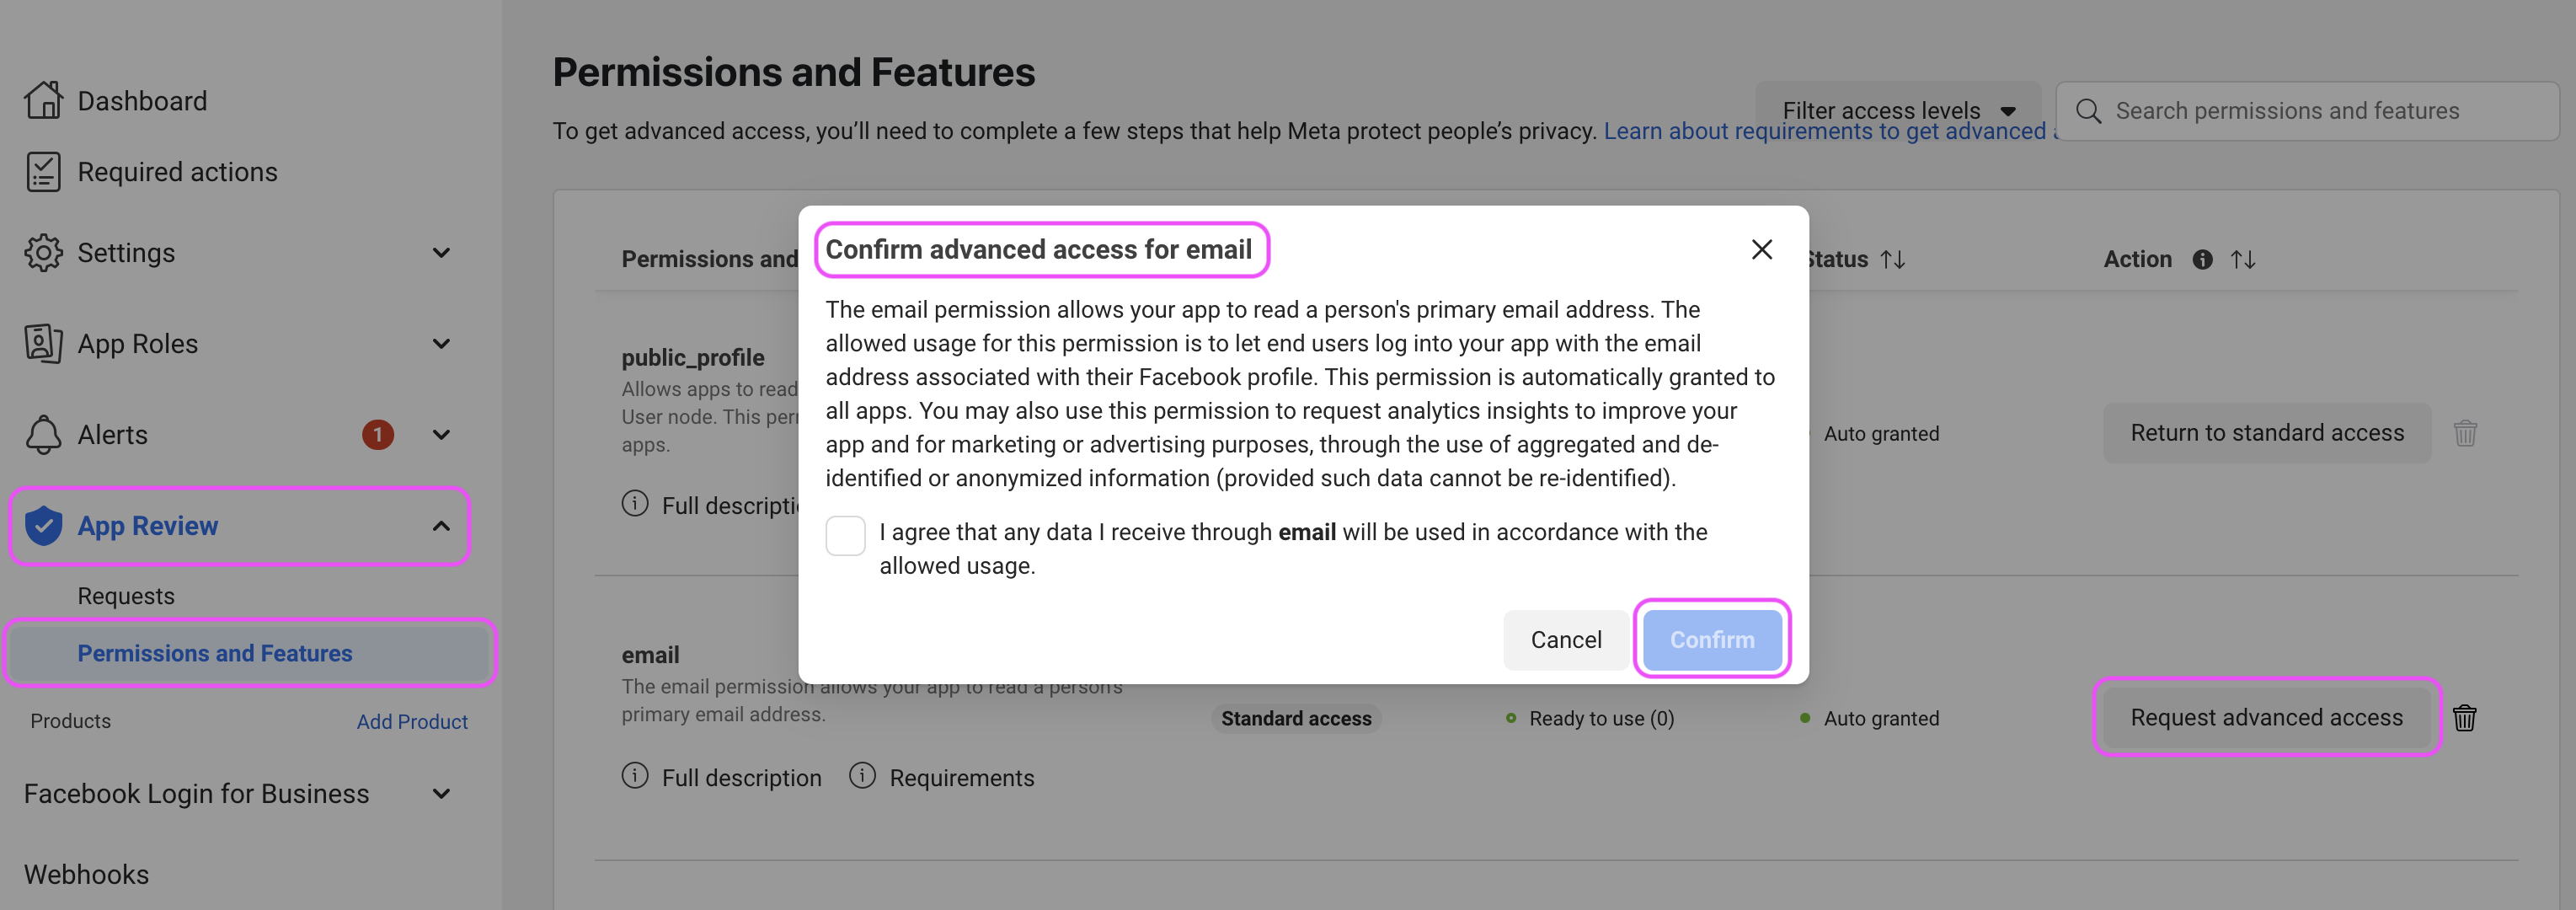
IMPORTANT!: If you try to request scopes that only have “standard access” then the authentication creation will fail.
You must makes sure you have granted Advanced access to any scopes that you wish to use.
Go to your application's main dashboard and click on App Review. Within this dropdown you will see Permission and Features.
Select the scopes you plan to work with and make sure they are granted Advanced access.

Leads retrievalCopy
To use the leads_retrieval scope a Facebook business application is mandatory. This option is simply not available in a consumer application.
More information on using the lead retrieval scope can be found here.
Finalize setupCopy
Head back to your Tray.io builder.
Paste the application details into the authentication model within the Client ID (i.e. App ID) and Client Secret (i.e. App Secret) fields.


Once you have added these fields to your Tray.io authentication pop-up window click the Create authentication button.
Your connector setup should now be complete.
Refresh AuthenticationCopy
It's important to note that due to Facebook's authentication system Tray.io has to ask users who have created an authentication on the platform to re-authenticate regularly.
Tray.io will send an email to the owner of the authentication warning that the authentication will expire soon. To re-authenticate, a link will be provided that will take you to the authentication page.

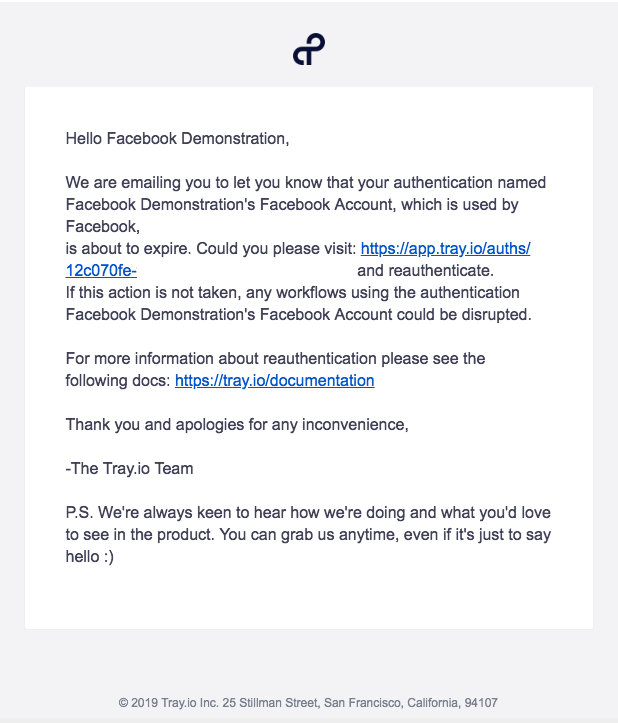
Click on the URL and it will take you to this page:

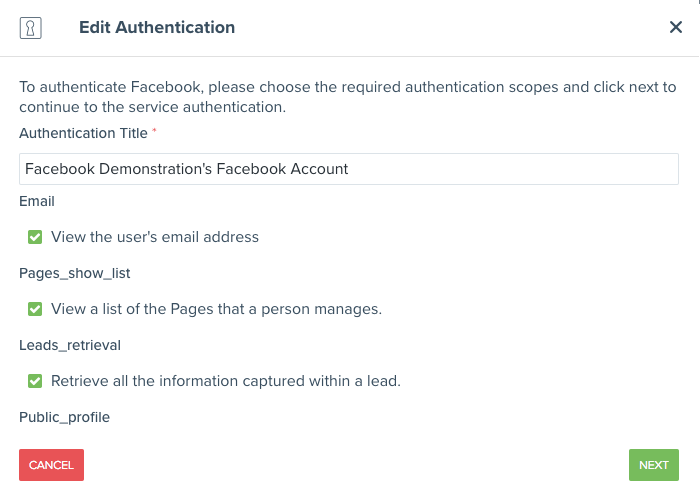
From here, follow the same steps that were discussed in the Authenticating with Facebook section.
It is important to note that if re-authentication does not occur, the connector will fail after the authentication expires and workflows will be affected by this.
Facebook TriggerCopy
The Facebook trigger allows you to receive notifications and trigger workflows when given events occur associated with the selected trigger operation.
Trigger Operations available:Copy
Subscribe to Lead Gen Ads
Webhook SetupCopy
Select the Facebook trigger. This can be done at the create new workflow stage or updated within the workflow builder itself.
Highlight the Facebook trigger. In the Facebook trigger properties panel to the right of the builder, click on the Authenticate tab and the Add new authentication button.
This will result in a Tray.io authentication pop-up modal. The first page will ask you to name your authentication and select the type of authentication you wish to create ('Personal' or 'Organisational').
Follow the instructions above in the Authentication section to complete the first part of authenticating your trigger.
PLEASE NOTE: Once you have clicked the Create authentication button return here for the rest of your instructions.
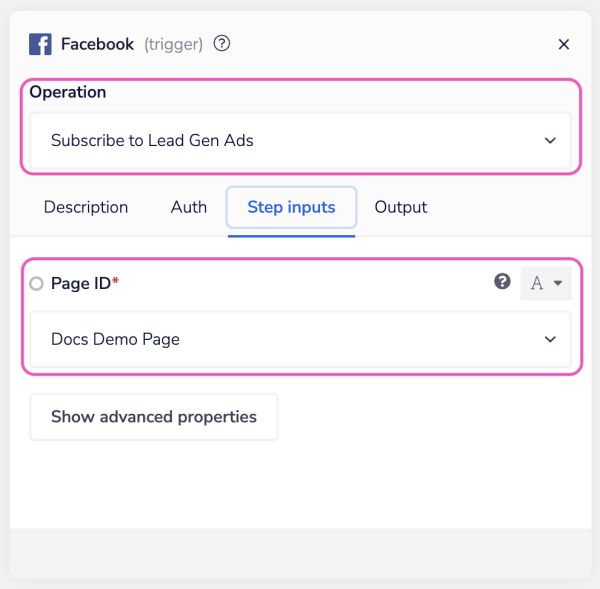
Now that your authentication is complete set your operation to Subscribe to Lead Gen Ads.
You will need to make sure you also select your Facebook page (the one you just created / want to reference) from the drop down options available.
PLEASE NOTE: The list of available page options for you to choose from will come from your account as a whole.
This means if you have built other applications - which also have pages connected to them - they will display as well. The application specific credentials you originally used to authenticate with will not limit the number of pages you will be able to choose from.
This is because pages are tied to accounts and are not application specific.

In order to verify your webhook is working Facebook have a dummy test page you can trigger.
Head to https://developers.facebook.com/tools/lead-ads-testing and make a test call.

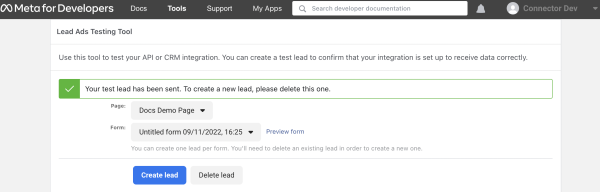
Your trigger authentication setup should now be complete.
If you still have issues with the trigger check the Alerts Inbox on the Facebook application dashboard incase Facebook has restricted the app call.
Notes on using FacebookCopy
Finding your Page IDCopy
Many of the operations require a Page ID to reference before completing their call.
You can find this by heading to the Facebook Page you wish to use.
Go through to the Meta Business page and add the ID from the URL at the top.

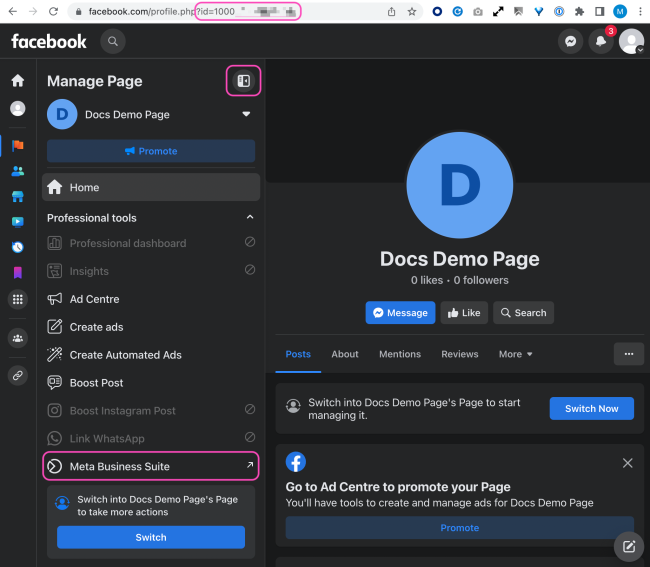
The ID you need will be located in the URL of the Meta Business page after /latest/home?asset_id=XXXXXXXX. For example:


Facebook permissionsCopy
It is important to note that some operations within the connector are dependant on certain permissions that the signed-in Facebook user has.
For example, to use the List leads from ad operation, you will need to be page admin to access the lead data of an ad: https://www.facebook.com/business/help/766393076839635
If operations are not returning data you're expecting, check using the Facebook documentation that permissions are set up correctly.
Available OperationsCopy
The examples below show one or two of the available connector operations in use.
Please see the Full Operations Reference at the end of this page for details on all available operations for this connector.
Example usageCopy
List leads from adCopy
This example will walk through how to list leads from a given ad. The first step is to add the Facebook connector to the workflow.
To list leads from an ad, the id of the ad we want to query needs to be provided. To find this ID, the operation list ads in ad account can be used. This will return data about all ads that belong to an ad account.
To use this operation, select the List ads in ad account operation in the input panel.

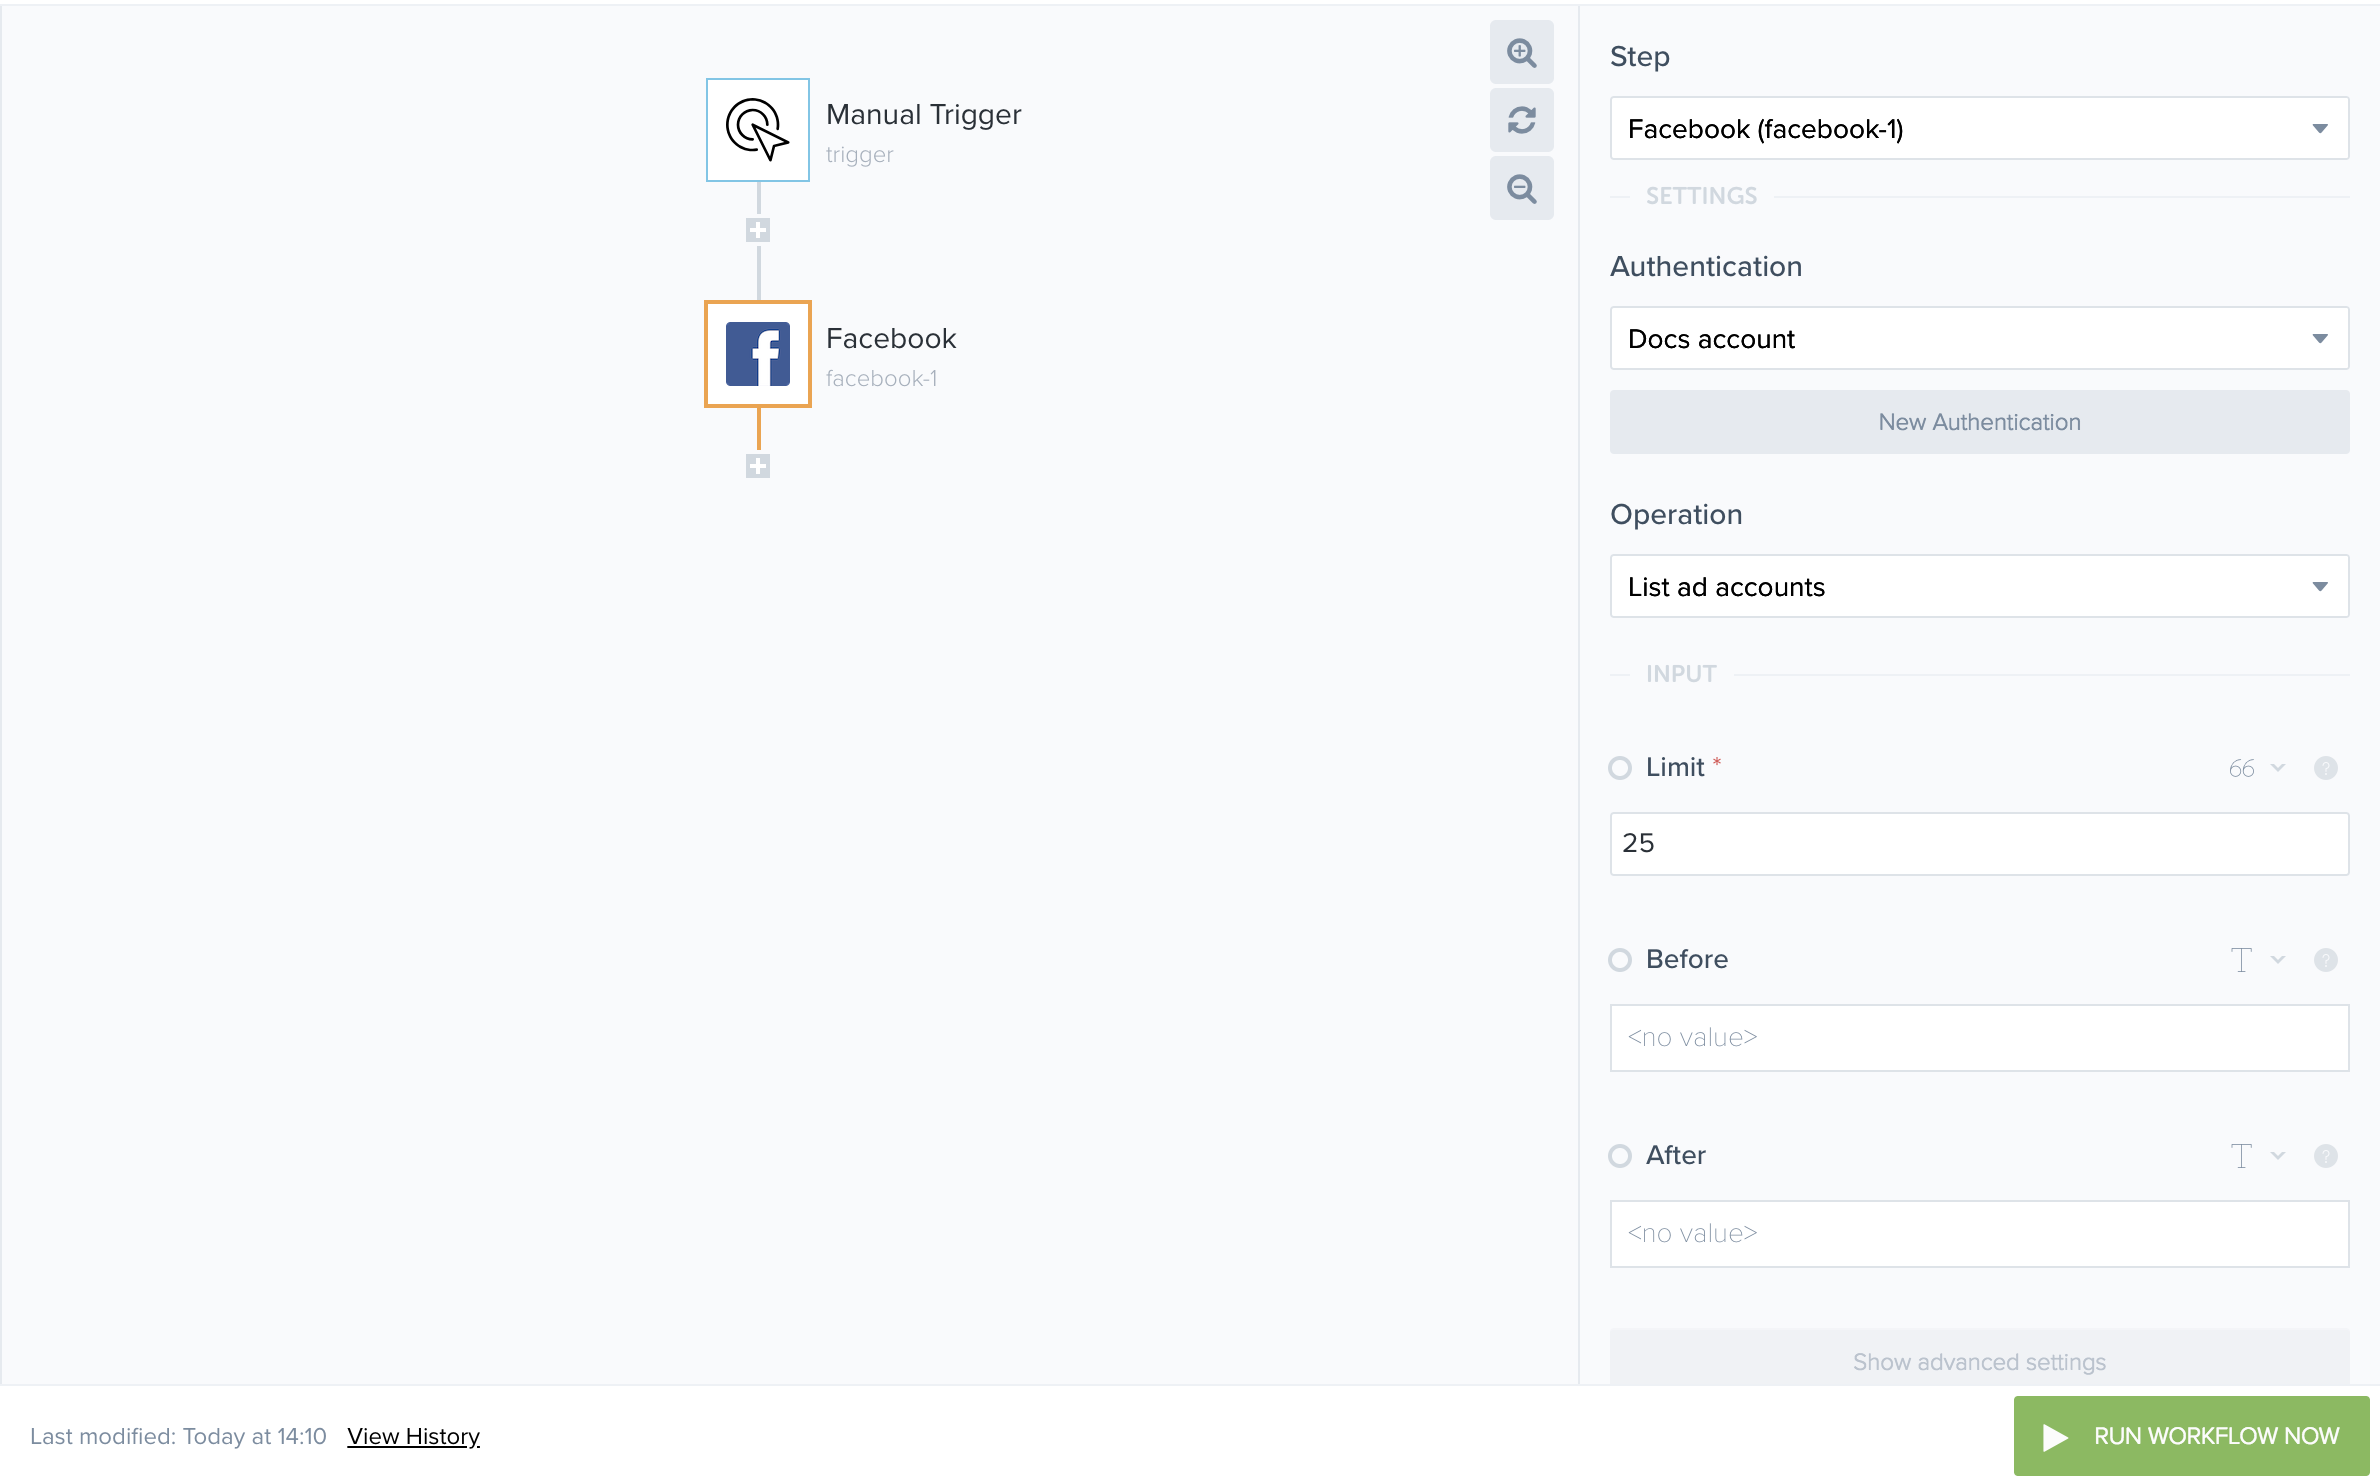
An ad account then needs to be selected, this dictates what ads are listed.

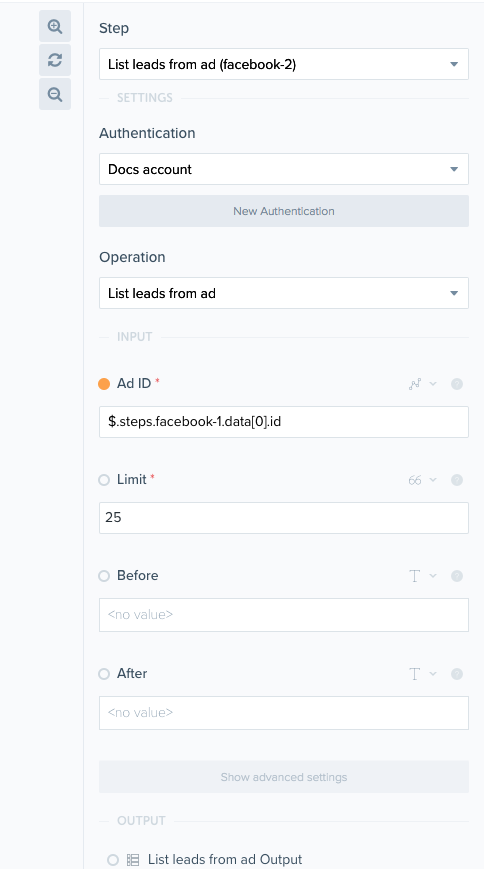
The ID of the advertisement can the be collected from the result set manually, or JSONPaths can be used to get the data straight from the operation. Below the connector snake is used to retrieve the JSONPath:


The input for the List leads from ad operation now looks like the following:

The workflow is ready to be ran. Below you can see that the workflow ran successfully and leads have been listed from a given ad.


Creating a custom audienceCopy
This example will walk through how to create a custom audience. The first step is to add the Facebook connector to the workflow.
The Create custom audience operation then needs to be selected.

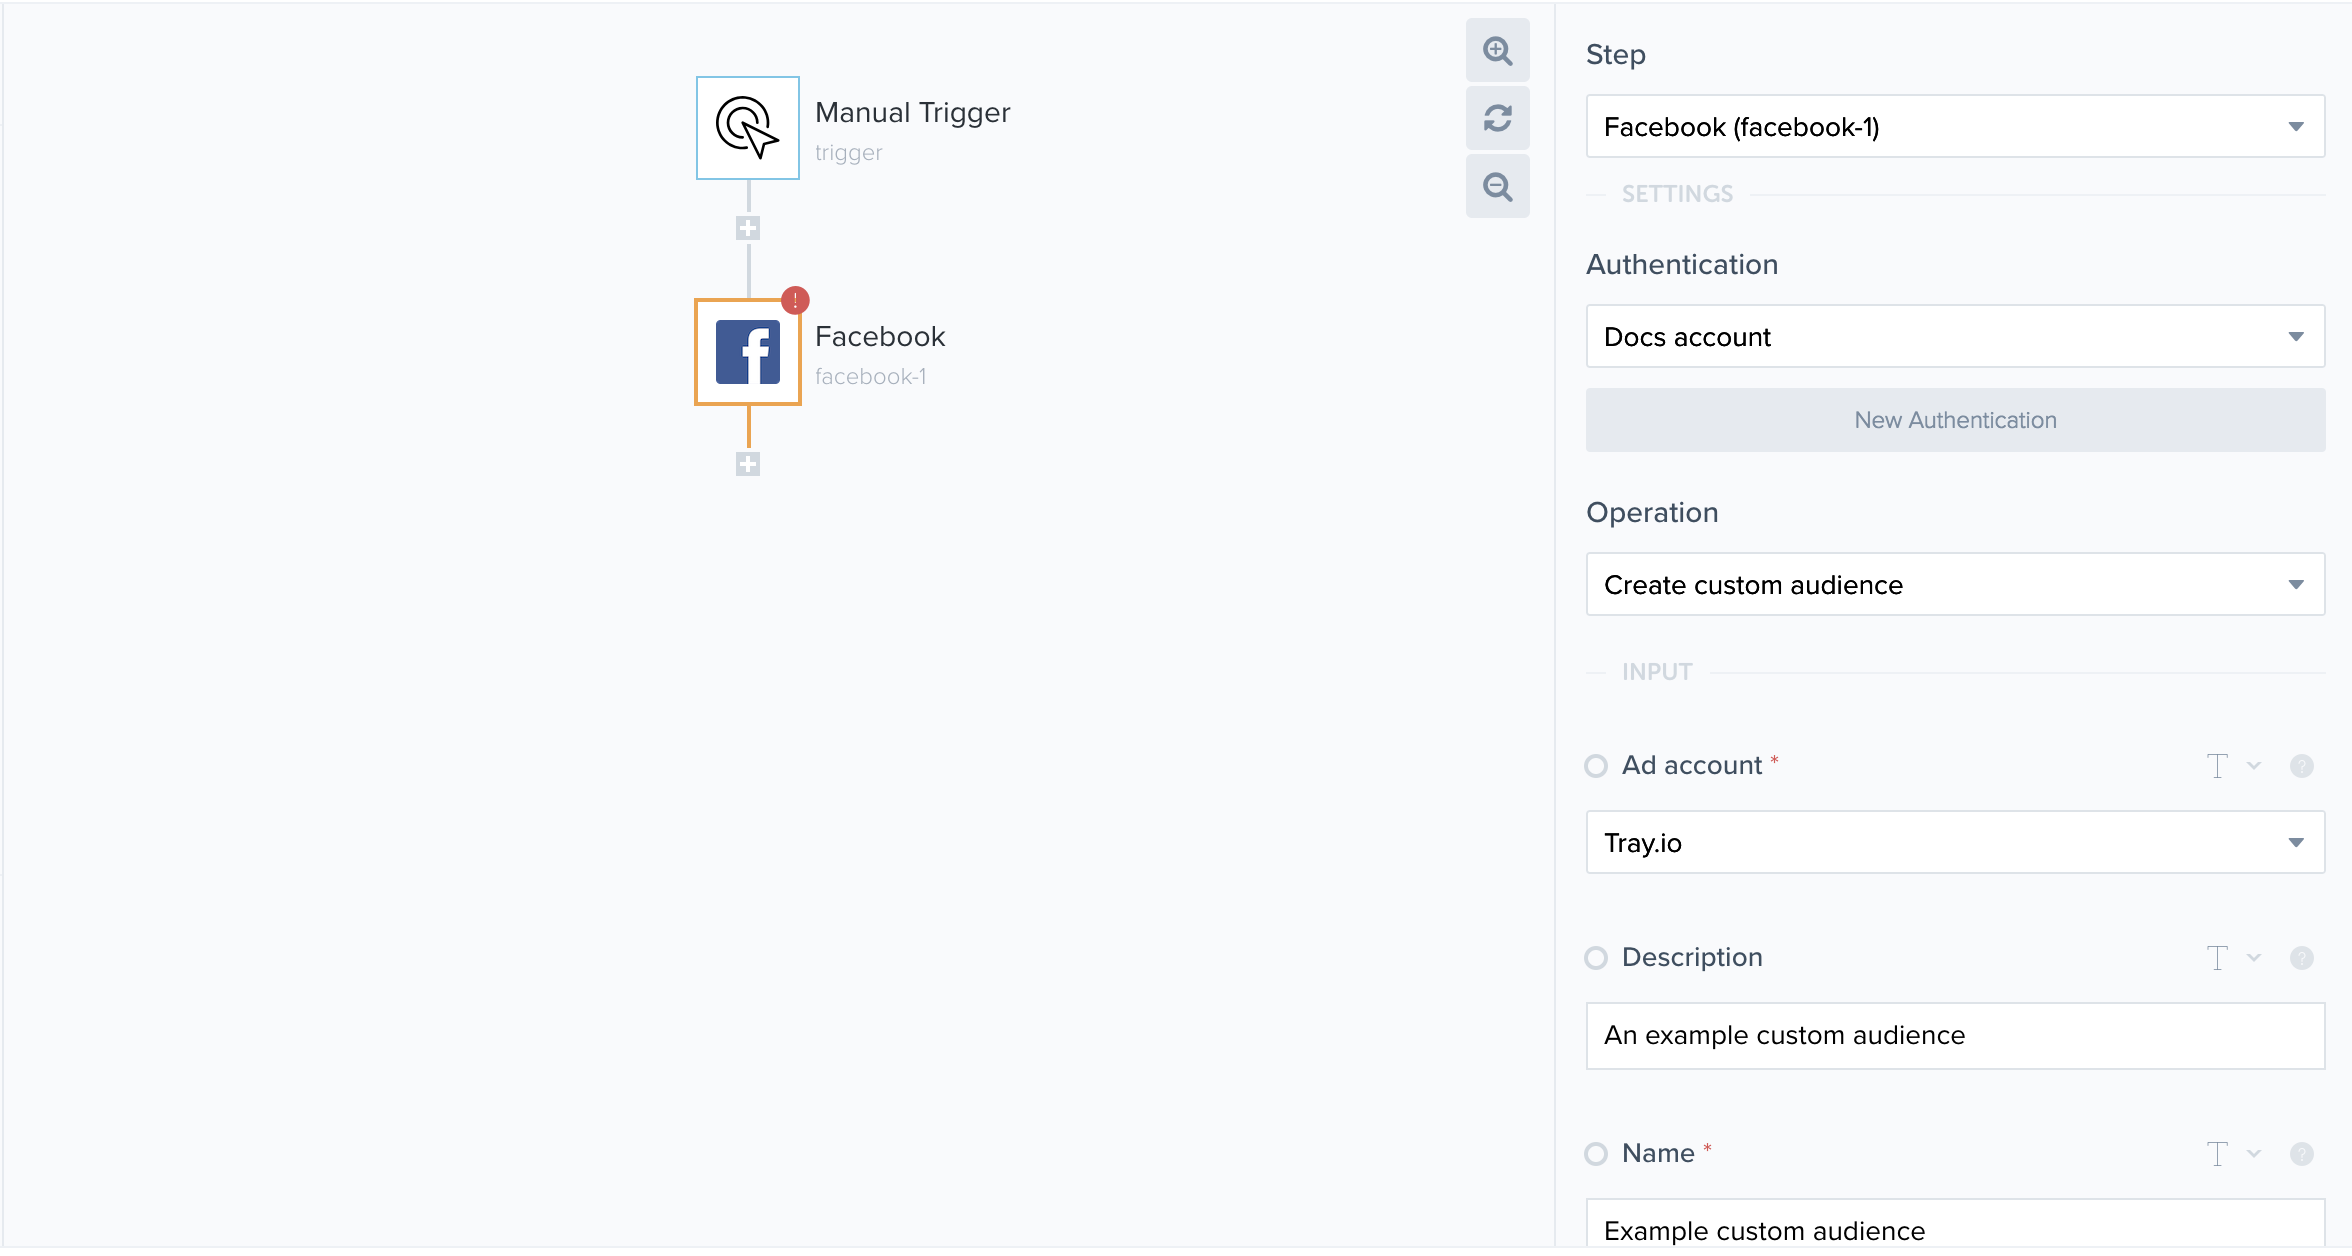
The first steps that will be taken will be to provide some information about the custom audience. This includes the ad account that this audience will belong to, a name for the audience, a useful description about the audience and the customer file source.


The next step is to provide a population for this custom audience. This is done by adding audience member objects to the array of audience members.
Below you can see an example of an audience member object.

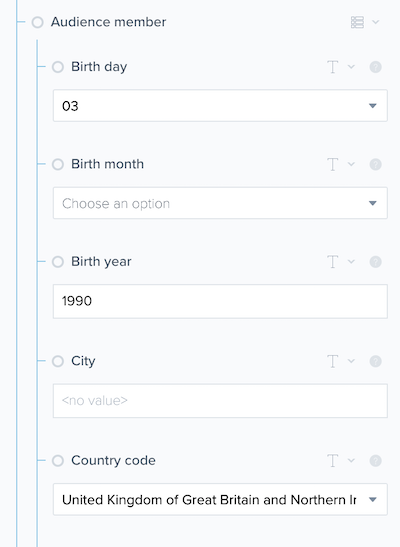
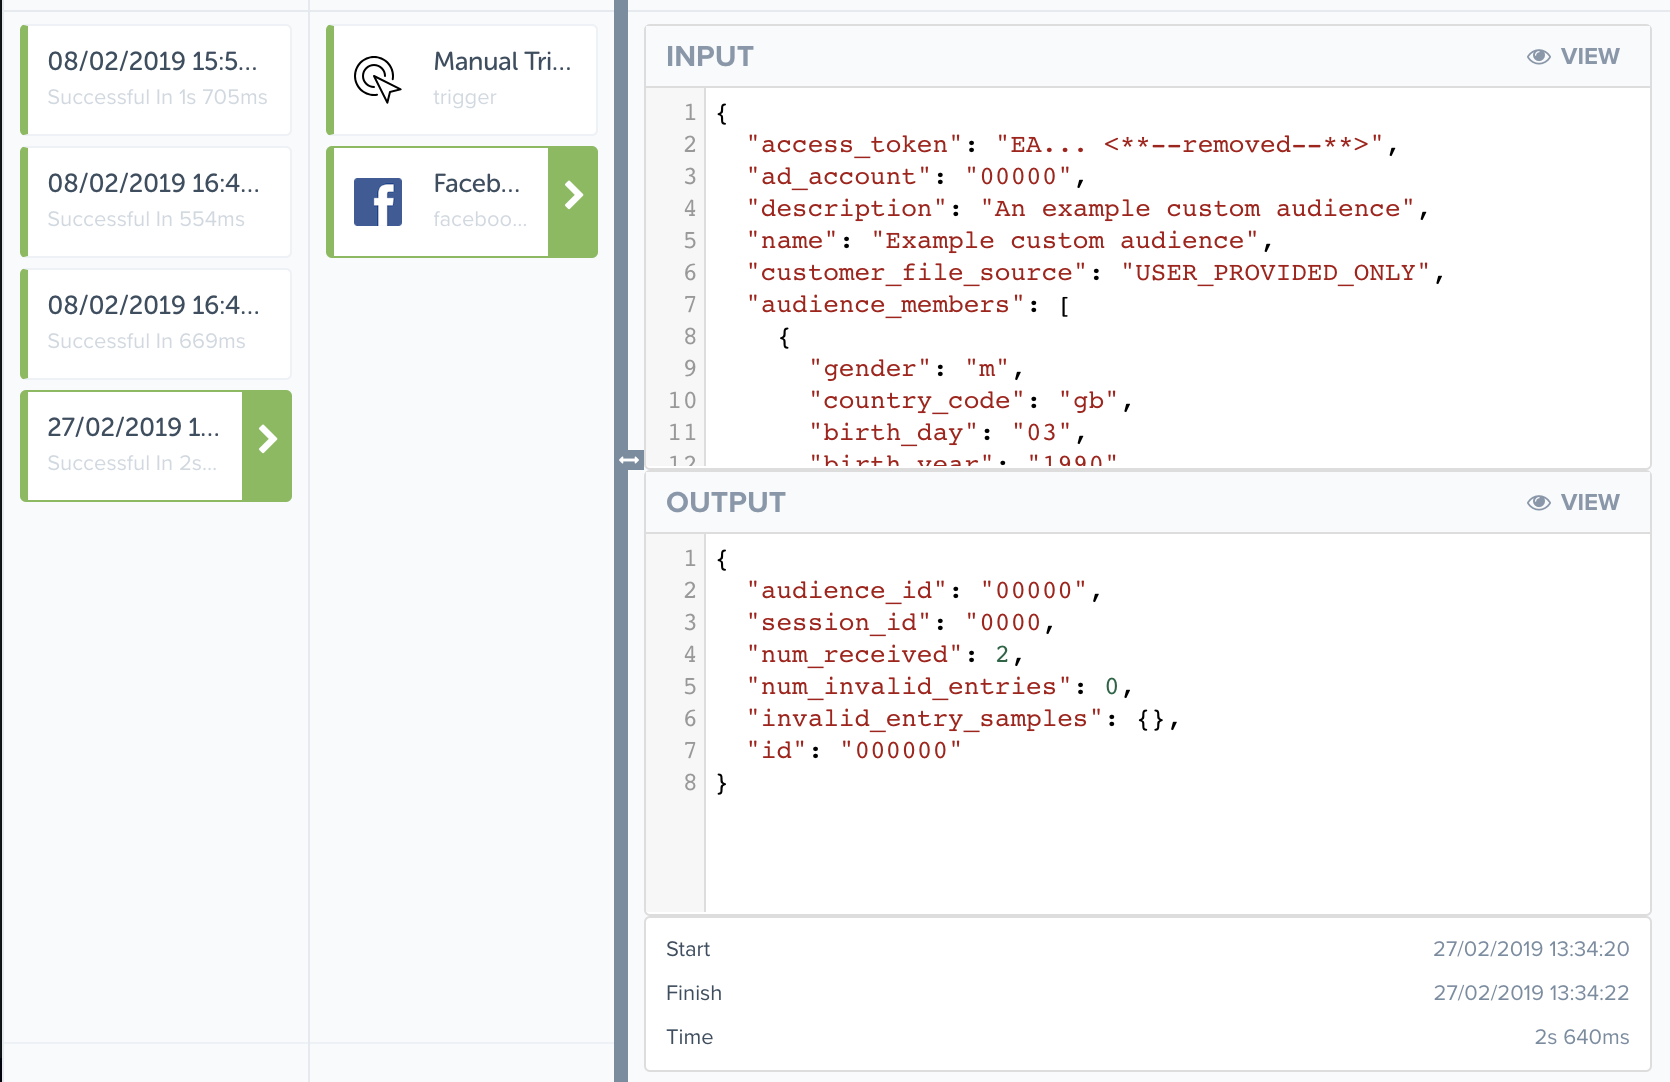
It is important to understand that if you did not want to include the same fields in every audience member object, you have to provide an empty string in the field you wish to leave out. An example below shows how in the next audience member, the Birth year attribute wants to be left out. Using the tooltip, an empty string can be set. This will prevent any errors from occurring when the workflow is run.


Now the custom audience has been defined, and the workflow is ready to be run. As can be seen in the image below, the workflow ran successfully and a custom audience has been created in Facebook.