
AWS Cognito 1.0
For simple and secure User Sign-Up, Sign-In, and Access Control
OverviewCopy
AWS Cognito offers user pools and identity pools. User pools are user directories that provide sign-up and sign-in options for your app users. Identity pools provide AWS credentials to grant your users access to other AWS services.
AuthenticationCopy
When using the AWS Cognito connector, the first thing you will need to do is go to your Tray.io account page, select your workflow. Once in the workflow dashboard itself select and drag the AWS Cognito connector from the connectors panel (on the left hand side) onto your workflow.
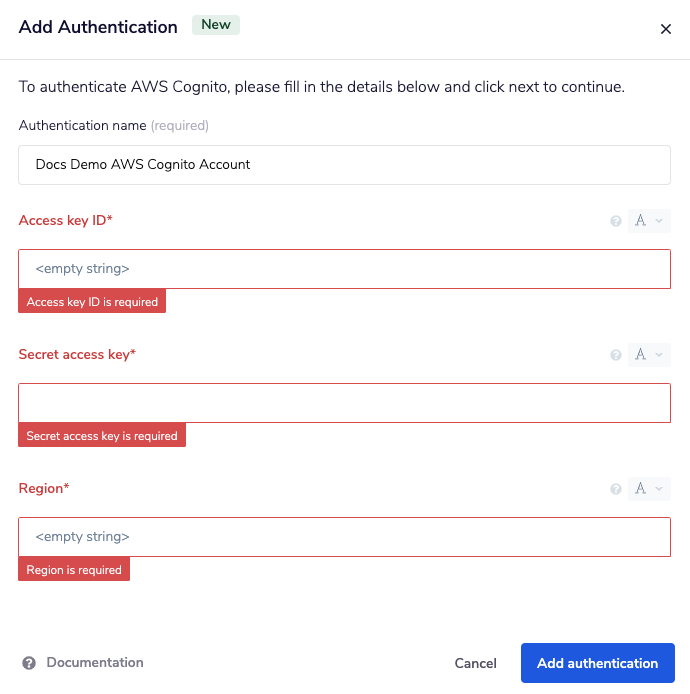
With the new connector step highlighted, in the properties panel on the right, click on 'New Authentication' under the 'Settings' heading.


This will result in a Tray.io authentication pop-up window that should look something like this:

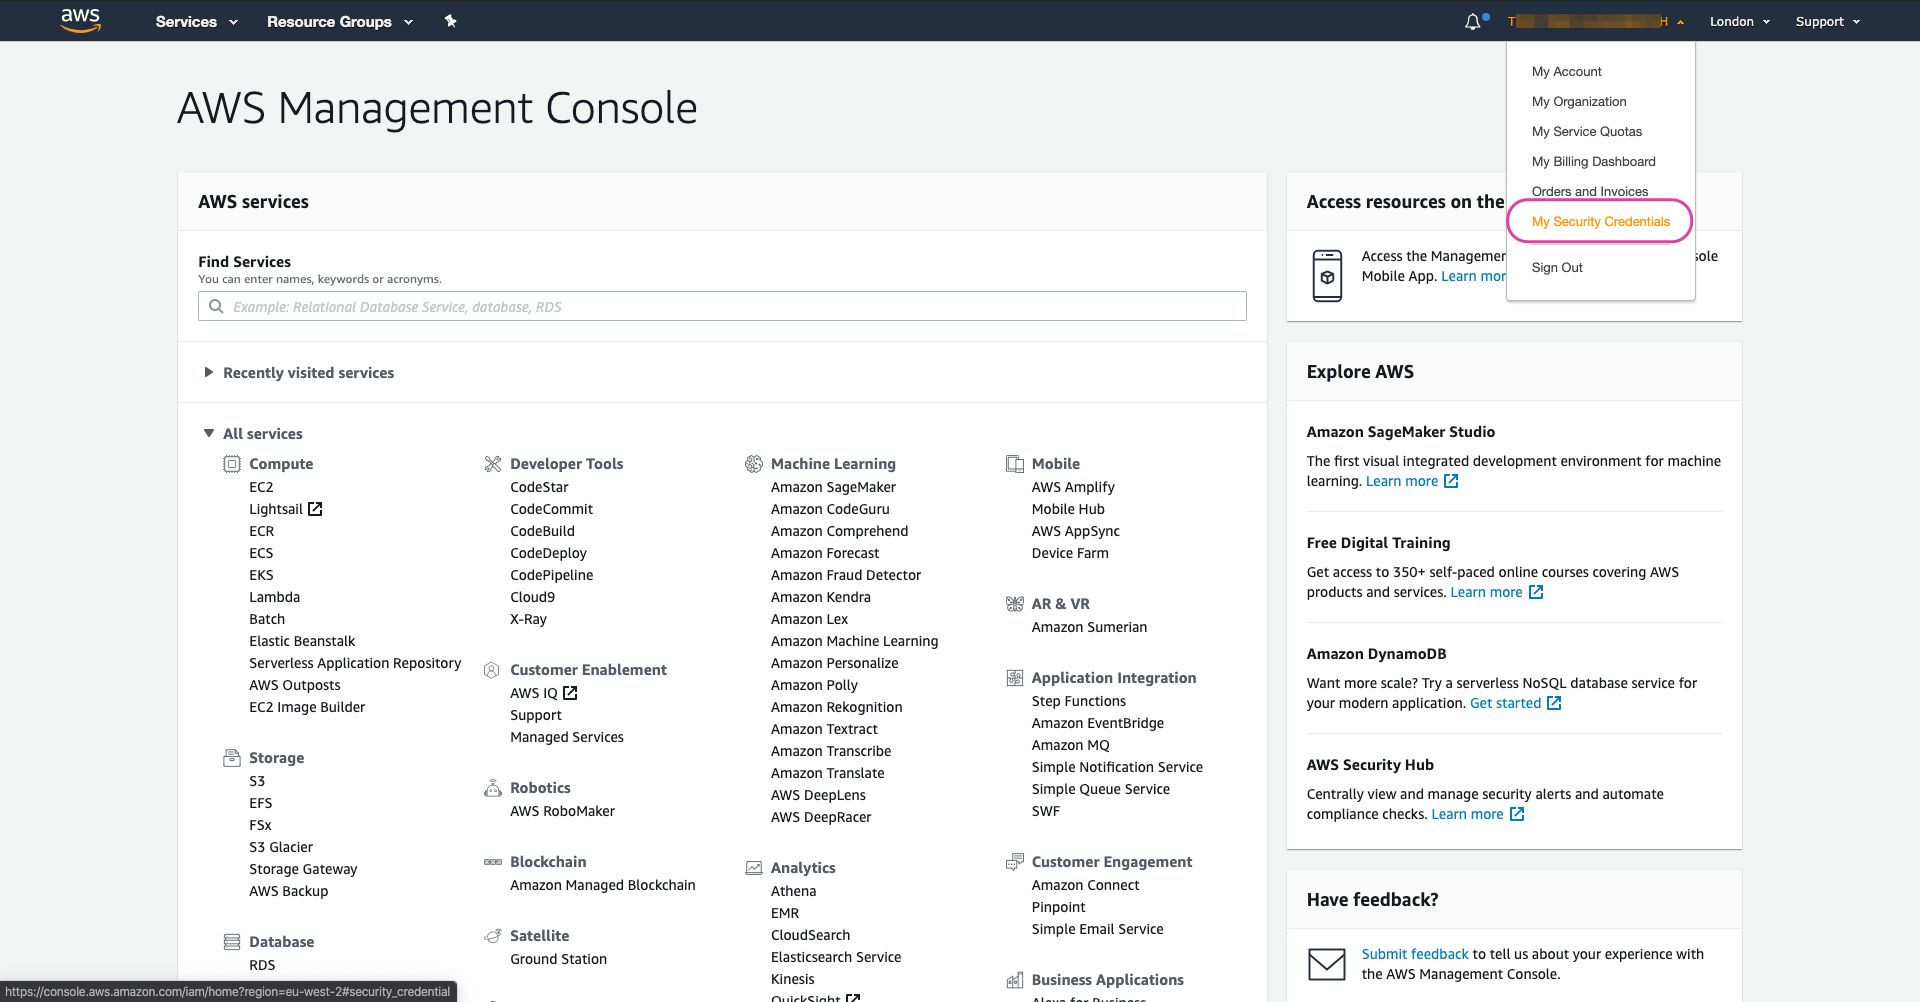
From here you will need to head to your AWS Management Console.
Once signed in, click on your username and then select 'My Security Credentials' from the dropdown menu:

In 'Your Security Credentials', select the 'Access keys (access key ID and secret access key)' option and then click the newly displayed 'Create New Access Key' button.
This will generate a popup with the option of 'Show Access Key'. Clicking this will display your 'Access Key ID' and your 'Secret Access Key':

Once you have your 'Access Key ID' and your 'Secret Access Key', go back to the Tray.io authentication popup box and enter them into the relevant fields.
Make sure to also specify your AWS Region.
The end result should now automatically appear when you select your AWS Cognito connector:


Available OperationsCopy
The examples below show one or two of the available connector operations in use.
Please see the Full Operations Reference at the end of this page for details on all available operations for this connector.
Example UsageCopy
Short summary of what the example below will work through, followed by a numbered list of steps with a brief description of each section. Your steps will essentially become your navigation list on the right hand side.
Please see the above section on example usage for list and get account type operations.
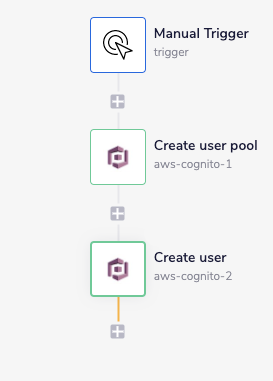
Setup your trigger and your first AWS Cognito connector to create a new user pool
Add second AWS Cognito connector and add a new user to said pool
The final example should look like this:

1 - Setup trigger & Create User PoolCopy
Once you have created and named your new workflow, select 'Manual Trigger' from the connectors panel on the left, and add a 'AWS Cognito' connector in your second step.
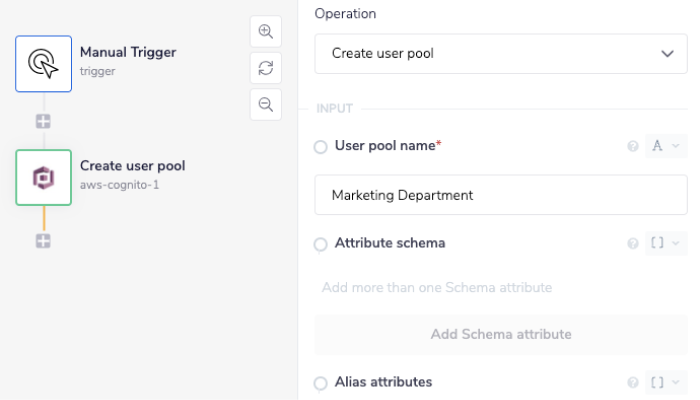
With the first AWS Cognito connector selected, set the operation to 'Create user pool'.
Make sure to give a 'User pool name'. As we are creating a new pool in this step, our example will use 'Marketing Department'
You will notice that there are a lot of additional configuration options that you can set on this operation ('Attribute schema', 'Alias attributes', 'Username attributes', etc). While none of these are mandatory please feel free to add as appropriate for you particular project needs.

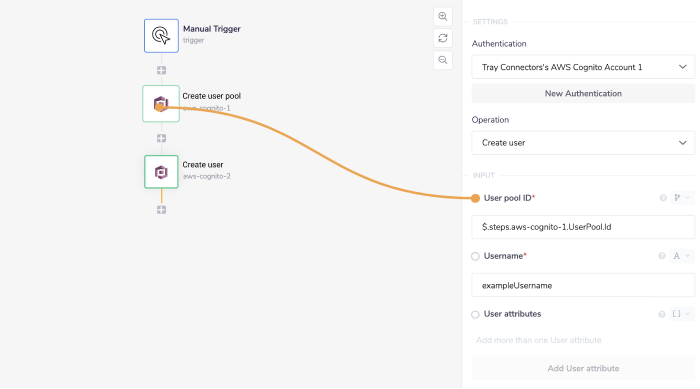
2 - Create & Add New UserCopy
Select the second AWS Cognito connector and set the operation to 'Create user'. For this operation you will need to supply a 'Username' (we used exampleUsername for the sake of clarity) and a 'User Pool ID'.
To find the 'User ID' you have two methods.
The first is to check the output results of your first step. Open the debug panel to view this, click on your 'Create user pool' step (AWS Cognito step 1), and look at the UserPool object. It will display an id within the output field.
The second method is to use the connector-snake as displayed below, by selecting the id from the options displayed from AWS Cognito step 1 - 'Create user pool'.

Once the workflow is set up, click 'Run Workflow' and then click on the 'Debug' tab to look through all the inputs and outputs of a successful run of the workflow.


You now have a new user added to your new user pool.