
Affinity 2.1
Affinity is a powerful relationship intelligence platform built to help you leverage your network.
OverviewCopy
Affinity exposes important relationship data hidden within communication streams to reveal which of your contacts may be able to initiate a warm introduction for you and your company. It eliminates manual processes by capturing relevant data, auto-updating contact in real-time, and automating CRM workflows.
AuthenticationCopy
When using the Affinity connector, the first thing you will need to do is go to your Tray.io account page, and select the relevant workflow. Once in the workflow dashboard itself, search and drag the Affinity connector from the connectors panel (on the left hand side) onto your workflow.
With the new Affinity connector step highlighted, in the properties panel on the right, click on 'New Authentication' which is located under the 'Settings' heading.

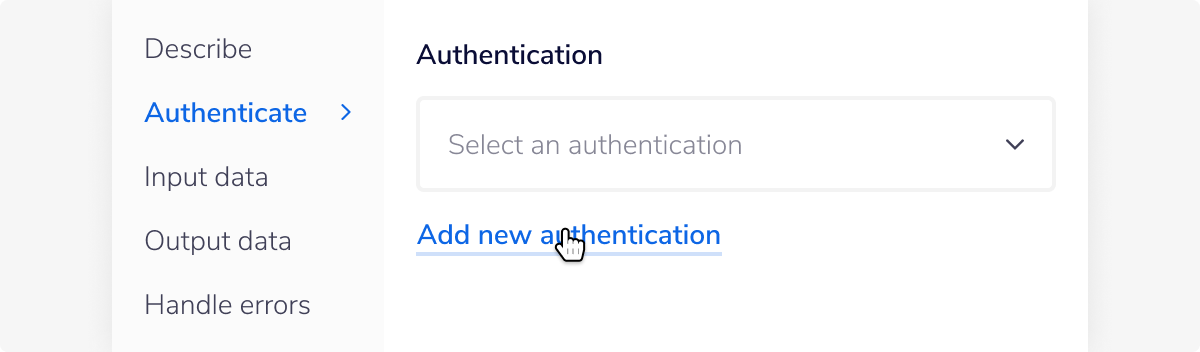
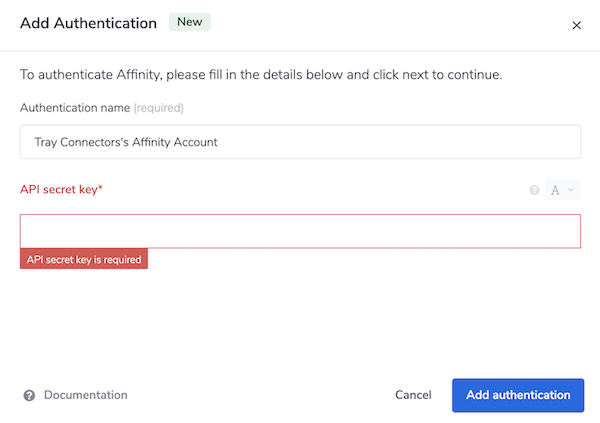
As you can see from the image below, in order to complete authentication set up, Tray requires that you input your "API secret key".

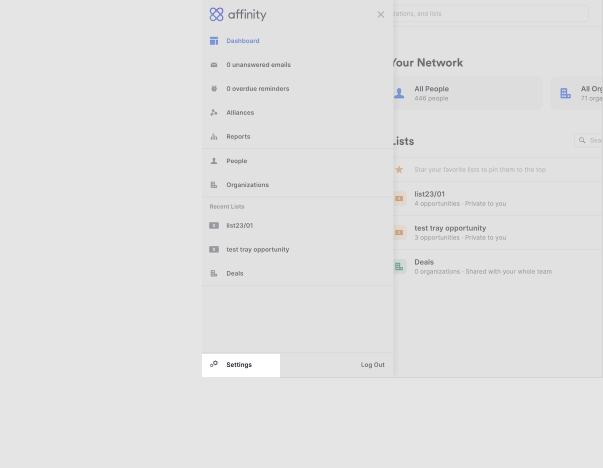
To generate an API secret key access the Settings Panel that is accessible through the left sidebar on the Affinity web app.

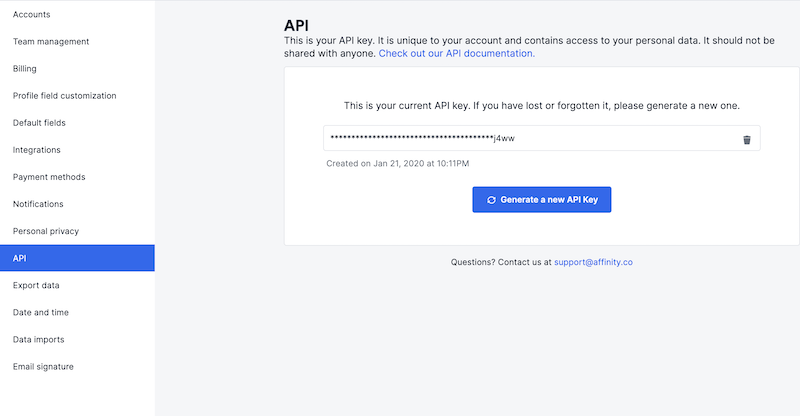
Next, press the API button on the left hand navigation pane. The API key will be displayed in the white box similar to the one displayed:

Copy and paste the key from Affinity web app into the API secret key field in the above Tray authentication dialog. Once you have added the authentication, it will already be selected in the authentication section in the Tray.io properties panel.
You have now completed the authentication process and can use the Affinity connector. Your auth field will now automatically select the Affinity auth created until stipulated otherwise.
Available OperationsCopy
The examples below show one or two of the available connector operations in use.
Please see the Full Operations Reference at the end of this page for details on all available operations for this connector.
Example usageCopy
TRAY POTENTIAL: Tray.io is extremely flexible. By design there is no fixed way of working with it - you can pull whatever data you need from other services and work with it using our core and helper connectors. This demo which follows shows only one possible way of working with Tray.io and the Affinity connector. Once you've finished working through this example please see our Introduction to working with data and jsonpaths page and Data Guide for more details.
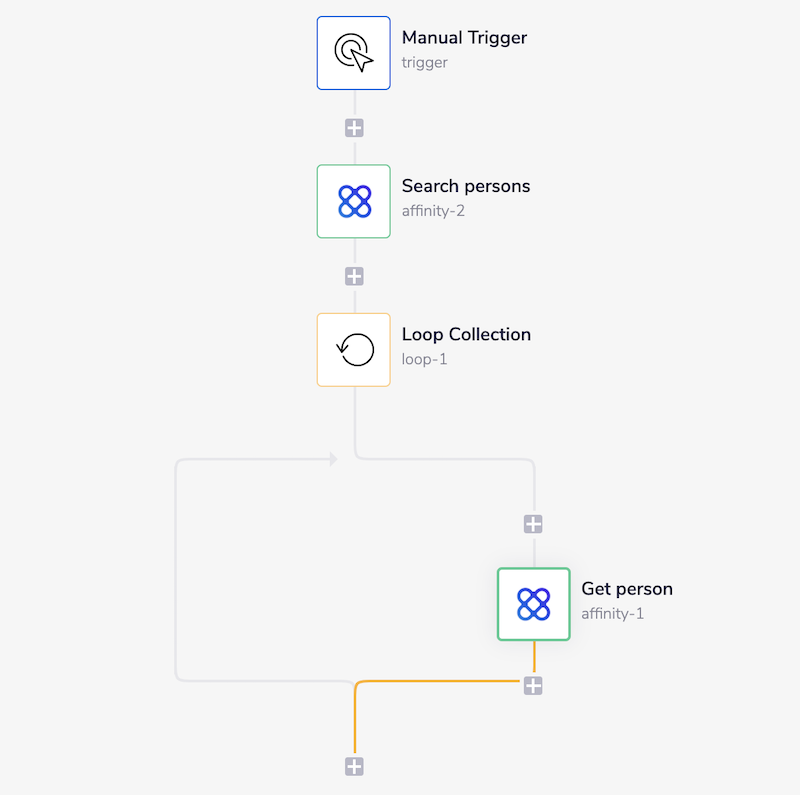
Below is a brief example which demonstrates how to iterate through the persons stored within your Affinity app.
This example imagines a scenario whereby the first step is manually triggered. This in turn kicks off the Tray workflow and will get the persons in the Affinity account one by one.
The outlined is as follows:
Set up your manual trigger and first Affinity connector step.
Add a Loop connector to iterate through your persons.
Add a step to get each person individually.

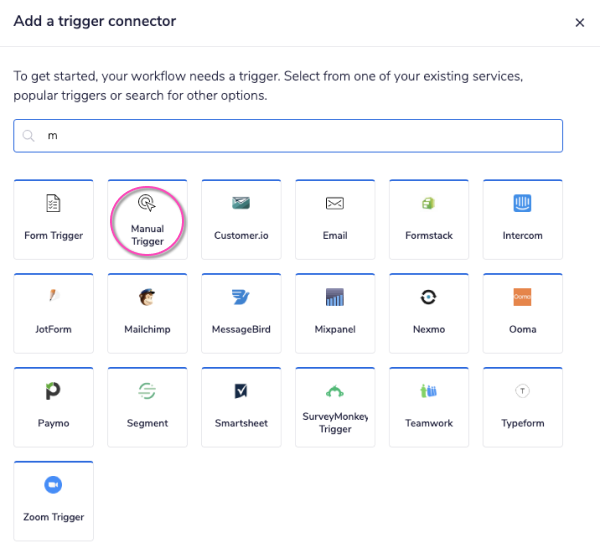
1 - Setup trigger & Search personsCopy
Once you have clicked 'Create new workflow' on your main Tray.io dashboard (and named said new workflow), select the 'Manual Trigger' from the trigger options available:

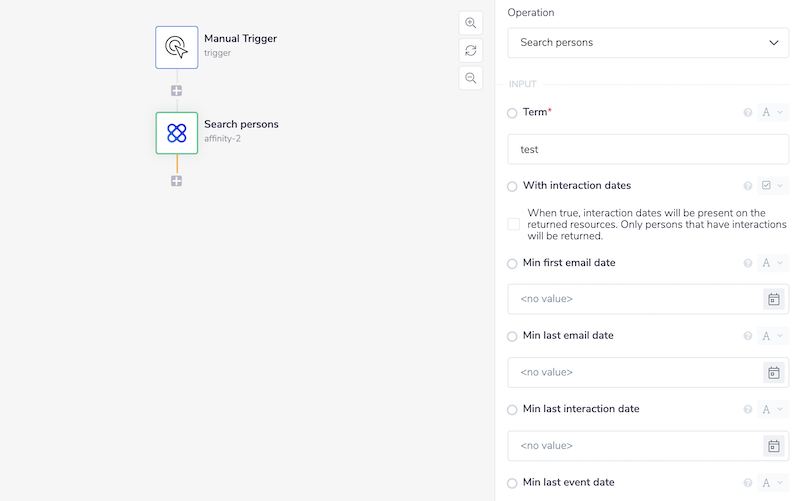
Once you have been redirected to the Tray.io workflow dashboard, from the connectors panel the left, add an 'Affinity' connector to your second step. Set the operation to 'Search persons'.
This operation will retrieve persons in the Affinity web app depending on the value added in the 'Term' input field. You can also filter through the results further by adding specific dates to the date input fields.
The fields that are mandatory while using this operation are 'Term' - which is used to search all the persons in your team’s address book - and 'Page size'. Please note that the 'Page size' field is already pre-filled for you, so you need not worry about it at this stage.
Feel free to re-name your steps as you go along to make things clearer for yourself and other users.

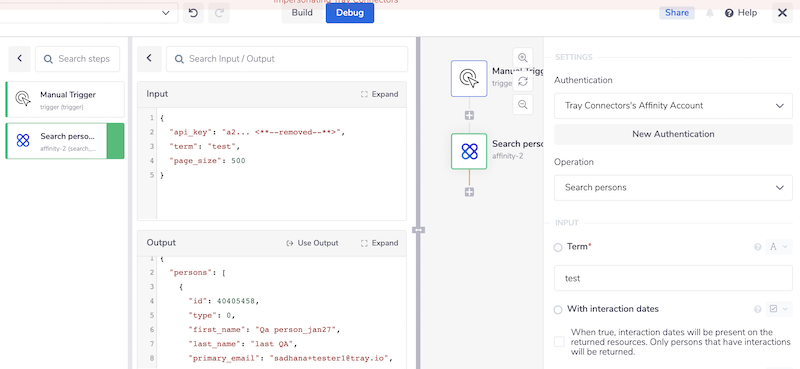
Now when this workflow is run, it will pull down a list of persons from the Affinity API. This means you will be able to view them when you click through your debug panel, and expend the output field.

2 - Add a Loop stepCopy
Next, we add a 'Loop Collection' connector to the workflow.
Use the connector-snake to generate the JSON path you will need, by clicking and dragging on the orange circle mapping icon, left of the 'List operation' itself.
CONNECTOR-SNAKE: The simplest and easiest way to generate your jsonpaths is to use our feature called the Connector-snake. Please see the main page for more details.
JSONPATHS: For more information on what jsonpaths are and how to use jsonpaths with Tray.io, please see our pages on Basic data concepts and Mapping data between steps
.
Once you have dragged it over to the first Affinity step, you will see a dropdown list of options appear. Select the persons array.
The Loop input panel should then look something like this:

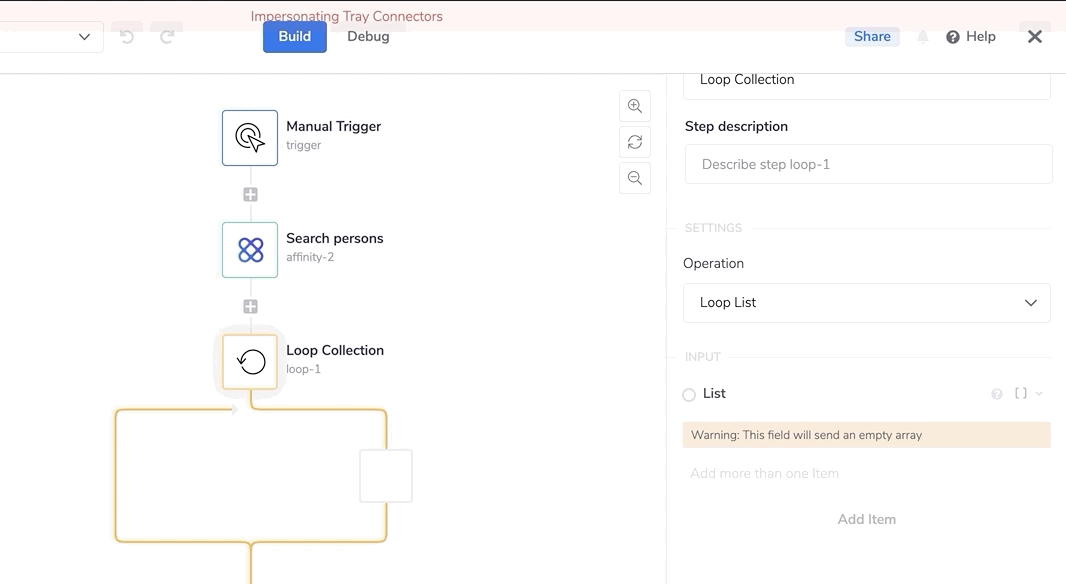
This will enable us to iterate over the list of persons, and perform operations for each one, during each loop cycle.
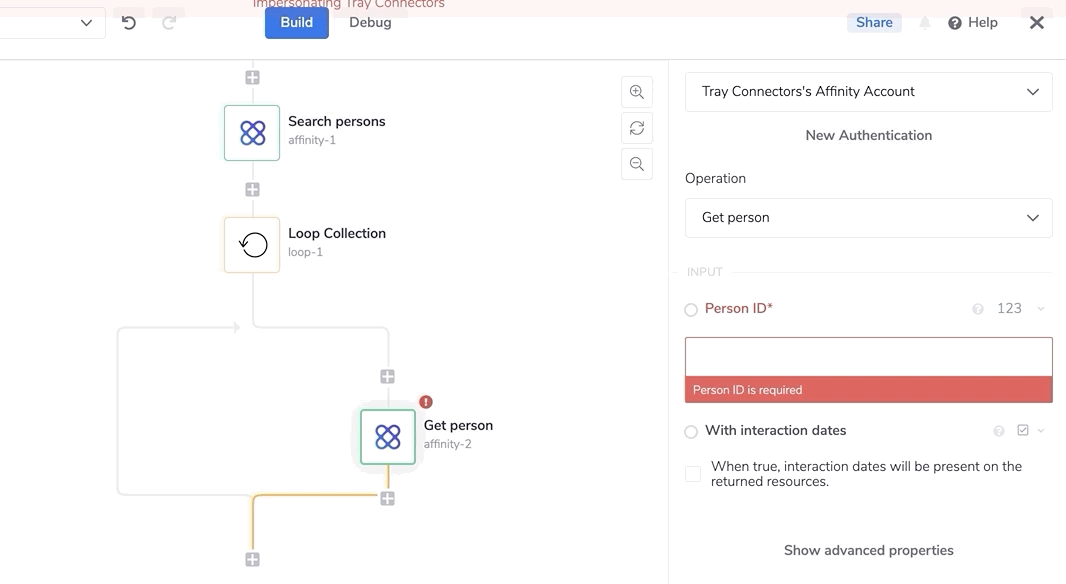
3 - Get personCopy
Finally, drag another Affinity connector step into the Loop collection itself, and select the operation 'Get person'. Use the same connector-snake method for generating the JSON path to get the 'ID' field.
Another following step could be to change 'Get person' to 'Update person' in order to update each person in turn with some new data, once you run your workflow
BEST PRACTICES: Whenever you do decide to create your own workflow, be sure to check out some of our key articles such as: