Script 3.3
The Script connector can be used to add JavaScript functions to your workflows
OverviewCopy
The Script connector can be used to add Script functions to your workflows.
The Script connector supports ES6.
The steps involved in using the Script connector are:
Optionally define input variables which can be pulled in from previous steps in your workflow. The below screenshot shows using
$.steps.loop-1.valueto pull in the value variable from the 'loop-1' workflow step.


Your script must begin with the
exports.step = function()line in order to function correctly. From within this you can create and return variables and work with objects. If you wish to use variables pulled in from previous steps, as mentioned in point 1, this should beexports.step = function(input)In your script, 'input variables' are written in the format
input.NAMESo for example you could sayvar message_object = input.message;to create an object based on the above screenshot.What you return in your script will determine what is available for subsequent connector steps to make use of, e.g.
return message_object;};
Please see our example workflow below for a simple demonstration of these points in action.
IMPORTANT!: You can choose from the Operation dropdown options whether you want to execute your step synchronously or asynchronously. You should nearly always choose synchronously, unless you're planning to make HTTP requests in your script.
JS LibrariesCopy
The following Javascript libraries come pre-installed and you can use them within your script:
Follow Node modules are pre-installed in connector version >= 3.2:
Go through the section below on Testing scripts locally.
Notes on using the Script connectorCopy
The main property of the Script connector is the 'Script' input field. This is where you would typically write up the code needed.
One of the way your code can integrate with Tray.io features is through the use of Interpolated mode.
As this property is essentially a "text field", the use of interpolated mode within the Script connector itself is supported. Simply use the same curly brackets and jsonpath method as normal and the output should be the same.
Take for example a workflow that generates a random string.

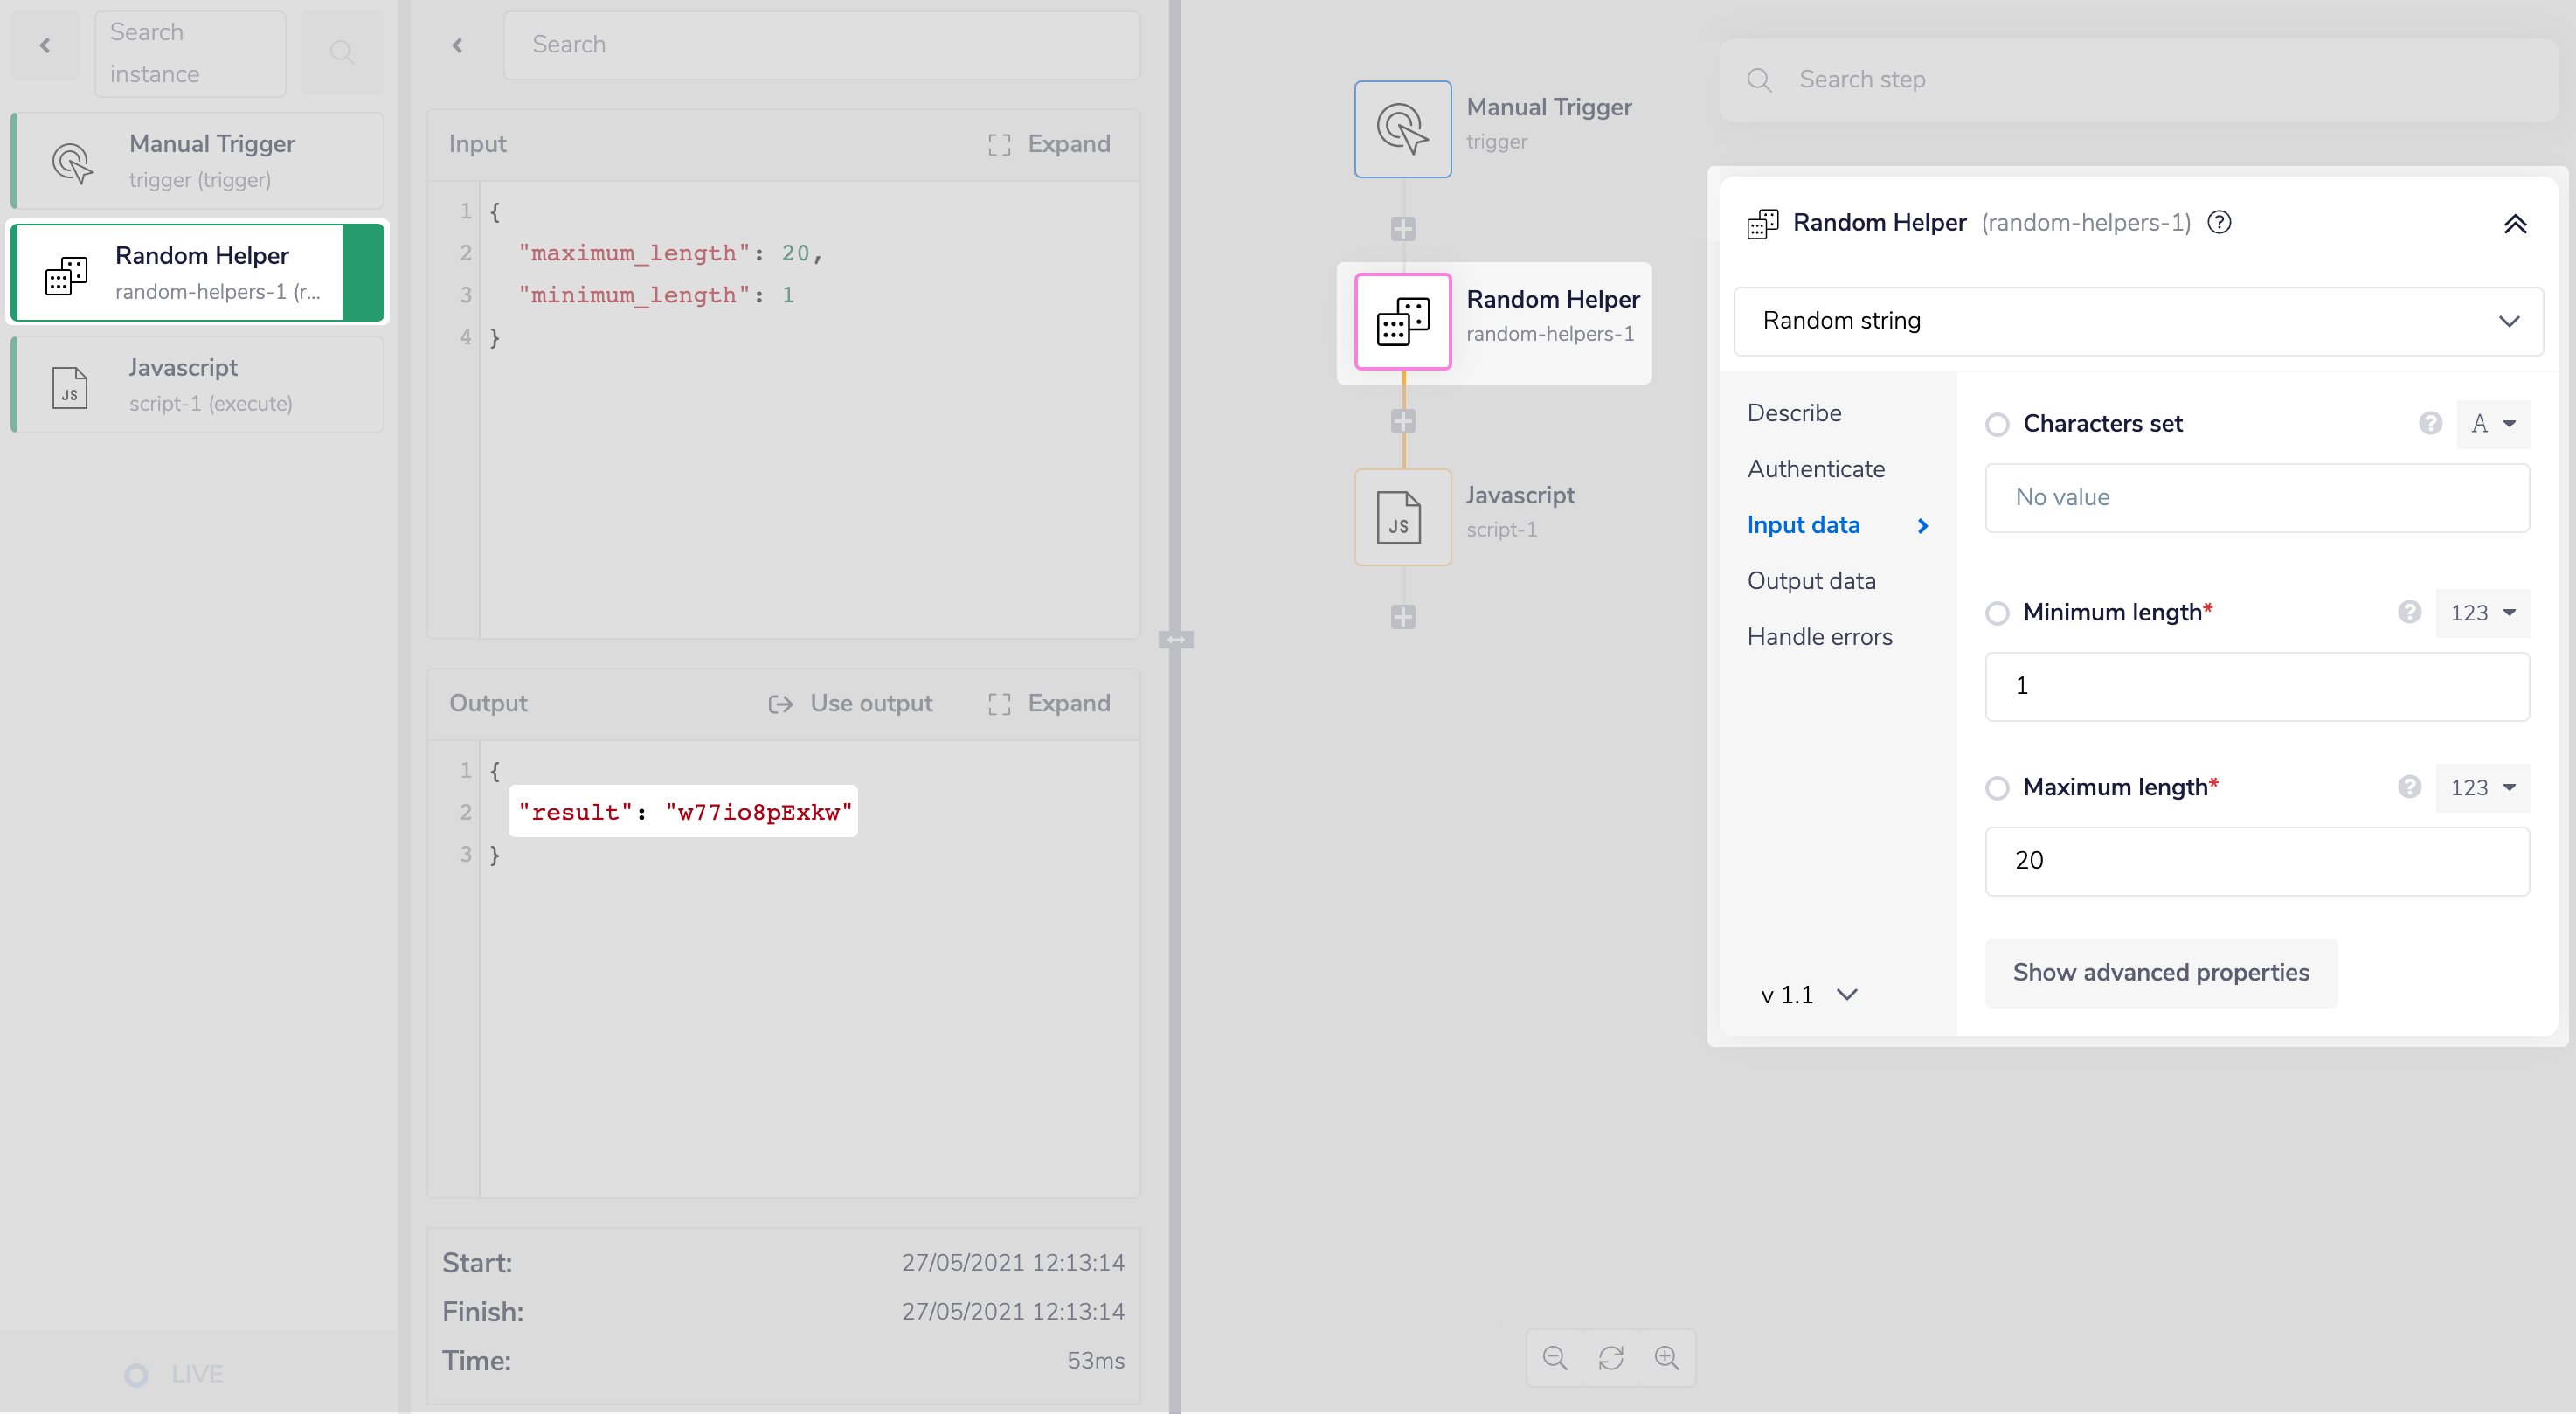
Using some simple Javascript and the Script connector, we call the random string utilising interpolated mode:
1exports.step = function(input, fileInput) {2return 'some value: ' + '{$.steps.random-helpers-1.result}';3};

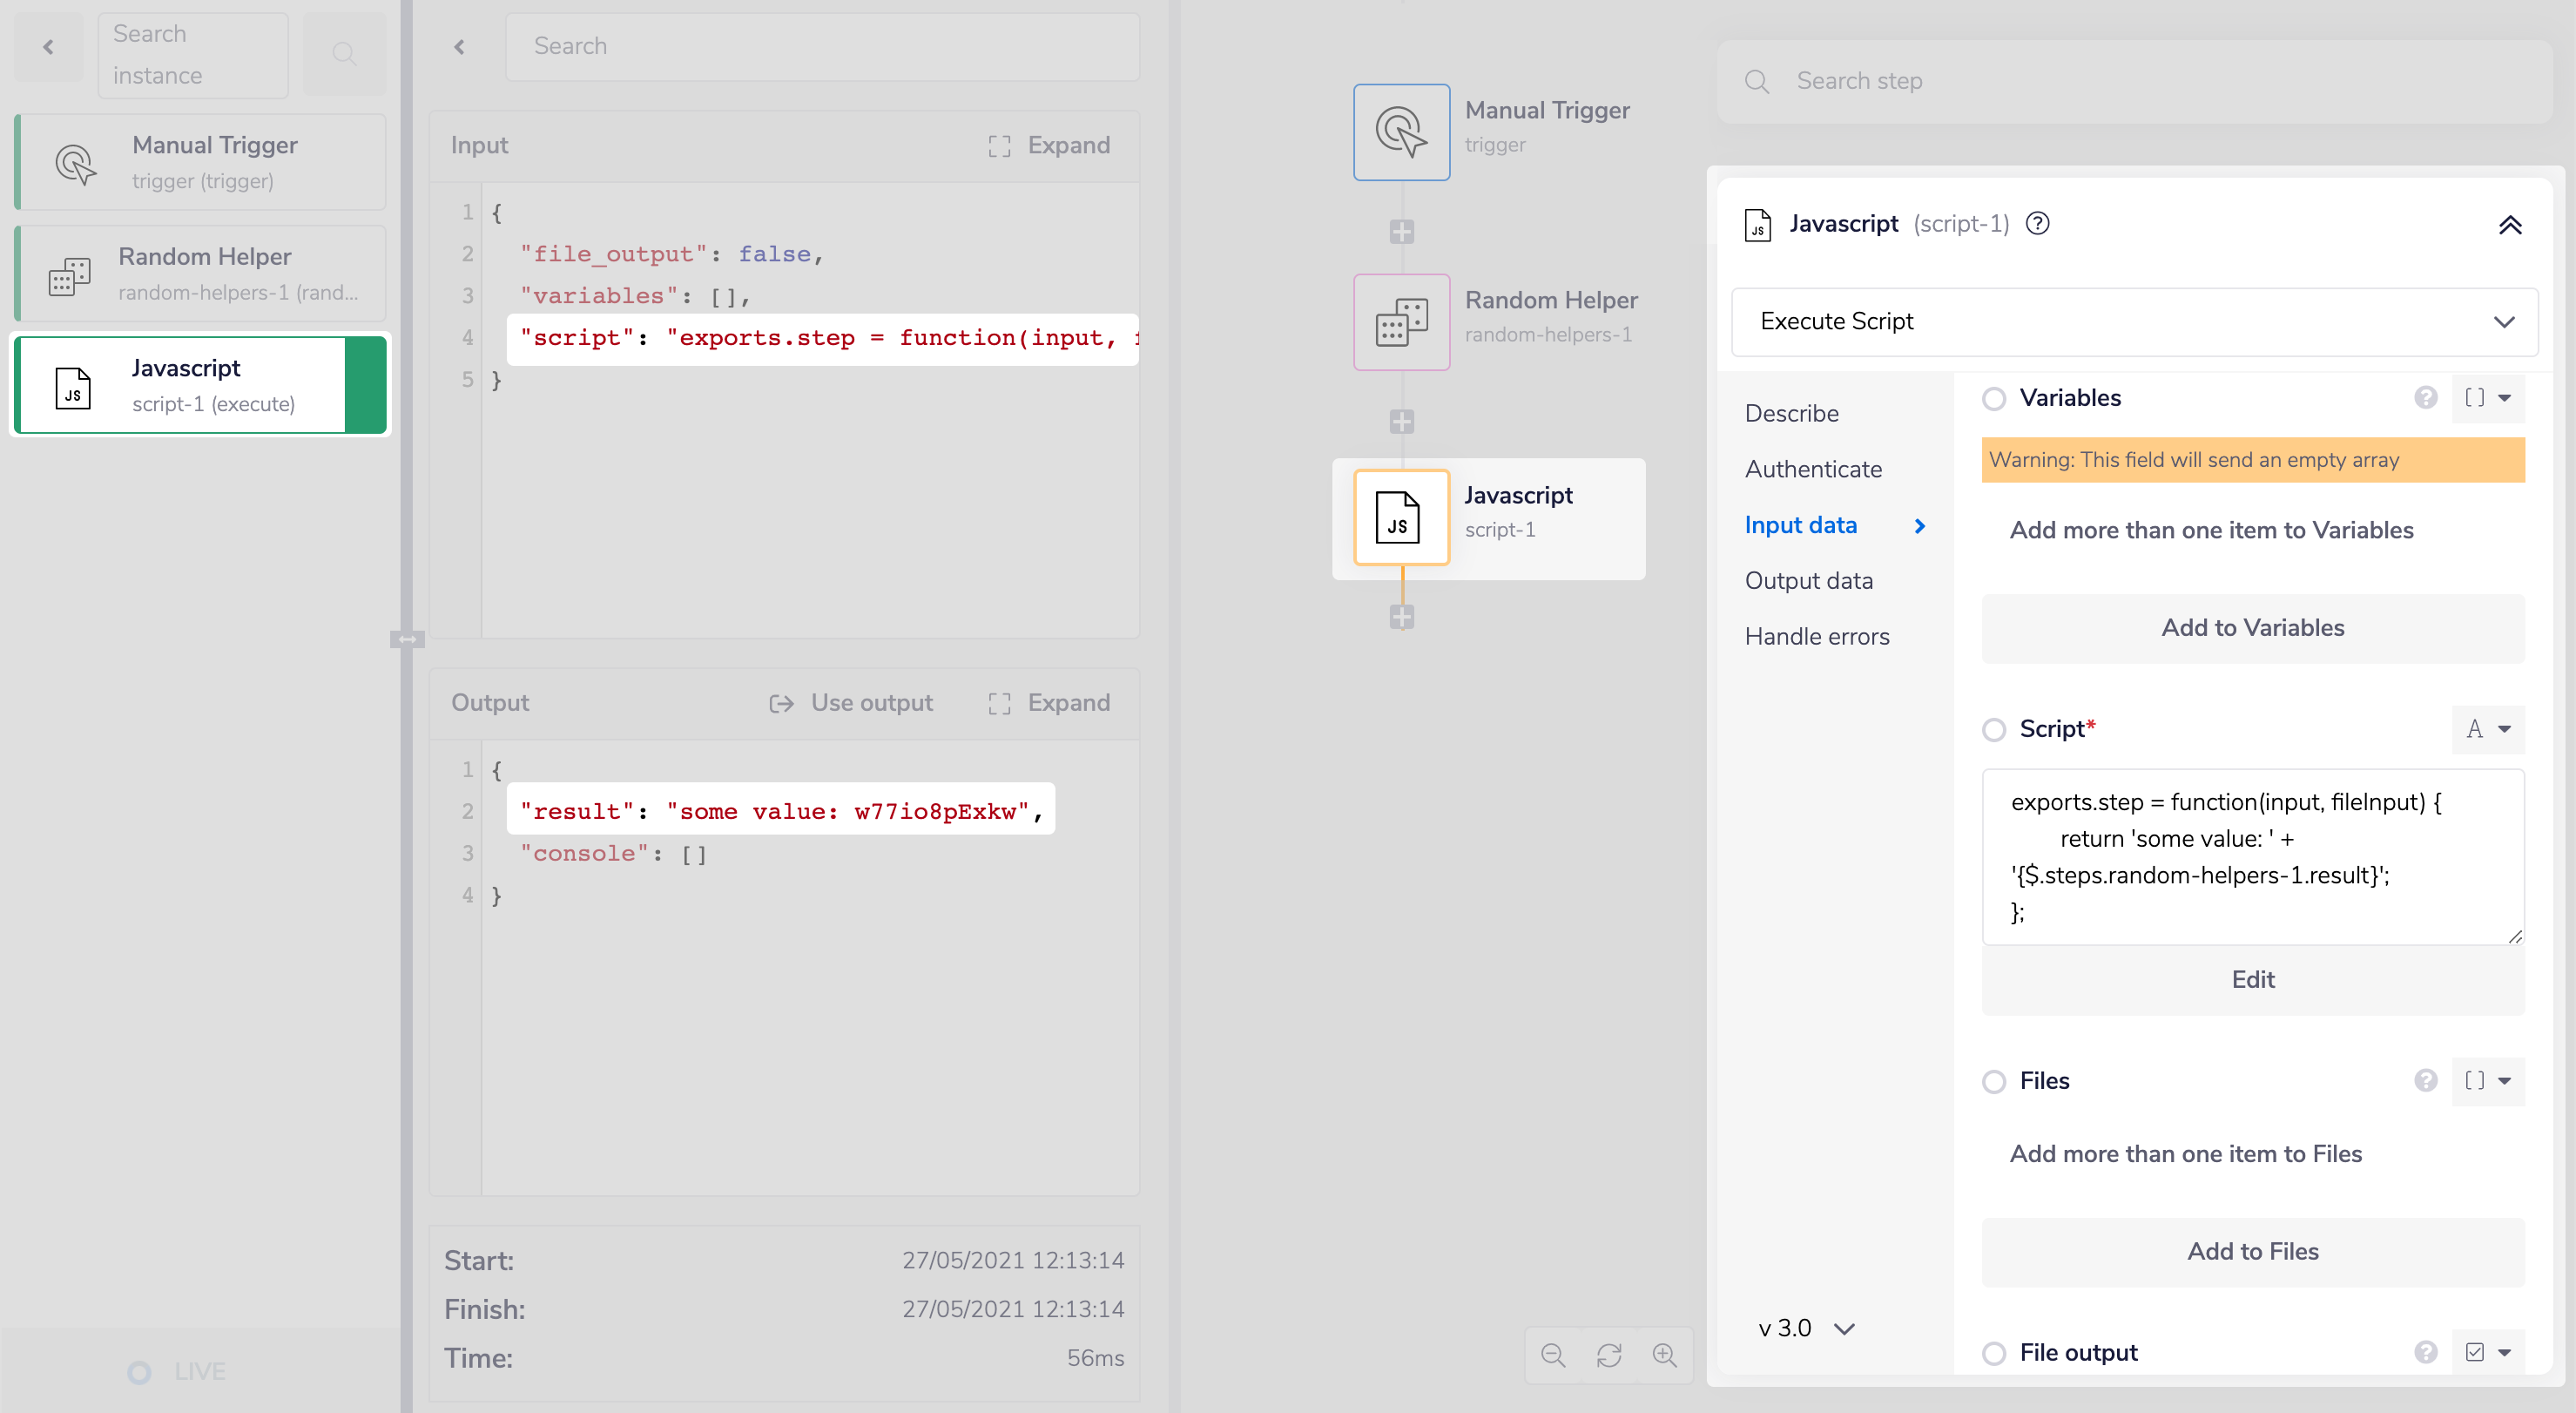
The code will then be interpreted as the actual result of the jsonpath rather than the jsonpath itself as displayed in the Debug panels:
1{2"file_output": false,3"variables": [],4"script": "exports.step = function(input, fileInput) {\n\treturn 'some value: ' + 'w77io8pExkw';\n};"5}


PLEASE NOTE: We don’t support Import statements in script connectors
Testing scripts locallyCopy
Although you can figure out what went wrong with your script code from your logs, you can save yourself some trouble by testing / debugging your code locally before adding it to the connector.
Script connector tester is a tool from Tray that you can use to quickly test / debug your code. It comes with loadash, mout and moment libraries.
Fork the repo, clone it locally and run npm install to install libraries
Now you can follow the steps below to use it:
You may have to run npm install at regular intervals just to ensure your libraries are up to date with latest versions (for example if you are trying to use a function from a newer version of loadash or moment )
Basic exampleCopy

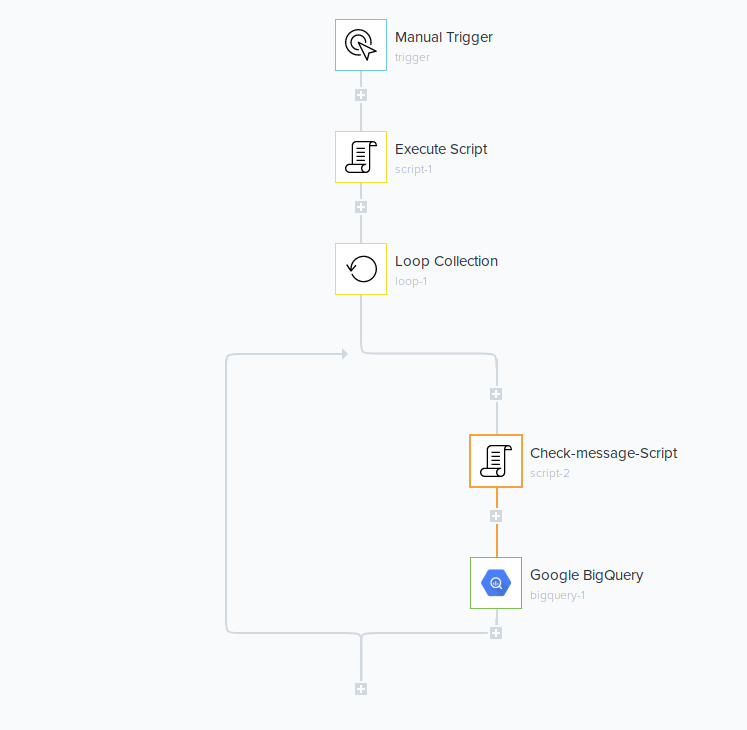
The above example shows a manually triggered workflow which implements the following steps:
Use a script to create some dummy message values. In a live situation these messages would be pulled in from another connector step (e.g. intercom, ringcentral etc.). Manually creating these values is actually a nice demo of the basics of working with the Script connector:
1exports.step = function() {2return {3"messages": [4{"body": "Hello is there anybody there?", "phone_number": "+147438662", "id": 1052332004},5{"body": "Anyone?", "phone_number": "+147438662", "id": 1052332004},6{"body": "Ah there you are", "phone_number": "+147438662", "id": 1052332004},7{"body": "empty", "phone_number": "+147438662", "id": 1052332004}8]9}10};
Use a Loop Helper to loop through the above. The 'Loop List' Operation can be used to deal with each message one by one.

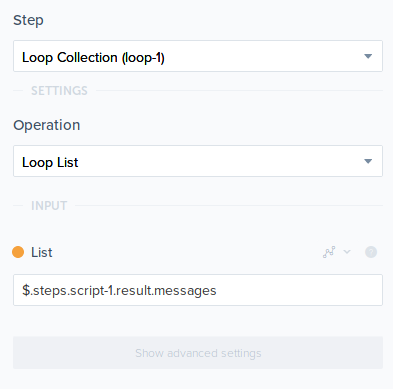
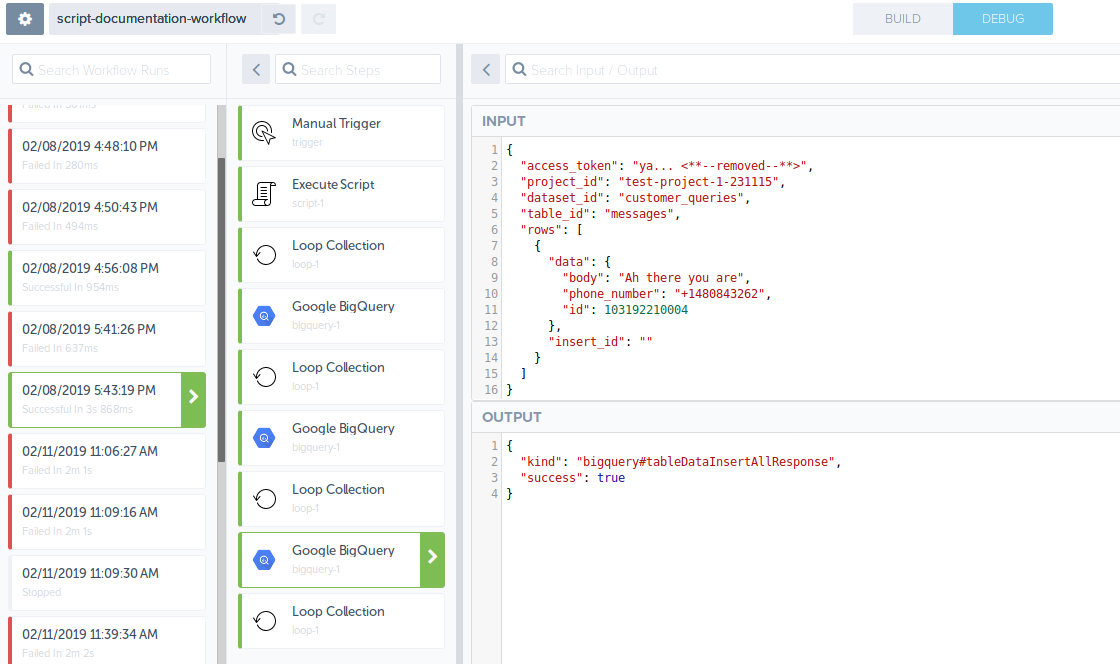
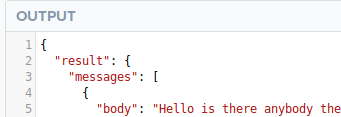
In order to pull in the message for the script we use $.steps.script-1.result.messages.
This is because, if we click on Debug and look at the output from the 'Execute Script' (script-1) step, it is in the format:

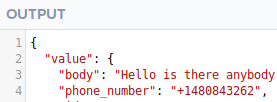
Then for each message that the loop helper processes, we can use another Script connector ('Check-message-Script' (script-2)) to check that the message fulfils certain criteria. We do this by first of all creating a 'message' input variable which pulls the message from Loop Collection (loop-1) with
$.steps.loop-1.value:


We have to use 'value' here because the output log of a Loop Connector shows:

The script itself then runs a check on each message fed by the loop, to see if the message itself was empty, in which case reformat it for the database. If it is not empty then it returns the message object unchanged:
1exports.step = function(input) {2var message_object = input.message;34if (message_object.body === "empty"){5return {6"body": "empty",7"phone_number": "---",8"id": "000"9}10} else {11return message_object;12}13};
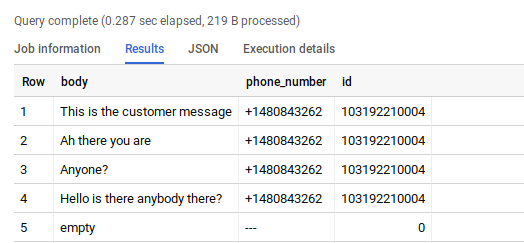
Finally, the result of each loop and message check is fed into a Google Bigquery database (you will need to authenticate the Bigquery connector with your Bigquery account and setup a dataset and table), using the 'Insert Rows' Operation. The 'Project Id' and 'Dataset Id' are specified and then the result of the message is fed in:


Once the workflow is setup, click 'Run Workflow Now' A successful run will then lead to your Bigquery dataset being updated so it will look something like this:

And clicking on the Debug tab of will enable you to view the output logs of each stage of your workflow: