Auth slots
Any services in your source workflows will have authentications that will need to be set by the End Users of your Solutions.

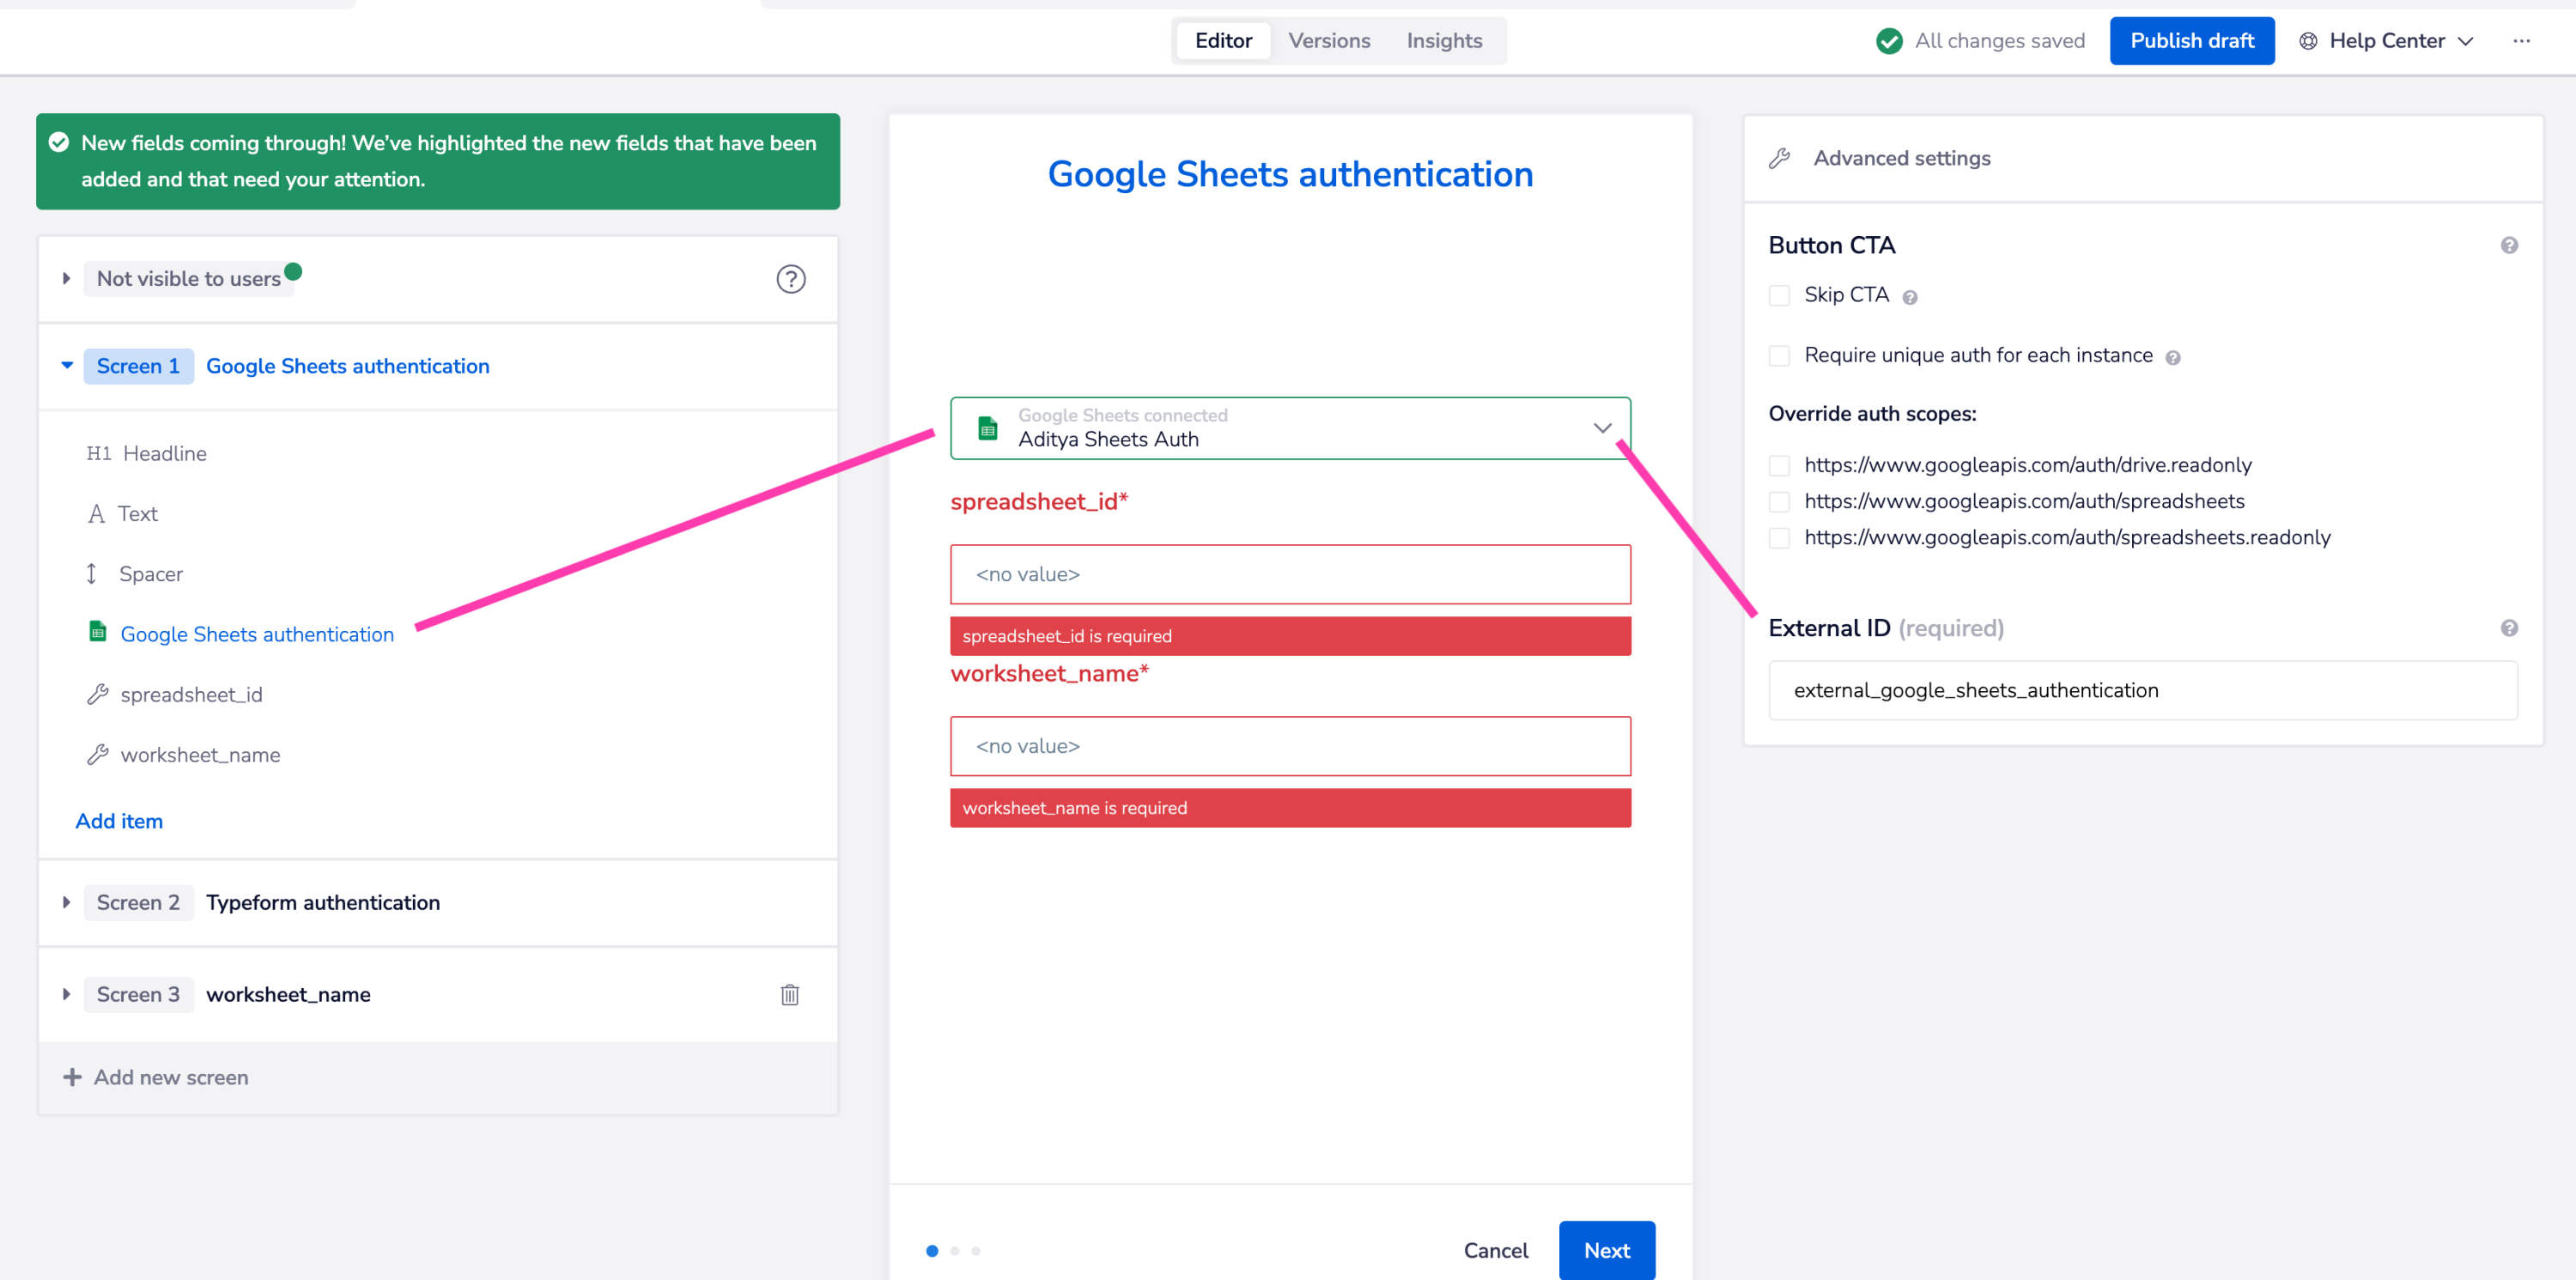
Each slot's External ID can be used to query and update auth and config data via the Embedded APIs
When using the Get Solution Instance query we can see that the auth details are found within authValues:
1{2"node": {3"id": "97fa58fe-0d67-423b-817a-e73d21887371",4"name": "Bolo Zenden Typeform > Sheets instance 1",5"enabled": true,6"owner": "334b5717-e400-4c24-ac47-2d860a16d19d",7"created": "2023-07-20T10:38:37.757272Z",8"solution": {9"id": "3569fd71-70e8-4b78-84cf-c14c44f216eb",10"title": "Quickstart Typeform > Sheets",11"description": ""12},13"workflows": {14"edges": [15{16"node": {17"triggerUrl": "https://936acb30-7958-4c51-8190-05f678265258.trayapp.io",18"id": "a7becc8b-549b-43a2-9016-e7d69fcf4c5b"19}20}21]22},23"authValues": [24{25"externalId": "external_typeform_authentication",26"authId": "f257e1c7-0e0d-490d-9fe4-ed4f3abe3123"27},28{29"externalId": "external_google_sheets_authentication",30"authId": "f7c90fe4-de65-4d79-88b1-c5f53002809f"31}32],33"configValues": [34{35"externalId": "external_spreadsheet_id",36"value": "\"1miJOZQvaVdzrwF1wuUSouHVch43Z9FyRvS5WP9wm1PM\""37},38{39"externalId": "external_form_id",40"value": "Zx86yu9P"41},42{43"externalId": "external_sheet_name",44"value": "\"leads\""45}46]47}48}
Setting auth scopes for End UsersCopy
When you are creating a workflow which will act as the basis for Solution Instances activated by your End Users, it is important to know how to set the scopes your End Users have for any OAuth-based authentications.
To do this all you have to do is create an Authentication in the source workflow.
The scopes you choose when you do this will then be the scopes that are set for your End Users when they are authenticating.
For example when you create an authentication for Hubspot, you can set the scopes as below:


This will enable you to control the scopes which your End Users have, and won't have to worry that they will choose scopes that should not apply to them.
When your End Users authenticate in the Configuration Wizard, they will only have to enter their login details, with no option to set scopes.
Shared auths (static slots)Copy
For some Embedded Solutions it may be that you want to use shared authentications without allowing the End User to set or change them.
In this case you can use what we call 'Static Slots'.
This is useful in cases where you wish all the End Users of your Solution to make use of the same authentication for a particular service, rather than having to administer multiple personal authentications.
An example of this might be if you have an FTP server with a company login, and you wish all your End Users to make use of this. Or you might have a company login for a service like Hubspot or Salesforce.
In order to set a static authentication you need to:
In the source workflow that your solution is based on, create the 'master' authentication for the service in question
In the solution editor, move the authentication under 'Hide from users' and tick the 'make static' box:

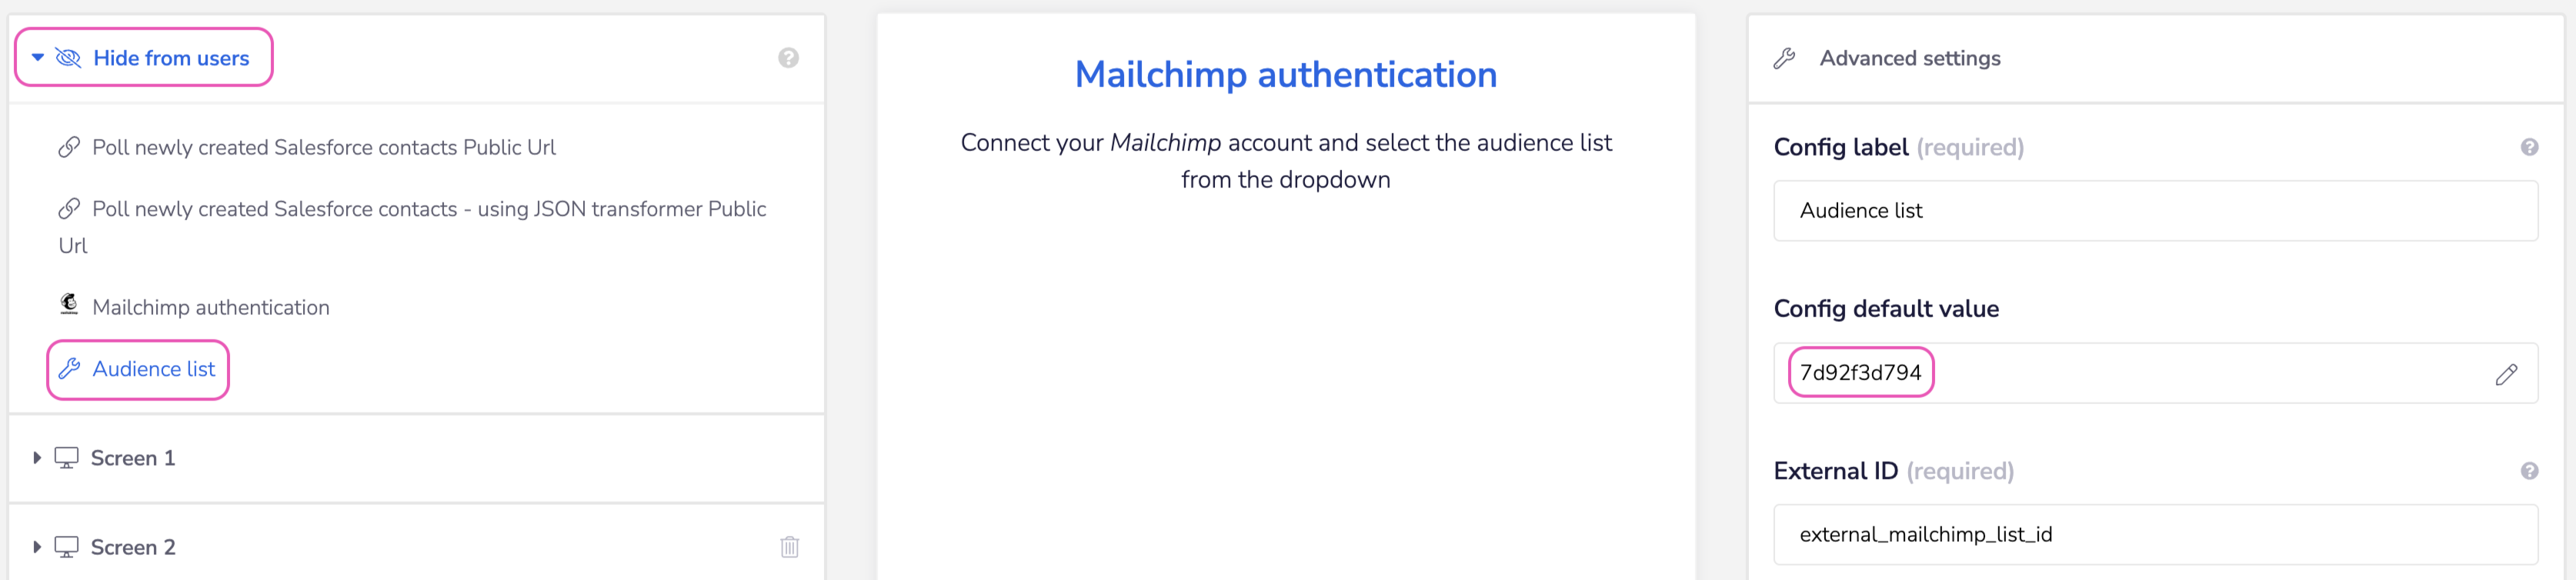
Note that any drop-down lists associated with the service that your solution statically authenticates to will be connected to the same static authentication.
For example, if you have used config data to allow the End User to choose from a list of Salesforce record types or Slack channels, then the record types or channels available will depend on what the static authentication has access to.
Forcing unique authsCopy
When creating a Solution, it may be that you wish to make sure that your End Users are only allowed to use one unique authentication per Solution Instance.
In Tray Embedded it is possible to set a limitation so that an End User is forced to add a new authentication for a particular Solution Instance, and cannot choose from a list of already-made authentications.
For example if a Salesforce authentication has already been created in a different Solution Instance which utilizes Salesforce, they will not be able to choose that authentication. They will be forced to create a new one.
This can be turned on in the Solution Editor. When setting the screens for the Configuration Wizard you can set the 'Force Unique' option:


If needed, you can permit the End User to subsequently edit their unique authentication, either by running the Config Wizard again, or by following the processes outlined below in 'mapping and editing auths'
Managing expired authsCopy
Some services have a strict authentication expiry period. An example of this is Facebook authentications, which expire after 60 days.
This will impact your End Users in that they will need to reauthenticate in order for their Solution Instances to continue working.
To help you deal with this, well in advance of the expiry (generally 7-10 days), we will send you a notification as a POST request to a specified url.
It is recommended that you ask your users to take action immediately to prevent their from expiring.
Setting the Expired auth URLCopy
Go to your Profile Settings page and enter an 'Expired auth notification webhook' URL which can consume notifications about expired auths:

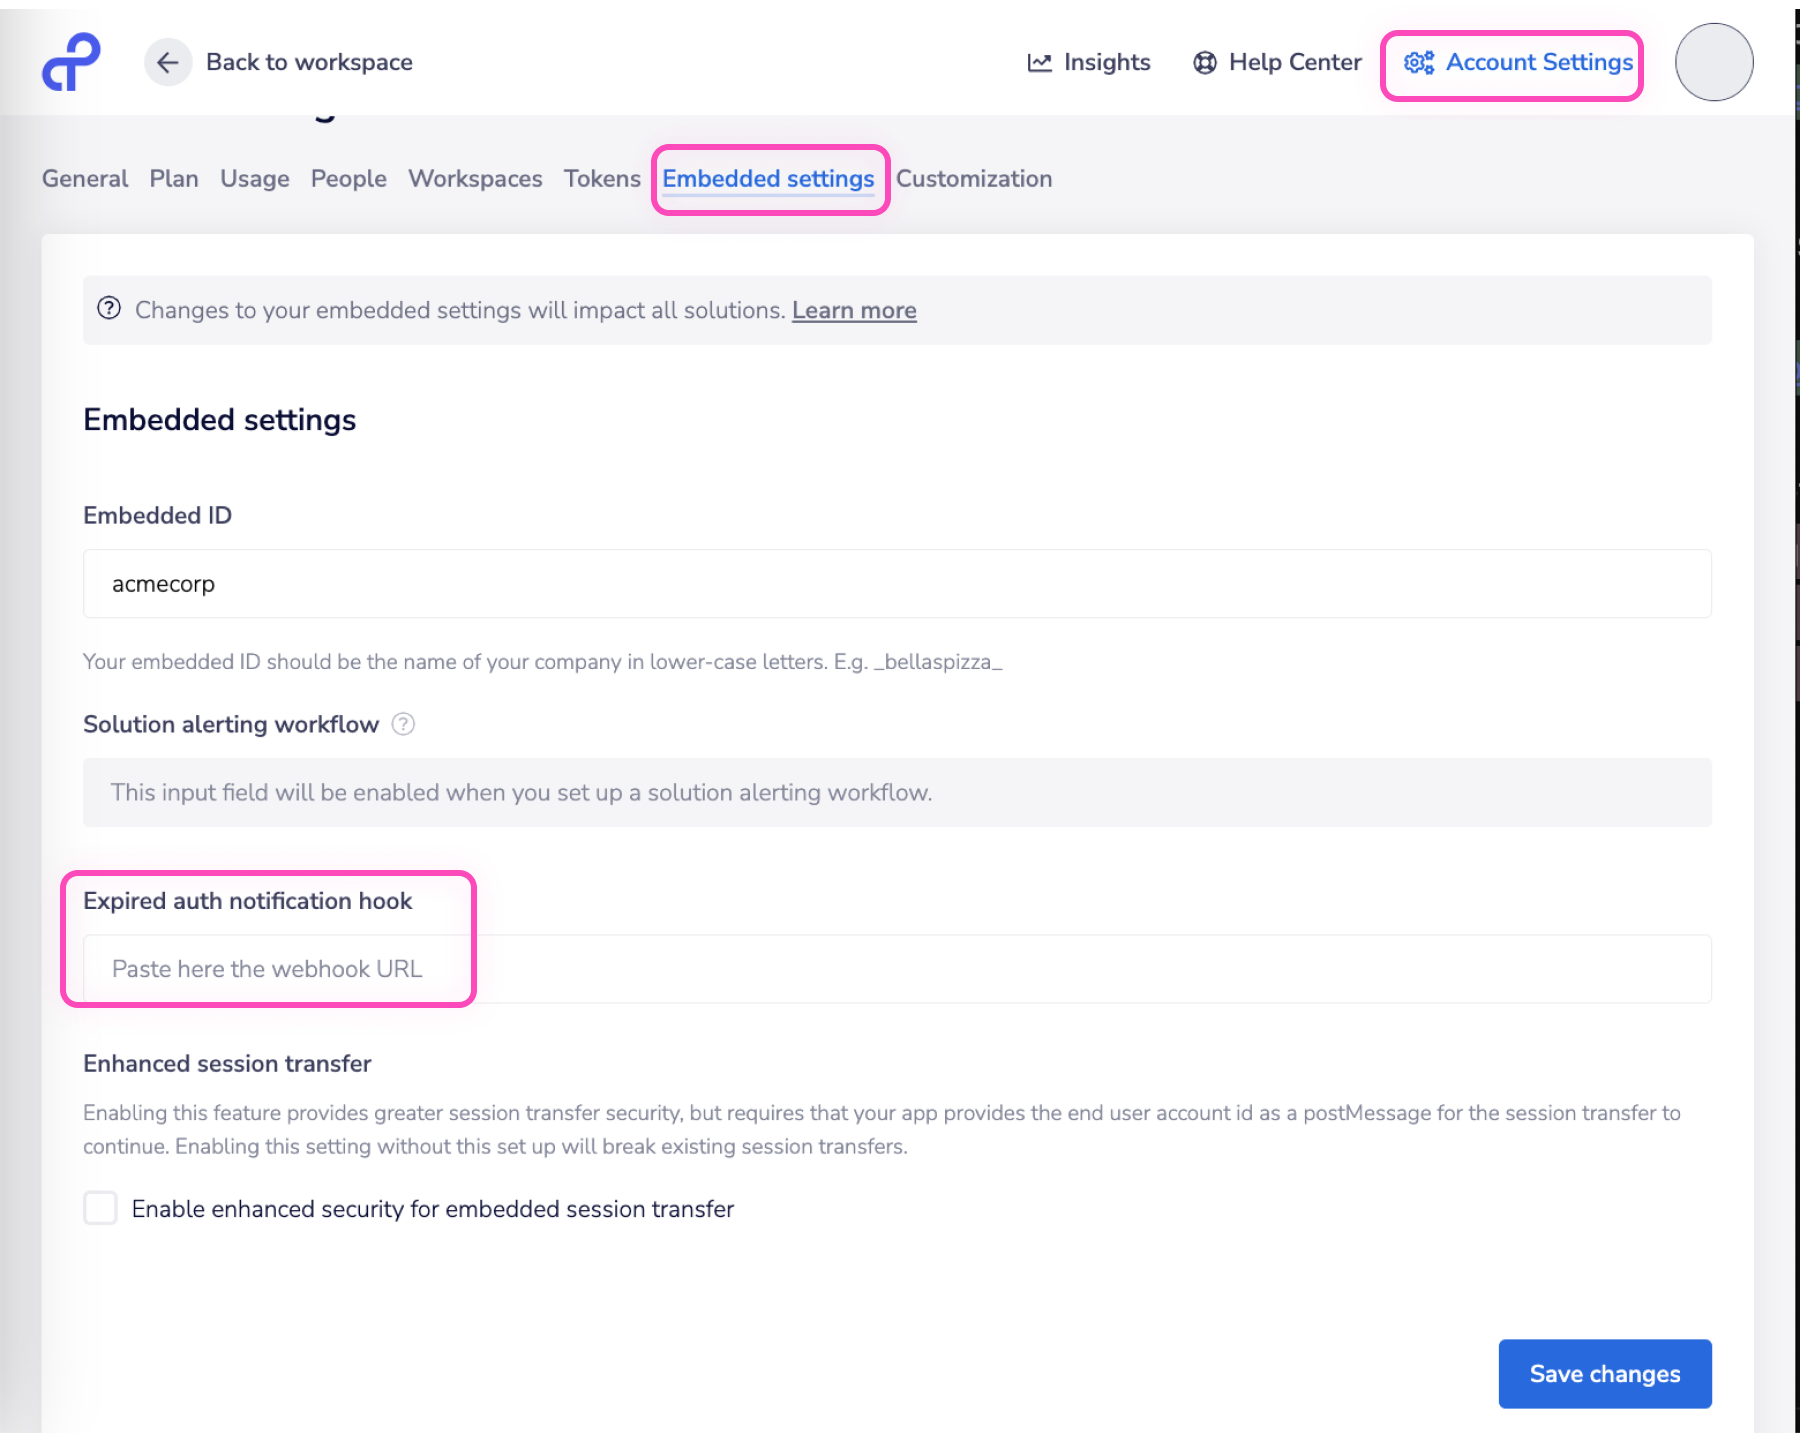
This url can be either:
A url hosted and controlled by you, whereby you choose exactly how to consume the payload.
A Tray workflow public url, in which case you can build a Tray workflow specifically to deal with the expired authentication payload (i.e. you could pull the data about the expired auth from a Webhook Trigger and then notify the individual user to take action).
The expired auth payloadCopy
When an expired authentication notification is sent, it will be in the following format:
1{2"authentication_name": "User auth",3"service_name": "facebook",4"user_id": "8c0227d7-0181-4b4b-9955-354a63edcae2",5"authId": "bd90582e-ac50-4bb6-aeb6-2f0175408b69",6"external_user_id": "8cddbba1-0de6-4723-a8e3-6a2a3cdd0ef9"7}
The recommended procedure for dealing with the payload is as follows:
The above notification will be sent as a POST request to your specified url (generally 7-10 days before the expiry)
Your url should reply with a status of 200
Use the payload to locate a contact email address for your End User. This email should be stored in your own system. Remember that
external_user_idwas set when you created the user and is a common id shared between your Tray Embedded account and your external database, so this could be used to locate details about the End UserYou can then use the
user_idto obtain a User Token and List Solution Instances for the user, and find any Instances which use theauthId, as discussed in 'Mapping and Editing Auths' belowIn order to update any authentications, you can prompt the user to either run the configuration wizard again, or use the edit auth url at the end of the above page on Managing and Editing auths to activate the auth-only dialog
Importing authenticationsCopy
The process of importing authentications can help you create a seamless branded experience and to save End Users who are already registered with your product having to register and authenticate again. It can be used to import authentications for your own product, or from other major token-based services supported by Tray (Zendesk, Marketo,etc.)
The steps involvedCopy
In the Tray app UI, when you are creating a solution you should make sure that the authentication option is hidden from the End User when they are configuring their solution instance in your external UI. At this point you should also allocate an External ID to the authentication, as this is required when finally creating a solution instance.
In your external app, when registering a new user, creating their access token etc. you should use the createUserAuthentication mutation to create an authentication. When using this API, in order to specify which service you are creating an authentication for, and to supply the correct auth details you will need to specify the serviceId, the serviceEnvironmentId and the auth data (API key, domain, etc.) will need to be passed in the data field. These details can be obtained from the Settings & People section in the Tray UI.
The
createUserAuthenticationmutation will return an authenticationId which can then be passed (along with External ID from step 1) when you are using thecreateSolutionInstancemutation which is required when you are activating a solution for an End User.Remember that once a Solution Instance has been created, the final step in activating it for an End User is to use the updateSolutionInstance mutation to set the status to 'enabled'.
1 - Set the hidden authentication field in the UICopy
First, when creating/editing your Solution, set the Authentication as hidden in the UI, by dragging it to the Not visible to the users section as per the below screenshot:


From this you can pick up the External ID which must be passed when you are creating the Solution Instance in step 3.
2 - Create the authenticationCopy
Before you create the authentication you need to go the Settings section of your dashboard and navigate to Embedded settings.

Scroll down and you will notice Authentication import generator. Enter your service name under connector dropdown and choose your environment to obtain the serviceId, serviceEnvironmentId and auth data for the service you are authenticating with:


When using the generator you will notice that the services listed in the drop-down are limited to token-based services. OAuth services (Ex. Salesforce, Slack etc.) are not included here but it is possible to get these values for an OAuth service if you have created an auth for that service. Please refer to the API call below to obtain the information needed.
Alternatively, you can use the Get User Authentications (with Master Token) graphQL API call to obtain serviceId and serviceEnvironmentId.
Using the Master Token here will return all the auths you have created when testing your source workflows.
The name given to the authentication you are creating is determined by you. This name will be visible in the Tray UI and can help you categorise authentications according to service and owner. You can also display it in your own app UI if it is ever needed.
Note also that, if you are the actual owners of the service and it uses standard password/token-based authentication, it is possible to pass extra custom fields into data in the above mutation. Please contact us if you would like to discuss this.
Note on connector versionCopy
You will also note that each connector contains multiple versions:

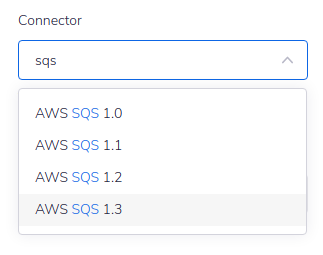
The version you choose should correspond to the version the connector is on in the Tray workflow builder. This is found by clicking on Show advanced settings for the Workflow connector step. You can then scroll back up to see the version, as per this SQS example:


Selecting the version is a necessary step to take because authentication details might change from one version of the Tray connector to the next - e.g. the service may ask for an extra key to be passed in the data field, or the type of the authentication may change from token-based to OAuth2.0
In the vast majority of cases authentication does not change from one version to the next, so you will notice that the returned code snippet will most often stay exactly the same when you change versions in the drop-down.
Important note on formatting dataCopy
The json values passed in data must be in single line format, with " characters escaped with a slash as per the above example.
If you are importing an auth for your own OAuth-based service, scopes (as a simple list of strings such as scopes: ["pages_show_list", "leads_retrieval"]) can be used to define the exact read/write access an auth has to different components of the service. Your service OAuth documentation should provide the necessary details for scopes.
The payload for this mutation will return an authenticationId.
3 - Create the Solution InstanceCopy
Along with the externalId obtained from step 1, the authenticationId you have just obtained when creating the auth can be passed (as authId) using the authValues argument when using the createSolutionInstance API:
1mutation {2createSolutionInstance(input: {3solutionId: "0dc02586-xxx-xxx-xxxx-cb98734578ef",4instanceName: "some instance name",5authValues: [{ externalId: "external_sqs_authentication", authId: "aaa67786-xxx-xxx-xxx-97dedd1519b3" }]6}) {7solutionInstance {8id9}10}11}
Note that the externalId of both authValues and configValues is case sensitive. For example if, in the UI at step 1 above, you have set the externalId as 'external_sqs_authentication' but then create the Solution Instance with 'External_SQS_Authentication' then the mutation will fail.
4 - Enable the Solution InstanceCopy
If you are auto-enabling the instances for your end users after they create the solution, your code should be configured to delay this call by at least 2 seconds after Create Solution Instance is complete.
Don't forget that once a Solution Instance has been created, the final step in activating it for an End User is to use the updateSolutionInstance mutation to set the status to 'enabled'.
Mapping and editing authsCopy
Mapping AuthenticationsCopy
In order to map an End User's Authentications to their Solution Instances, you can run a GraphQL query which combines listing their Solution Instances and Authentications.
This query requires a User access token (obtained as per Create User Token) to be passed as the Bearer in the request header:
1query {2viewer {3solutionInstances {4edges {5node {6id7name8authValues {9authId10externalId11}12}13}14}15authentications {16edges {17node {18id19name20}21}22}23}24}
An example result would be:
1{2"data": {3"viewer": {4"solutionInstances": {5"edges": [6{7"node": {8"id": "5f85b697-7b1b-4a1b-9c8f-5d7dabe22634",9"name": "Slack channel solution 1",10"authValues": [11{12"authId": "569adf96-3c05-40a6-b565-07e829d2c56d",13"externalId": "external_slack_authentication"14}15]16}17},18{19"node": {20"id": "41bbe979-d162-4c02-b03b-e8ca7f5c02f5",21"name": "Slack and Trello solution 1",22"authValues": [23{24"authId": "0b07a653-fbc3-4e91-9893-b8d4121471c3",25"externalId": "external_trello_authentication"26},27{28"authId": "a29d8a87-4b58-49a3-928d-99901f41c698",29"externalId": "external_slack_sales_dept_authentication"30}31]32}33}34]35},36"authentications": {37"edges": [38{39"node": {40"id": "569adf96-3c05-40a6-b565-07e829d2c56d",41"name": "Roger Ramjet's Slack Account"42}43},44{45"node": {46"id": "0b07a653-fbc3-4e91-9893-b8d4121471c3",47"name": "Roger Ramjet's Trello Account"48}49},50{51"node": {52"id": "a29d8a87-4b58-49a3-928d-99901f41c698",53"name": "Roger Ramjet's Slack Account 2"54}55}56]57}58}59}60}
This information can then be used to map Instances and Authentications in your application.
Note that the above example shows that one End User can have two different authentications for the same service - in this case for Slack authentications. The authId tells you which auth has been used for which Solution Instance.
The unifying identifier here is the authId - this can be used to map any of the other values such as name and id of the Solution / Instance and name of the Authentication,
Note also that externalId is an auto-set value which you can edit when creating your Solution:


externalId is primarily used for importing already-made authentications, when it is passed along with authId to identify what service within the solution the authentication is for.
Editing AuthenticationsCopy
If an End User needs to edit an authentication you can allow them to do this with the following URL which accepts the authId:
https://embedded.tray.io/external/auth/edit/{embeddedId}/{authId}?code={authorizationCode}
Remember that embeddedId is the value that you set when configuring your Config Wizard CSS
And that {authorizationCode} is the one-time use code that must be generated as per Create Config Wizard Authorization Code
You can remove the Tray.io domain and whitelabel the Config Wizard url. If you have done so then embedded.tray.io will be replaced with e.g. acme.integration-configuration.com
Skipping Auth naming pageCopy
You can skip the title field of the authentication (it will be automatically named for you) by adding the skipTitleField=true query parameter to the above URL.
For example:
https://embedded.tray.io/external/auth/edit/{embeddedId}/{authId}?code={authorizationCode}&skipTitleField=true
Skipping Auth settings page (OAuth services only)Copy
For OAuth services (i.e. non-token-based) you can also skip the auth settings (i.e. login details) and go straight to the scopes page by using the skipAuthSettings=true query parameter.
For example:
https://embedded.tray.io/external/auth/edit/{embeddedId}/{authId}?code={authorizationCode}&skipAuthSettings=true
Lastly, You can skip both title and auth settings for OAuth service using:
https://embedded.tray.io/external/auth/edit/{embeddedId}/{authId}?code={authorizationCode}&skipTitleField=true&skipAuthSettings=true