The Standard Experience (Config Wizard)
This page will introduce you to all the API calls necessary in order to register an End User and allow them to click on an available solution to activate their own instance.
Embedded API documentation with all queries and mutations can be found here: https://developer.tray.io/openapi/embeddedapi-introduction/
All of the API queries and mutations below can be run by using our Insomnia GraphQL collection (runs locally) or they can be pasted into the GraphQL playground (runs online). You will need an Embedded ID and master token to use the API calls.
Each API call will need the correct token (master or user) passed as a bearer. This is done largely automatically in our Insomnia collection (once you add your master token to the environment) but will need to be entered manually when using the GraphQL playground.
You will be able to simulate an End User clicking to configure a Solution Instance by deploying the Integration Marketplace App and completing the setup of a Solution Instance for that End User.
You will then be able to test the Solution Instance by pasting its webhook URL into your browser. As it is a webhook-triggered workflow, this will trigger a run of the End User's Workflow Instance.
Finally, you can then login to the Tray Embedded UI to find the End User's Solution and Workflow Instances, to see how debugging works.
Tray AcademyCopy
The steps have been summarised in a tutorial:
Notes on the user journeyCopy
Note that, while there may be a fairly 'linear' process for when an End User first configures an integration for their use, the API calls by your app are not necessarily made in a strict order.
For example, an End User may need to edit their settings for an integration at any point after they have registered.
You may also wish to list available integrations before a user has registered.
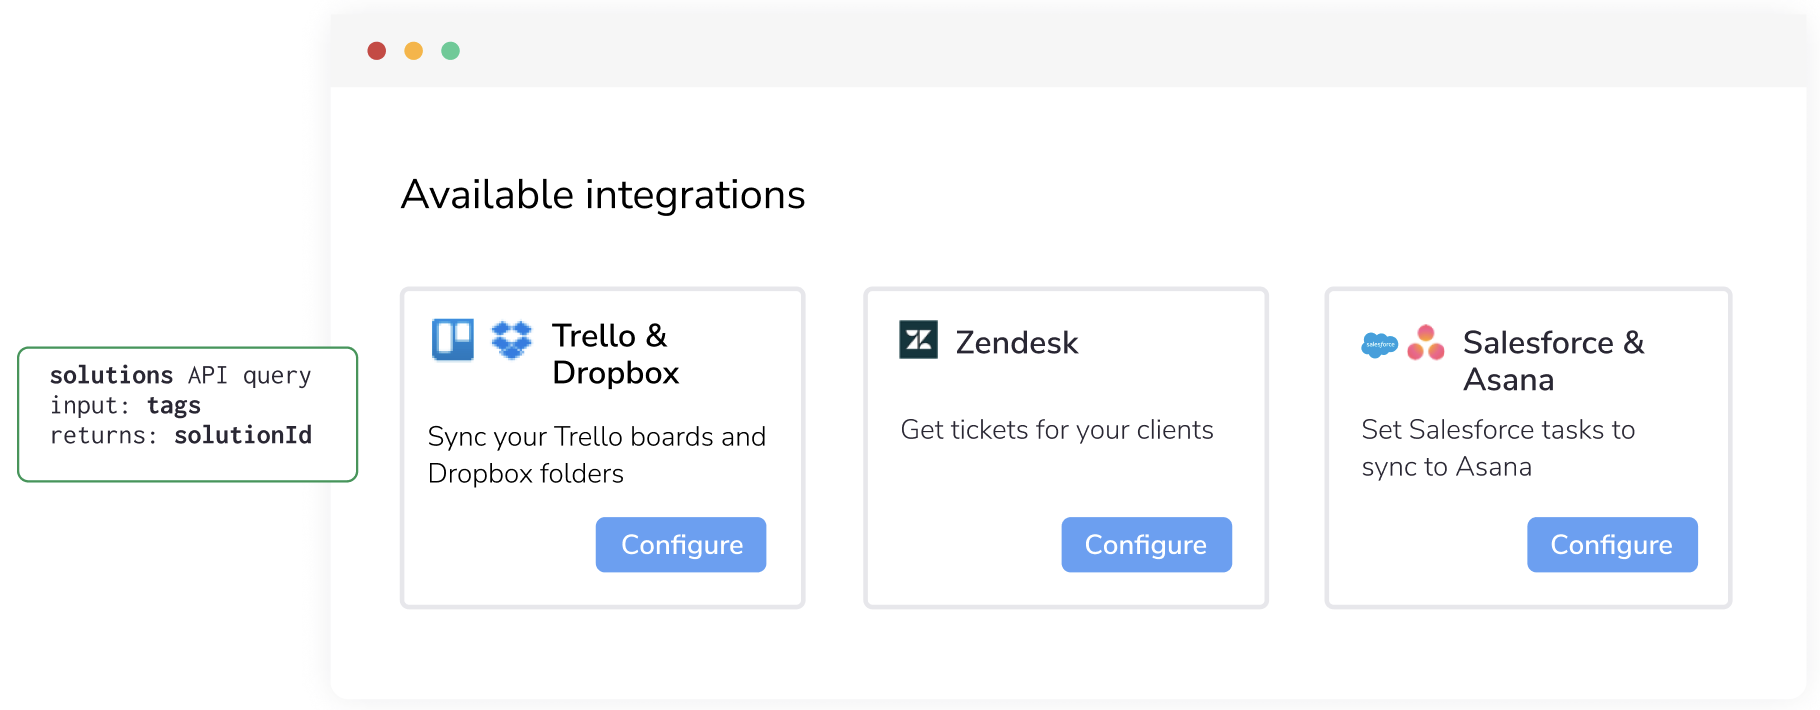
For each section below we have included a user journey diagram such as the following for when an End User logs in and available integrations are displayed:


Notes on Config Wizard URL and regionCopy
When initiating the Config Wizard for your End Users, you will need to compose the Config Wizard URL as such
https://embedded.tray.io/external/solutions/${embeddedId}/configure/${solutionInstanceId}?code=${authorizationCode}
This URL will vary depending on your region.
If you are in the EU region, the URL would be:
https://embedded.eu1.tray.io/external/solutions/${embeddedId}/configure/${solutionInstanceId}?code=${authorizationCode}
If you are in the APAC region, the URL would be:
https://embedded.ap1.tray.io/external/solutions/${embeddedId}/configure/${solutionInstanceId}?code=${authorizationCode}
Notes on using the Integration Marketplace appCopy
The sections below also contain relevant pieces of code from Tray's Integration Marketplace App on how to use each API call. You can deploy this application and use it as an example for creating your own application.
Register a userCopy


Log existing user inCopy


The best practice here would be to pull the end user information from your own database. You can do it by using the id (email, username etc.) that end users use to log in to your marketplace as their external ID and create a Tray user. Store this External ID that you used in the createExternalUser API call and the returned user ID in your database.
This way, you wouldn't have to make this extra graphql query call. We have not followed the best practice in the marketplace app to show how you can achieve this with the API call.
List available integrationsCopy

User configures integrationCopy

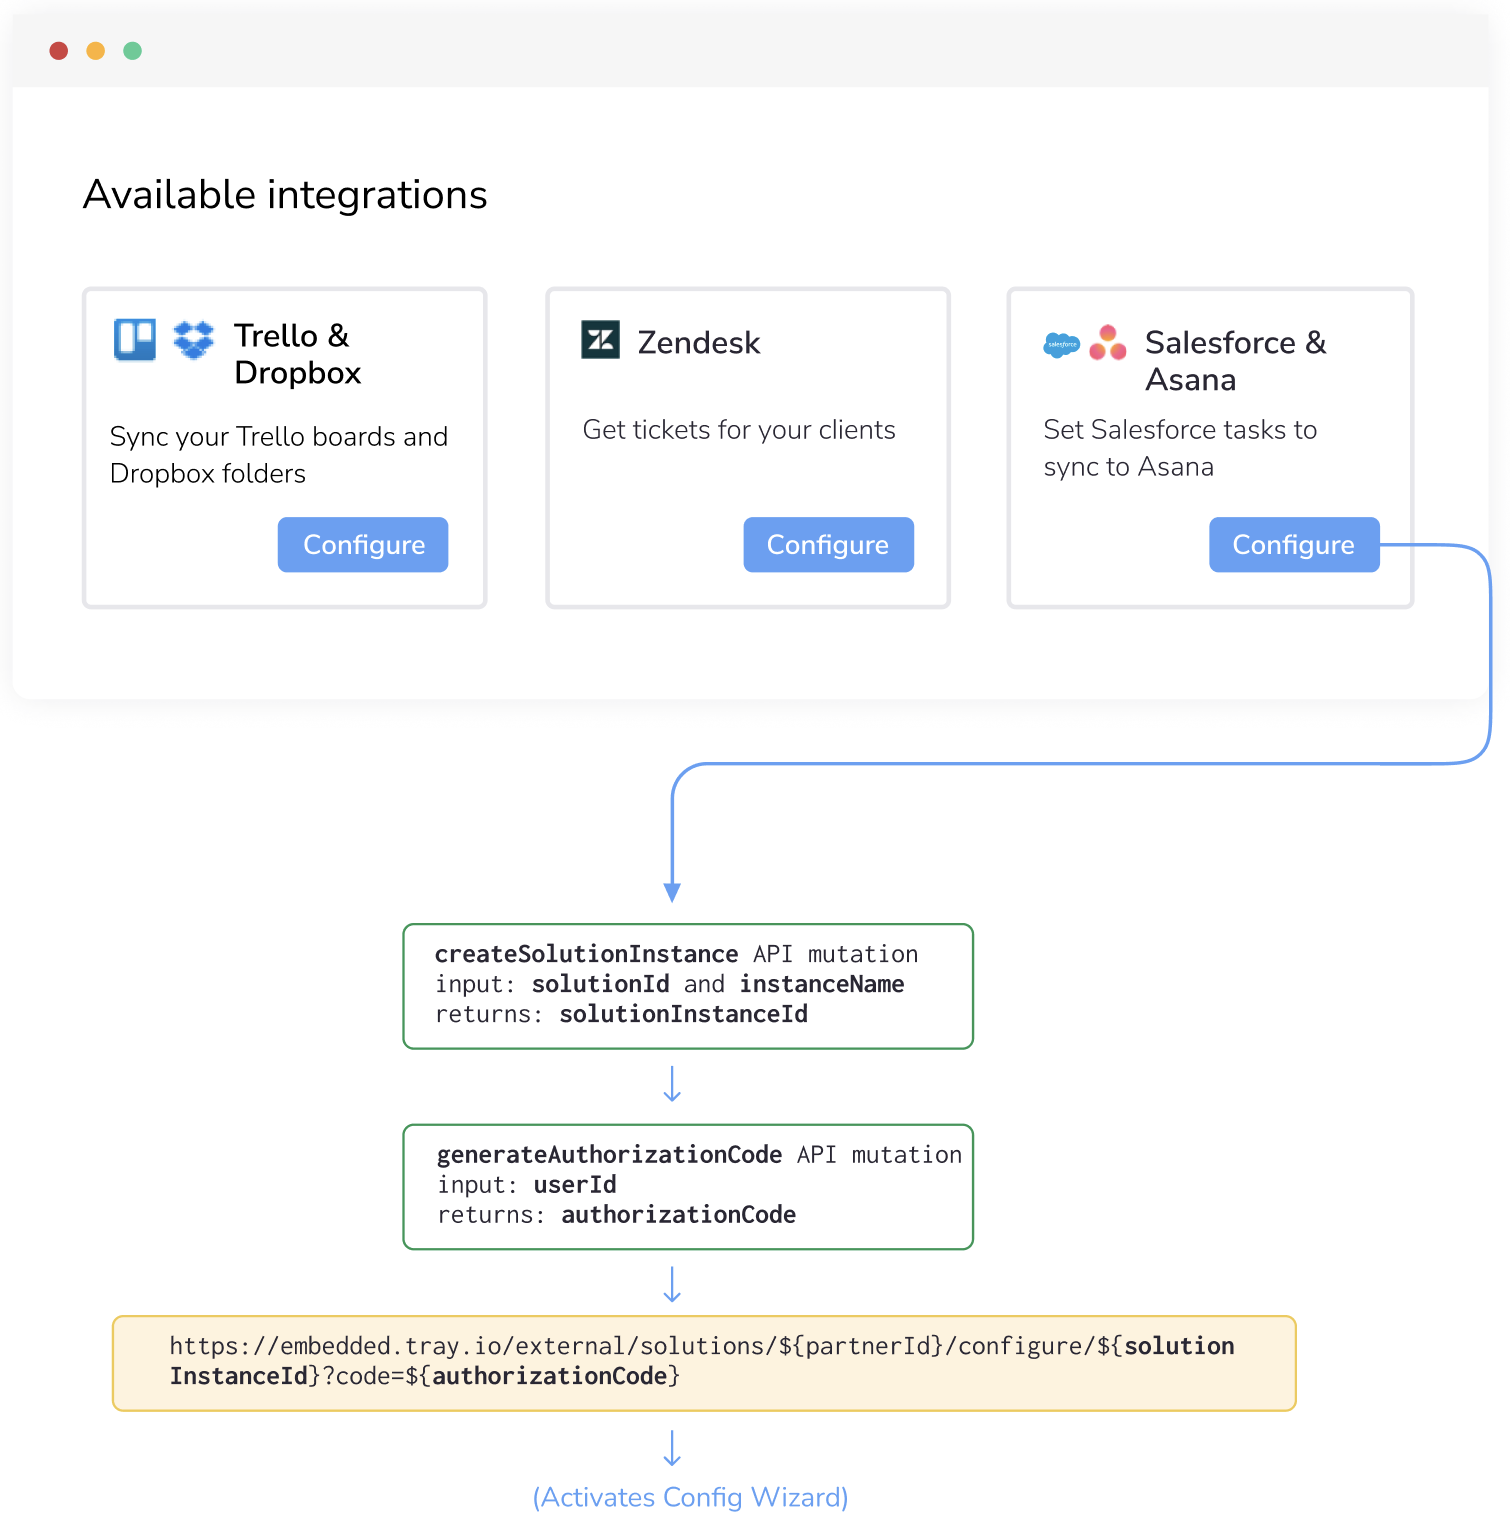
Create solution instanceCopy
At this stage, there are no authValues or configValues. They will be populated when the End User runs the Config Wizard.
Enable the Solution InstanceCopy
Navigate to the relevant Project > Solution instances section. Here, you'll find the Solution Instance for that End User. Currently, it's disabled to allow you to perform any necessary checks or make changes before activating the Instance.


Please not the warning below when enabling instances through the API:
If you are auto-enabling the instances for your end users after they create the solution, your code should be configured to delay this call by at least 2 seconds after Create Solution Instance is complete.
Run and testCopy
Trigger a run of the Workflow InstanceCopy
Now you can paste the triggerUrl into your browser address bar and hit 'enter' to trigger a run of the Workflow Instance.
Debugging the Solution InstanceCopy
Navigate to the relevant Project > Solution instances you will now see that the Solution Instance is enabled and you can click on 'Debug Workflows' on the solution instance card as shown below:


This will open a modal of all the linked workflows of this solution instance. You can the debug the workflow that you want.


This will open a read-only version of the Workflow in a new tab:

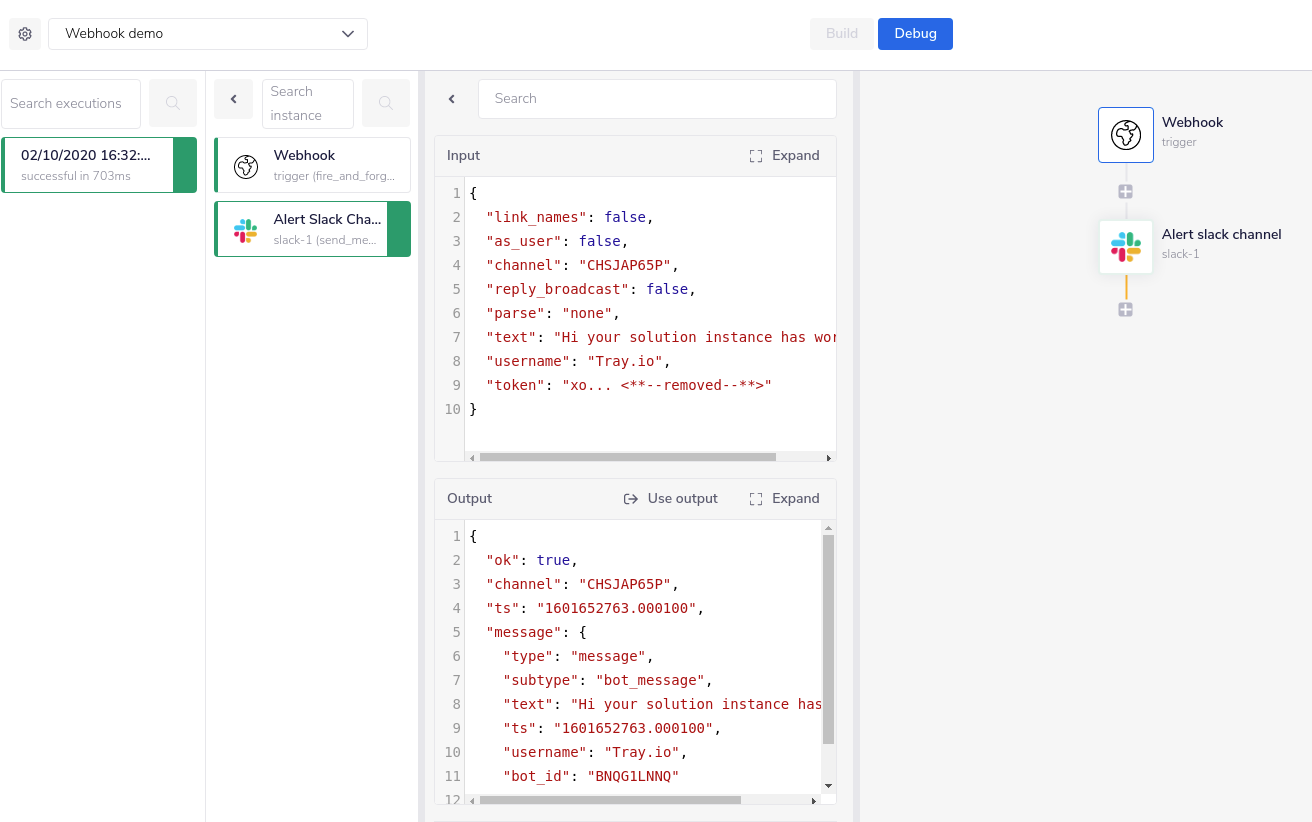
As you can see the log data is relevant to this particular End User - reflecting the Slack Channel and message entered in the Config Wizard.
And the webhook-triggered message has been sent to the Slack channel chosen by the End User in the Config Wizard:


Please see our documentation on troubleshooting for more on debugging, log streaming and error handling.
List an End User's Solution InstancesCopy


User edits integrationCopy


Follow these steps to present this experience for end users:
Note on updating Solution InstancesCopy
When you (not end user) publish a new version of a Solution, there are two types of updates that would happen to all Solution Instances linked to this Solution:
A 'lazy' update (no new config or auths are required)
A 'breaking changes' update (i.e. requires new auth and/or config data) whereby you will have to notify End Users to edit their integrations as above
For more details, please see our guide to Updating Solutions and Instances.


User deletes integrationCopy


Delete solution instanceCopy
Users may want to delete the instance they no longer wish to use and you can achieve it by following the steps below: