Examples
IntroductionCopy
In this article, you will go through some common use cases of Custom JS in your embedded solutions. Alternatively, You can check out our Custom JS repository with use cases and walkthrough videos.
For examples 1, 2 and 3, we have set up an Embedded project which you can download and install to test yourself.
It is a data mapping integration between Salesforce and a fictional CRM called Acme:


Salesforce is a real world CRM while Acme is another mock CRM system which is a placeholder for the service you want to build a custom integration with.
Prerequisites for Example 1-3Copy
You have to do these steps if you want to see the examples 1,2 and 3 in action. You may skip this and navigate to standalone examples in Use Cases (standalone) section.
Create Salesforce account (optional)Copy
Set up the projectCopy
Import the mock API workflowCopy
Edit webhook URLsCopy
You will then need to edit the webhook urls in the following screens to match that of your Acme API service workflow:
Test using the Embedded demo appCopy
You will then need to:
Publish your solution
Test your solution either by creating instance from the UI or through the marketplace app.
Once you have created a Solution Instance for an End User test by adding a new contact/account etc. to Salesforce and you will then see a successful run for that End User:
In all the Custom JS below, the headers, parameters, url etc. entered are specific to the mock Acme API service we have created. When using your own service, you will need to adjust these accordingly
Examples (using ACME service)Copy
The examples shown below can also be found at our Github repository.
1 - Generating dropdown listsCopy
Normally when you want to display a dynamic list in the config wizard, this is quite intuitive - you create the config slot on a field that is a dropdown list in the workflow (see Config and drop-down lists).
However, this only works when we have the correct connector operations and dropdown lists.
There may be times when you want to define a new list. You can achieve this using custom javascript.
In this example, when pushing records to Acme, we want to prompt the end user to select what object type they want to push new Salesforce records to:


This is done with the following steps:
2 - Customising the data mapping componentCopy
As in the example of generating dropdown lists, there are times when you might want to use the Data Mapping component with dynamic lookups but we don't support the connector operation you need to set this up.
In this case when an End User has selected e.g. 'Contacts' as the Acme object to sync to in step 1 above, we want the available fields to dynamically respond to the fields available for a 'contact'.
On the right hand side, we want the user to be able to select from the list of available Acme fields for the object they have chosen:


In order to achieve the above functionality, we do the following:
3 - Showing / hiding slots based on dependenciesCopy
In order to improve the user experience of the wizard you may wish to show or hide slots based on the value of another. In this solution, on the final screen we present the option to the user of either:
using the default mapping if the user so chooses
making use of a user-defined mapping

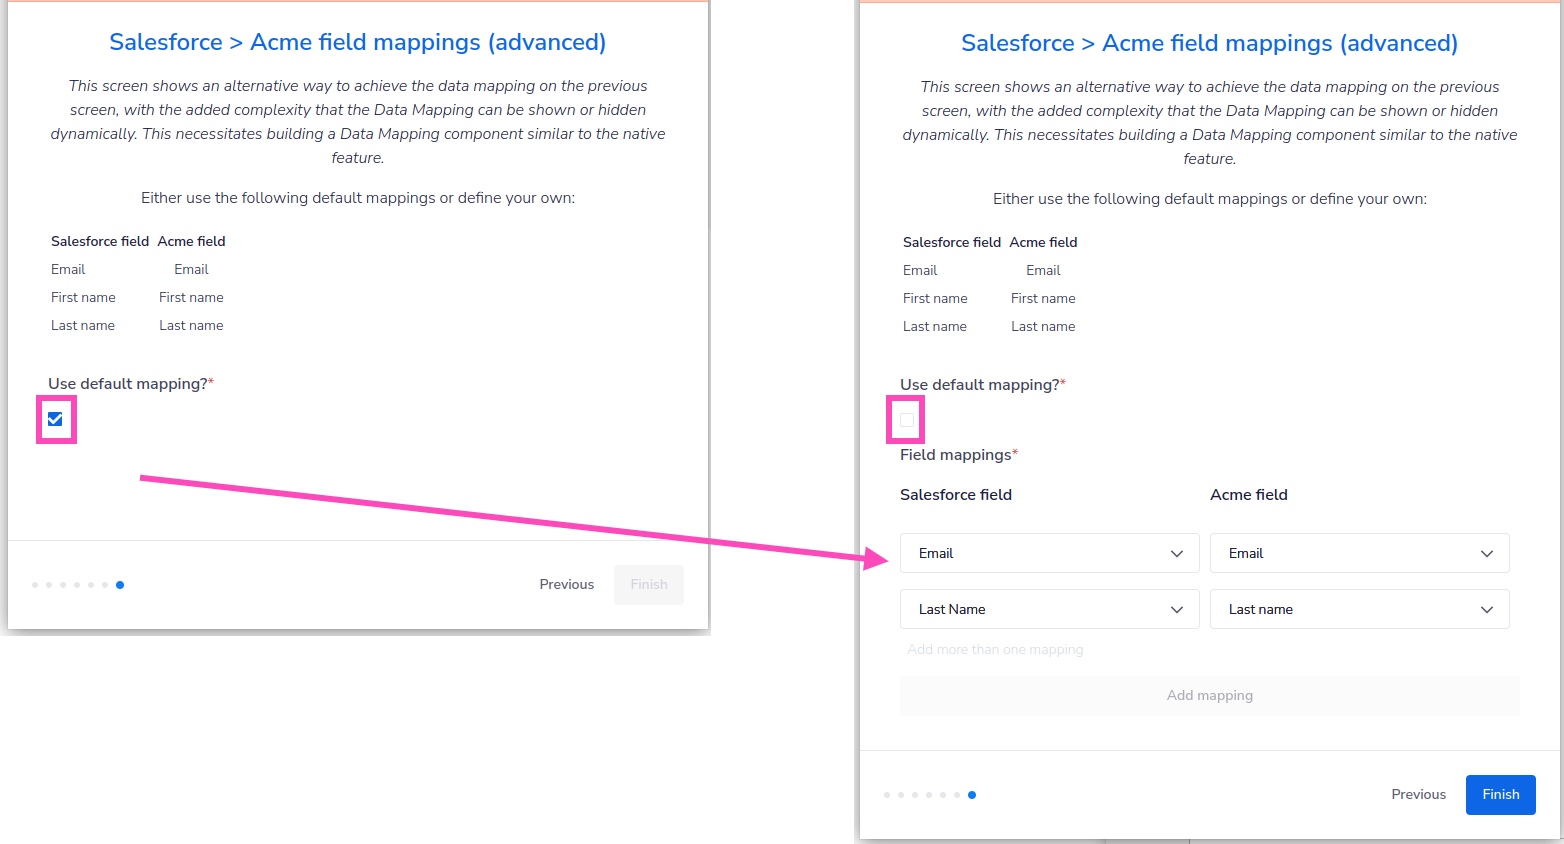
The native Data Mapper feature doesn't support the ability to be hidden or visible based on the value of another slot.
So we set up the external_use_default_mapping slot in the following manner:
More Examples (standalone)Copy
1 - Validating the auth or input dataCopy
This example illustrates another use case of Custom JS and does not employ the Acme-Salesforce integration use case we used to illustrate examples 1, 2 and 3.
Data validation is a very common use case where you might want to use Custom JS. You can perform a sanity check on the data entered by the user in the config wizard and display an error message if data entered does not pass the tests given by you.
1a - Use case for data type validation
Copy
You can download the project from here and import to test this example end to end.
If you are taking a config value like 'Email' or 'phone number' from the user in the config wizard, you can use custom JS to check for a valid email address/phone number.
Here we show you an example where end user has to enter a valid email address for the field 'username'.

If the entered email is not a valid email, config wizard throws an error and the user can' move to the next step and has to go back to the previous step to fix the error.


Below are steps how you can achieve this:
1b - Use case with a connector operation
Copy
You can download the project from here and import to test this example end to end.
This example shows how you can use Call Connector function to validate user supplied data in the config wizard.

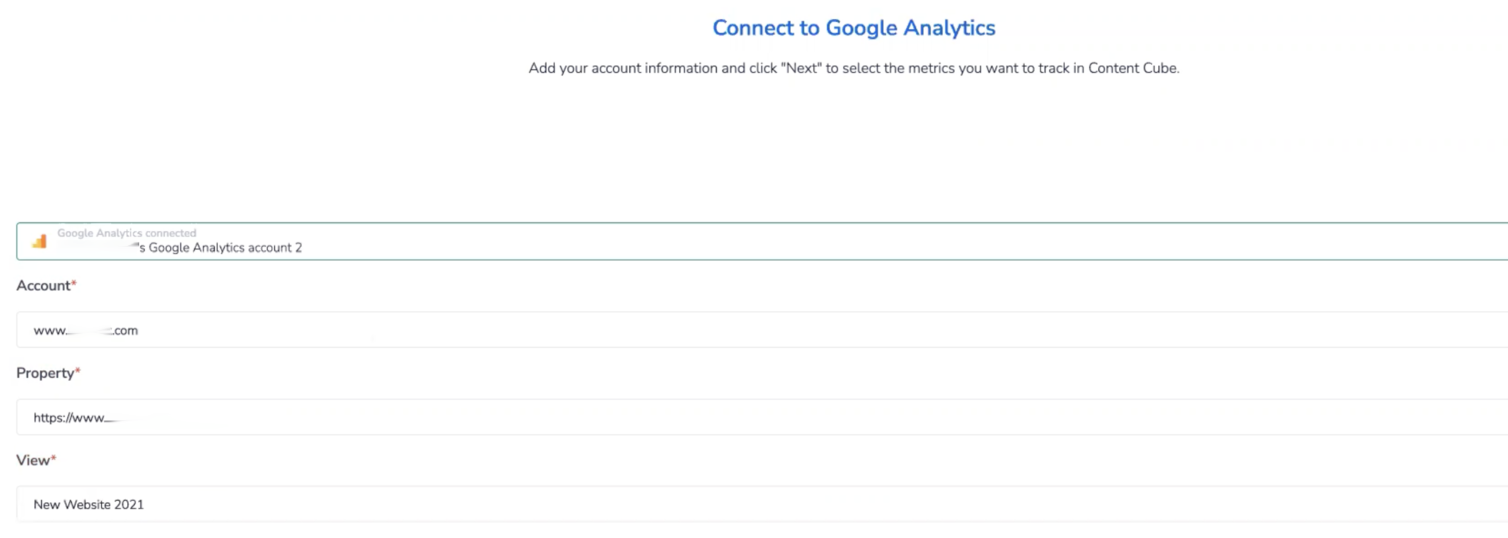
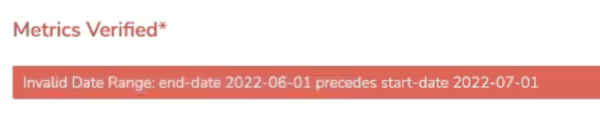
This integration runs the google analytics report for a website from a start date to an end date and feeds the data to a storage (like Amazon S3).

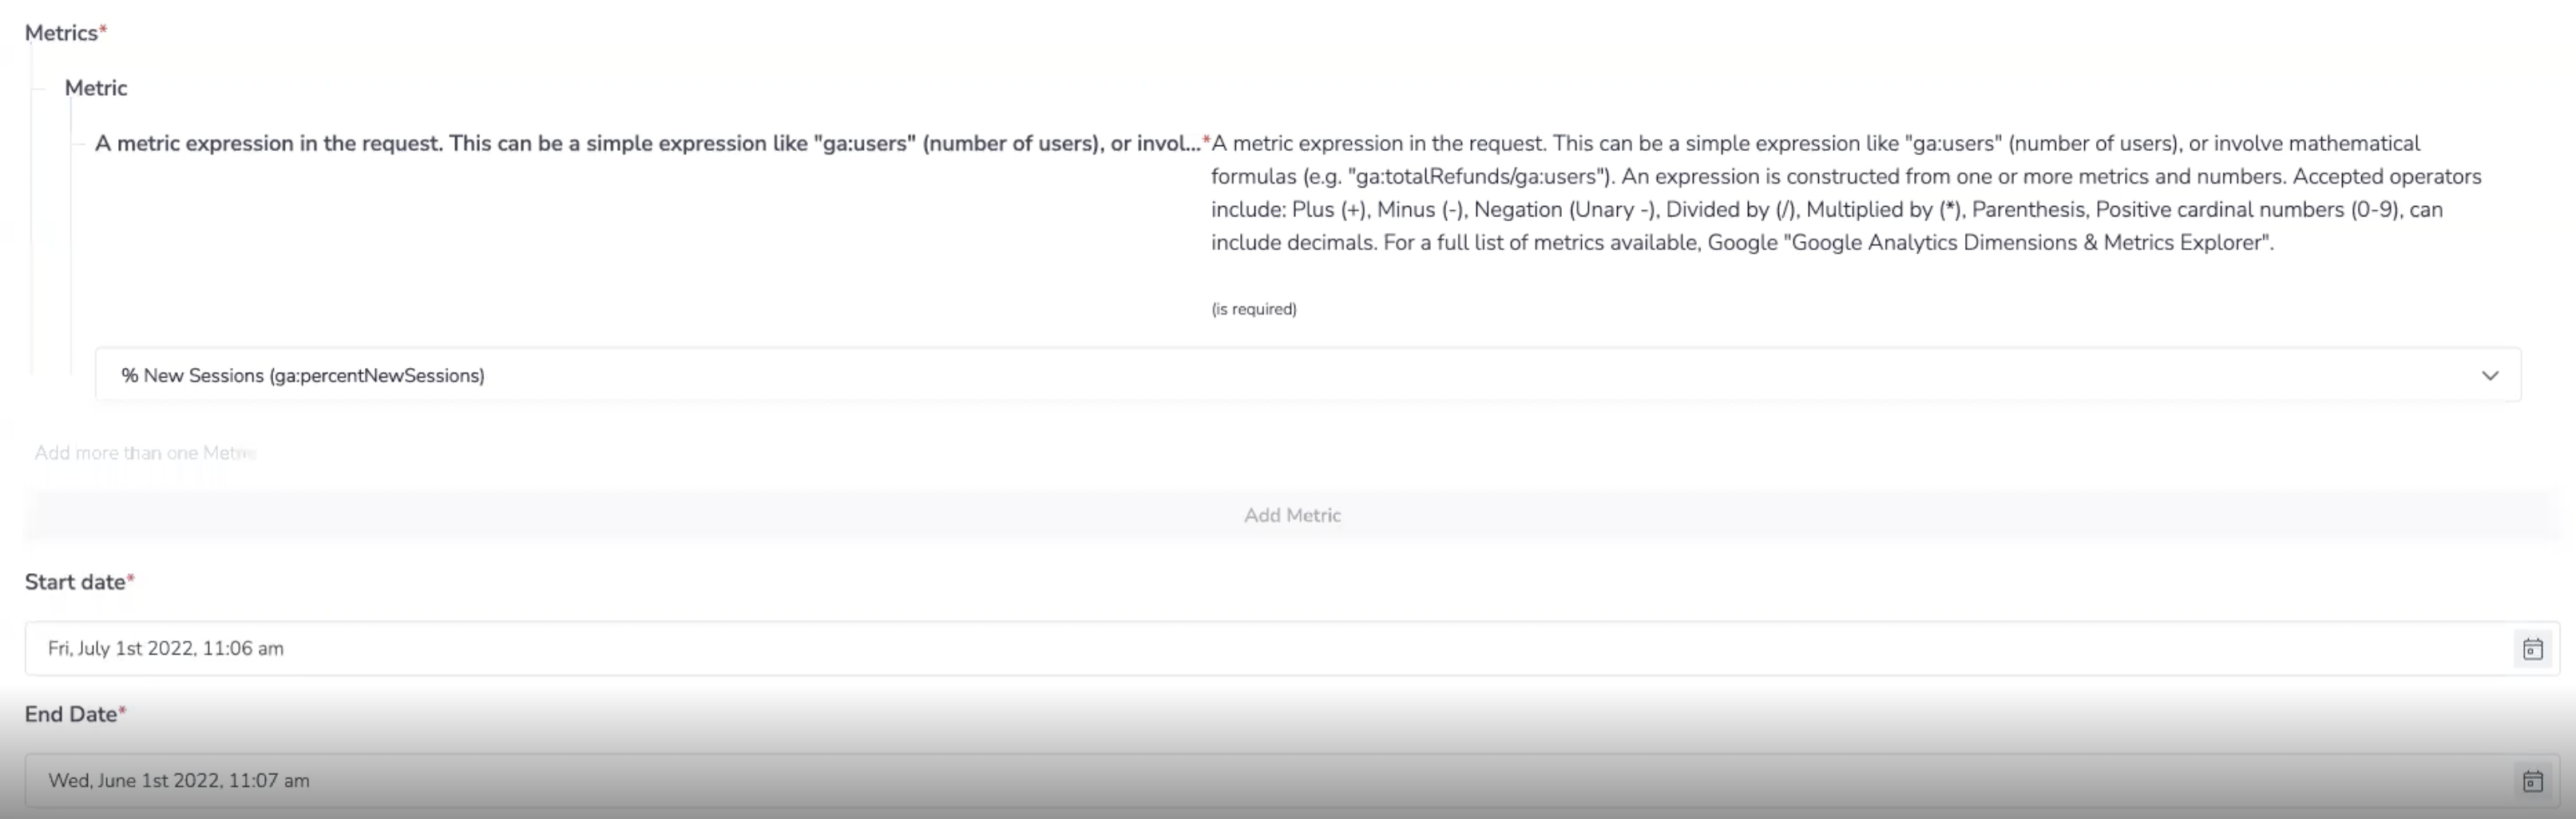
The connector's 'Generate report' operation expects the end date to be greater than the start date and so if a user goes ahead and chooses a start date later than end date, the config wizard throws the error returned by the connector, instead of running the integration end to end. User can go back and correct the date order and proceed as usual.

Here's how you can achieve this with custom JS:
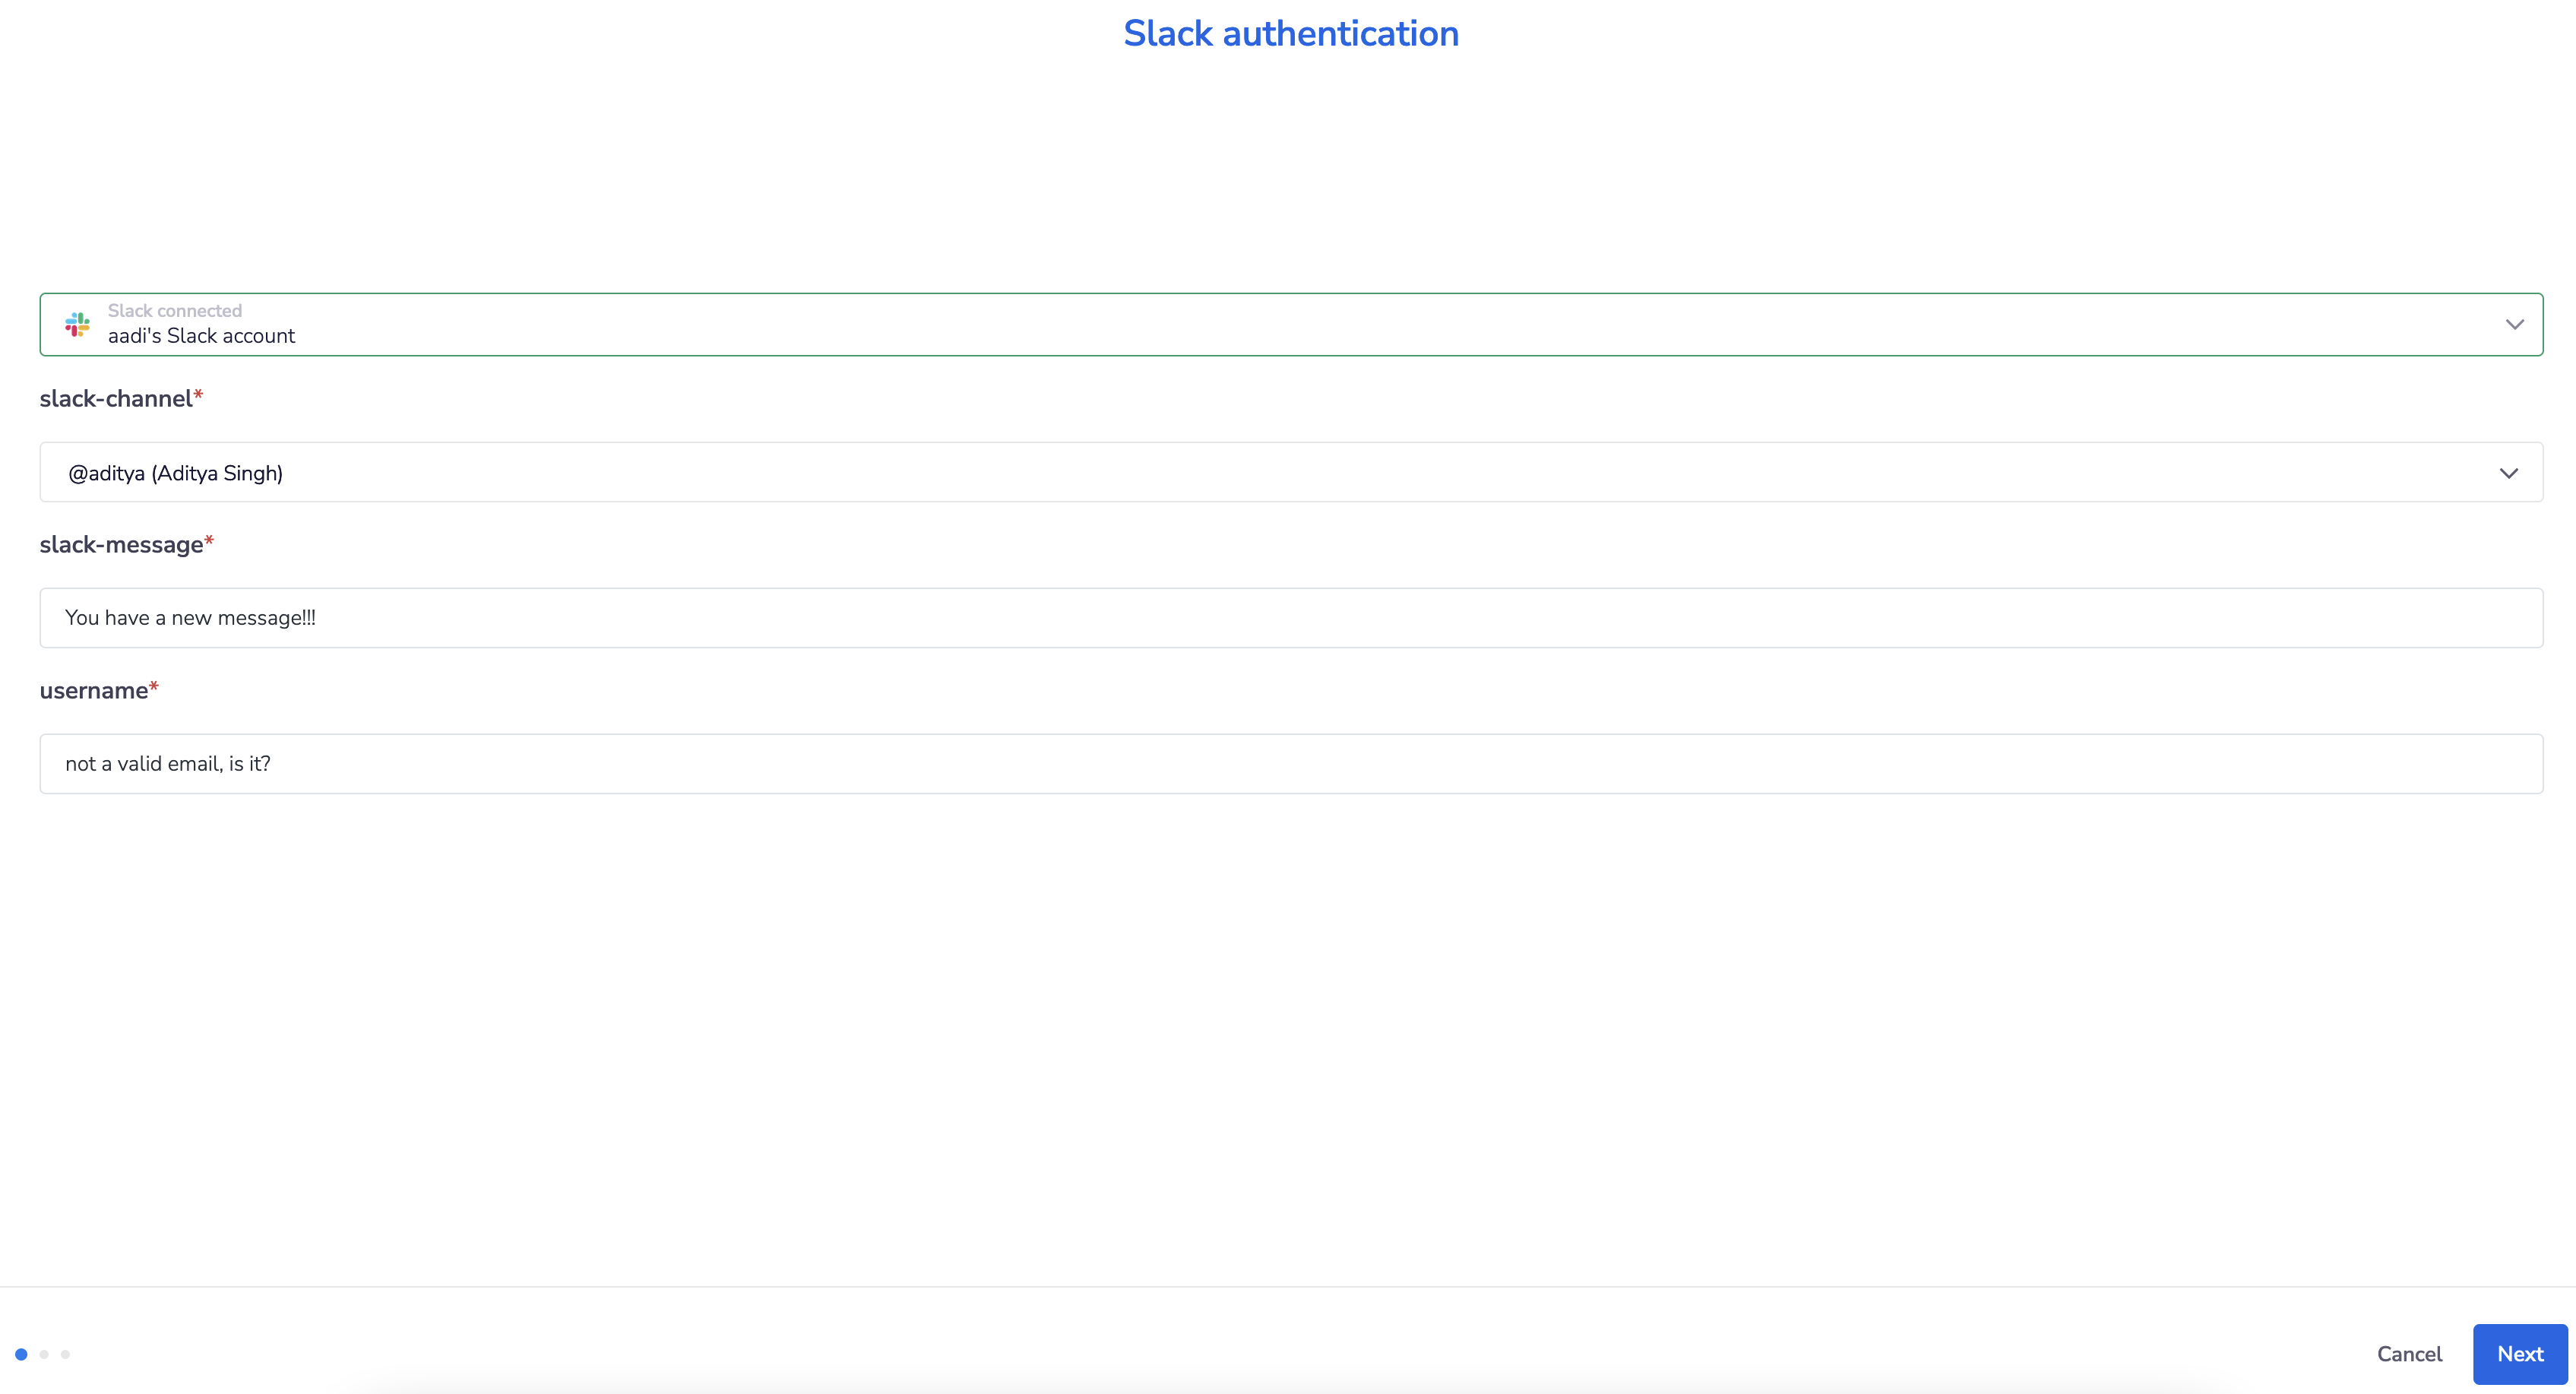
2 - Showing / hiding slots based on dependenciesCopy
Here's another example of this use case.
You can download the project from here and import to test this example end to end.
You want to send a slack notification for workflow success and failure to the end user's configurable slack channel.

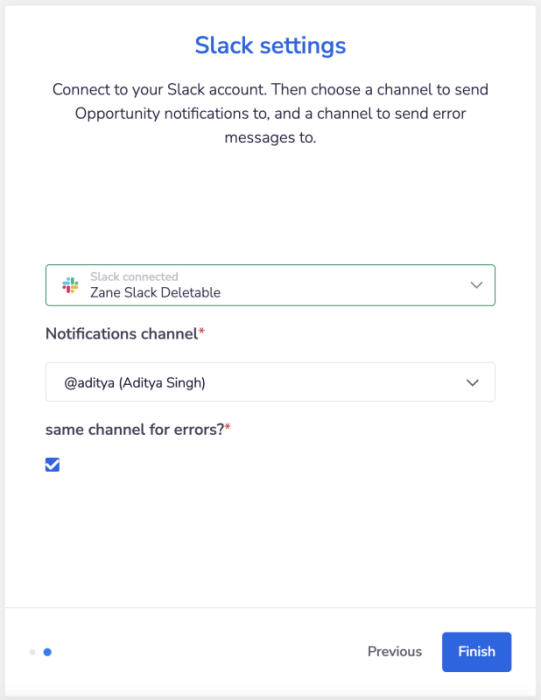
The default option sends notification to the same channel but if user unselects the default check box, you could show a slot to configure the channel for error notification.
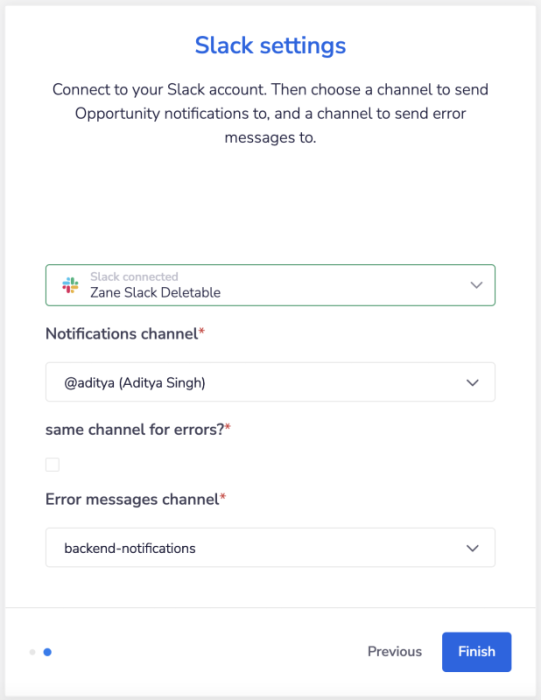
It is up to you to decide how you want to provide best user experience.
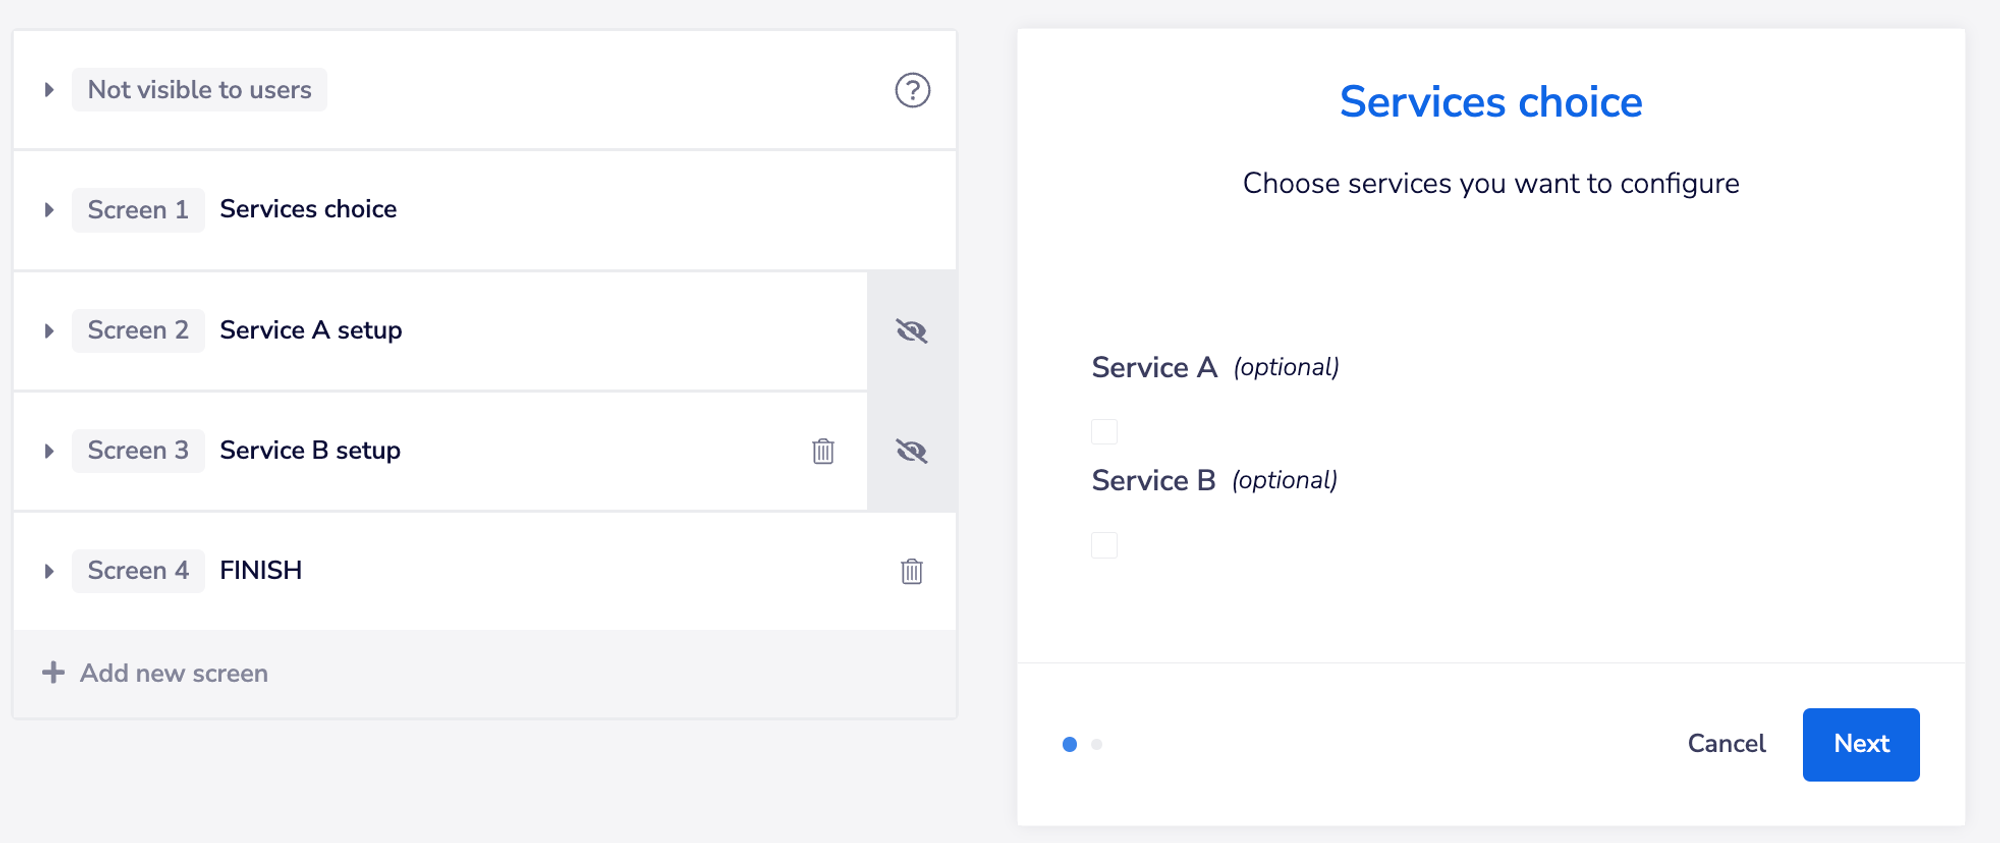
3 - Conditional display for solution screensCopy
You can show / hide config wizard screens.
You set screen visibility dynamically in CustomJS by emitting a TOGGLE_SCREENS_VISIBILITY event. You will need to pass which screens you want to show or hide as shown below:
1tray.emit("TOGGLE_SCREENS_VISIBILITY", [2{3screenId: "b3146e55-1134-45cf-8c62-6991a6b5855f", // screen id you want to toggle visibility for4isVisible: true,5},6{7screenId: "978c8df3-3043-4acd-a1a7-504d33ab9506",8isVisible: false,9}10]);
You can get screen ids from the solutionInfo object, that is passed as part of the callback argument of all solution events, such as "CONFIG_SLOT_MOUNT" or "CONFIG_SLOT_VALUE_CHANGED".
You can hardcode the ids or use the solutionInfo.screens[index] but if the screens order changes, the code would have to be updated.
1tray.on("CONFIG_SLOT_MOUNT", ({ event, previousWizardState, solutionInfo }) => {2/* ...3...4console.log(solutionInfo.screens);5...6...7*/8});9tray.on("CONFIG_SLOT_VALUE_CHANGED", ({ event, solutionInfo }) => {10/* ...11...12console.log(solutionInfo.screens);13...14...15*/16});1718solutionInfo.screens[0].id // The "Not visible to users" screeen19solutionInfo.screens[1].id // Screen 120solutionInfo.screens[2].id // Screen 2 etc.
index - 0 refers to the "Not visible to users" screen, index - 1 refers to the first screen and so on as shown in the code block above.
When a screen is hidden, an icon will show up in the screens list next to the corresponding screen.

If you intend to use config slots within a hidden screen, make sure you set default values and toggle 'Use config default'.
Do not place authentication slots in hidden screens, as they require user input.
Example implementationCopy
Here is a simple example that shows how to set screens visibility dynamically based on config variables (e.g. checkboxes). Download the project file from here.
1. Create checkboxes to control the visibility of chosen screens (boolean config slots)


2. Set the default visibility in the "CONFIG_SLOT_MOUNT" callback.
1// On the earliest slot mount, set default2tray.on("CONFIG_SLOT_MOUNT", ({ event, previousWizardState, solutionInfo }) => {3if (event.data.externalId === tray.env.slotExternalId) {4tray.emit("TOGGLE_SCREENS_VISIBILITY", [5{6screenId: "978c8df3-3043-4acd-a1a7-504d33ab9506", // solutionInfo.screens[2].id,7isVisible: previousWizardState.values["external_screen_2"] || false,8},9{10screenId: "b3146e55-1134-45cf-8c62-6991a6b5855f", // solutionInfo.screens[5].id,11isVisible: previousWizardState.values["external_screen_5"] || false,12}13]);14}15});
3. On checkbox change, set screen visibility for each checkbox by editing CustomJS for each config slot
1// On checkbox toggle, set screen 2 visibility to true2tray.on("CONFIG_SLOT_VALUE_CHANGED", ({ event, solutionInfo }) => {3if (event.data.externalId === tray.env.slotExternalId) {4tray.emit("TOGGLE_SCREENS_VISIBILITY", [{5screenId: "978c8df3-3043-4acd-a1a7-504d33ab9506", // solutionInfo.screens[2].id,6isVisible: event.data.value7}]);8}9});