
Typeform 4.0
Typeform is an online form-making service.
- On this page
- Typeform
- Overview
- Authentication
- Typeform Trigger
OverviewCopy
Typeform is an online service that enables users to easily make forms. Users can choose from a wide variety of templates covering different purposes, or create a new form from scratch.
AuthenticationCopy
When using the Typeform connector, the first thing you will need to do is go to your Tray.io account page, and select the workflow you wish to work on. Once in the workflow dashboard itself, search and drag the Typeform connector from the connectors panel (on the left hand side) onto your workflow.
With the new Typeform connector step highlighted, in the properties panel on the right, click on 'New Authentication' which is located under the 'Settings' heading.


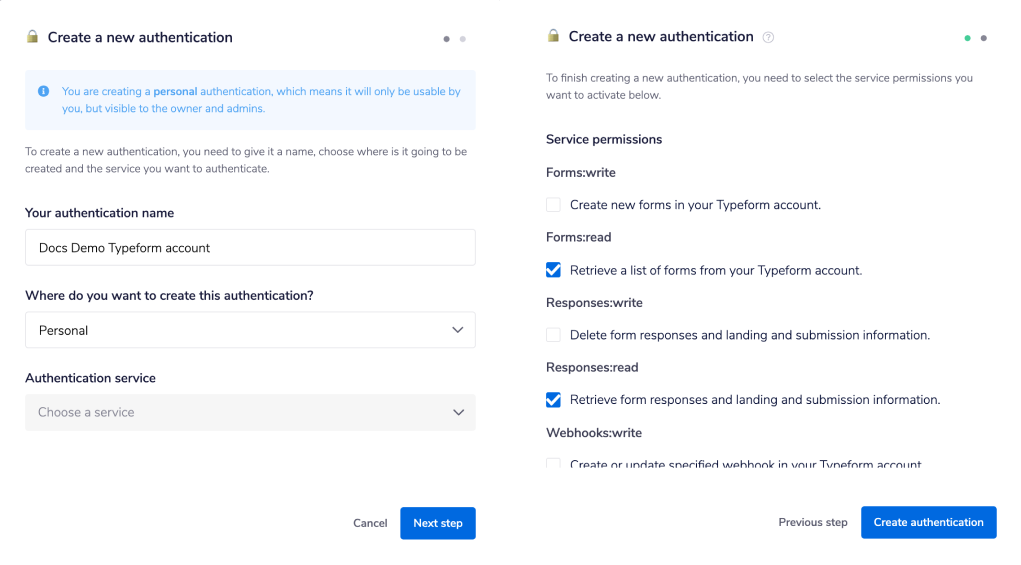
This will result in a Tray.io authentication pop-up window. The first page will ask you to name your authentication appropriately, and state which type of authentication you wish to make ('Personal' or 'Organisational').
As you can see, the next page asks which service permissions you wish to grant your authentication. Select the ones you want and click 'Create authentication'.

Another pop-up will then open, asking you to log in to your Typeform account.

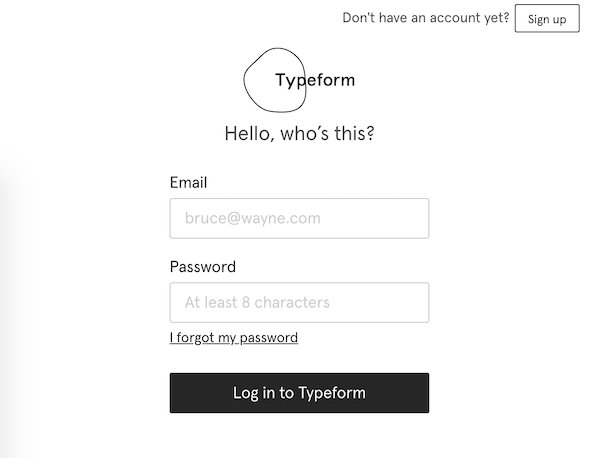
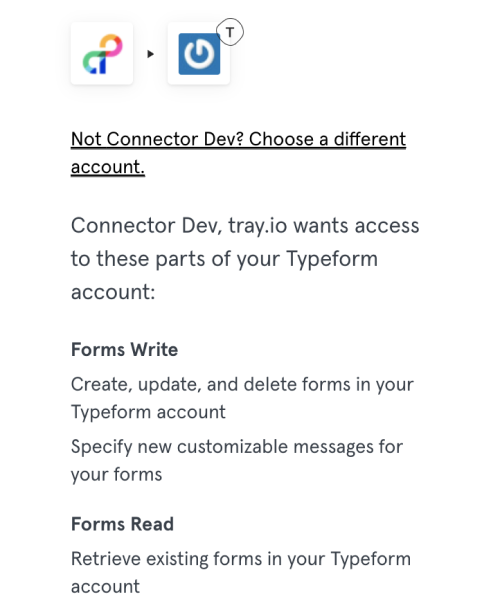
Enter your username and password, and click 'Log In to Typeform'. You will then be directed to a page confirming that you want to authorise tray.io with the permissions you specified earlier. Scroll to the bottom, and click 'Accept'.

Once you have added these fields to your Tray.io authentication popup window, click on the 'Create authentication' button. Go back to your settings authentication field (within the workflow builder properties panel), and select the recently added authentication from the dropdown options now available.
Your connector authentication setup should now be complete.
Typeform TriggerCopy
If you wish your workflow to be kicked off by a particular action in Typeform, you can use the Typeform Trigger.
The Typeform trigger allows you to receive notifications and trigger workflows when somebody completes a form in your Typeform account.
Trigger operations available:Copy
Webhook
Webhook SetupCopy
When creating a new workflow, click the 'Create new workflow' button in the top right hand corner of your main Tray.io dashboard. When the trigger popup window opens, search and select the Typeform trigger. Wait to be redirected to your new workflow and the workflow dashboard itself.


With the new Typeform trigger step highlighted, in the properties panel on the right, click on 'New Authentication' which is located under the 'Settings' heading.
Follow the instructions above to continue authenticating your trigger, though please make sure to select the 'Webhooks:write' and 'Webhooks:read' permissions on the second page of the authentication pop-up.
Once authentication is complete, make sure that the operation for your trigger is set to 'Webhook'.

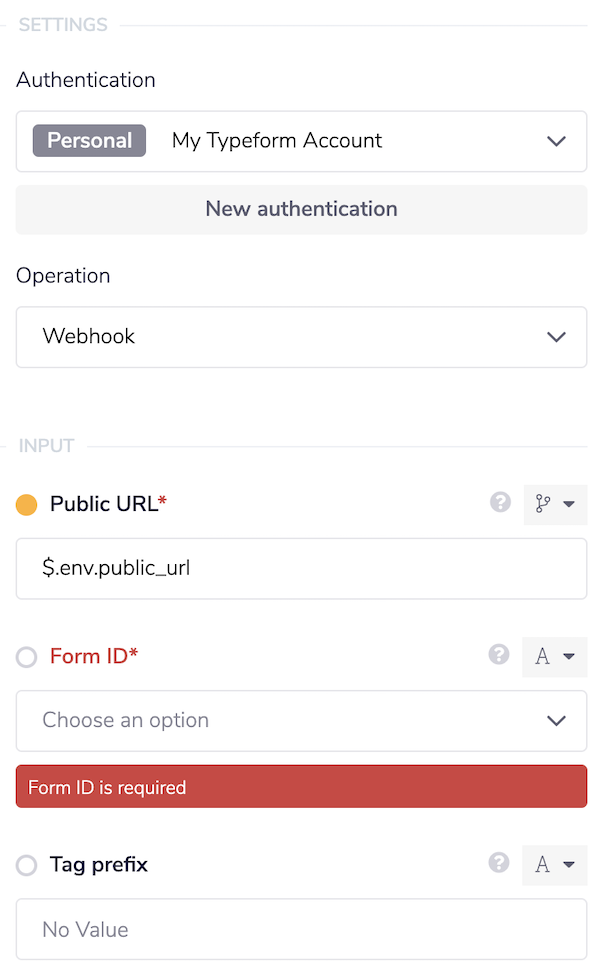
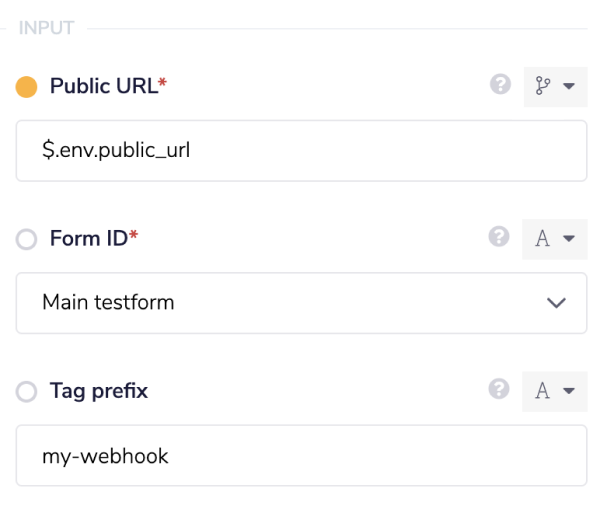
As you can see, there are two mandatory fields: 'Public URL' and 'Form ID'. The 'Public URL' is automatically filled in for you, but you will need to select a 'Form ID' from the dropdown options available. This will determine which form will notify the webhook if somebody submits to it.
You can also add an optional 'Tag prefix', which will pre-pend the webhook's automatically-generated tag, with the specified string, making it easier to identify.

When you have completed this, click on the 'Enable' button in the bottom-right-hand corner.
Now your trigger should be set up and listening for events from your specified form. You can test this by "triggering" said event and opening the Debug panels, in order to see if there has been any input/ output data generated.
Available OperationsCopy
The examples below show one or two of the available connector operations in use.
Please see the Full Operations Reference at the end of this page for details on all available operations for this connector.
Using the Raw HTTP Request ('Universal Operation')Copy
As of version 3.0, it is now possible to effectively create your own operations.
This is a very powerful feature which you can put to use when there is an endpoint in Typeform which is not used by any of our operations.
To use this you will first of all need to research the endpoint in the Typeform API documentation v1.0 , to find the exact format that Typeform will be expecting the endpoint to be passed in.
Note that you will only need to add the suffix to the endpoint, as the base URL will be automatically set (the base URL is picked up from the value you entered when you created your authentication).
The base URL for Typeform is: https://api.typeform.com
For example, say that the 'Retrieve response file' operation, which allows users to download files submitted to their form, did not exist in our Typeform connector. If you wanted to use this endpoint, you would use the Typeform API docs to find the 'Retrieve response file' endpoint. Note that it is a GET request at the following
URL:

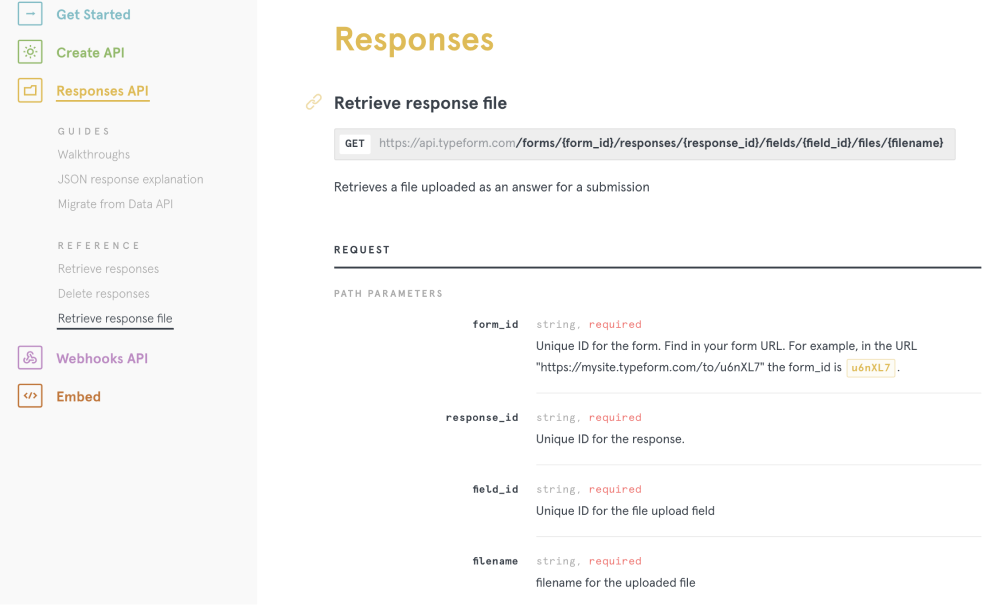
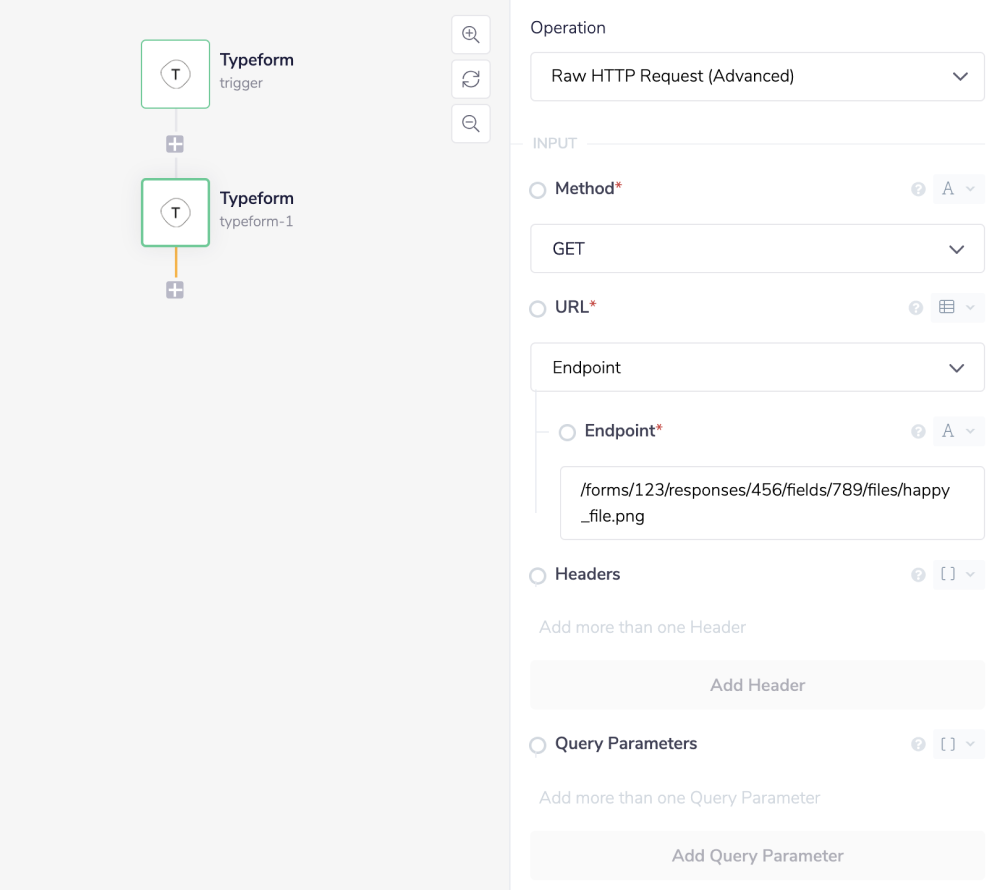
As you can see, there are several path parameters that you will need to set. So if you not only know what your endpoint is - but also your: "Form ID", "Response ID", and "Field ID" - you can get the response file with the following settings:
Method: GET
Endpoint: /forms/[form_id]/responses/[response_id]/fields/[field_id]/files/[filename]
Final outcome being:
** https://api.typeform.com/forms/[form_id]/responses/[response_id]/fields/[field_id]/files/[filename] **

This setup should return the file as requested.
Example usageCopy
TRAY POTENTIAL: Tray.io is extremely flexible. By design there is no fixed way of working with it - you can pull whatever data you need from other services and work with it using our core and helper connectors. This demo which follows shows only one possible way of working with Tray.io and the Typeform connector. Once you've finished working through this example please see our Introduction to working with data and jsonpaths page and Data Guide for more details.
Below is an example of a way in which you could potentially use the Typeform connector, to list all the responses you have received to each form in your account.
The steps will be as follows:
Setup trigger and list all forms available.
Add a Loop Collection helper to iterate through said form.
List the responses achieved.
The final outcome should look like this:

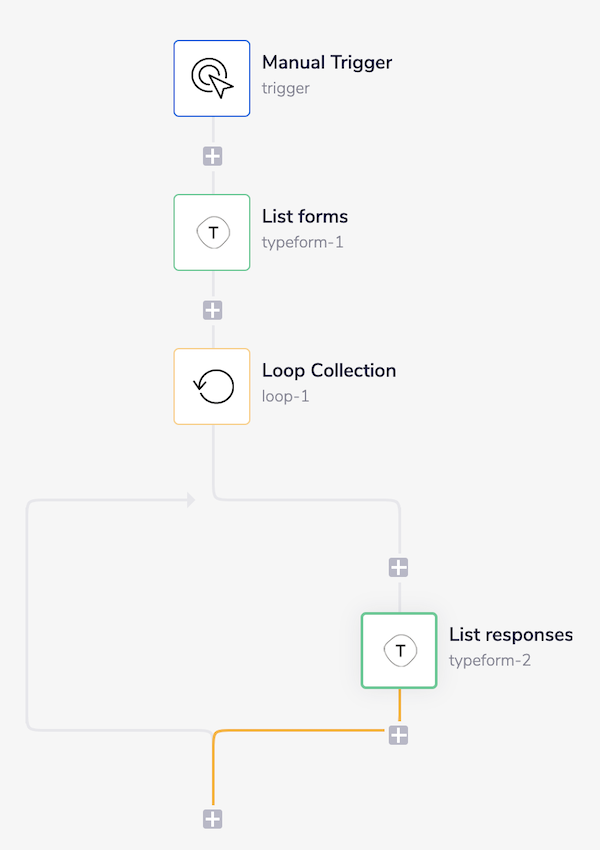
1 - Setup trigger & List formsCopy
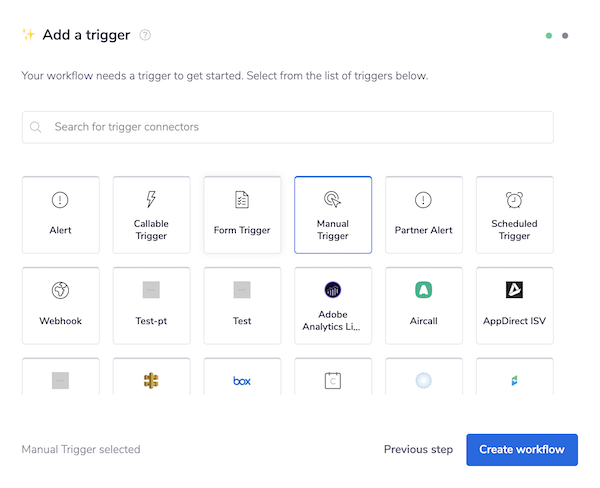
Once you have clicked 'Create new workflow' on your main Tray.io dashboard (and named said new workflow), select the Manual trigger from the trigger options available:

After you have been redirected to the Tray.io workflow dashboard, from the connectors panel on the left, add a Typeform connector to your second step. Set the operation to 'List forms'.

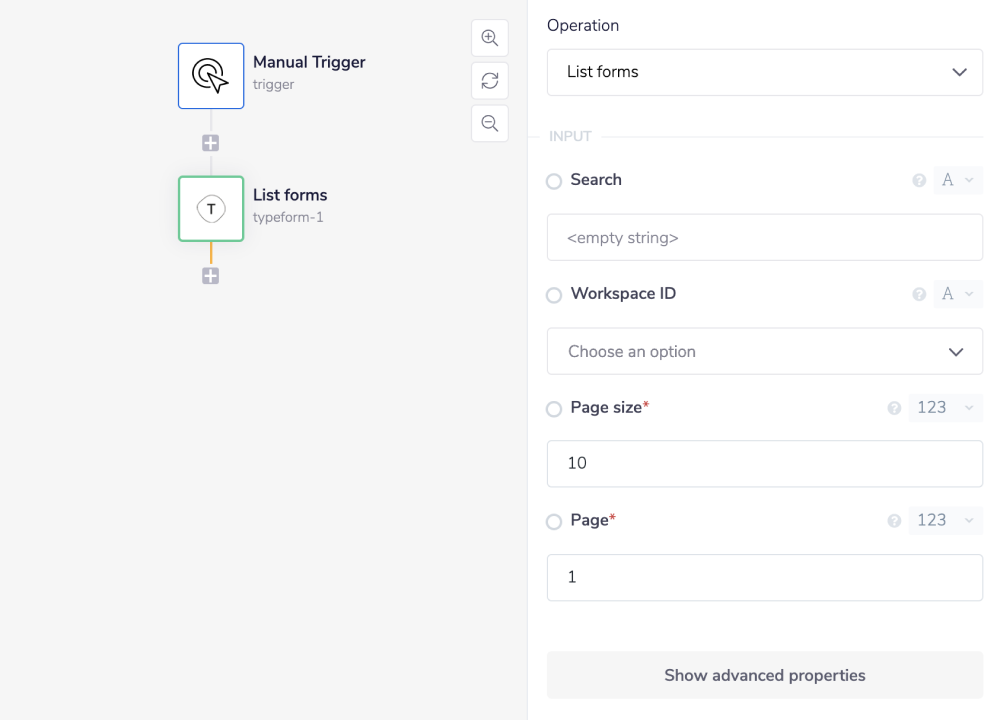
Feel free to re-name your steps as you go along to make things clearer for yourself and other users.
Now, when this workflow is run, it will list all the forms in your account.
2 - Loop CollectionCopy
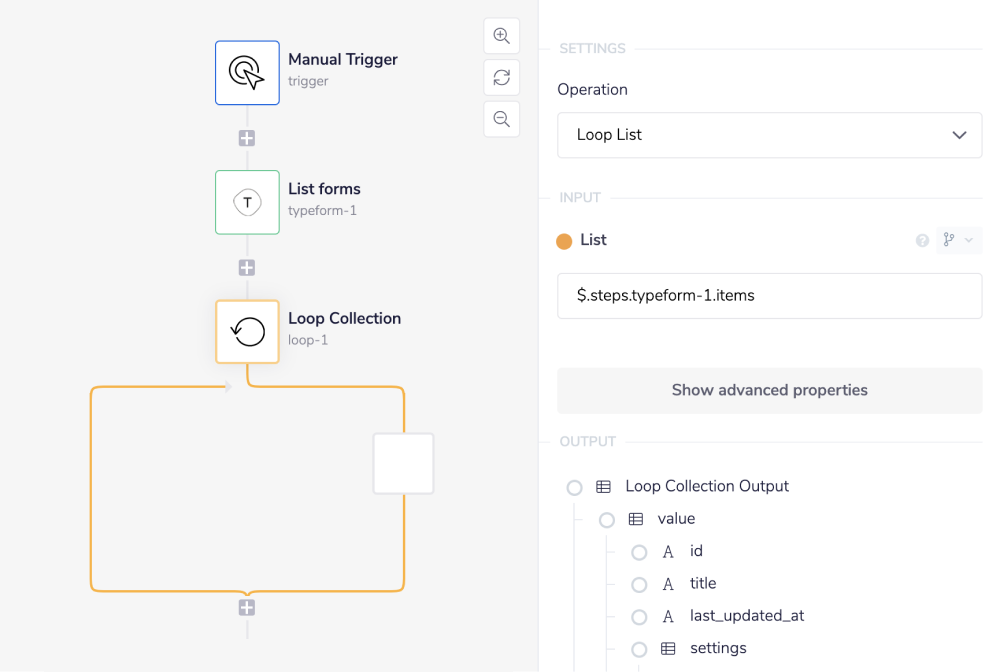
To iterate through this list of forms so that it can return the responses from each form individually, drag a 'Loop Collection' helper connector to your workflow.
In order to have this step loop through your forms, use the connector-snake to assign the 'List' field to the items list produced by the previous step.
JSONPATHS: For more information on what jsonpaths are and how to use jsonpaths with Tray.io, please see our pages on Basic data concepts and Mapping data between steps
CONNECTOR-SNAKE: The simplest and easiest way to generate your jsonpaths is to use our feature called the Connector-snake. Please see the main page for more details.


The workflow will now loop through each form in your account and gather individual information on each one.

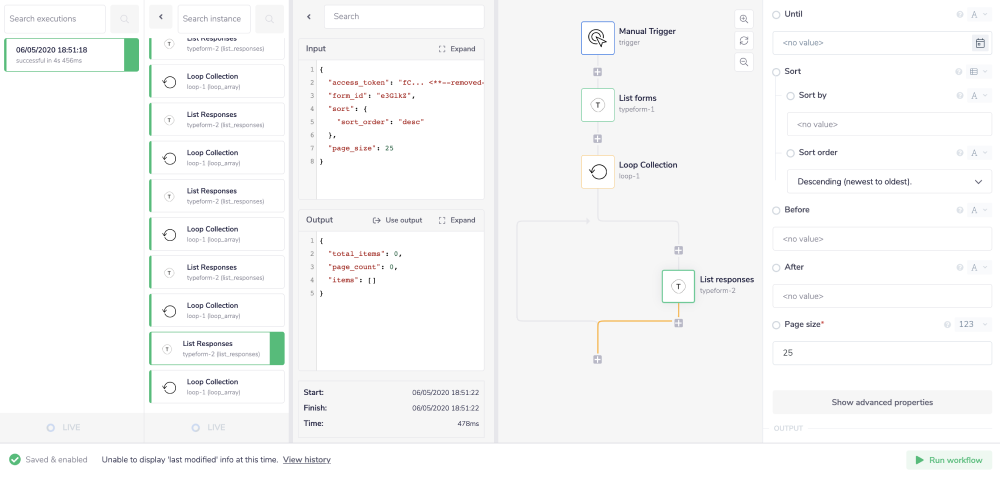
3 - List responsesCopy
In order to retrieve the responses to each form, drag a new Typeform connector into your workflow, making sure that it is placed INSIDE of the Loop Collection step. Set the operation 'List responses'.


As you can see, this operation requires a 'Form ID'. To supply this, use the connector-snake once more this time to retrieve the id field from the Loop Collection step.

Now, when the workflow is run, it will first retrieve all forms in your account, and then get their individual details.

BEST PRACTICES: Whenever you do decide to create your own workflow, be sure to check out some of our key articles such as: