
Totango 1.2
Totango is a customer success platform that helps recurring revenue businesses simplify the complexities of customer success by connecting the dots of customer data, actively monitoring customer health changes, and driving proactive engagements.
OverviewCopy
Best for large recurring revenue businesses that need to simplify their complex customer operations, gain revenue predictability from existing customers, or reduce churn for high-value accounts.
AuthenticationCopy
When using the Totango connector, the first thing you will need to do is go to your Tray.io account page, and select the workflow you wish to work on. Once in the workflow builder itself, search and drag the Totango connector from the connectors panel (on the left hand side) onto your workflow.
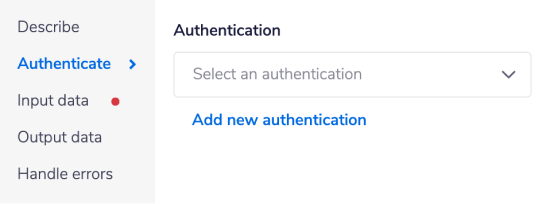
With the new Totango connector step highlighted, in the properties panel on the right, click on the Authenticate tab and 'Add new authentication' (located under the 'Authentication' field).

This will result in a Tray.io authentication pop-up window. The first page will ask you to name your authentication, and state which type of authentication you wish to create ('Personal' or 'Organisational').
As you can see, the next page asks you for your API key.


In order to get the API key, login into Totango, click on your username (top-right corner of the page) and click 'Edit Profile'.

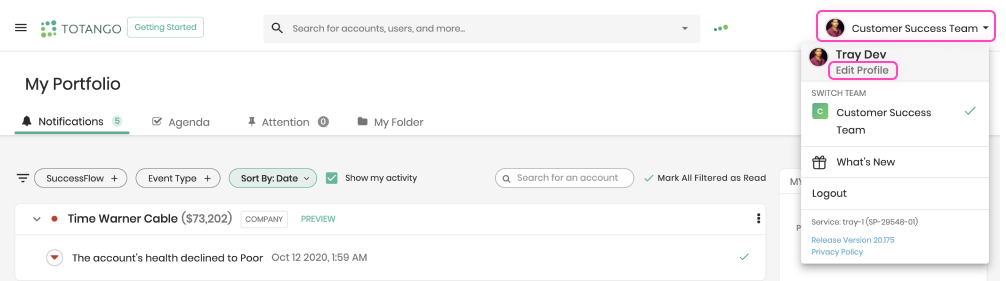
Your API Key is available under the INTEGRATION tab.
PLEASE NOTE: Click on 'Generate Token' will generate a new token and can cause other integrations (using your token) to fail.


Once you have added the API key to your Tray.io authentication popup window, click on the 'Create authentication' button. Go back to your settings authentication field (within the workflow builder properties panel), and select the recently added authentication from the dropdown options now available.
Your connector authentication setup should now be complete.
Using the Raw HTTP Request ('Universal Operation')Copy
As of version 1.0, you can effectively create your own operations.
This is a very powerful feature which you can put to use when there is an endpoint in Totango which is not used by any of our operations.
To use this you will first of all need to research the endpoint in the Totango API documentation, to find the exact format that Totango will be expecting the endpoint to be passed in.
Note that you will only need to add the suffix to the endpoint, as the base URL will be automatically set.
The base URL for Totango is: https://app.totango.com
For example, say that the 'Create touchpoint' operation did not exist in our Totango connector, and you wanted to use this endpoint, you would use the Totango API docs to find the relevant endpoint - which in this case is a POST request called: /api/v3/touchpoints/.
More details can be found here.


With the Create touchpoint operation you need to include a body in the request. So if you know what your method, endpoint and details of your body, you can create a Totango touchpoint with the following settings:
Method: GET
Endpoint: /api/v3/touchpoints/
Body Type : Raw : { "account_id" : "your_AccountId", "content": "your_Content"}
Final Example outcome being: https://app.totango.com/api/v3/touchpoints/


Example UsageCopy
TRAY POTENTIAL: Tray.io is extremely flexible. By design there is no fixed way of working with it - you can pull whatever data you need from other services and work with it using our core and helper connectors. This demo which follows shows only one possible way of working with Tray.io and the Totango connector. Once you've finished working through this example please see our Introduction to working with data and jsonpaths page and Data Guide for more details.
EXTRA AUTHS: In order to complete this workflow, you will also need to be authenticated with the Slack' connector.
Below is an example of a way in which you could potentially use the Totango connector, to search account that match a certain criteria.
The steps will be as follows:
Setup using a manual trigger and search for accounts and add the data as a message in slack.
Add Loop collection step to iterate through each employee found in records.
Add a Slack connector.
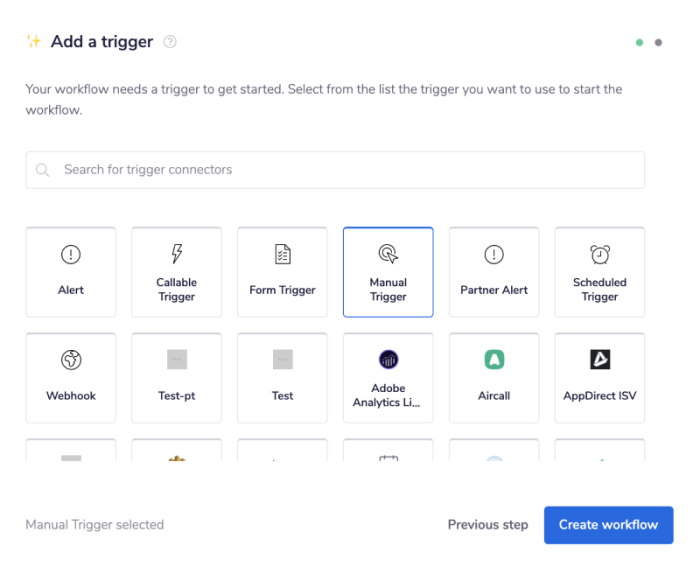
Once you have clicked 'Create new workflow' from your main Tray.io dashboard named it, select the Manual trigger from the trigger options available:

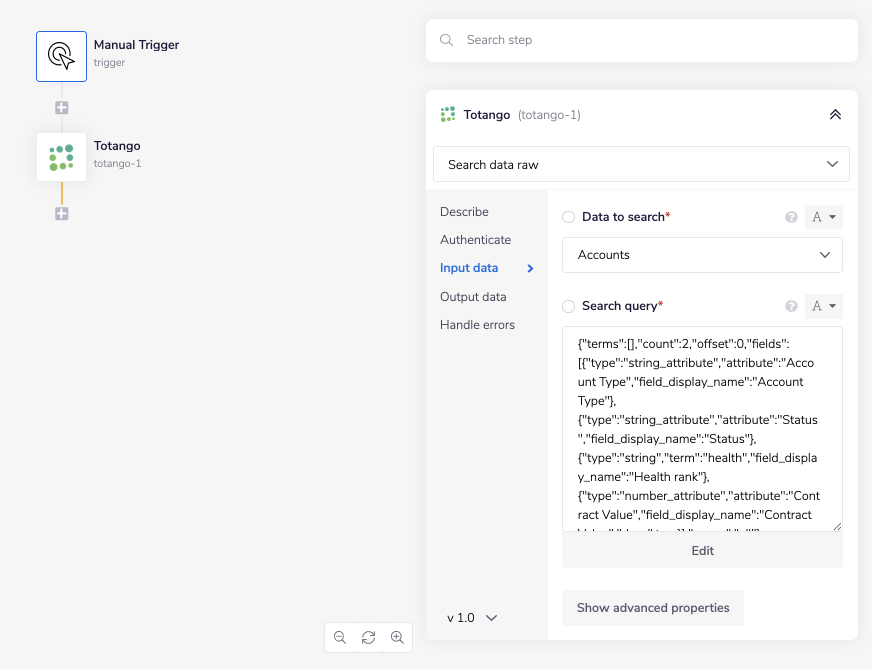
After you have been redirected to the Tray.io workflow dashboard, from the connectors panel on the left, add a Totango connector to your second step. Set the operation to 'Search data raw'.
With this operation you can search for accounts or users matching a certain criteria.
As you can see there are two required fields:
Data to search - which can be Accounts or Users
Search query string
The easiest way to create a search query is to use the Totango UI and copy the resulting API call.
Click on the down arrow at the end of the search bar and choose the 'All Accounts' segment.

Add filters & columns to match your desired search parameters.


Click on the three dots under your username and choose 'Generate API endpoint'.

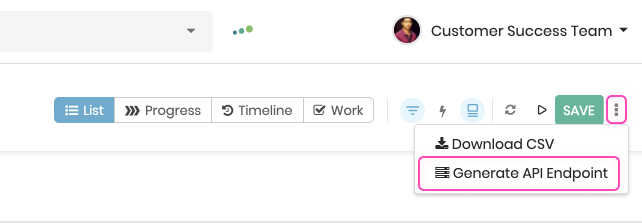
Copy the search string and paste it into the 'Search query' field in the connector.

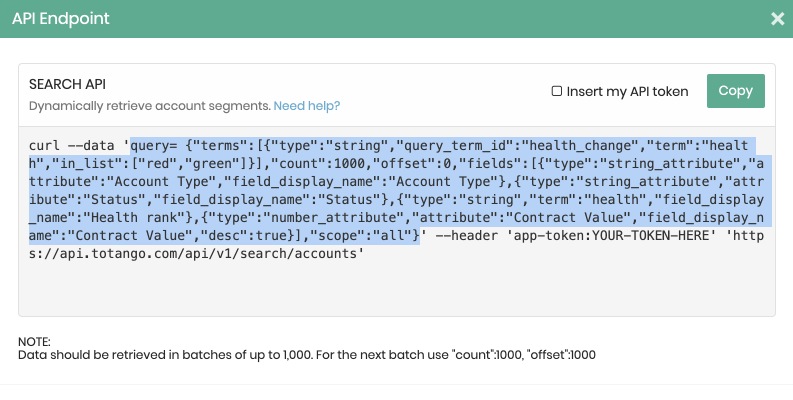
Note: In order to have a successful request the search query has to contain the 'terms' array which is mandatory. Otherwise it will fail with a 401 error.

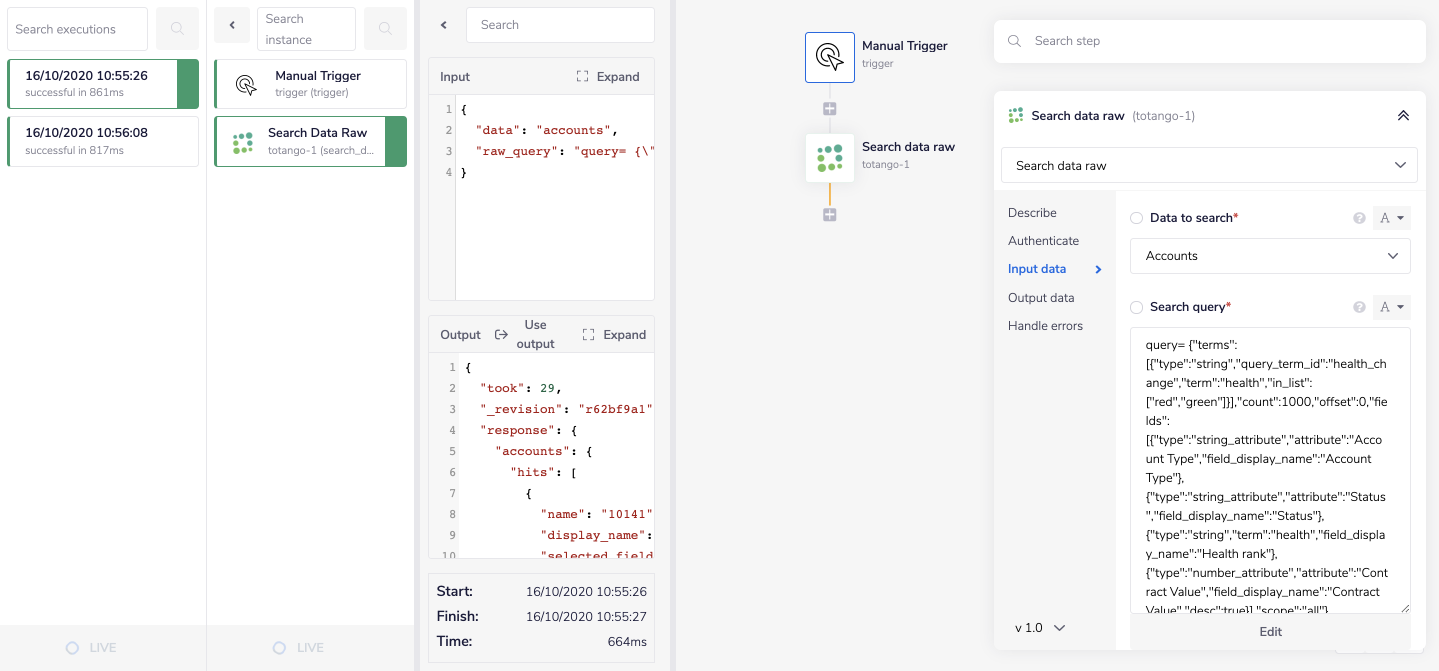
Now when you run your workflow, you will have the necessary data available for each dashboard displayed within your Debug panel.

2 - Loop CollectionCopy
Next, search for the 'Loop collection' connector within your connector panel, and drag it into your workflow as your next step. Set your operations to 'Loop list'.
The Loop Collection connector allows you to iterate through a list of results. In this example, we will use it to iterate through the data found within the previous 'Search raw data' connector step.
In order to specify the list you want to loop through, start by using the 'List' mapping icon (found next to the list input field, within the properties panel) to generate the connector-snake.
While hovering over the 'Search raw data' step (with the tail end of the connector-snake), select hits from the list of output properties displayed. This will auto-populate a jsonpath within your 'List' input field, and update the type selector to jsonpath.
For more clarification on the pathways you have available, open the Debug panel to view your step's Input and Output.
JSONPATHS: For more information on what jsonpaths are and how to use jsonpaths with Tray.io, please see our pages on Basic data concepts and Mapping data between steps
CONNECTOR-SNAKE: The simplest and easiest way to generate your jsonpaths is to use our feature called the Connector-snake. Please see the main page for more details.


3 - Slack connectorCopy
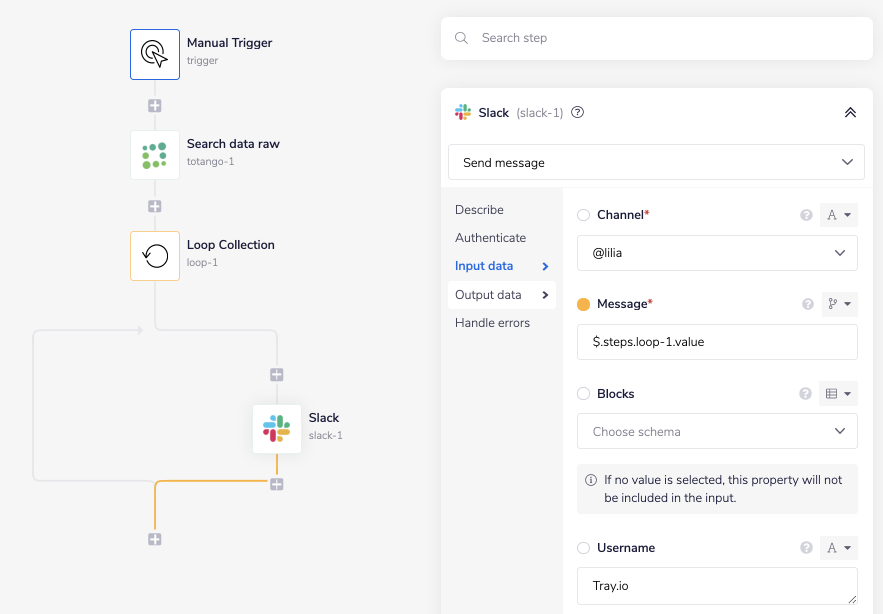
Final step would be to drag a slack connector into your workflow and make sure to authenticate for this service too.
Use the same connector-snake method for auto-generating the jsonpath for the 'Message'. This time drag your mouse over the loop step previously and select value from within the value. This is further exemplified once more within the images below:

Again, when you run your workflow, you will have the necessary data available for each dashboard displayed within your Debug panel.

