
Stripe 7.0
Stripe is a highly secure online payment gateway and merchant processor. It has many customisation tools available for its clients and also offers a huge amount of flexibility for developers.
- On this page
- Stripe
- Overview
- API Information
- Authentication
OverviewCopy
Stripe combines a payments platform with applications which put revenue data at the centre of their business operations. It is geared towards removing the barriers associated with online commerce in order to create a more seamless transaction experience for all concerned.
API InformationCopy
The Stripe connector has the following Base URL: https://api.stripe.com/v1. More information can be found on their main API documentation (v1) site. Details regarding their API limitations can be found here.
AuthenticationCopy
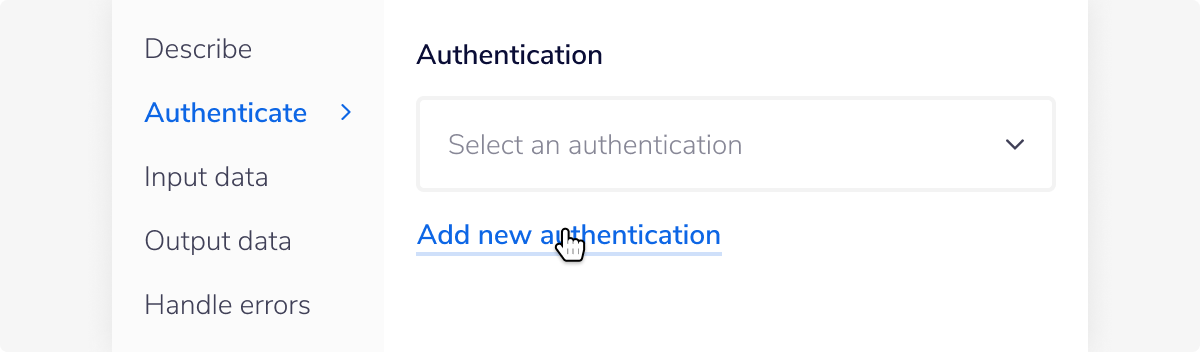
Whether you are using the Stripe Trigger or main Connector, the first thing you will need to do is select 'New Authentication' (if you are using the Stripe Trigger please also see the relevant section below):

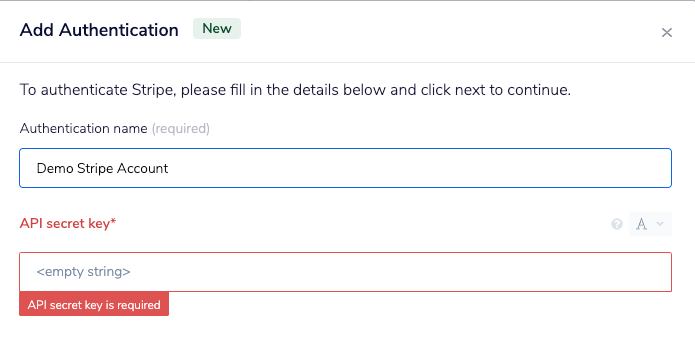
As you can see from the below image, in order to complete authentication set up, Tray requires that you input your "API secret key":

This is found within the main dashboard of your Stripe account. Once you have logged into your Stripe account, navigate to the Developers section which is on the right hand side panel. Under this heading, you will see another option listed "API keys".

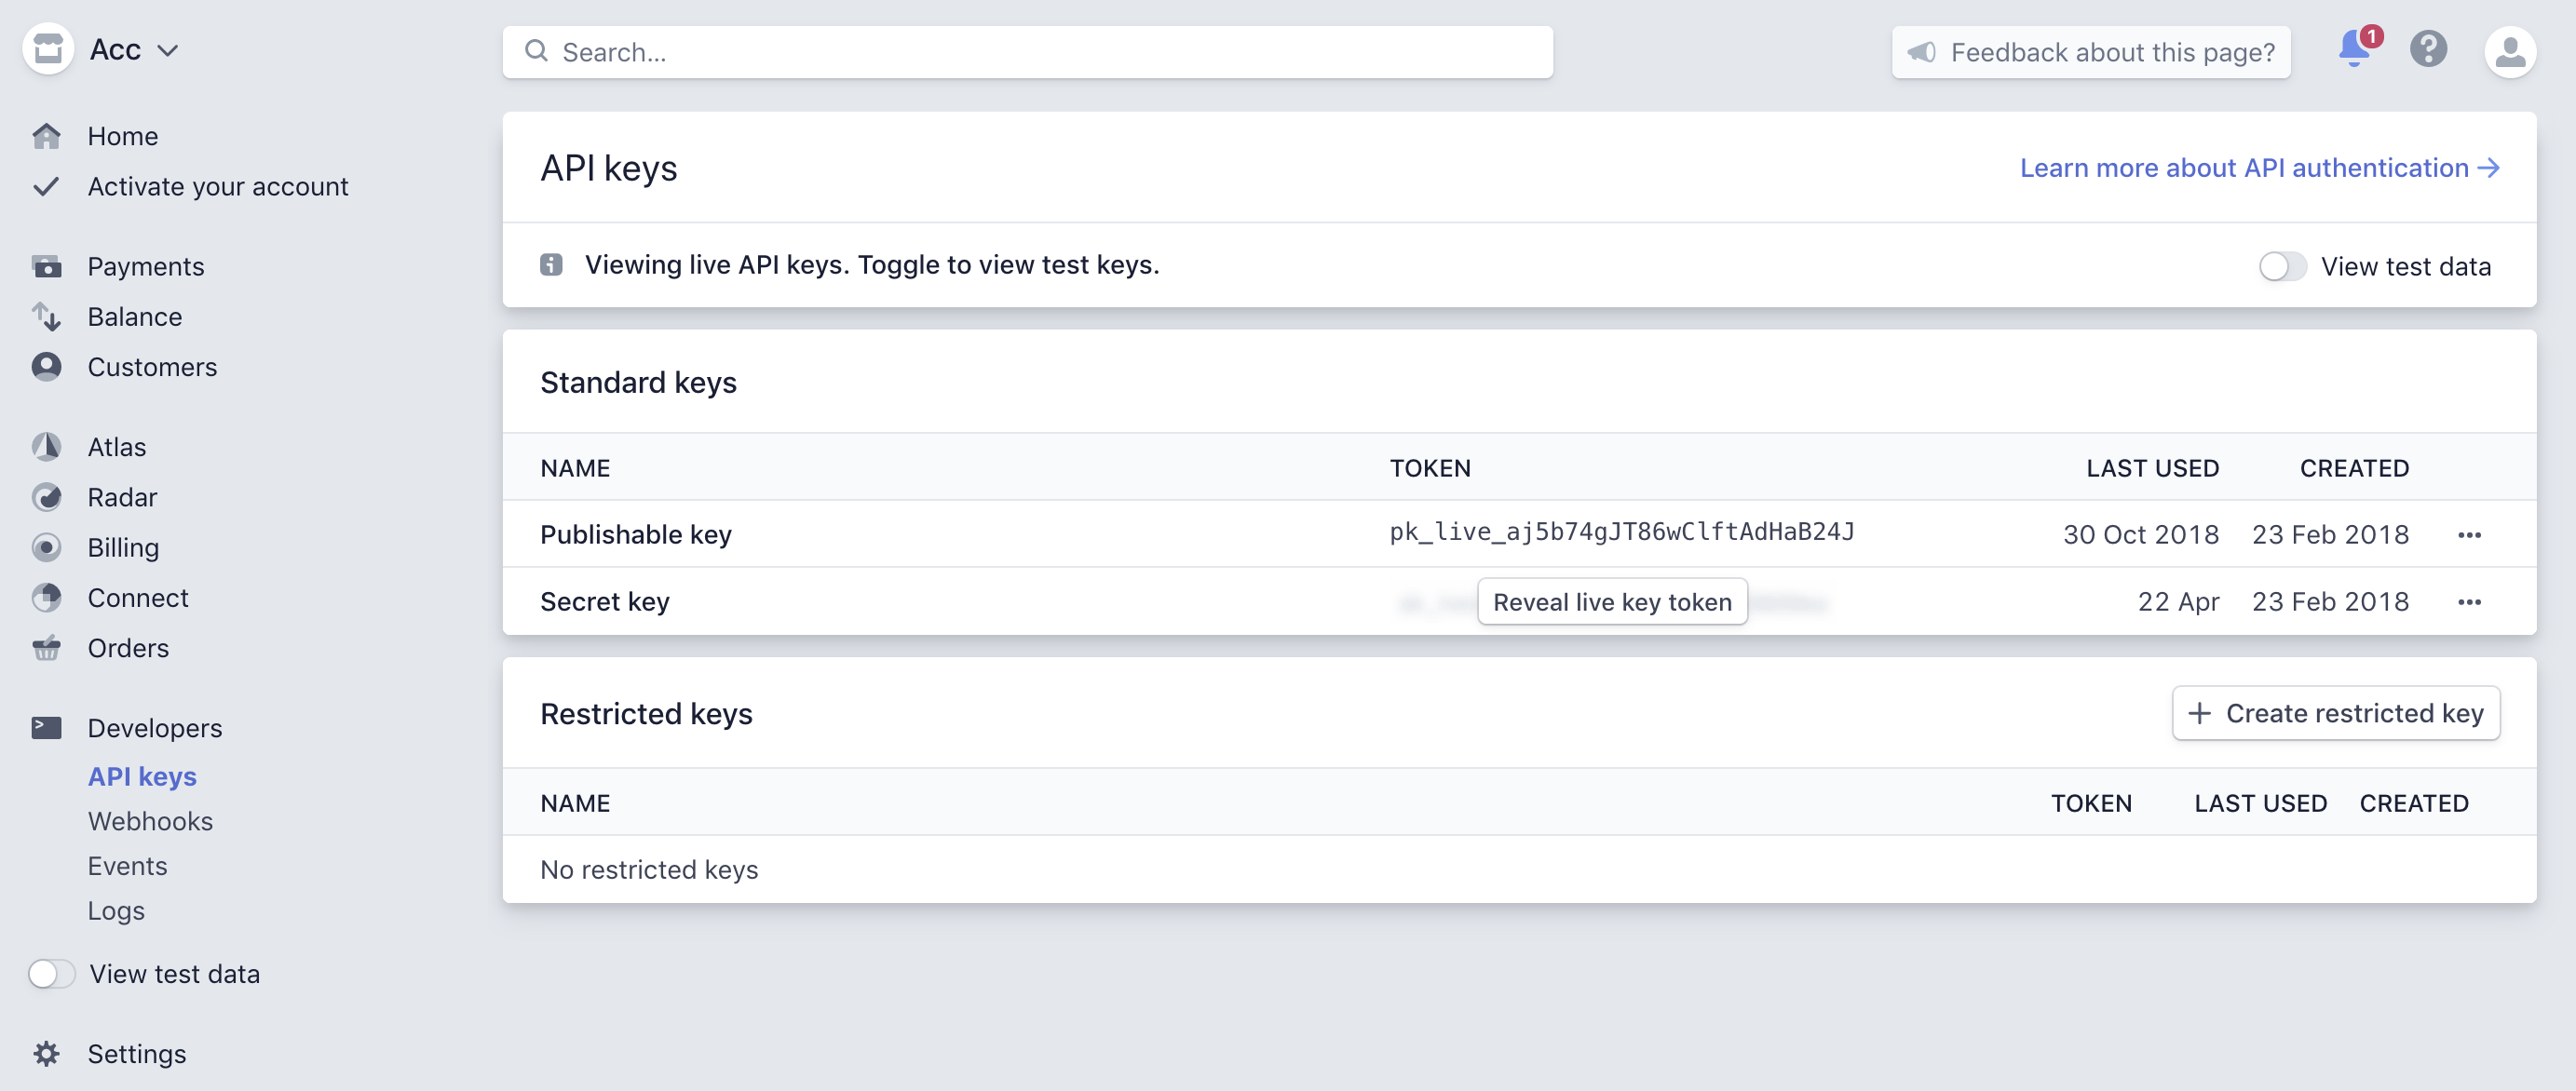
Click through to reveal your API key, then copy and paste it into the API secret key field in the above Tray authentication dialog. Once you have added the authentication, it will already be selected in the authentication section in the Tray.io properties panel:


When you select either a Stripe trigger or Stripe connector for your projects, you will have this specific Stripe-Tray authentication to hand regardless of project.
IMPORTANT!: For both the Stripe connector and the Stripe trigger, when creating an authenticationit verifies that the API key being used is valid. For an authentication to be successfullyvalidated, the key must have permissions to either the Charges or Webhooks resources (if using arestricted API Key).
The Stripe TriggerCopy
If you are using the Stripe Trigger, you will need to setup a webhook in Stripe.
First, in your Tray.io workflow, select the settings icon in the top left hand corner. Under General settings, you will see an option labelled "Workflow Public URL". Copy this, press 'Cancel changes', and head back to your Stripe Developer dashboard.


Then, in the 'developers' section of the Stripe dashboard, select the "Webhook" option under the API Keys subheading.
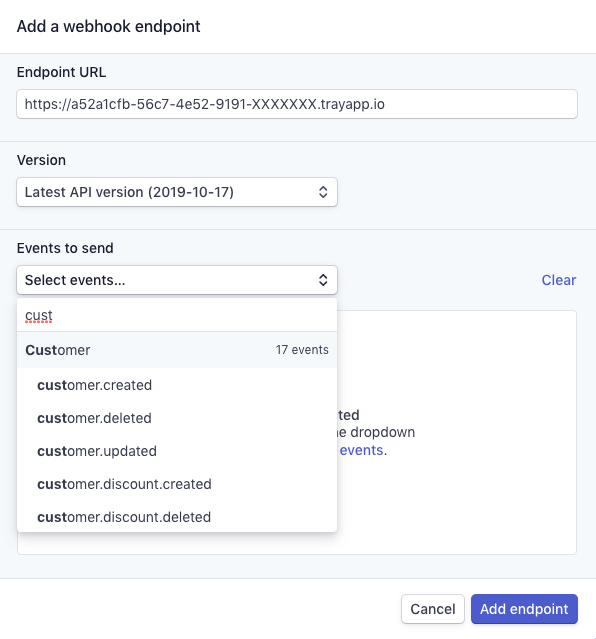
This will redirect you to a new page. Choose 'Add Endpoint' and paste the Tray.io "Workflow Public URL" into the "Endpoint URL" section. Make sure you don't have a double "https://" at the beginning of said URL (Stripe tends to auto populate the bar). Then choose the most current version option beneath.
Under "Events to send", select what is relevant to your workflow (e.g customer.created will send a webhook any time a new customer in Stripe is created). Click 'Add endpoint'.
Depending on your personal usages, you may wish to select other kinds of webhook event types such as: 'Account', 'Coupon', etc. There are 141 individual options to choose from so it is best to select what is relevant to your workflow:

While your dashboard will not have changed, and the authentication will appear the same as it was, don't be alarmed. You can test your trigger by performing an action in Stripe (e.g. create customer) which will trigger your webhook.
Note: Before testing your Stripe-triggered workflow, make sure you have clicked the Enable button in the bottom-right corner of the builder screen.
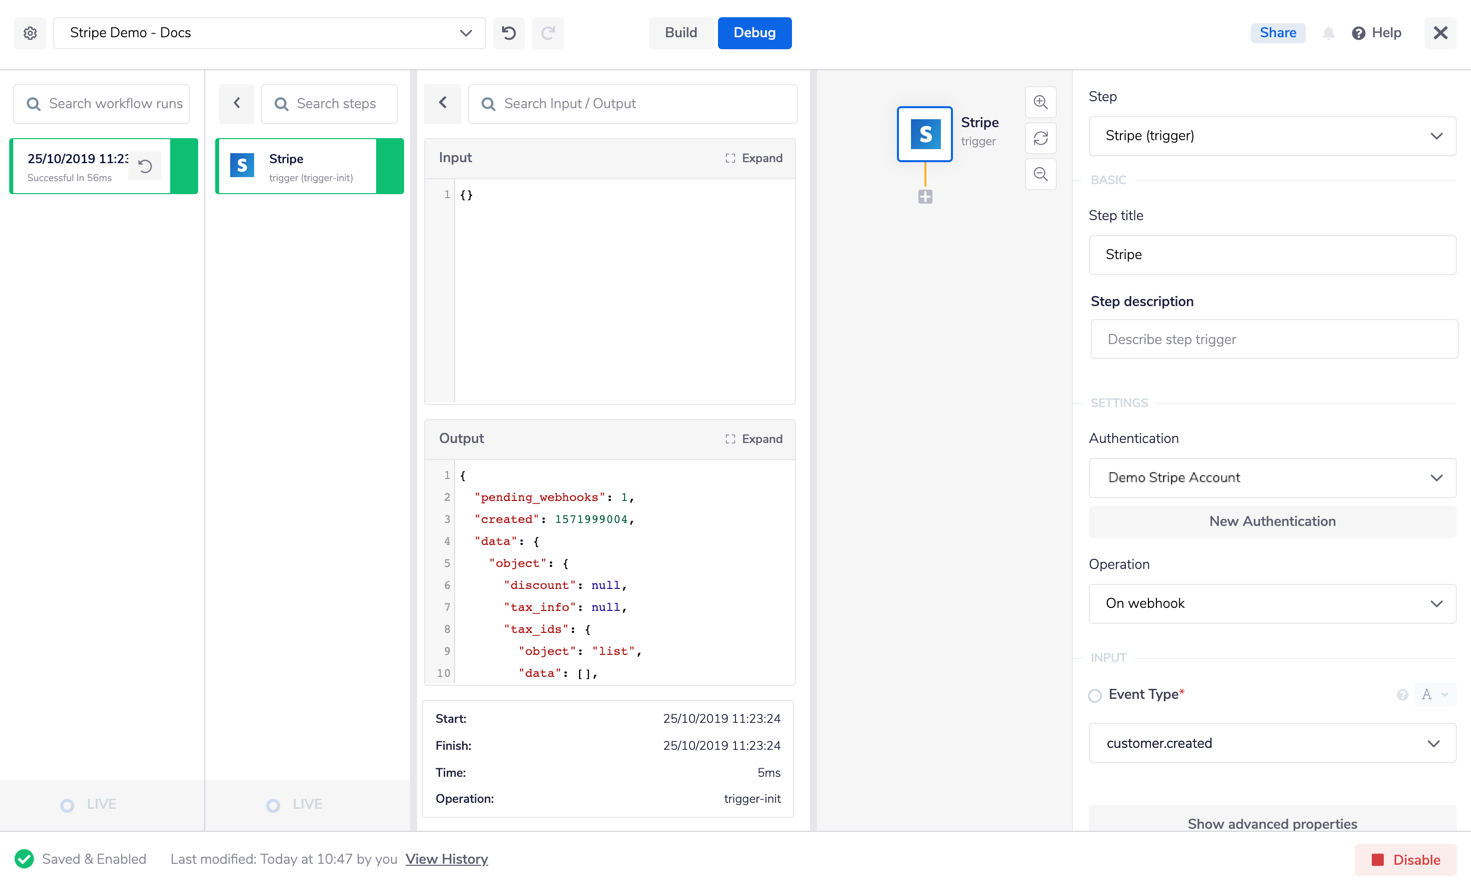
When you perform an action in Stripe which triggers your workflow you can check the result by opening the debug panel in your workflow:

Available OperationsCopy
The examples below show one or two of the available connector operations in use.
Please see the Full Operations Reference at the end of this page for details on all available operations for this connector.
Note on Operations usageCopy
Please be aware that the "Create card" operation is for advanced users as it requires more than basic Tray workflow knowledge.
Example usageCopy
This brief tutorial will demonstrate how to use the Stripe connector in order to email relevant customers regarding their account invoices.
This example envisages a scenario whereby the first step is manually triggered (for the sake of our demonstration), rather than using the Stripe trigger itself. This in turn kicks off the Tray workflow which will eventually return an automated email response to the customers provided.
The trigger is manually invoked.
A list of invoices is called for via the Stripe connector.
The Loop connector iterates through the list of invoices.
Another Stripe connector is used in order to retrieve each invoice's customer data.
Each customer receives an automated reminder email regarding the invoices found under their account.
The completed workflow will look like this:


1 - Set up the Manual triggerCopy
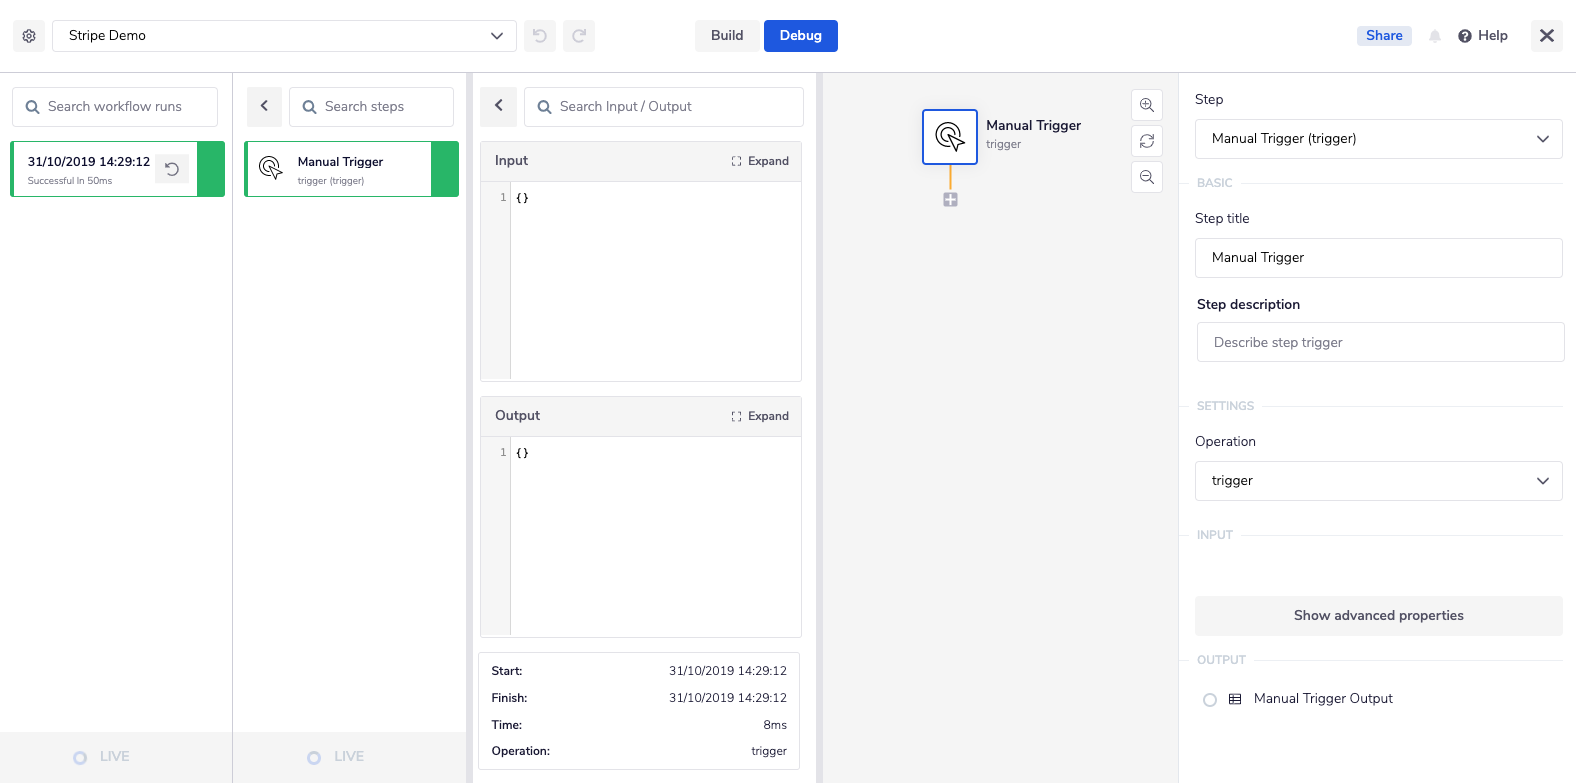
Once you are logged into your Tray account and are in the main dashboard, select the 'Create new workflow' button, name said workflow, and choose the Manual trigger when prompted.
Follow through the authentication process as described above - making sure the endpoints you select - in this case customer - in your Stripe webhook account is accurate.
The most important aspect of this step is to note that you are setting up a TRIGGER, not a Connector. The CONNECTOR is another aspect of the Tray toolkit. For future projects you may wish to use the Stripe trigger instead of the Manual one displayed here; in order to prompt the workflow i.e. When a new customer is created, do X, Y and Z. However for our current testing purposes the manual one works best.

2 - List InvoicesCopy
Using the search panel on the left hand side of your workflow, select the Stripe connector and add your second step. Validate the step with your pre-made Stripe authentication. You can rename the steps to make the workflow more user friendly however this is not mandatory.

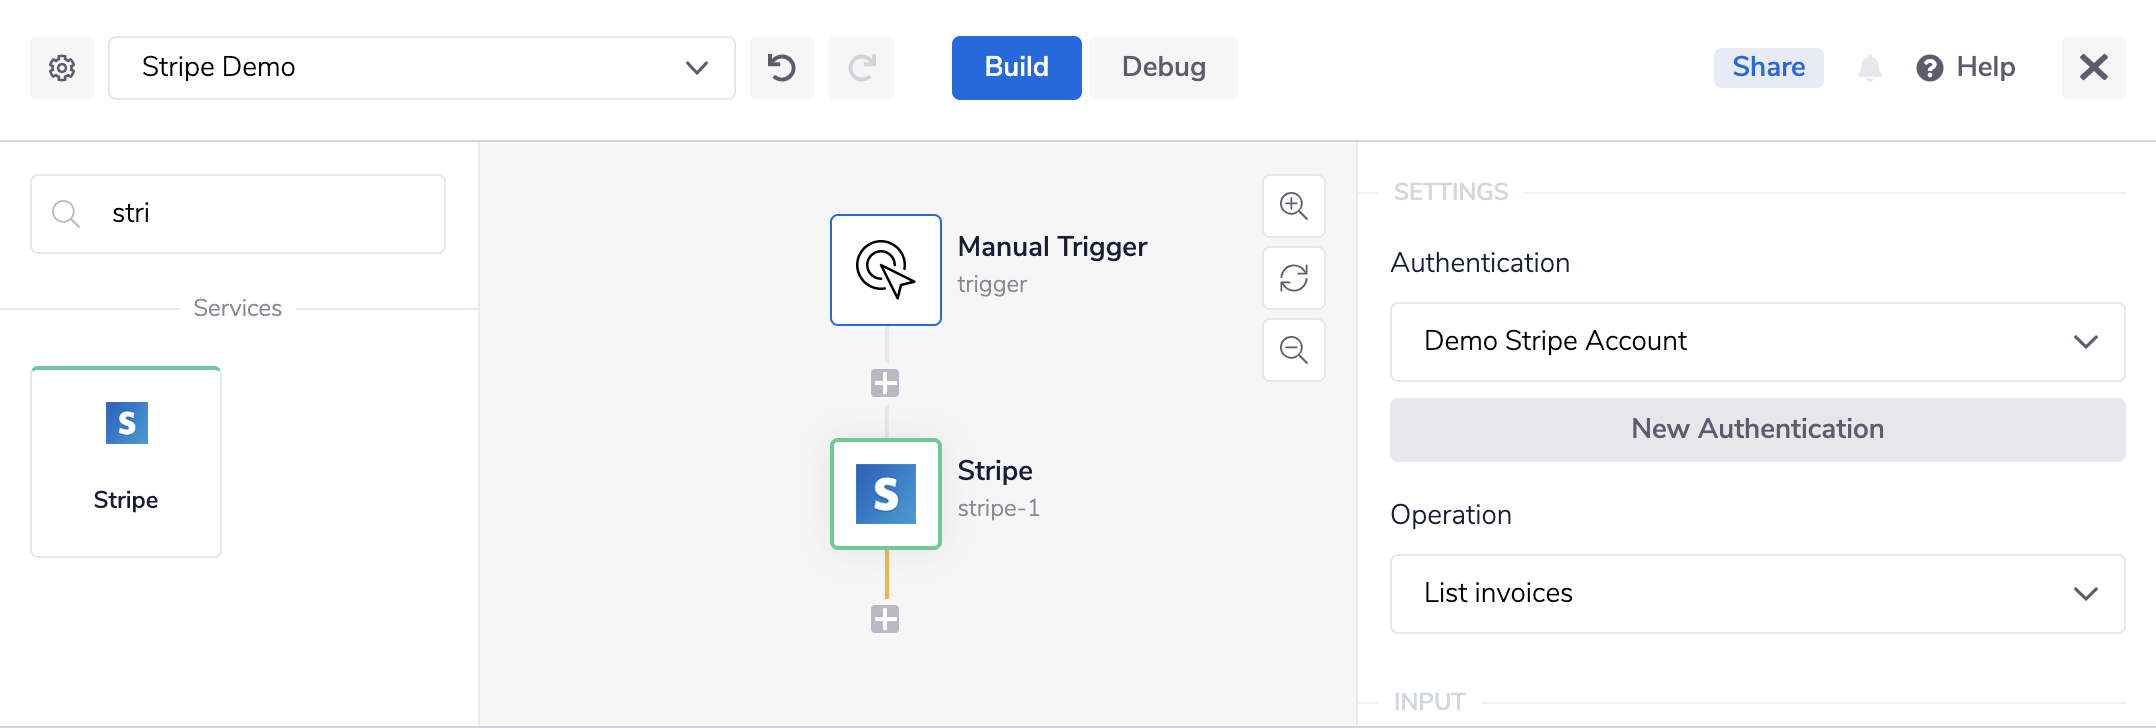
Make sure to choose the 'List invoices' operation under your authentication option.
Either click on the 'Run workflow' button in the bottom right corner or hit the refresh option on any previously run flows in the debug panel. Your Input and Output panels will display the relevant JSON data, listing the available invoices currently in your Stripe account:


These panels are expandable if you wish to see their details more clearly.
3 - Iterate through the invoicesCopy
Now search for and add the Loop connector for your next step.
This connector will iterate through the list of available invoices created from the previous step, and deal with each of them individually, accordingly. It is a very simple but very effective tool and we recommend you see its main documentation page for more use cases.
Link the Loop connector to the list using the connector snake as displayed below:

4 - Get customer dataCopy
Add another Stripe connector onto the square space available in the loop connector's workflow. Set the Operation to 'Get customer', with the Customer ID as $.steps.loop-1.value.customer, making sure that the input type for your Customer ID is set to JSON.

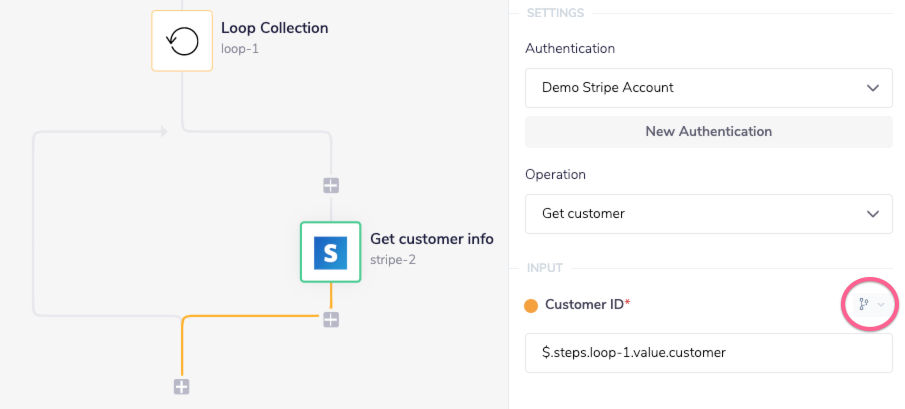
This step within the loop, will now retrieve each invoice's customer data. You can see the relevant output when you run the workflow and open the debug panel.
5 - Email customersCopy
Finally, add the Send Email connector to the next stage of the loop. Start by clicking 'Add recipient' beneath the "To recipients" option (under the input section, in the right hand panel).


Once you click through, you will be asked to fill in both the email address and names for said recipients. In order to make sure this is coded for each individual customer, use the JSON path method and the connector snake in conjunction with second Stripe connector. The field values should be along the lines of: $.steps.stripe-2.email.


The last stage of the email connector is adding the subject and content fields, in the next section below. Naturally you can adjust these to your needs, below is just an example of the kind of message you may wish to send:

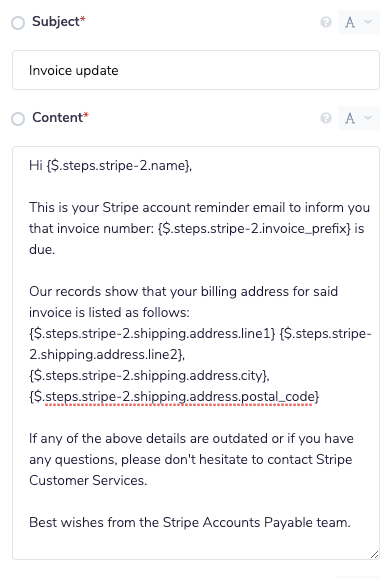
As you can see, we have used Interpolation in order to automatically fill in the fields mentioned within the email itself. This is essentially using the JSONpaths similar to what has been used earlier, within a plain text setting.
For more information on how to use this please reference Tray's <Content type link TBD> .
The end result being, once your have run your workflow, as demonstrated below.


Your customers in the meantime will have received fully rendered emails similar to this:

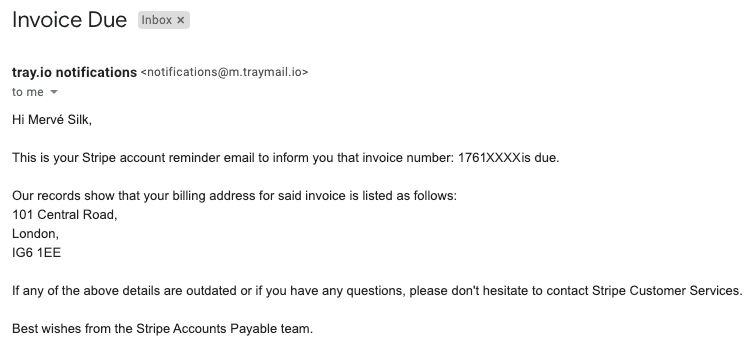
In which case Congratulations!, you have fully completed the Stripe tutorial.