
Snowflake (Okta) 1.1
The only data warehouse built for the cloud.
- On this page
- Snowflake (Okta)
- Overview
- Authentication
OverviewCopy
Snowflake (Okta) offers an alternative way of connecting to Snowflake, by allowing you to authenticate with Okta.
AuthenticationCopy
IMPORTANT!: You will need to have both your Snowflake and Okta account details available,as you will be pulling information from both to complete the authentication set up.
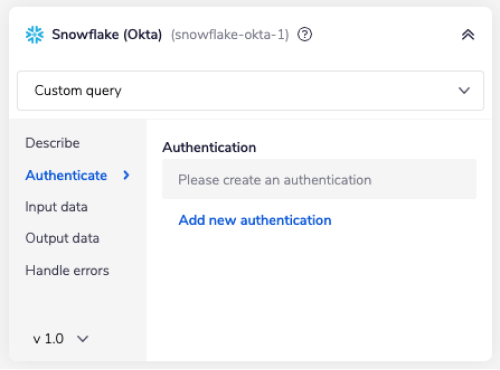
Within the workflow builder, highlight the Snowflake (Okta) connector.
In the Snowflake (Okta) connector properties panel to the right of the builder, click on the Authenticate tab and the 'Add new authentication' button.

This will result in a Tray.io authentication pop-up modal. The first page will ask you to name your authentication and select the type of authentication you wish to create ('Personal' or 'Organisational').
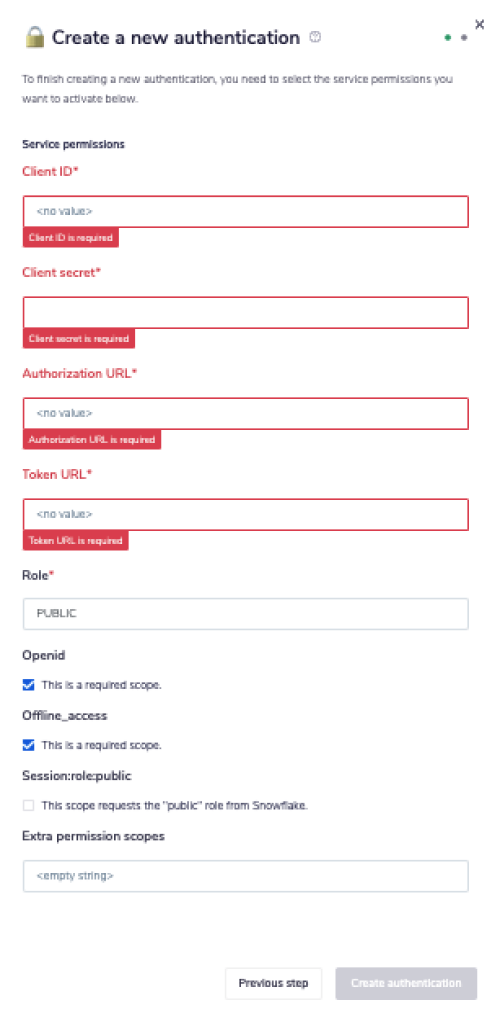
The next page asks you for your 'Client ID', 'Client secret', 'Authorization URL', 'Token URL' and 'Role' credentials.

In order to get these fields, head to your Okta dashboard. Click on the 'Applications' tab in the navigation bar.

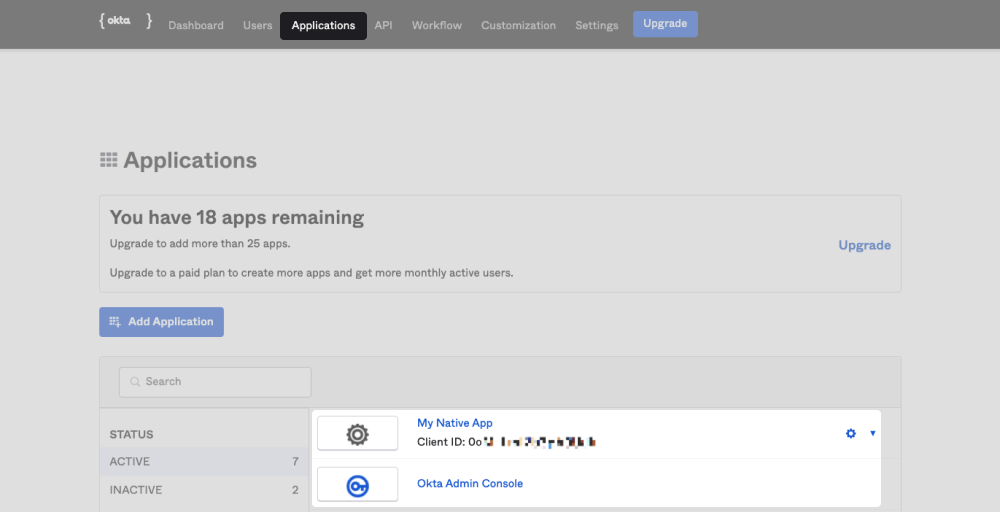
Next navigate to your chosen app from the list of applications. Your 'Client ID' and 'Client secret' credentials can be found here.
If you do not have an application set up, you will need to do this now. You can follow this guide.
PLEASE NOTE: You will also need to create a security integration between Snowflake andOkta. To do so, please follow this guide from Snowflake.
To get both of the URLs, click on the 'Settings' tab inside of your authorization server and click on the link beside 'MetaData URI'

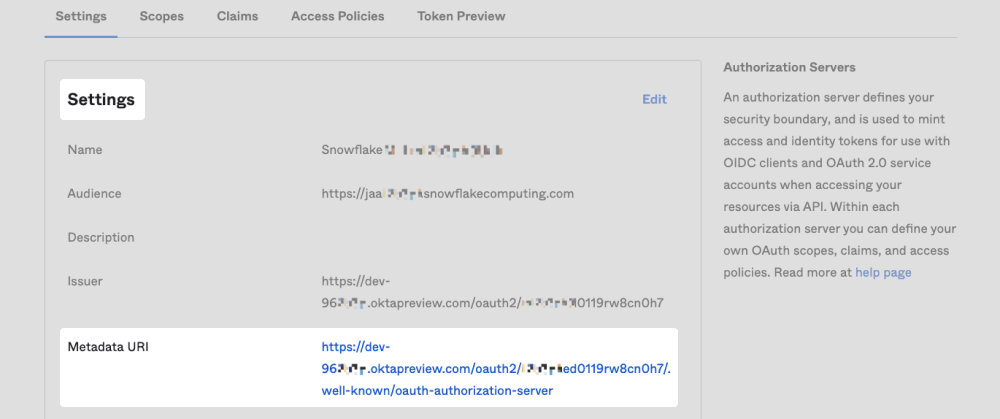
This will open a new page in your browser containing a JSON object.
Search this document (using 'control+F' or 'command+F') for token_endpoint and authorization_endpoint. This will highlight both of the URLs needed.
They should look like this:
authorization_endpoint:"https://your-okta-domain-name.oktapreview.com/oauth2/000000000/v1/authorize"
token_endpoint:"https://your-okta-domain-name.oktapreview.com/oauth2/000000000/v1/token"
To get the 'Role' credential, head to your Snowflake dashboard.
PLEASE NOTE: Snowflake automatically assigns new users with a default role of 'PUBLIC'. Wehave included this default in the Tray.io authentication pop-up modal, as well as the associatedscope.
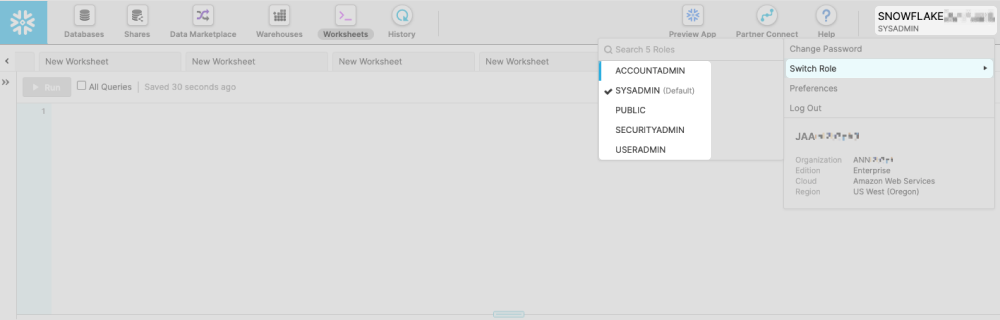
The role currently assigned to your user appears under your username in the navigation bar.
You can view all of the roles your user has available (including which one is the current default) by clicking on the arrow beside your username and selecting 'Switch Role'.

IMPORTANT!: You will have to assign the associated scope to your role in the authenticationsetup, as it is this scope which will request the role from your Snowflake account. If you areusing 'PUBLIC', you can check the 'Session:role:public' box in the Tray.io authentication pop-upmodal. If not, you can add your scope inside of the 'Extra permission scopes' field. These rolescopes will also have to be added to your authorization server. Please see below.
To add your Snowflake role scopes to your authorization server, navigate back to your Okta dashboard and click on the 'Scopes' tab located inside of your authorization server and click on the 'Add Scope' button.
You can create a new scope for each role from your Snowflake account if you wish.


You will also have to make sure that you have these scopes enabled in your Access Policy.
To check this, navigate to the 'Access Policies' tab and select the rule associated with your authorization server. If you do not have one you will have to create one.
Next, check that you either have 'Any scopes' selected or that you have added these scopes under 'The following scopes' option.

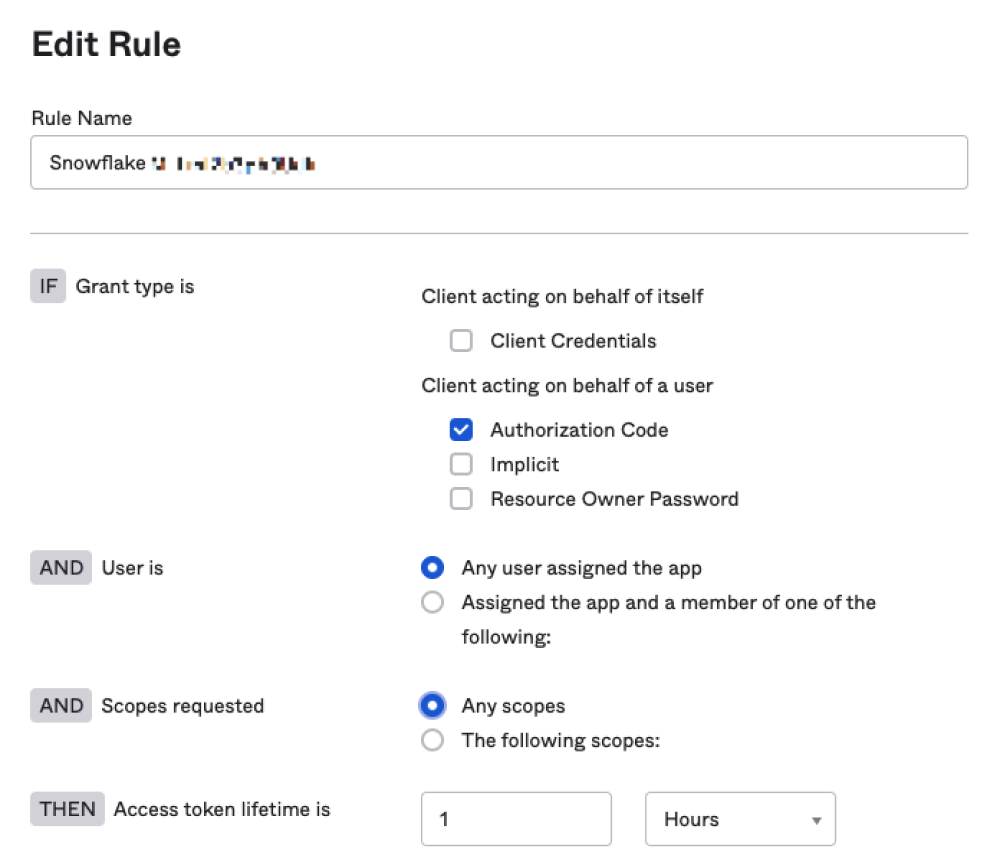
Your scopes should now have been added successfully.
PLEASE NOTE: Scopes are case-sensitive. When entering a new scope in the Tray.ioauthentication pop-up modal, it must be in lower-case (e.g 'session:role:public'). However, itwill be displayed with a capital letter (e.g 'Session:role:public').
Once you have added these fields to your Tray.io authentication popup window, click the 'Create authentication' button.
Go back to your settings authentication field (within the workflow builder properties panel), and select the recently added authentication from the dropdown options now available.
Your connector authentication setup should now be complete.
Please refer to the standard Snowflake documentation for instructions on using operations.
BEST PRACTICES: Whenever you do decide to create your own workflow, be sure to check out some of our key articles such as: