
Sage Intacct 1.9
Sage Intaact is a provider of cloud-based financial management and accounting software.
OverviewCopy
Sage Intacct cloud financial management solution manages all core financials and provides professional services to help implement Sage Intacct software.
AuthenticationCopy
When using the Sage Intaact connector, the first thing you will need to do is go to your Tray.io account page, and select the workflow you wish to work on. Once in the workflow builder itself, search and drag the Sage Intaact connector from the connectors panel (on the left hand side) onto your workflow.
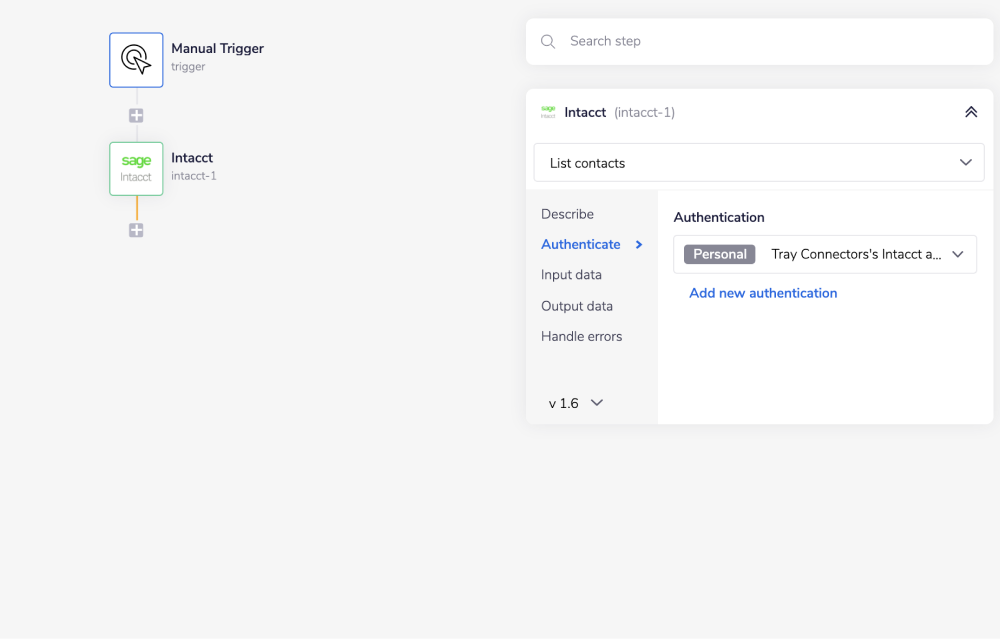
With the new Sage Intaact connector step highlighted, in the properties panel on the right, click on the ‘Authenticate’ panel followed by ‘Add new Authentication’ (located under the Authentication input field).


This will result in a Tray.io authentication pop-up window. The first page will ask you to name your authentication, and state which type of authentication you wish to create ('Personal' or 'Organisational').
As you can see, the next page asks you for your 'Sender ID', 'Sender password', 'User ID', 'User password' and 'Company ID' credentials.

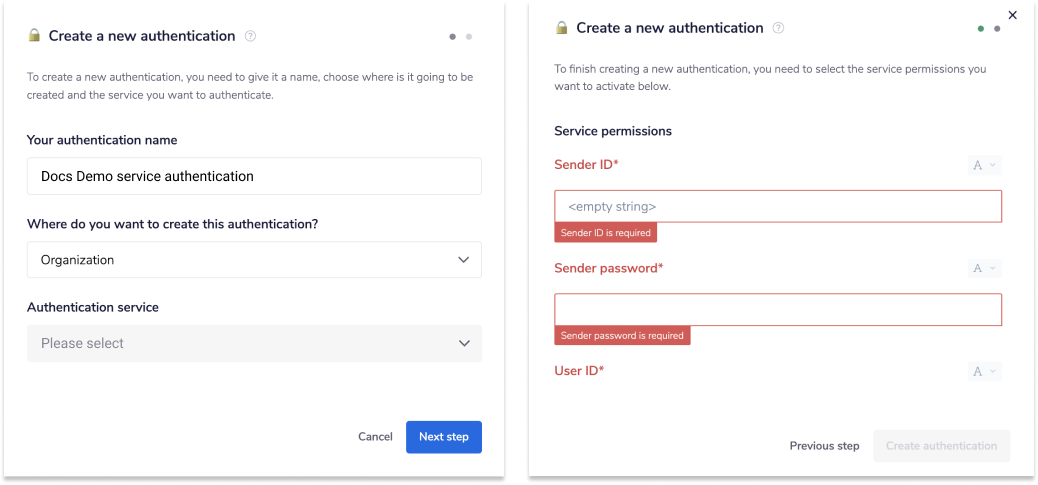
Your Sage Intaact Web Services developer license will provide you with your Tray.io authentication Sender ID and Sender Password.
IMPORTANT!: In order to authenticate, you must have an active Sage Intaact Web Services developer license, which automatically includes a Web Services Sender ID and Sender Password. Take note that a Sender ID can be authorized for more than one company and can be tracked through audit history reports. If you need a developer license at this stage, then please contact your Sage Intaact account manager.
IMPORTANT!: In addition to the aforementioned license, the administrator for the target company in question must enable the Web Services subscription in order to fully authenticate with Tray.io. In order to do this, follow the method outlined below.
Go to the Sage Intaact UI main webpage:


Click on the 'Applications' dropdown and a list of different options will display themselves.


Choose 'Company' followed by 'Subscriptions':

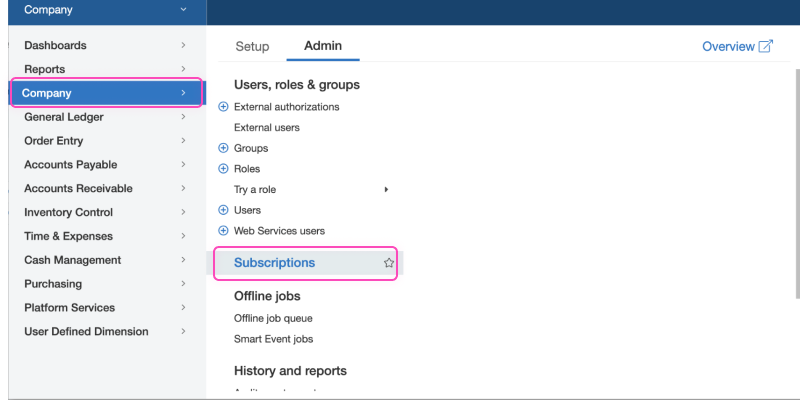
A list of available applications will display. Scroll down until the 'Web Services' option is displayed. Enable this using the switch:


IMPORTANT!: make sure to ask your Company Administrator to review your Web Services Authorisation before proceeding.
PLEASE NOTE: If you have an external application or integration that needs a unique user to exchange information with Sage Intacct via Web Services API calls, then add a Web Services user for them here. More details can be found at Sage Intaact instructions.
Once you have added these fields to your Tray.io authentication popup window, click on the 'Create authentication' button. Go back to your settings authentication field (within the workflow builder properties panel), and select the recently added authentication from the dropdown options now available.
Your connector authentication setup should now be complete.
Available OperationsCopy
The examples below show one or two of the available connector operations in use.
Please see the Full Operations Reference at the end of this page for details on all available operations for this connector.
Note on Operations UsageCopy
If you have an external application or integration that needs a unique user to exchange information with Sage Intacct via Web Services API calls, then add a Web Services user for them when enabling the Web Services subscriptions.
More details can be found at Sage Intaact instructions.
Example UsageCopy
Within this example we will list our Sage Intaact contacts and process them based on their status.
Setup your trigger and get the list of contacts.
Loop over collection of contacts.
Find contacts with "status" equal to "active".
Send Record numbers of the active contacts to to slack chanel.
Get detailed information about inactive accounts.
The final outcome should look like this:


1 - Setup Trigger & List contactsCopy
Once you have clicked 'Create new workflow' from your main Tray.io dashboard named it, select the Manual trigger from the trigger options available:


After you have been redirected to the Tray.io workflow dashboard, from the connectors panel on the left, add a Sage Intaact connector to your second step. Set the operation to 'List contacts'.

Feel free to re-name your steps as you go along to make things clearer for yourself and other users.
2 - Loop collectionCopy
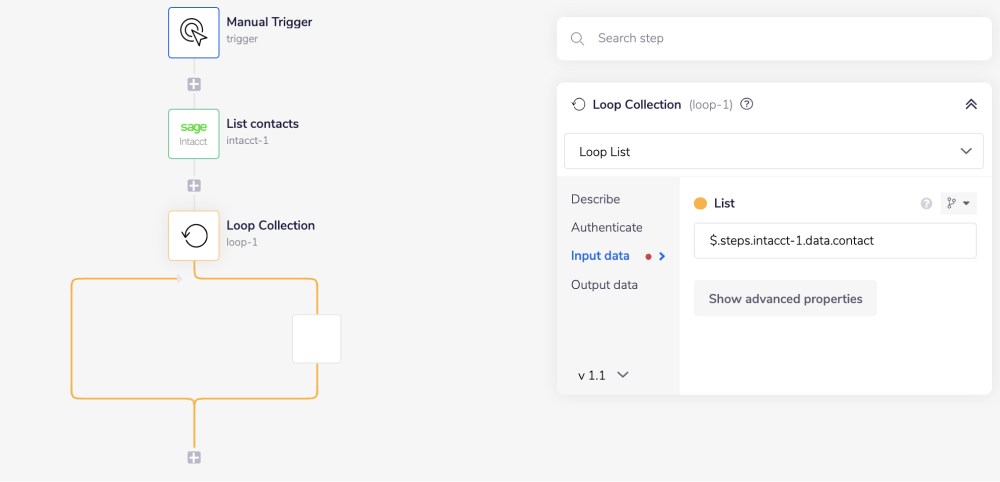
Next, search for the 'Loop collection' connector within your connector panel, and drag it into your workflow as your next step. Set your operations to 'Loop list'.
The Loop Collection connector allows you to iterate through a list of results. In this example, we will use it to iterate through the data found within the previous Sage Intaact connector step.
In order to specify the list you want to loop through, start by using the 'List' mapping icon (found next to the list input field, within the properties panel) to generate the connector-snake.
While hovering over the 'List contacts' step (with the tail end of the connector-snake), select
CONTACT from the list of output properties displayed. This will auto-populate a jsonpath within
your 'List' input field, and update the type selector to jsonpath.
For more clarification on the pathways you have available, open the Debug panel to view your step's Input and Output.
JSONPATHS: For more information on what jsonpaths are and how to use jsonpaths with Tray.io, please see our pages on Basic data concepts and Mapping data between steps
CONNECTOR-SNAKE: The simplest and easiest way to generate your jsonpaths is to use our feature called the Connector-snake. Please see the main page for more details.

3 - Boolean conditionCopy
Find 'Boolean Condition' connector in the 'Core' section of the panel and add it to your third step. Choose 'Boolean condition' operation. To set the boolean connector to check if "status" equal "active" we use the $.steps.loop-1.value.STATUS jsonpath to pull it from 'Loop Collection' step.


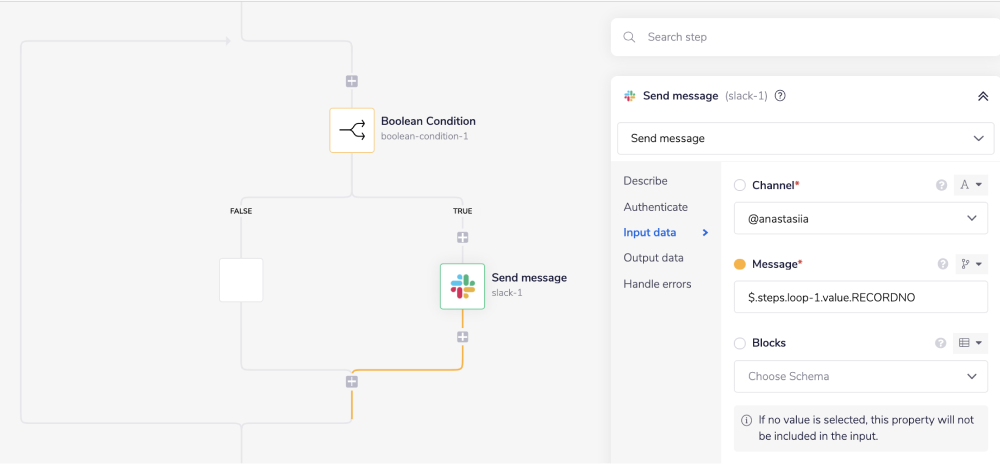
4 - Send a Slack messageCopy
Add a Slack connector to your TRUE brunch and select 'Send message' operation.
We use the $.steps.loop-1.value.RECORDNO jsonpath to pull "Record numbers" from the first Sage Intaact step.

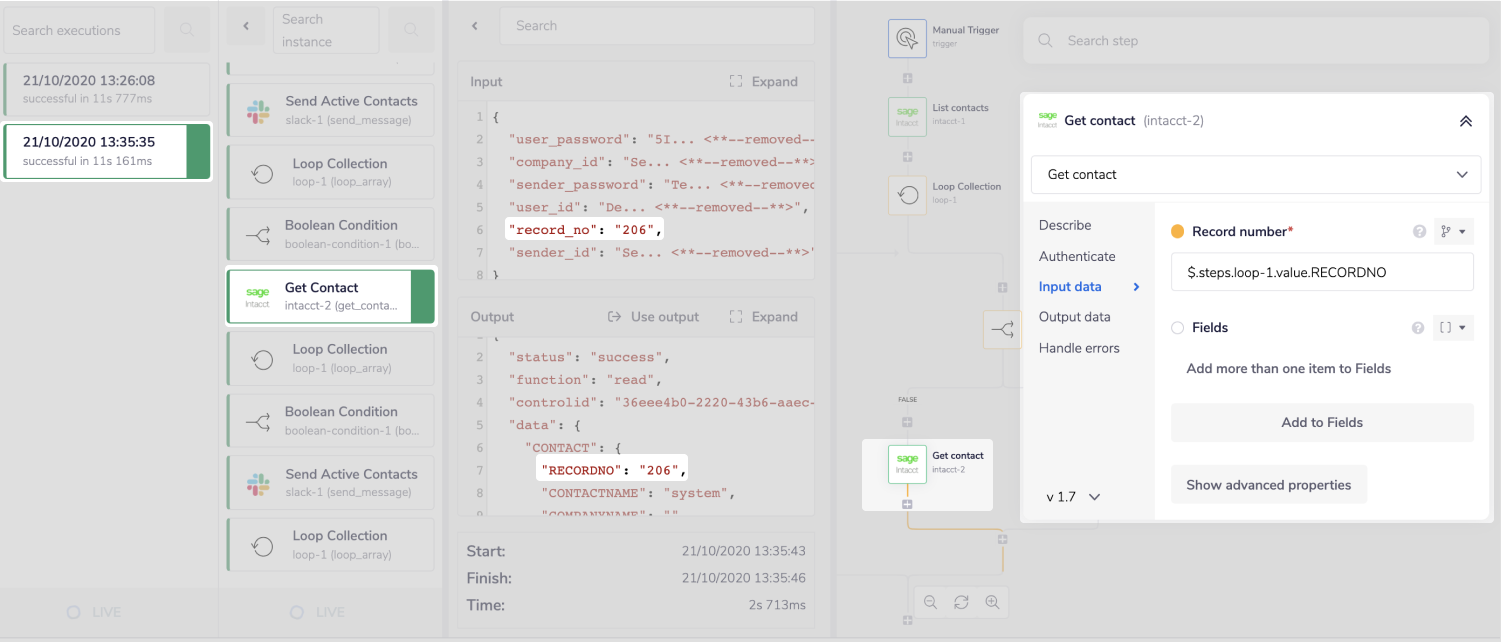
5 - Get inactive contactsCopy
Add a 'Sage Intaact' connector to your FALSE brunch and select 'Get contact' operation.
We use the $.steps.loop-1.value.RECORDNO jsonpath to pull "Record numbers" from the first Sage Intaact step.


Click 'Run workflow' an go to the Debug tub to see a successful of the output

Congratulations! You just created a fully functional workflow.
BEST PRACTICES: Whenever you do decide to create your own workflow, be sure to check out some of our key articles such as: