PortaBilling (PortaOne) 1.1
Platform supporting billing for Communication Service Providers
OverviewCopy
The Workfront connector currently allows you to retrieve specified data about any type of object within Workfront.
AuthenticationCopy
To authenticate with the PortaBilling connector you will need your login/username used to access the PortaBilling UI. You will also need an API token/key (not your password).
To connector to your PortaBilling instance, the domain of where your PortaBilling server is hosted is required, along with the port number. The interface is available for administrators on port 443, the interface for customers is available on port 8444, the interface for resellers is available on port 8442 and the interface for accounts is available on port 8445.
If you're not sure which port is required and you have an admin account on your PortaBilling instance, use the default of 443.
Notes on operation usageCopy
The API documentation for PortaBilling can be found here.
The operations for the PortaBilling connector allows users to specify which high level service and associated record type they would like to create or retrieve. For example, the Account service type encompasses a number of record types, such as Account, Alias and Auto payment. If all that was required is to create an account, then the service type would be Account and the record type would also be Account. The same goes for customer and service.
The PortaBilling connector allows users to enter properties in Attributes for the record type they are creating or listing. For create operations, the attributes represent values that will populate the new record. In the list operation, the values are used to filter the results e.g. only return customers with a name of "Tray demo".
The Attributes object needs to be structured in the same way as the PortaBilling API documentation specifies. For example when creating a customer, in the API document it specifies the properties you need (see below).

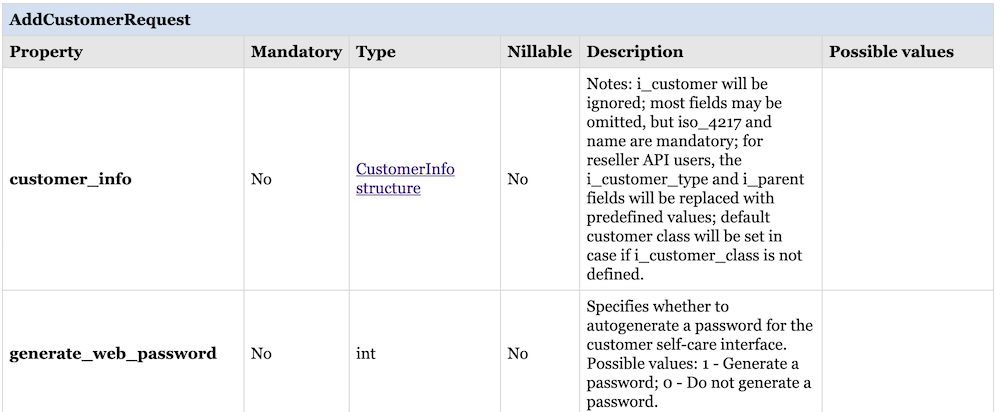
The AddCustomerRequest table shows two high level properties that are required to create an account, customer_info and generate_web_password. We can see that there is a nested structure underneath customer_info. This is another object which contains properties for the account. Clicking on the link in the type column, it takes us to another table of properties.
The structure of customer_info > CustomerInfo properties needs to be replicated under the attributes object. Please see below for a basic example.
Example 1 - Creating an accountCopy
In this example, we'll go ahead and create an account.
Step 1 - Navigate to API documentationCopy
The first step is to navigate to the PortaBilling API documentation to find out the name of the service and record type that is required. To add a new account, we could search for add_account. We could also navigate in the documentation to PortaBilling API methods > Account information > Account management > add_account.

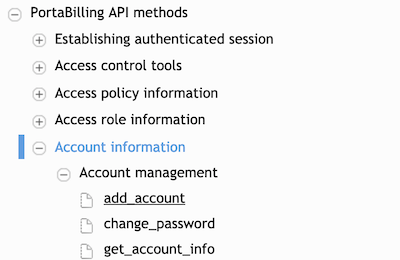
A sure way to find out the service name is to look at the URL of the API docs page as you click on the links e.g. clicking on the add_account link makes the end of the URL change to Accountadd_account. This means the service is Account, the operation is add (create), and the record type is account.


Step 2 - Configure inputCopy
In the Tray workflow, drag a PortaBilling step to the workflow. Select the Create record operation. Select Account as the Service type and account as the Record type.
We can now start building up our request. In the API documentation, we can see the the request should contain two high level properties.


The AddAccountRequest table shows two high level properties that are required to create an account, account_info and generate_web_password. We can see that there is a nested structure underneath account_info. This is a nested object which contains properties for the account. Clicking on the link in the type column, it takes us to another table of properties.
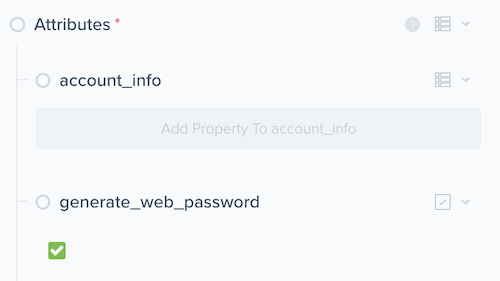
So we add two properties to our attributes object (see below) - the account_info (which is iteself an object) and generate_web_password (a boolean which takes a boolean or a 1 or 0).


In the screenshot above we are also changing the data type of the properties we are adding i.e. account_info is an object, generate_web_password is a boolean. It should look like the below.

Step 3 - Adding account propertiesCopy
Now we can start adding account properties to the account_info object. To do this we refer to the table of account properties in the API documentation (see below).

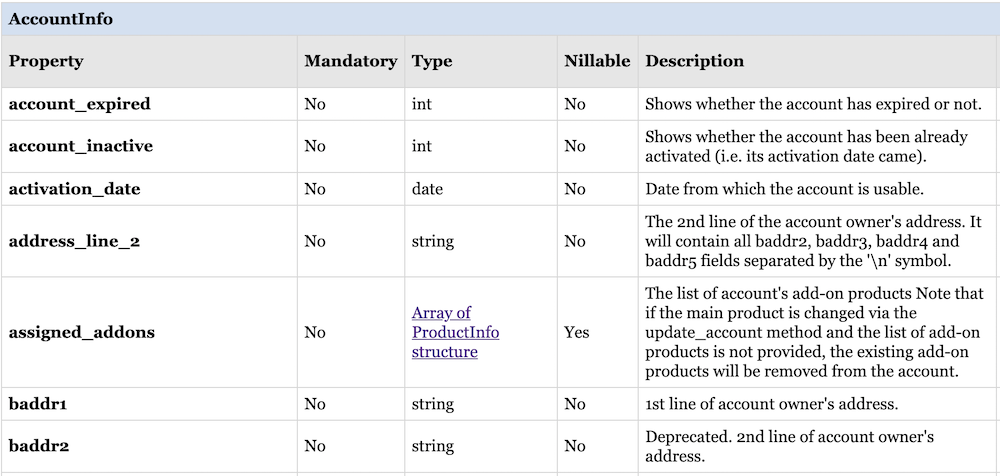
To add a property, click on Add Property To account_info. Enter the name of the property exactly as it appears in the API document.
The mandatory fields for creating an account are bill_status, billing_model, i_product, id and i_customer.
Remember to change the data type so that it matched the API documentation. The exception here is where the property is a 1 or 0 indicating true or false respectively. The data type for these properties can be a boolean and the connector will automatically convert.
Once all the desired account properties have been added, you should have an account_info object that looks like the below.


Step 4 - Run workflowCopy
Once the input properties have been entered. It's time to run the workflow and create the account. If there is anything wrong or missing with the account property names the PortaBilling API will send an error similar to the below.

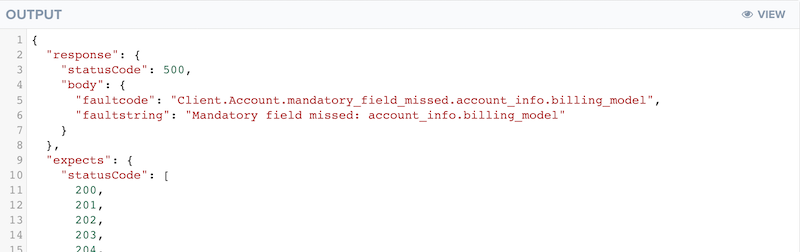
This tells us that we did not include the required field billing_model on the account_info object.
Example 2 - Listing customersCopy
In this example, we'll list customers in the PortaBilling instance.
Step 1 - Discover filter attributesCopy
To list records, we can filter on the properties for that record type. The list of properties to filter on can be found in the API documentatoin for PortaBilling.
In the API document, navigate to PortaBilling API methods > Customer information > get_customer_list in left menu.

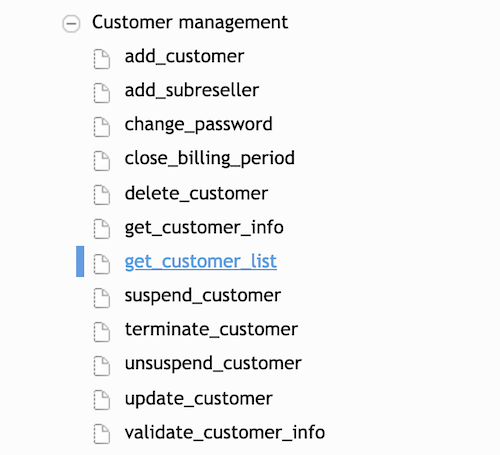
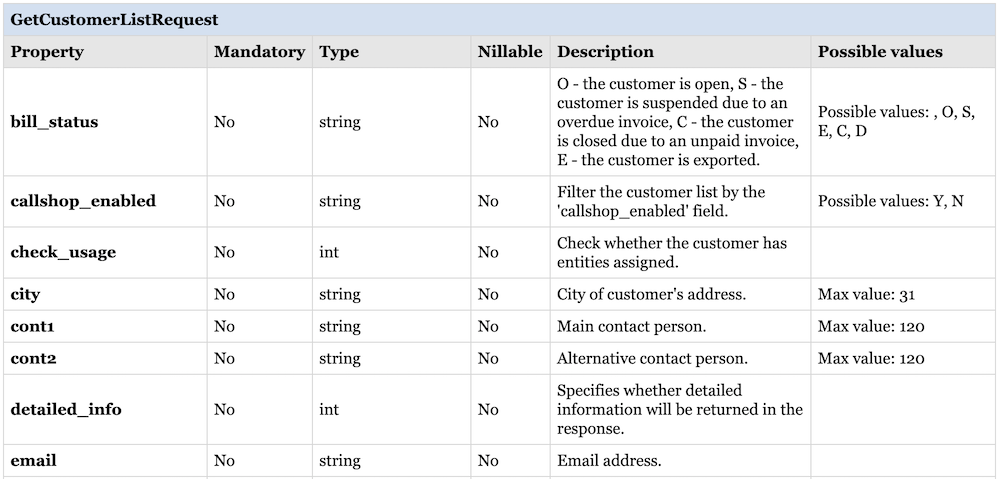
Once at the right point in the document, you should be able to see a table of customer filters (see below).

The limit and offset properties used for pagination are added for you, so there is no need to add these to the attributes object.
Step 2 - Filter by bill statusCopy
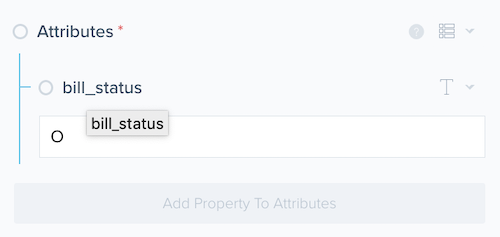
To retrieve a list of customers filtered by bill_status, we need to add that property to the attributes object in the input property panel.
We can see from the API documentation that bill_status has four possible values, O (open), S (suspended), C (closed) and E (exported). Here we will search for customers with bill status of open. So we add new property called bill_status and a value of O.