
Pigment 1.0
Pigment is a business planning platform for forward-thinking organizations.
OverviewCopy
Pigment is the business planning platform that allows you to share a common understanding of the numbers that matter, spend less time data-crunching and more time adding value, by defining the impact of all actions on your business.
AuthenticationCopy
Within the workflow builder, highlight the Pigment connector.
In the Pigment connector properties panel to the right of the builder, click on the Authenticate tab and the 'Add new authentication' button.


This will result in a Tray.io authentication pop-up modal. The first page will ask you to name your authentication and select the type of authentication you wish to create ('Personal' or 'Organisational').
The next page asks you for your 'API Key' credential.

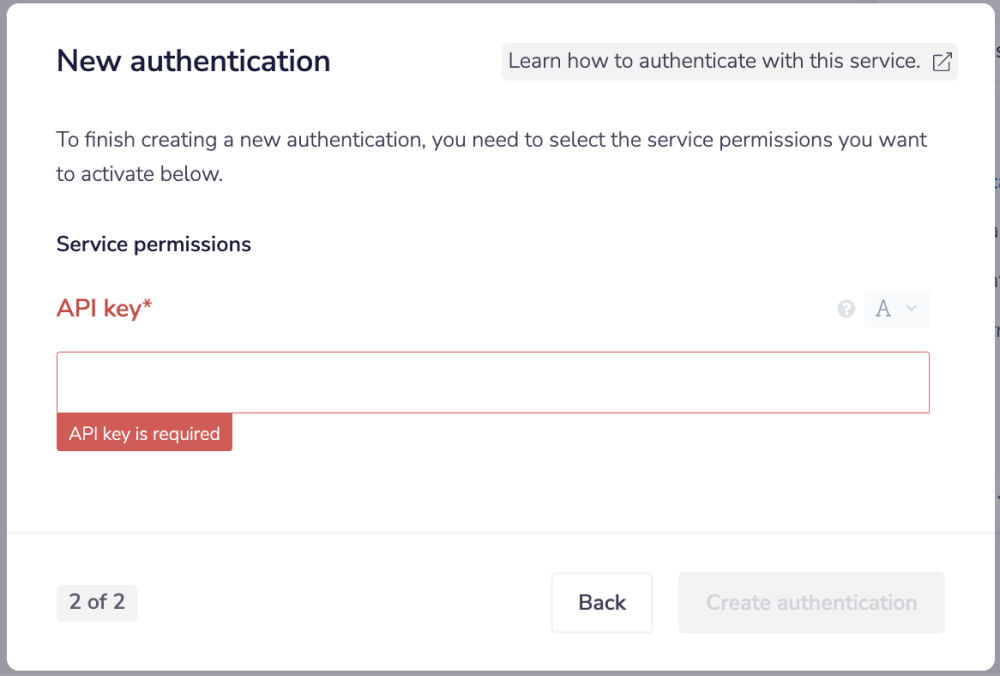
You will need to get the value for this API key from Pigment. Please note that a different API key is required for importing and exporting data. You will need to create two separate authentications, one for export and one for import. Be sure to name them appropriately so they are easily distinguished later.
Once you have added these fields to your Tray.io authentication pop-up window, click the 'Create authentication' button.
Go back to your settings authentication field (within the workflow builder properties panel), and select the recently added authentication from the available drop-down options.
Your connector authentication setup should now be complete.
Available OperationsCopy
The examples below show some of the available connector operations in use.
Please see the Full Operations Reference at the end of this page for details on all available operations for this connector.
Using the Raw HTTP Request ('Universal Operation')Copy
As of version 1.0, you can effectively create your own operations.
This is a very powerful feature which you can put to use when there is an endpoint in Pigment which is not used by any of our operations.
To use this you will first of all need to research the endpoint in the Pigment documentation, to find the exact format that Pigment will be expecting the endpoint to be passed in.
Note that you will only need to add the suffix to the endpoint, as the base URL will be automatically set through the connector.
The base URL for Pigment is: https://pigment.app/api
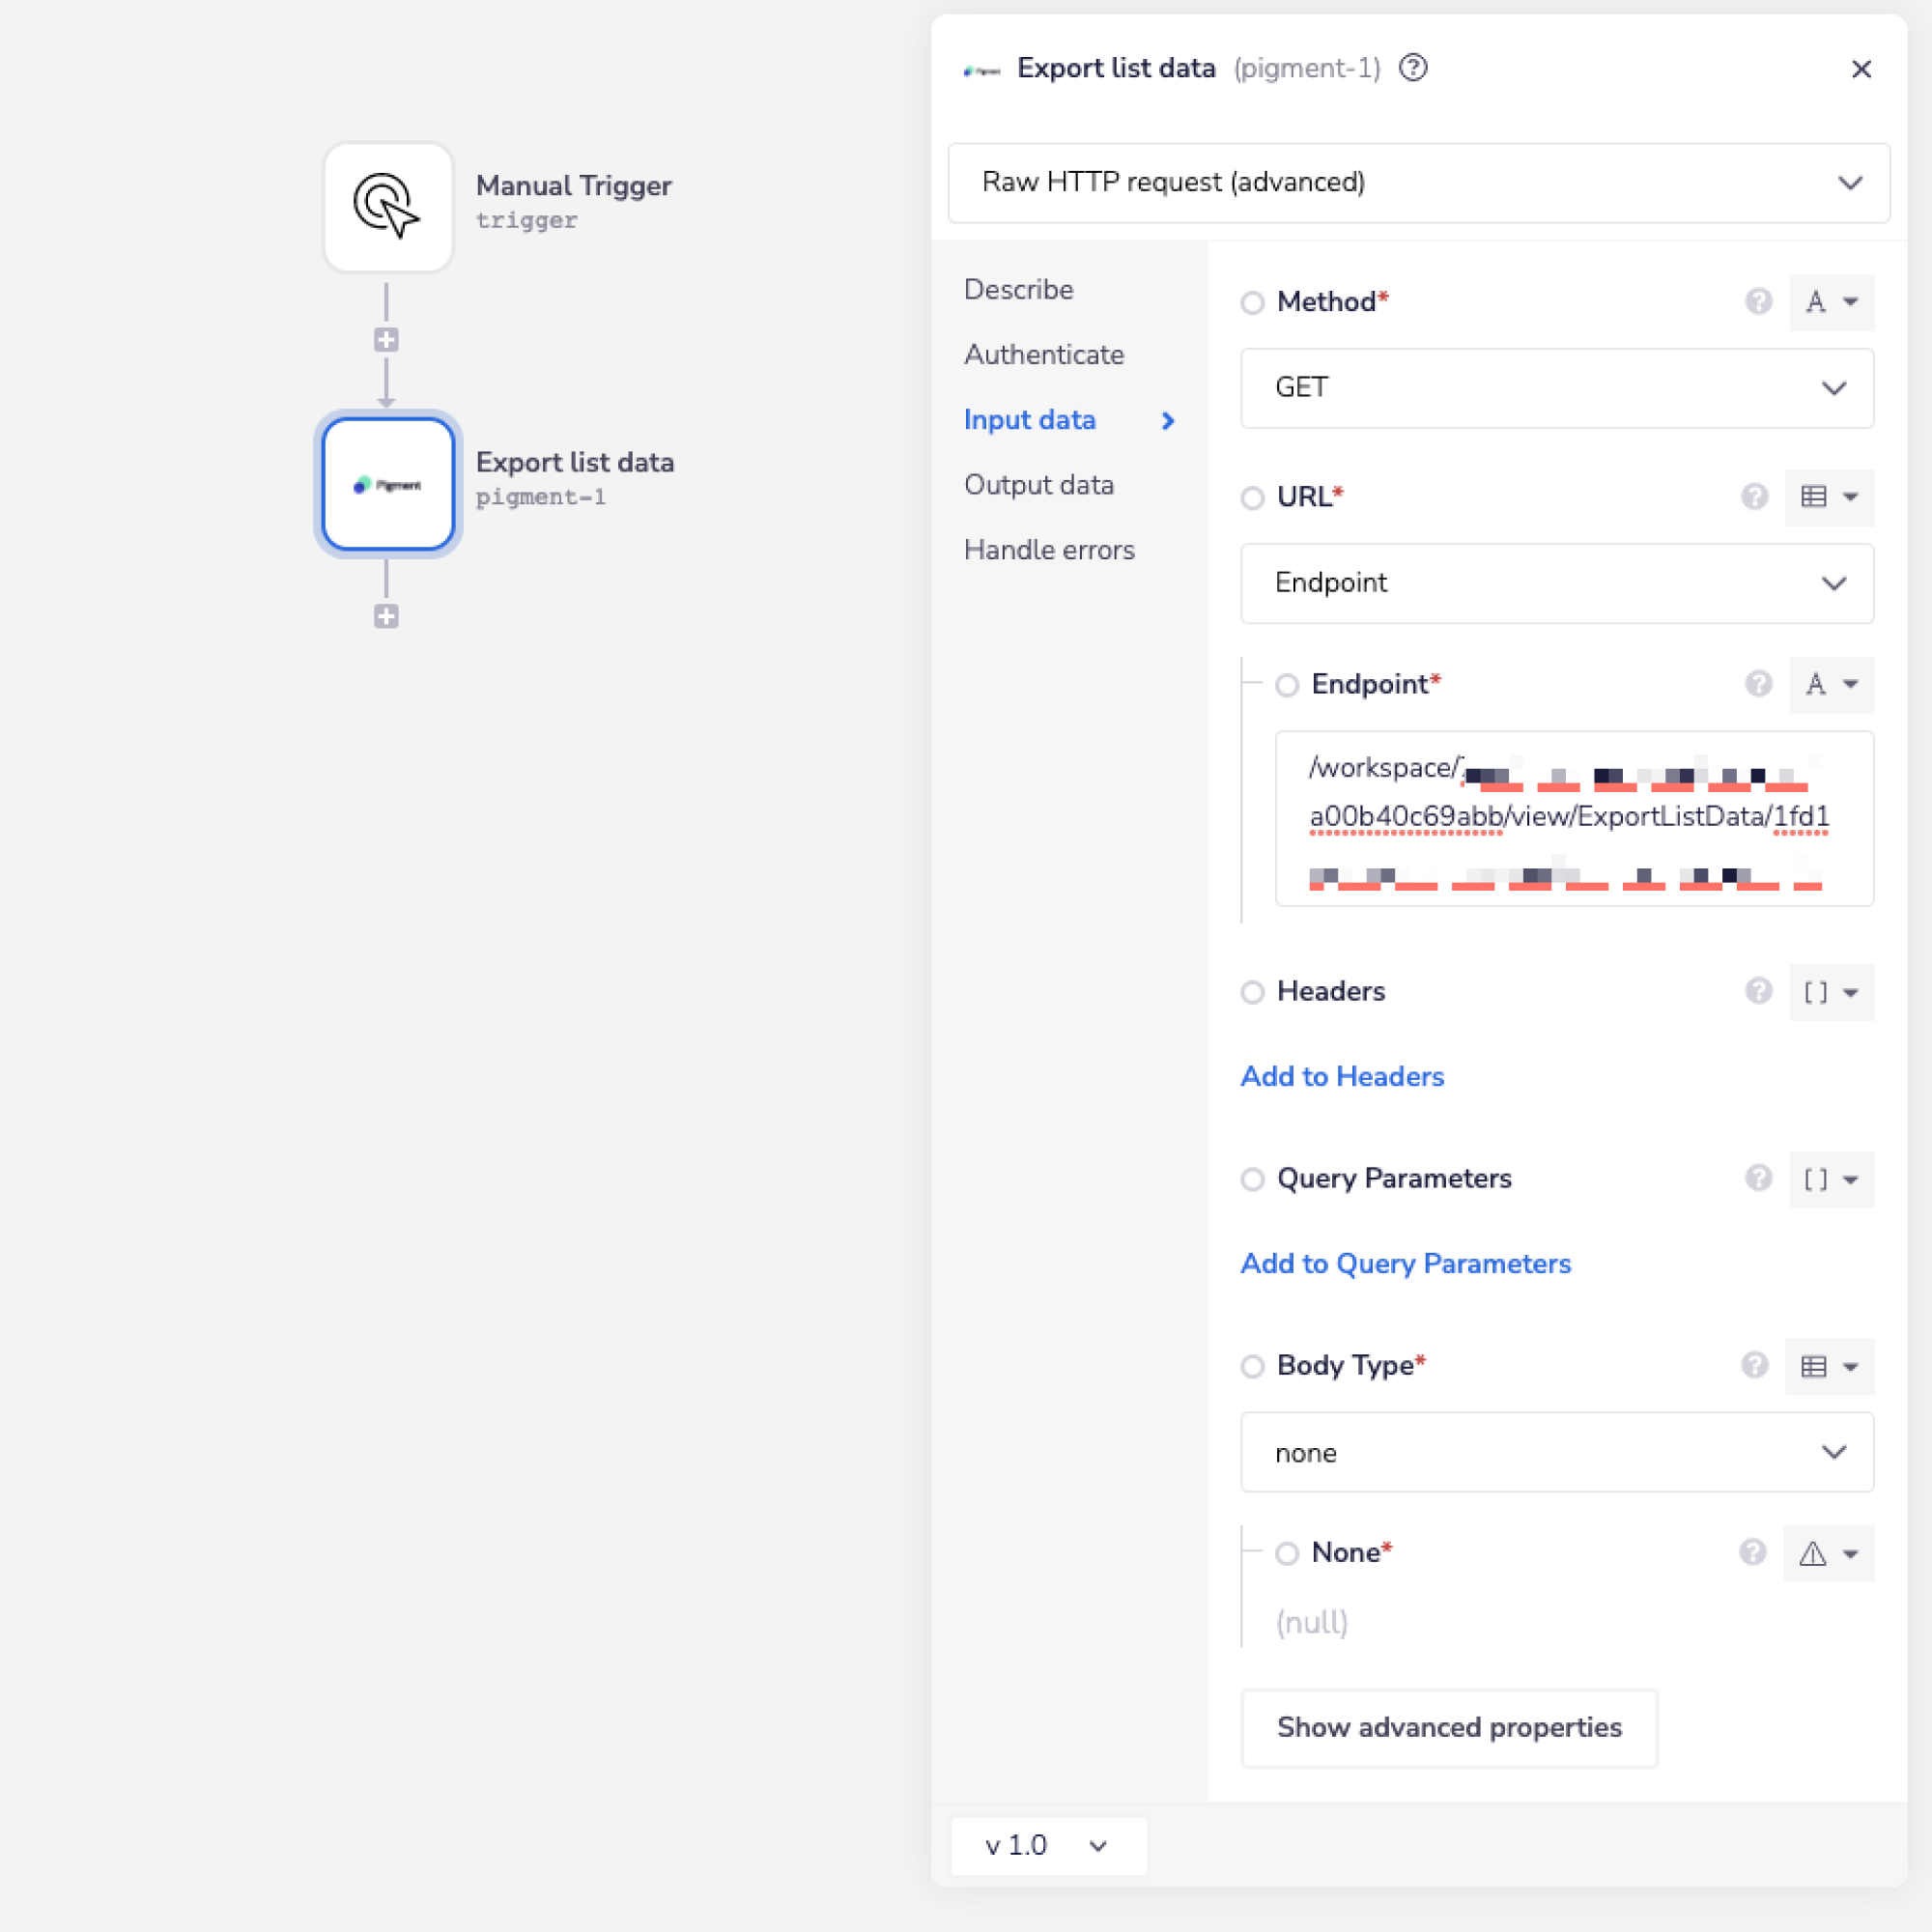
For example, say that the 'Export list data' operation did not exist in our Pigment connector, and you wanted to use this endpoint. You would use the Pigment API docs to find the relevant endpoint - which in this case is a GET request called: /workspace/{applicationId}/view/ExportListData/{viewId}.
More details about this endpoint can be found here.

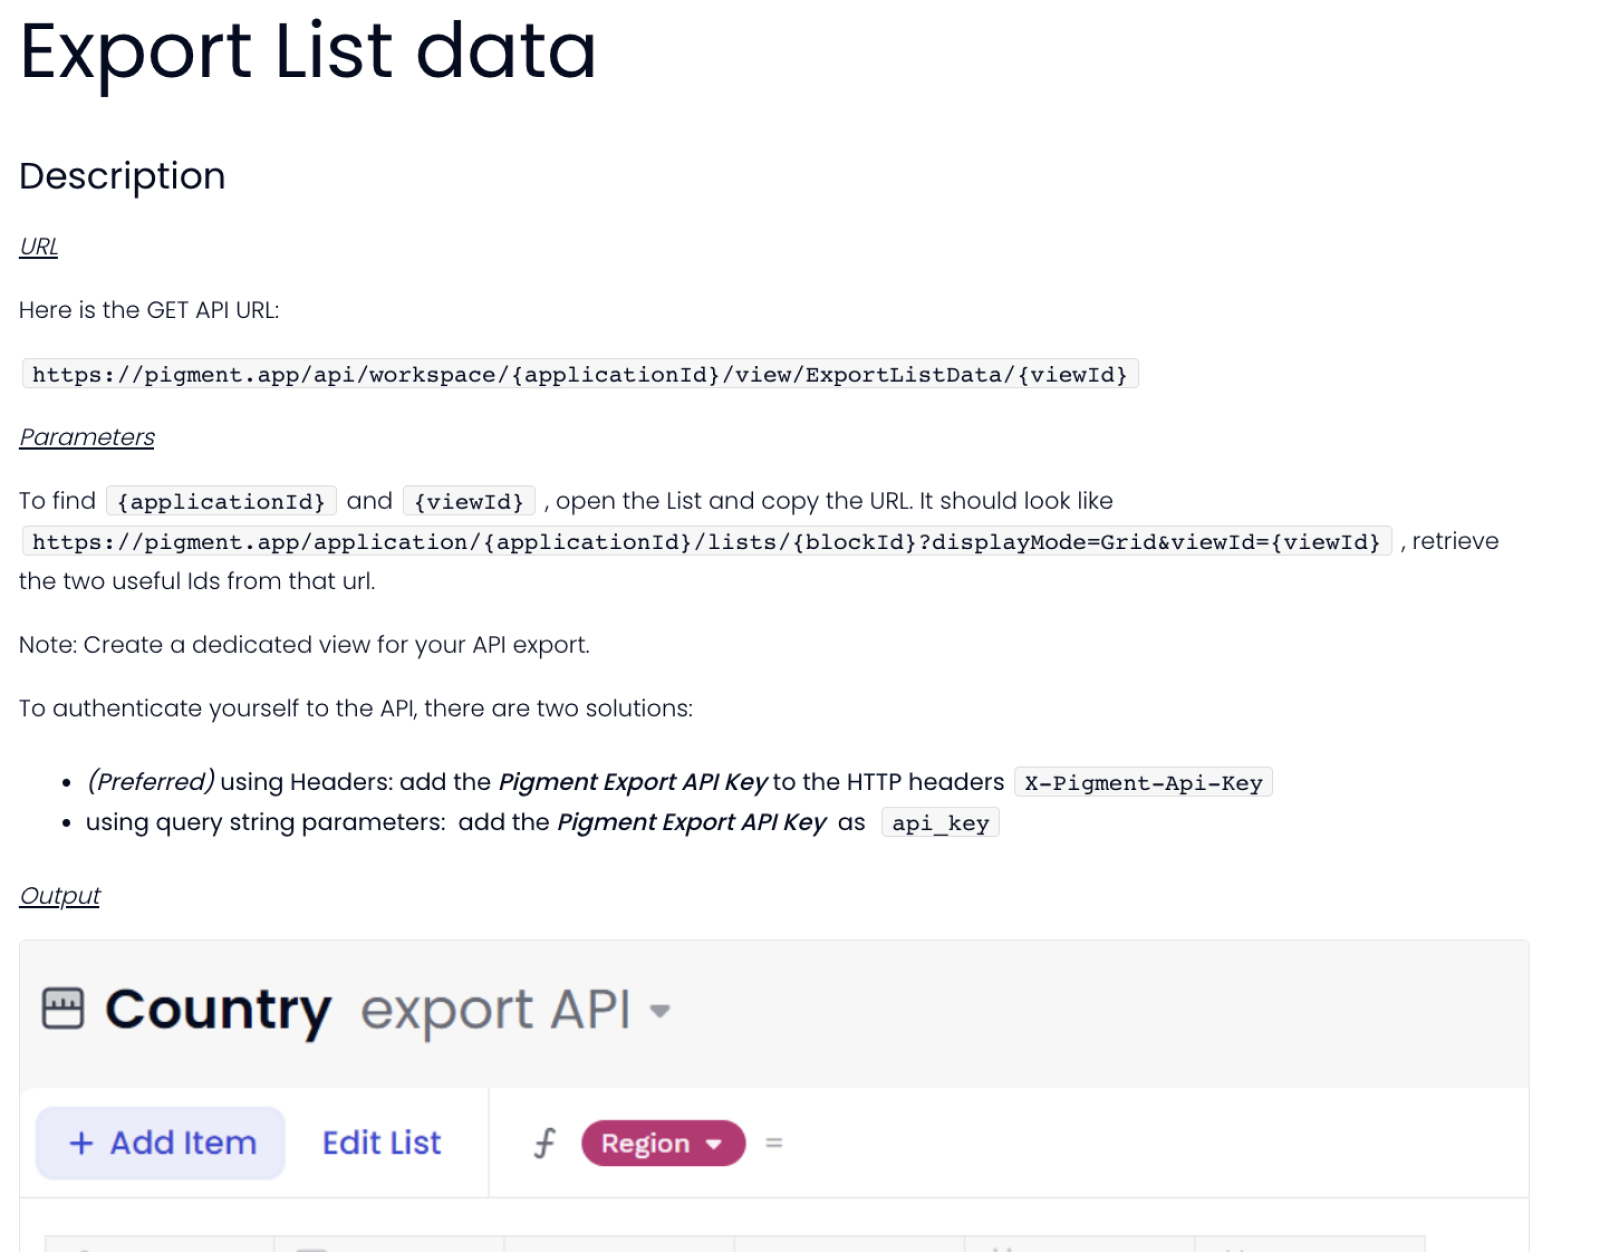
To use this endpoint, you will need to know your 'Application ID' and 'View ID'. You can find these in the Pigment UI by following the instructions in the documentation, as shown in the screenshot.
You will need to input your Application ID and View ID within the URL, in place of the {applicationId} and {viewId} sections.
Note, that this raw implementation will differ from the implementation of the operation in the connector. You will notice that the operation asks for a 'File name' property. This is because the Tray connector will not only return the data from the endpoint, but will also turn that data into a Tray file object to be used in the workflow. The raw implementation of the endpoint will only return the data as returned by the API, which in this case is a string of data.
So if you know what your method and full endpoint are you can export the data as a list with the following settings:
Method: GET
Endpoint: /workspace/{applicationId}/view/ExportListData/{viewId}
Body Type : none
Final outcome being: https://pigment.app/api/workspace/{applicationId}/view/ExportListData/{viewId}
NOTE: Don't forget to chose the correct authentication for your chosen endpoint. In this case, the 'Export' authentication, using the export API key.

Example UsageCopy
TRAY POTENTIAL: Tray.io is extremely flexible. By design there is no fixed way of working with it - you can pull whatever data you need from other services and work with it using our core and helper connectors. This demo which follows shows only one possible way of working with Tray.io and the pigment connector. Once you've finished working through this example please see our Introduction to working with data and jsonpaths page and Data Guide for more details.
Below is an example of a way in which you could potentially use the Pigment connector to retrieve a CSV file from Google Drive and upload it to Pigment.
The steps will be as follows:
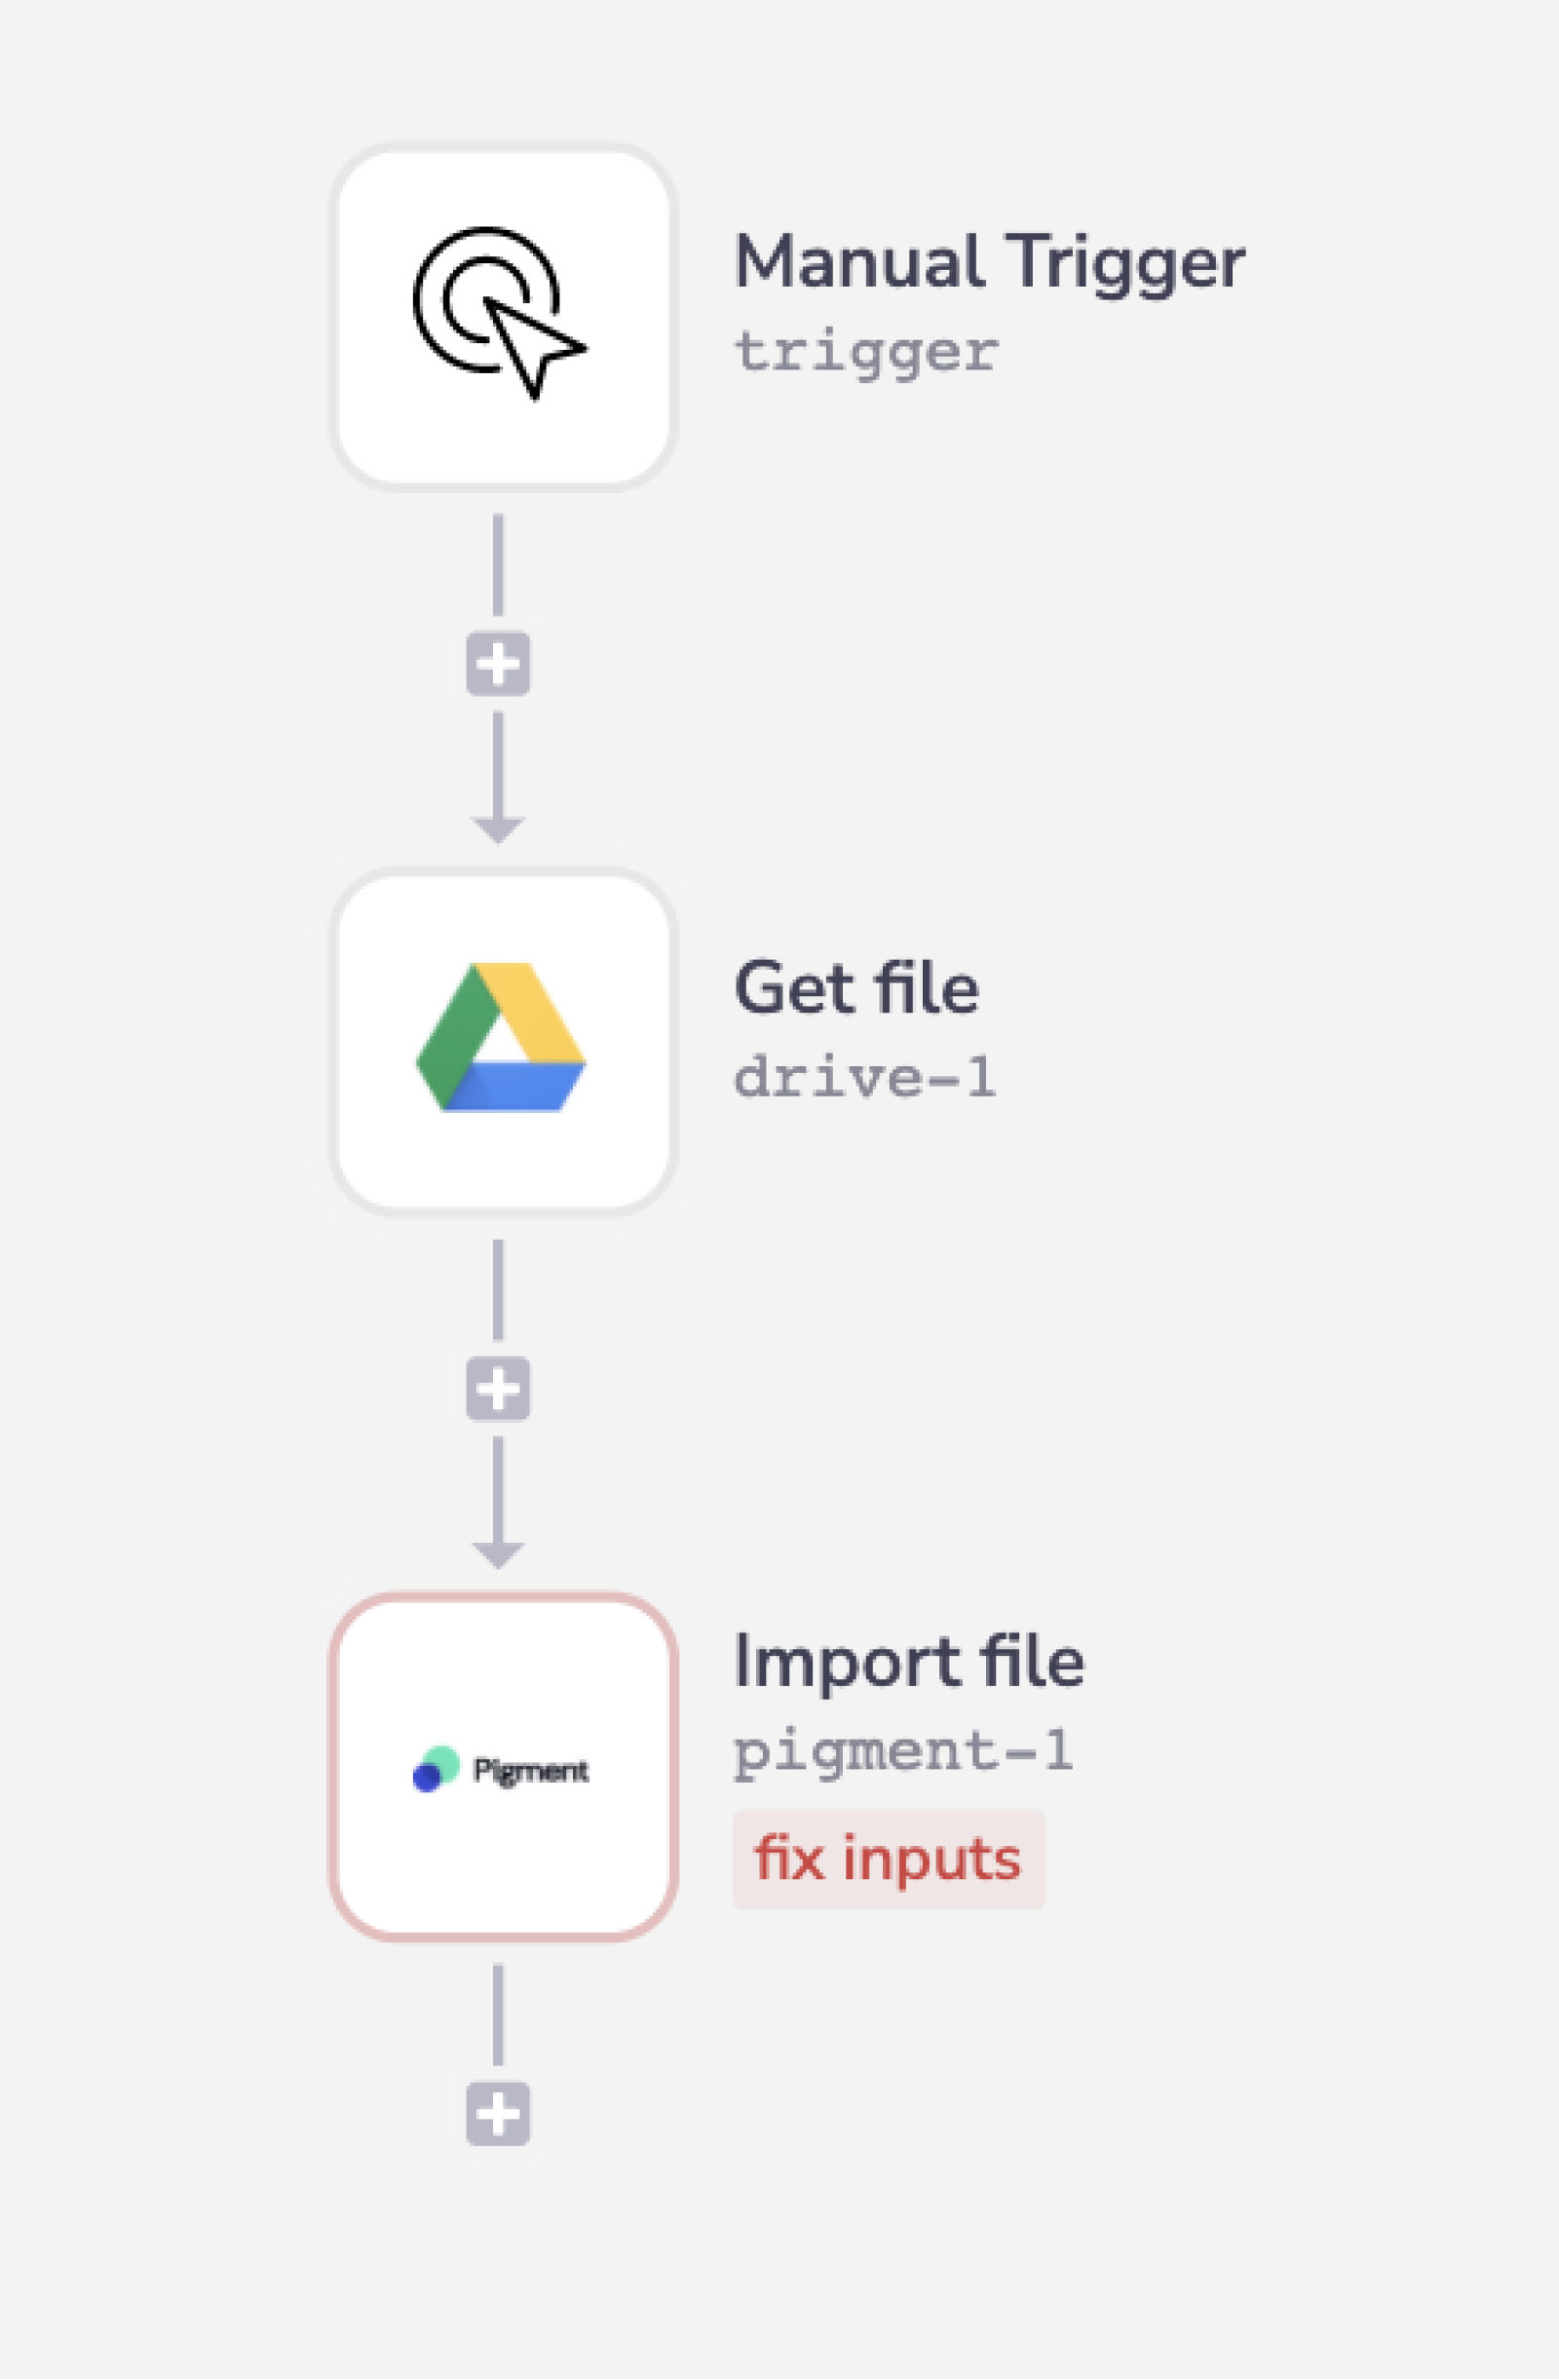
Setup using a manual trigger and download a CSV file from Google Drive.
Import the downloaded CSV file to Pigment.
Your completed workflow should look similar to this:

1 - Setup Trigger & download a CSV fileCopy
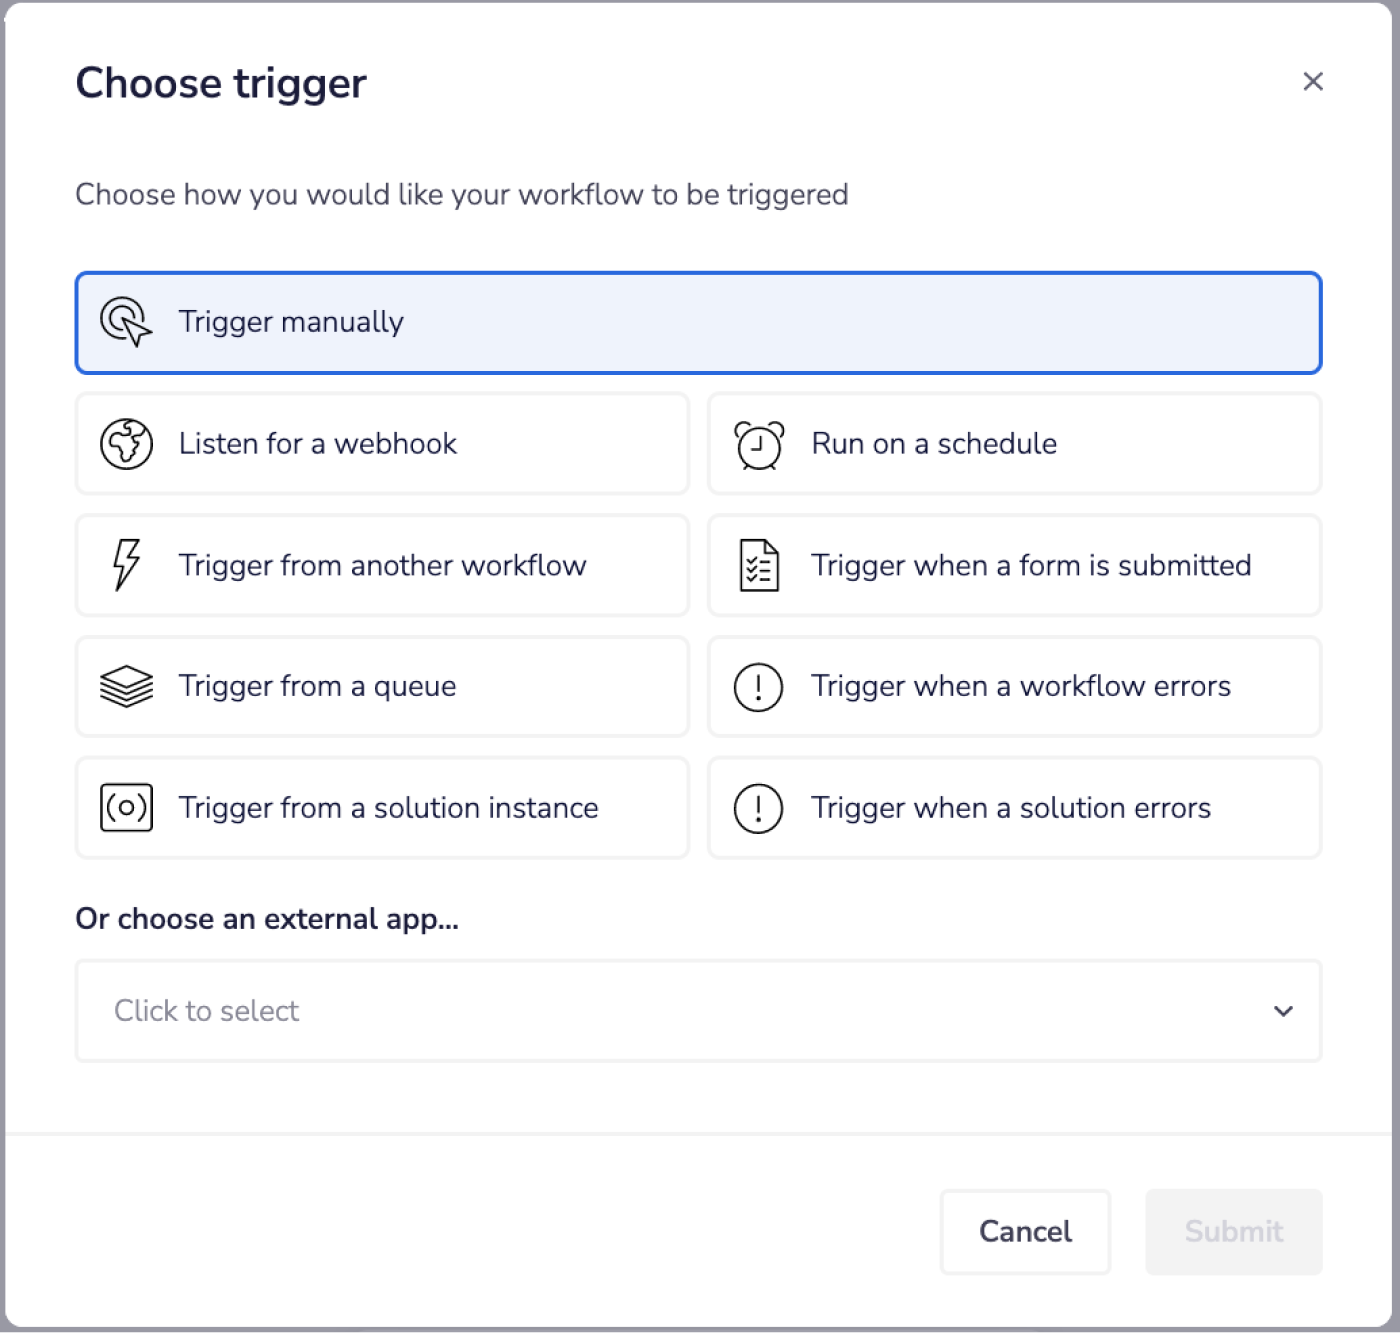
Select the manual trigger from the trigger options available.

From the connectors panel on the left, add a Google Drive connector to your workflow. Set the operation to 'Download Google file'.
Authenticate with your Google account. For more detail on authenticating, please see the Google Drive connector guide here.
You will need to supply the 'File ID' of the file you want to use, and also select the 'File type' from the drop-down list. In this case, it should be a CSV file.
It can be helpful to rename steps as you go to make it clear what each step is doing. We will call this step 'Get file'.

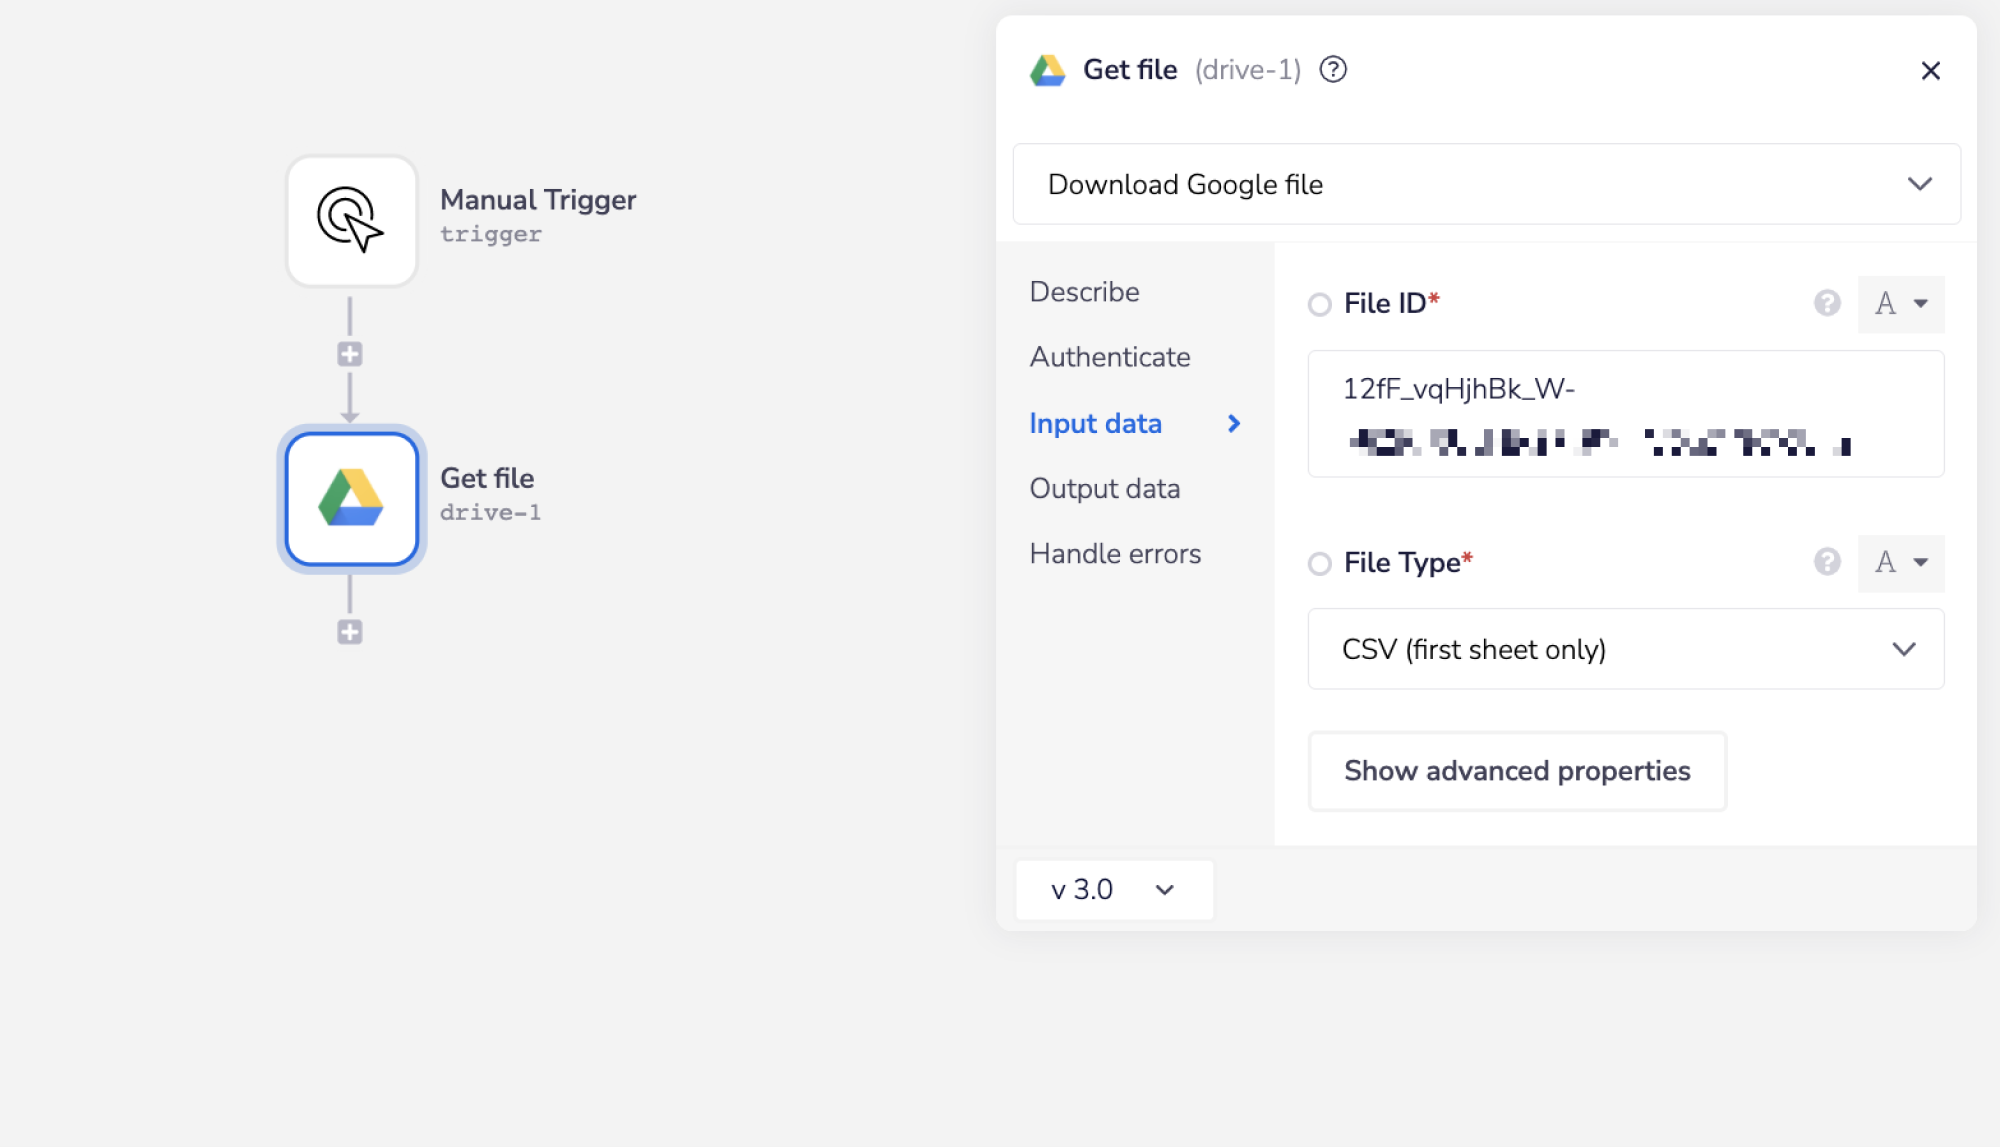
Now when this workflow is run, it will download your chosen CSV file from your Google Drive, and save it as a Tray file object.
2 - Import the file to PigmentCopy
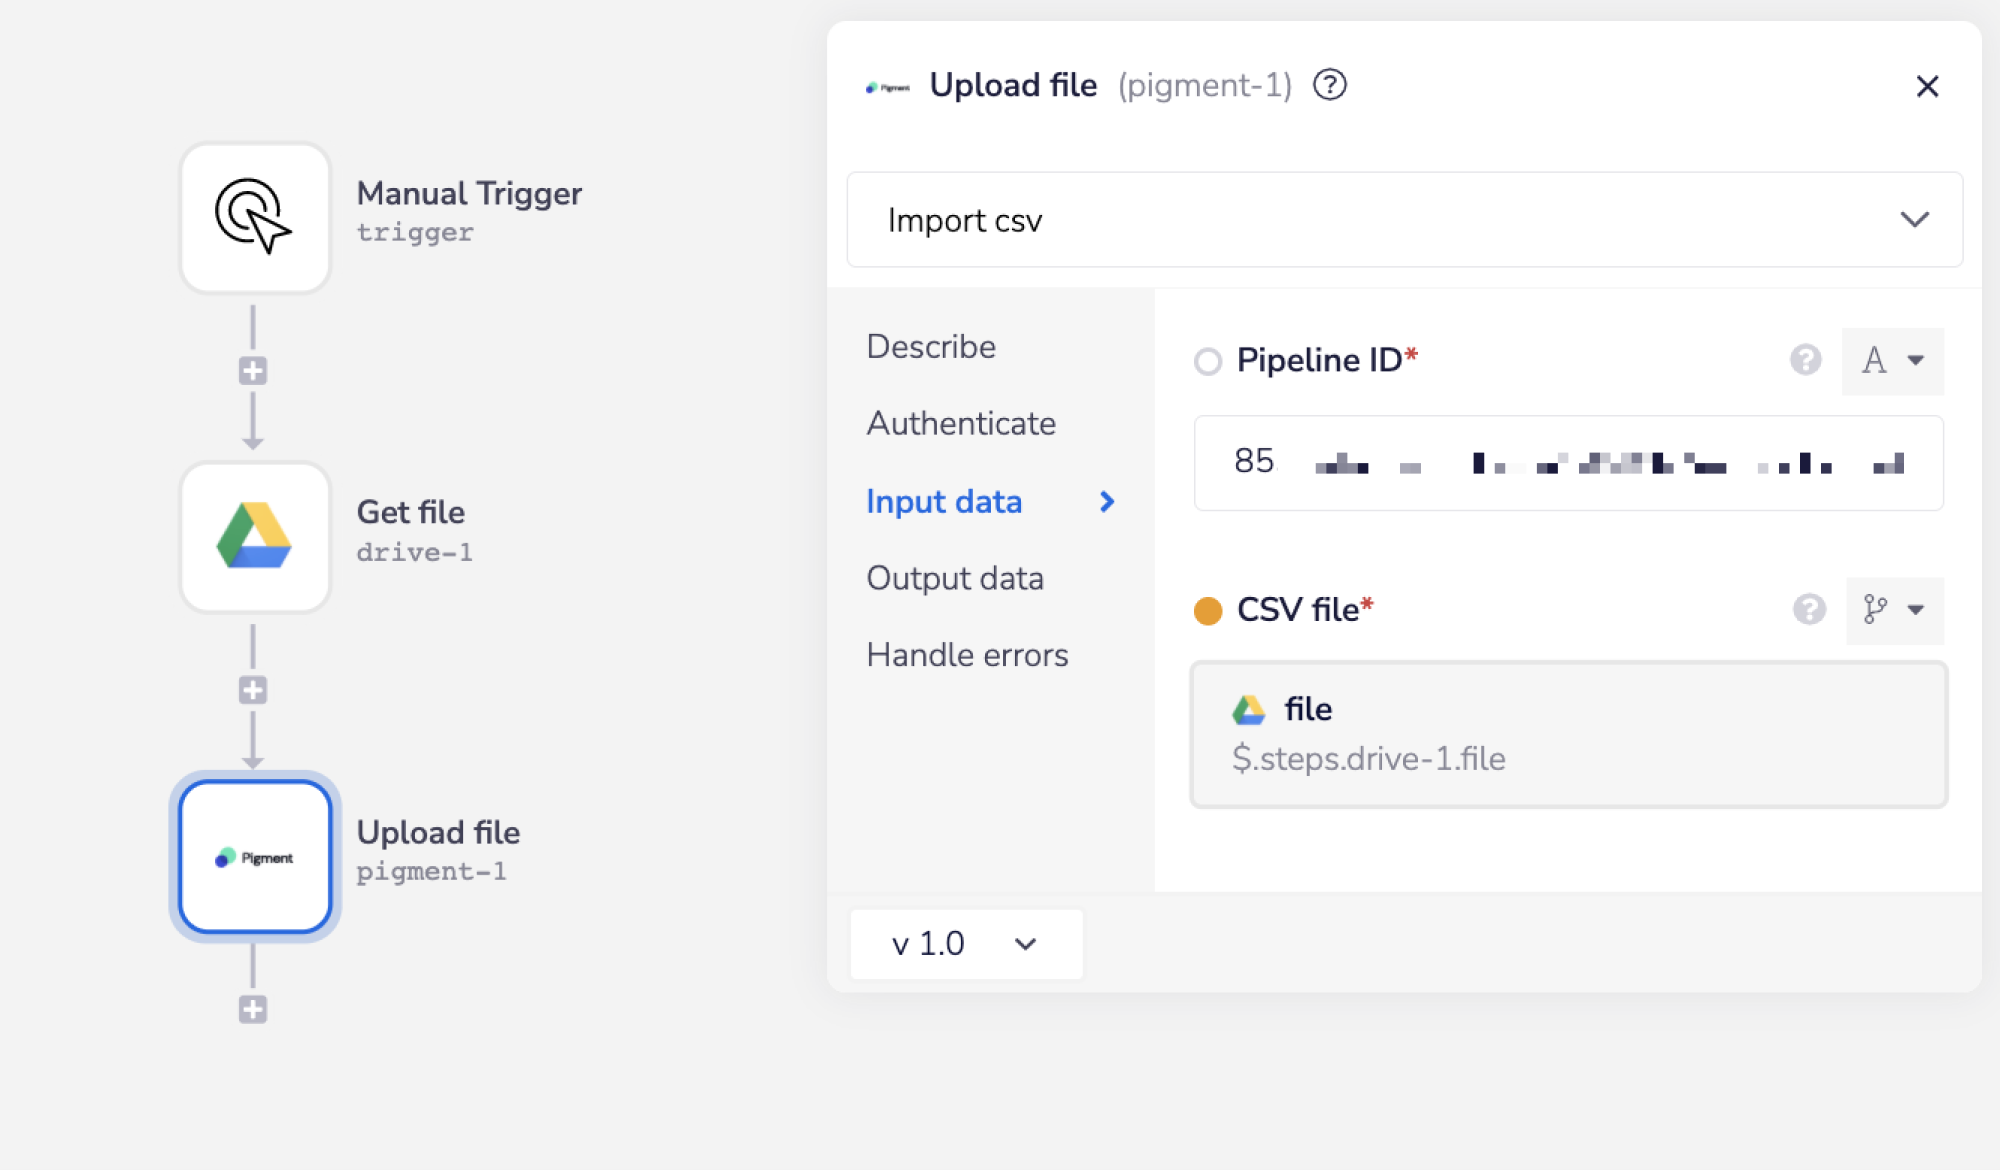
Next, add a Pigment connector to your workflow.
Choose or create an authentication for your Pigment connector. Note, you will need to use an 'Import' authentication in this case, which uses an import API key.
Set the operation to 'Import csv'. Enter your Pipeline ID. This can be found within the Pigment UI.
In order to specify the CSV file to import, start by using the mapping icon (found next to the input field, within the properties panel) to generate the connector-snake.
While hovering over the Google Drive 'Get file' step (with the tail end of the connector-snake), select 'file' from the list of output properties displayed, to select the returned Tray file object. This will auto-populate a jsonpath within your file input field, and update the type selector to jsonpath.
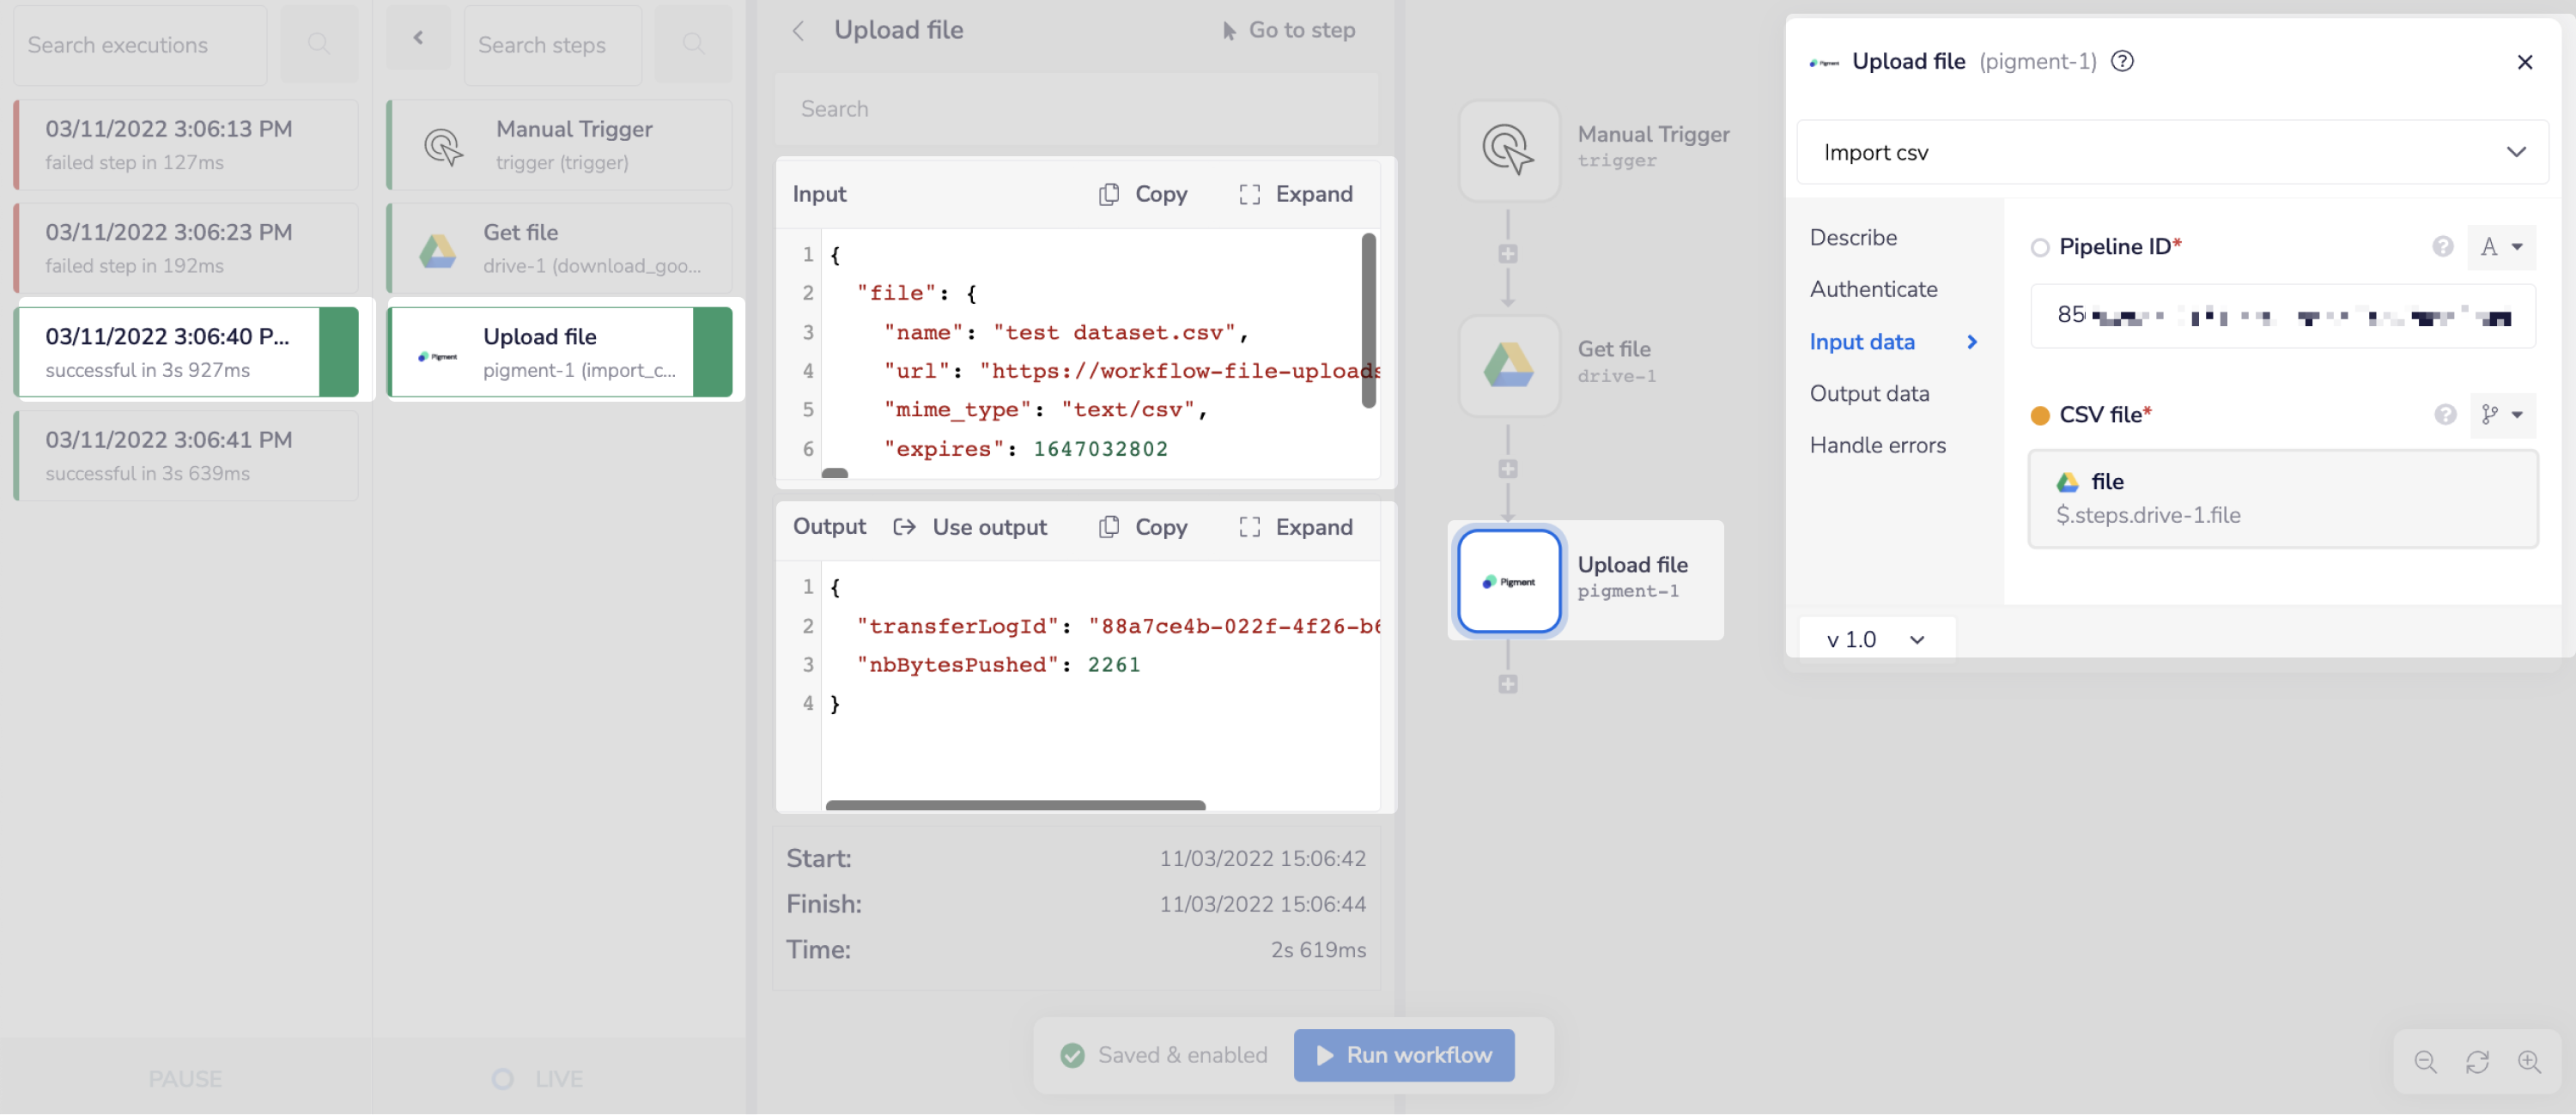
For more clarification on the pathways you have available, open the Debug panel to view your step's Input and Output.
JSONPATHS: For more information on what jsonpaths are and how to use jsonpaths with Tray.io, please see our pages on Basic data concepts and Mapping data between steps
CONNECTOR-SNAKE: The simplest and easiest way to generate your jsonpaths is to use our feature called the Connector-snake. Please see the main page for more details.

This will enable us to download a Google Drive CSV file, and import it to Pigment.

BEST PRACTICES: Whenever you do decide to create your own workflow, be sure to check out some of our key articles such as: