
PayPal 1.2
PayPal is the faster, safer way to send money, make an online payment, receive money or set up a merchant account.
- On this page
- PayPal
- Overview
- Authentication
- PayPal Trigger
OverviewCopy
PayPal operates a worldwide online payments system that supports online money transfers and serves as an electronic alternative to traditional paper methods like checks and money orders.
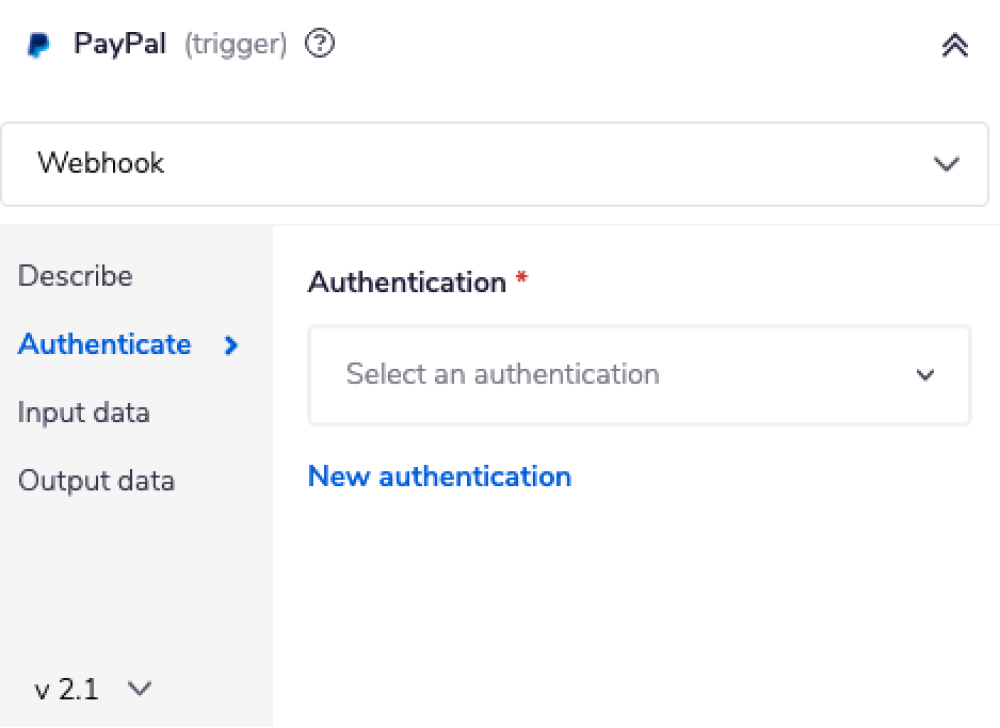
AuthenticationCopy
Before being able to use the PayPal trigger, an authentication will need to be created. With the PayPal trigger step highlighted, in the properties panel on the right, click on 'New Authentication' which is located under the 'Settings' heading.

This will result in a Tray.io authentication pop-up window. You will first need to name your authentication and select which type of authentication you wish to set up (personal or organisational). Proceed by clicking 'Next Step'.
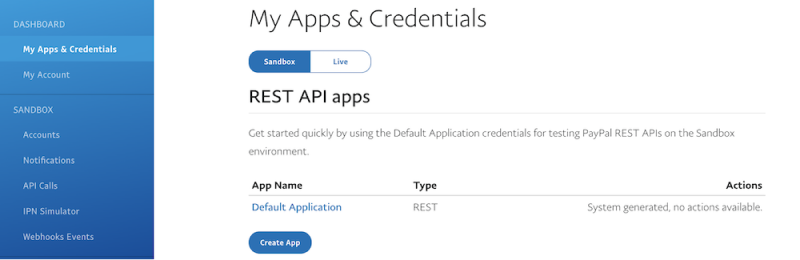
On the next page that appears you will notice that you need both the 'Client ID' and 'Client Secret' of your PayPal application.


Your PayPal credentials can be found within your PayPal account developer dashboard.
Navigate to the My apps and credentials option under the "DASHBOARD" heading within the left hand navigation.
You can either create a new REST Api application, or find a pre-existing REST Api application from which to gleen your credentials from. Click on the app of your preference in order to see the 'Client ID' and 'Client secret' keys associated with it.

Copy this information and paste it into the Tray.io authentication window from earlier.
Once you have clicked the 'Create authentication' button, go back to your authentication field (within the workflow dashboard properties panel from earlier), and select the recently added authentication from the dropdown options now available.
Your connector authentication setup should now be complete.
PayPal TriggerCopy
If you wish your workflow to be kicked off by a particular action in PayPal, you can use the Paypal Trigger.
The Paypal trigger allows you to receive notifications and trigger workflows when given events occur associated with the selected trigger operation.
Instead of using a connector, choose PayPal as your trigger at the 'Create new workflow' section and wait to be redirected to your new workflow.


Trigger Operations available:Copy
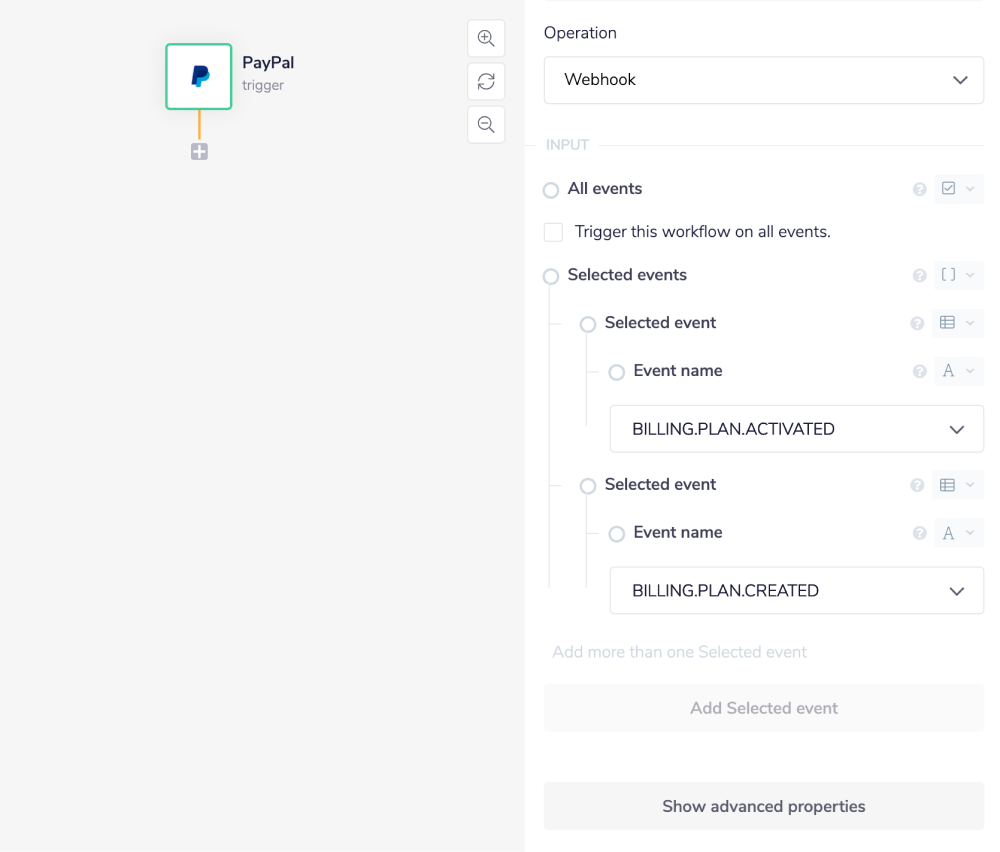
Webhook
Webhook setupCopy
Use the instructions above to authenticate your trigger, and select the 'Webhook' operation.

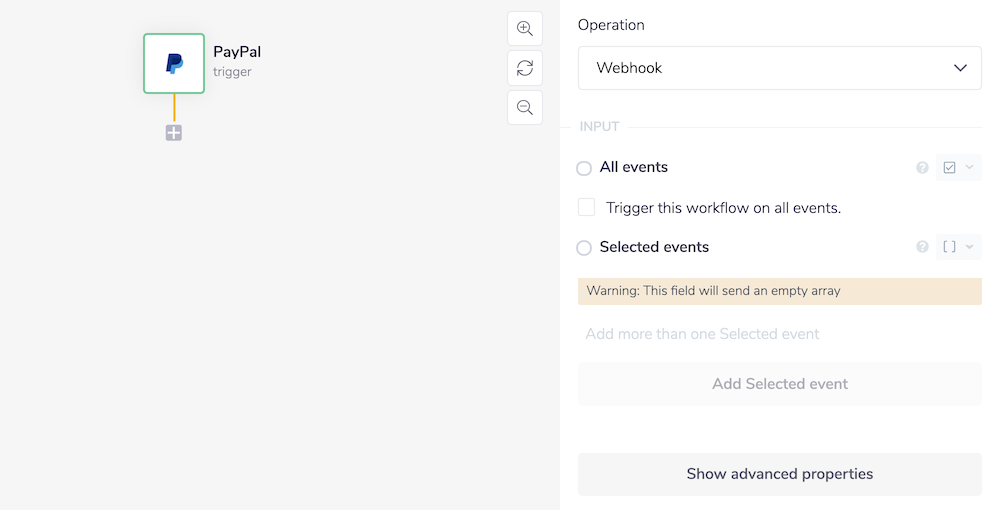
To trigger the workflow you have two options. You can either tick the 'All events' option (which is self explanatory) or choose the 'Selected events' which allows for specified events only.
Note: If you ticked the 'All events' option, any events added to 'Selected events' will be ignored.

Before testing your PayPal-triggered workflow, make sure you have clicked the Enable button in the bottom-right corner of the builder screen to activate your workflow.
You should now have a complete working PayPal trigger that will activate when called.
BEST PRACTICES: Whenever you do decide to create your own workflow, be sure to check out some of our key articles such as:
Notes on using PayPalCopy
List disputesCopy
The 'List disputes' endpoint allows a 'next page token' input parameter. You can find this token in the output of a previous 'List disputes' step, provided there is more than one page of results returned.
To find this, navigate to the output panel of the previous 'List disputes' step within the workflow debug panel.

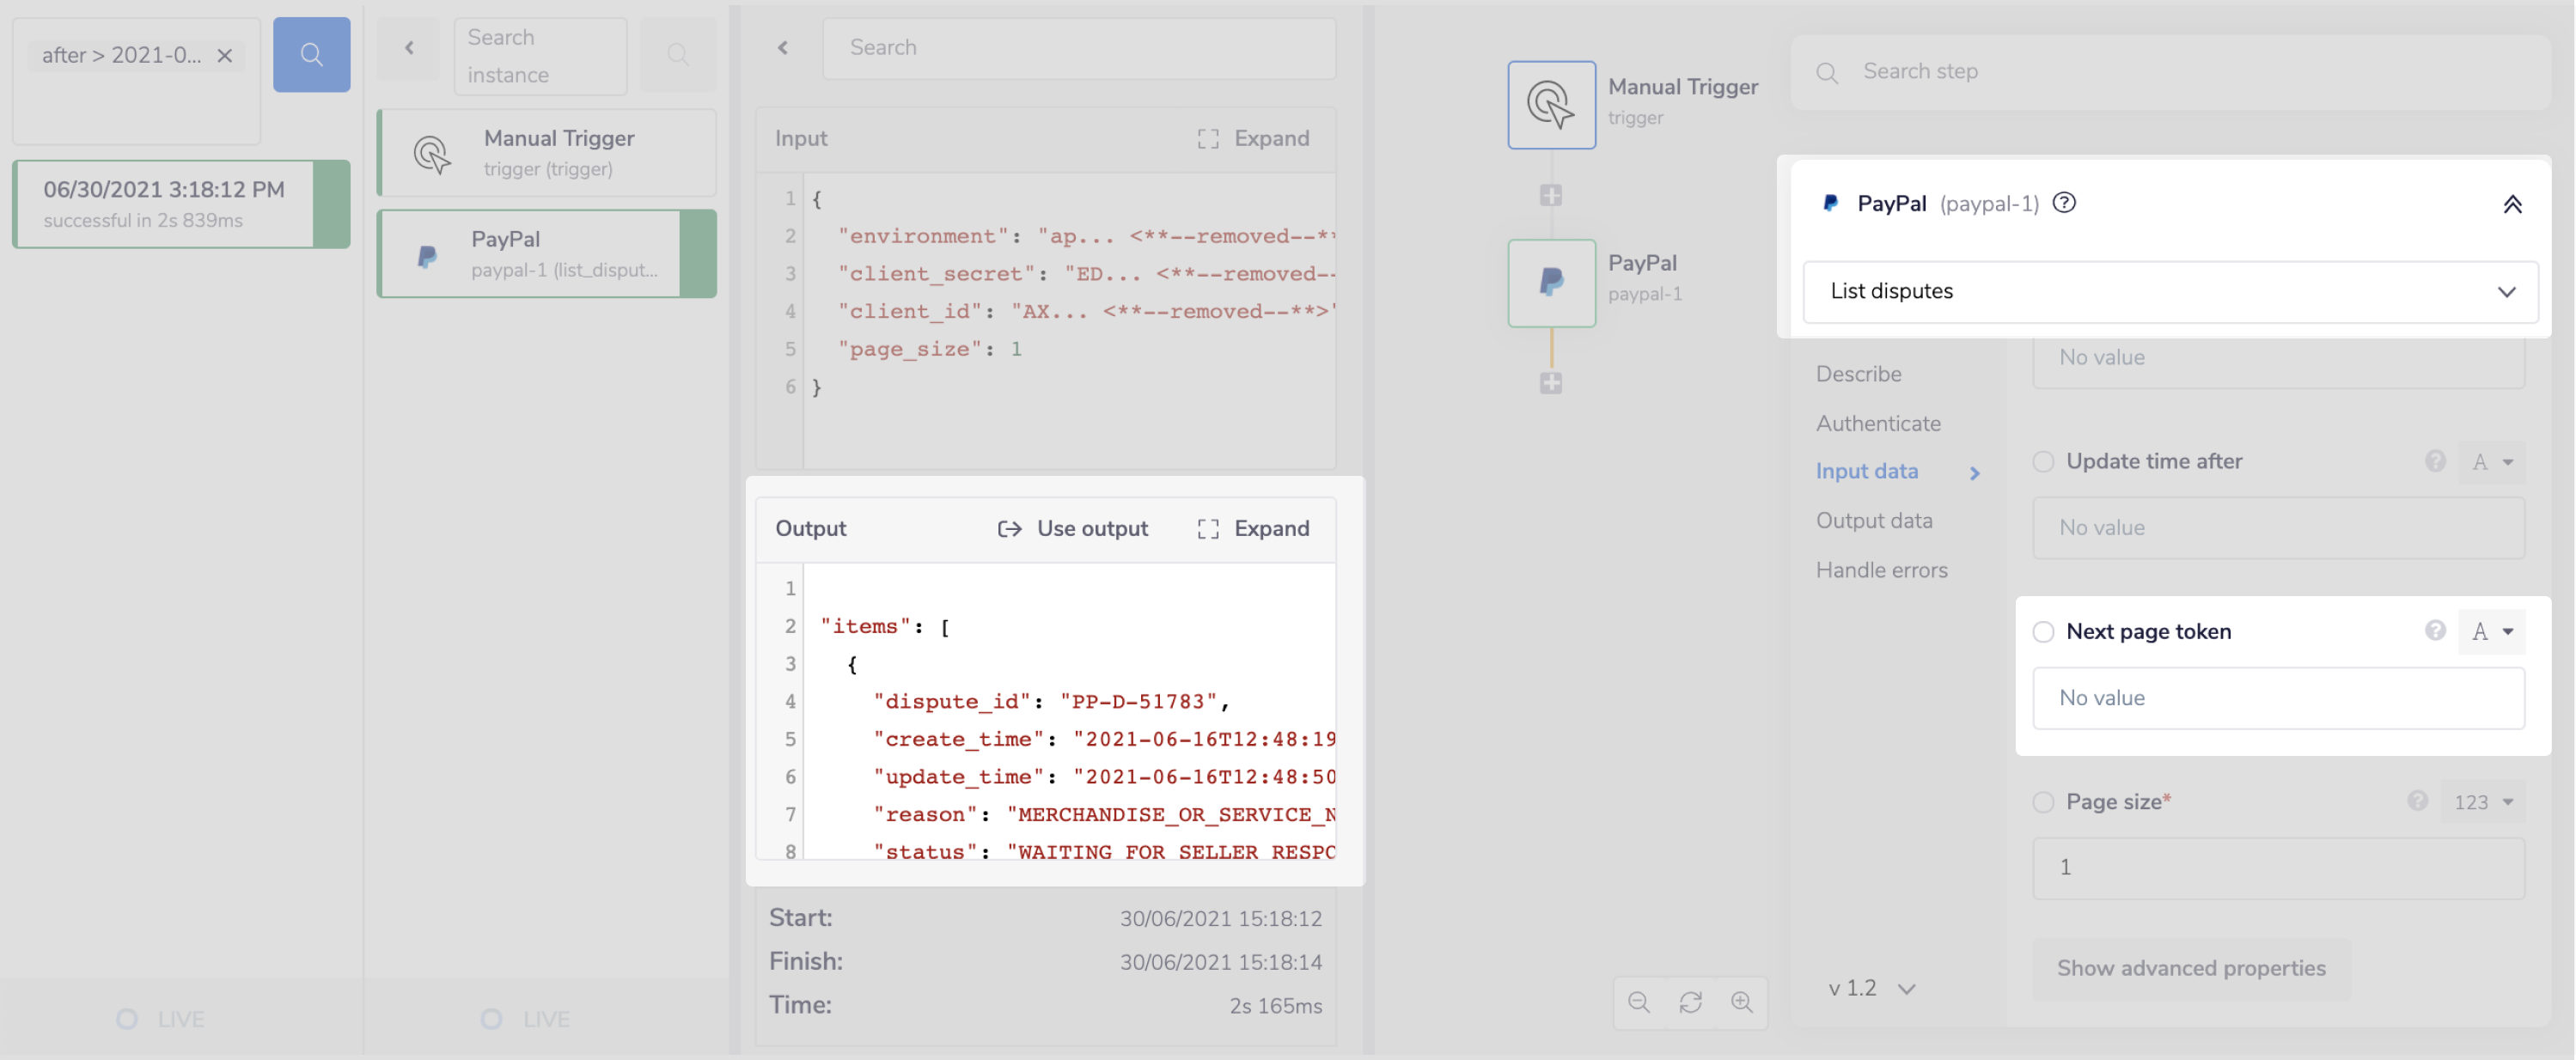
Expand the output panel, and scroll to the end of the output. You will see a list of 'links'. Within these links, you can find a link marked with the link relation attribute 'next', if multiple pages of results are available. Within this link, you can find the 'next page token'. You can copy and paste this token into the 'next page token' parameter in the workflow input panel to view the next page of results.

