
Okta 3.4
On-demand identity and access management
- On this page
- Okta
- Overview
- Authentication
- Okta Trigger
OverviewCopy
Okta is an on-demand identity and access management service for web based applications, both in the cloud and behind the firewall.
AuthenticationCopy
When using the Okta connector, the first thing you will need to do is go to your Tray.io account page, and select the workflow you wish to work on. Once in the workflow builder itself, search and drag the Okta connector from the connectors panel (on the left hand side) onto your workflow.
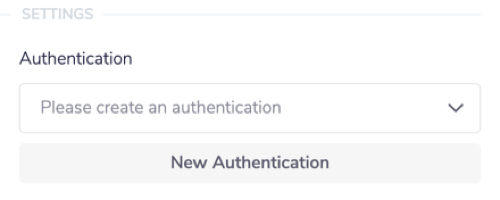
With the new Okta connector step highlighted, in the properties panel on the right, click on 'New Authentication' which is located under the 'Settings' heading.

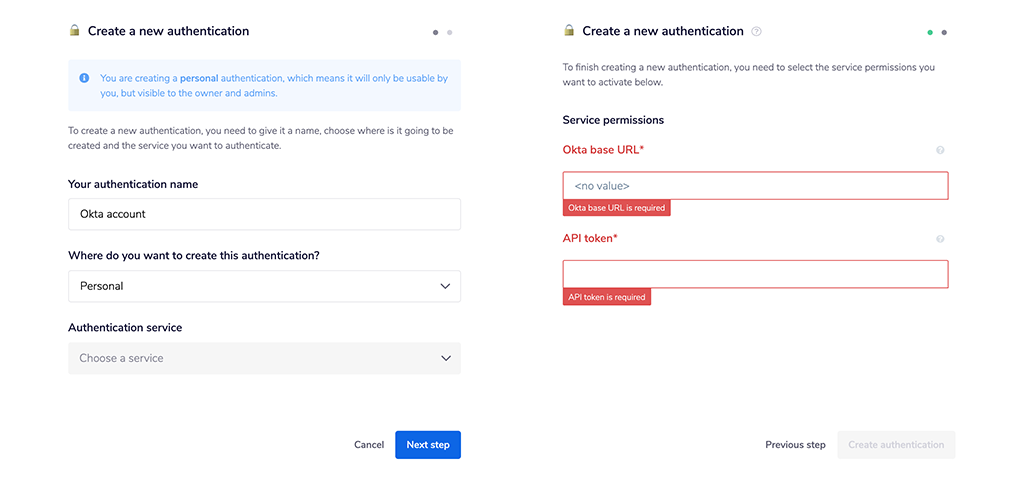
This will result in a Tray.io authentication pop-up window. The first page will ask you to name your authentication, and state which type of authentication you wish to create ('Personal' or 'Organisational').
As you can see, the next page asks you for your 'Okta domain' and an 'API token' credentials.

In order to get these fields, log in to the Okta app. Your Okta domain will be in the top right hand corner of your main Okta Dashboard. Please note that you don't need to include https.
To find the 'API Token', click on 'Token' under the 'API' menu in the top navigation bar.


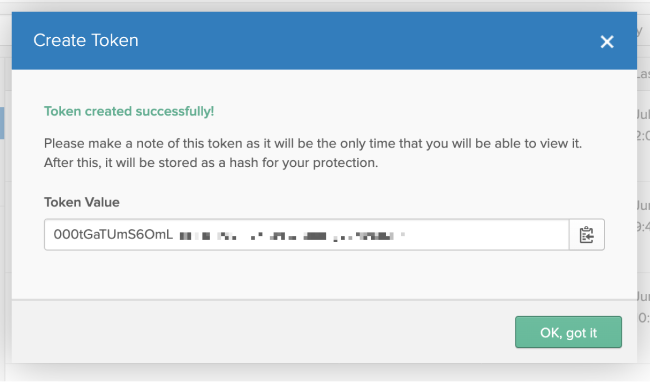
Once you get to the main token dashboard you will see a list of tokens you have available. As you are not able to view your tokens after their creation, you will then need to select 'Create Token' in order to generate one that you can copy.


Be sure to make a note of the token hash key as you won't be able to view it again.

Once you have added these fields to your Tray.io authentication popup window, click on the 'Create authentication' button. Go back to your settings authentication field (within the workflow builder properties panel), and select the recently added authentication from the dropdown options now available.
Your connector authentication setup should now be complete.
Okta TriggerCopy
If you wish your workflow to be kicked off by a particular action in Okta, you can use the Okta Trigger.
The Okta trigger allows you to receive notifications and trigger workflows when given events occur associated with the selected trigger operation.
Trigger operations available:Copy
Webhook
Webhook SetupCopy
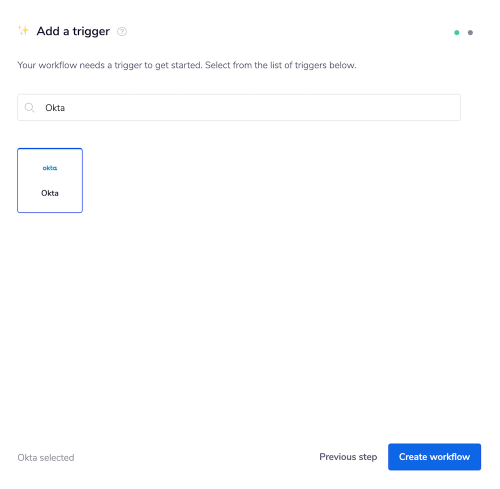
When creating a new workflow, click the 'Create new workflow' button in the top right hand corner of your main Tray.io dashboard. When the trigger popup window opens, search and select the Okta trigger. Wait to be redirected to your new workflow and the workflow dashboard itself.

With the new Okta trigger step highlighted, create a new authentication. This step is similar to a regular Okta connector. in that you need only follow the instructions above in order to authenticate your trigger.
The main difference being that you must select 'Webhook' as the event you want your trigger to listen to (aka the operation):

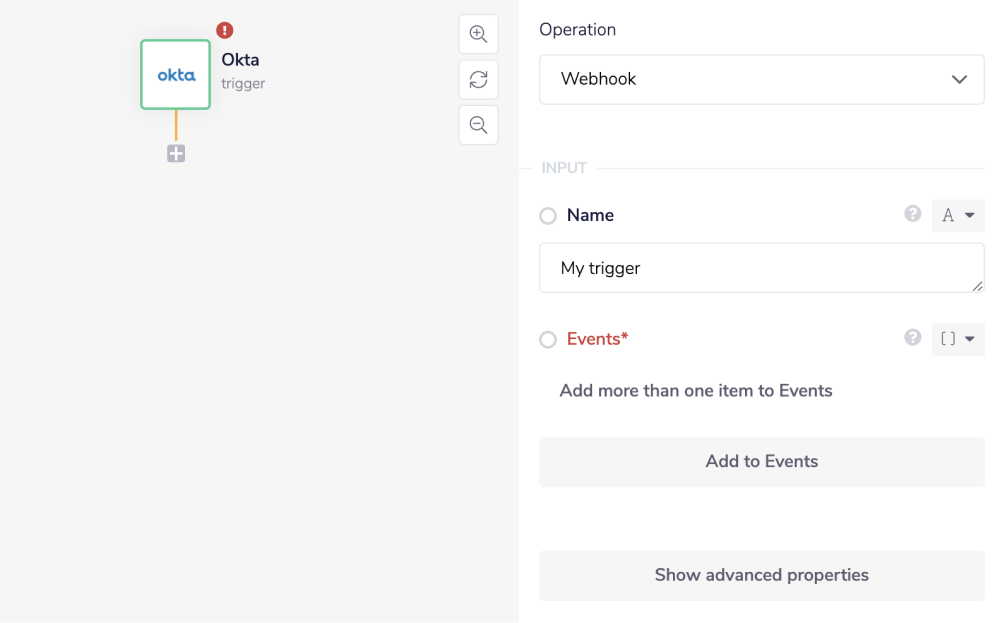
You now need to choose what action you want to trigger your workflow. Firstly, name your trigger under the 'Name' field.
Under 'Events', click on the 'Add to Events' button. From within the new 'Event' dropdown menu, select an event to trigger your workflow.
For example, 'Create user' will send a webhook notification any time a new user in Okta is created. There are over 42 individual options currently to choose from so please select carefully.
While your dashboard will not have changed, and the authentication will appear the same as it was, don't be alarmed. Test your trigger by performing the event in question in Okta (which in this case is create user).
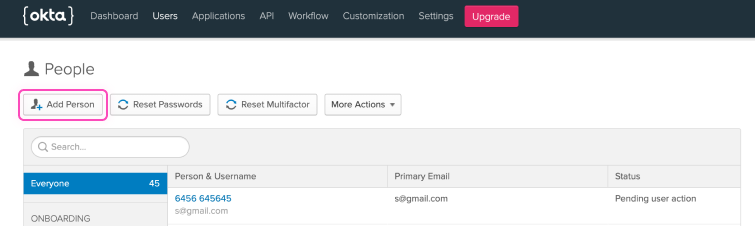
In your Okta account, under the 'Users' tab you can create a user by clicking on 'Add Person'. Once created your workflow should be triggered.

PLEASE NOTE: Before testing your Okta-triggered workflow, make sure you have clicked the'Enable' button in the bottom-right corner of the builder screen.
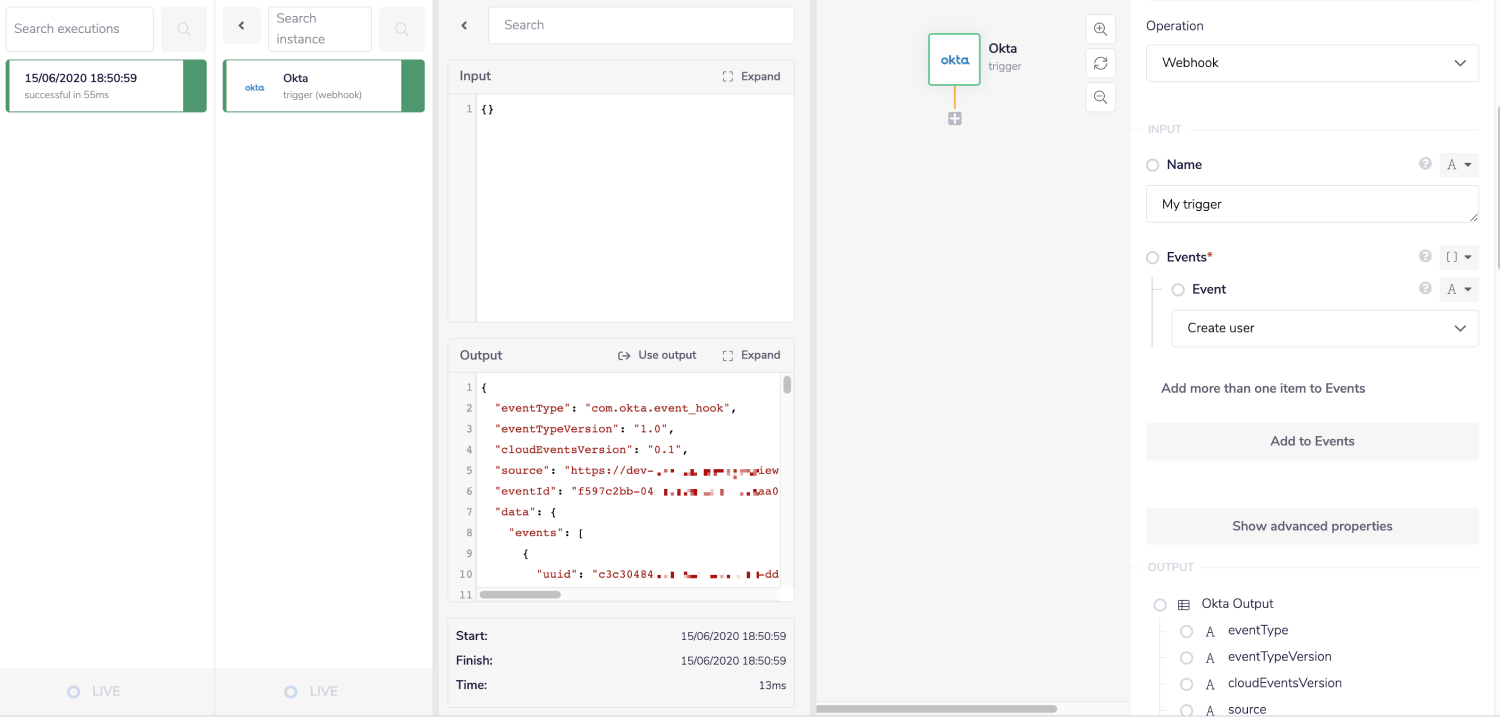
When you perform an action in Okta which triggers your workflow you can check the result by opening the debug panel in your workflow:

Available OperationsCopy
The examples below show one or two of the available connector operations in use.
Please see the Full Operations Reference at the end of this page for details on all available operations for this connector.
Note on Operations usageCopy
PaginationCopy
Whenever an operation makes use of pagination, its output will also return the 'Next' property, containing the cursor for the next page, if there is one.
If an operation makes use of pagination, you will find the 'After' property where you would insert the next property value.
When looping through a list, you can check whether the 'Next' property value is equal to null, to exit the loop or use it to specify the 'After' property value.