
Mailchimp 8.1
Mailchimp is an all-in-one marketing platform that helps you manage and talk to your clients, customers, and other interested parties.
- On this page
- Mailchimp
- Overview
- Authentication
- Mailchimp trigger
OverviewCopy
Mailchimp is a software which gives you the ability to create and manage mailing lists, newsletters, automated campaigns and more. It puts you in the driver’s seat and lets you have full control over your email marketing efforts from beginning to end.
AuthenticationCopy
If you are an Embedded Native user, Please see the section on creating a Custom OAuth App to have white-labeled solutions.
When using the Mailchimp connector, a new authentication has to be created in the step editor. Drag a Mailchimp connector in the workflow and click on the 'New Authentication' button.


When the new window opens, click the 'Add authentication' button.

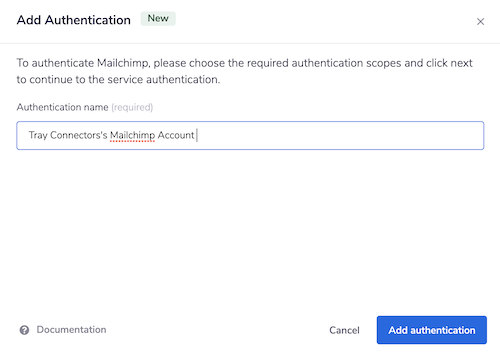
Connect Tray.io to your Mailchimp account by adding the username and the password from Mailchimp account in the popup window and click 'Log in'.


Click the 'Save' button to create the authentication.
Mailchimp triggerCopy
If you wish your workflow to be kicked off by a particular action in Mailchimp, you can use the Mailchimp Trigger.
The Mailchimp trigger allows you to receive notifications and trigger workflows when given events occur associated with the selected trigger operation.
Instead of using a connector, choose Mailchimp as your trigger at the 'Create new workflow' section and wait to be redirected to your new workflow.
Operations available:Copy
Webhook
Webhook setupCopy
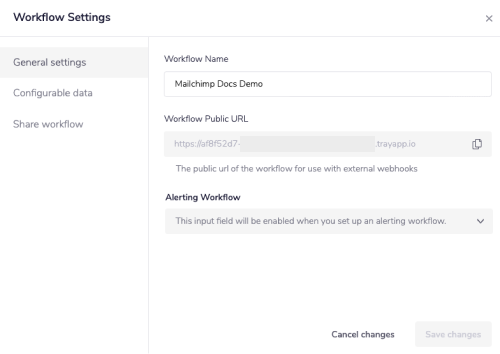
As the trigger needs a Webhook setup in order to activate, the first step will be to head to the gear icon in the top left side and get to your workflow settings page:

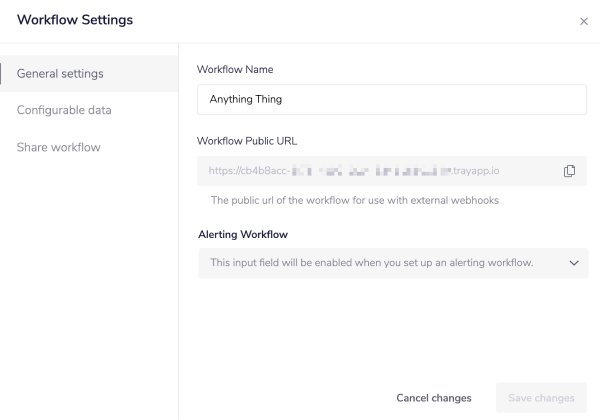
Here you will need to copy the URL and save it for use later. Sign into your Mailchimp account and navigate to 'Audience' at the top of the navigation plane. On said audience page,you will see a button called 'Manage Audience'. Once you click on this button you will be given a list od dropdown options from which you need to select 'Settings':

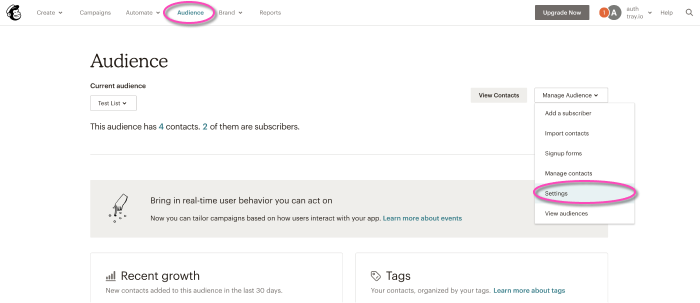
Once on the settings page you will see a list of options and at the very bottom will be 'Webhooks'. Click through once more.


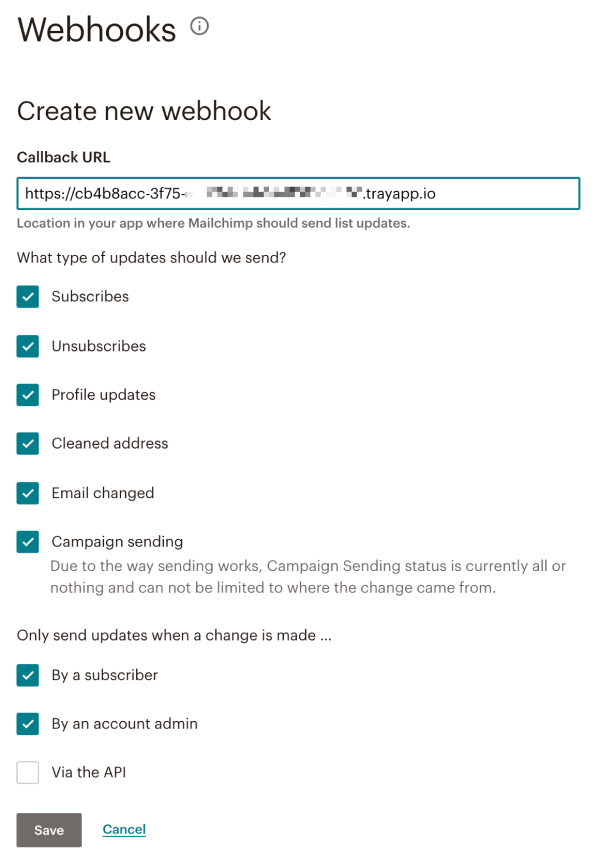
Here you will see either a list of previously configured webhooks or none at all depending on your usage. Click the 'Create New Webhook' button.


This is where you will need your public URL that you saved earlier in your Tray.io settings page. Paste it here in the input field marked 'Callback URL' and set your permissions as appropriate for your project.

Back in the Tray.io dashboard, your trigger will require you to select an appropriate 'List ID' (or Audience) for it to respond to. Select one making sure to choose from the dropdown list available.
You will also see the trigger has a list of possible 'Events' and 'Sources' you can configure as per your permissions preferences:
Set these appropriate for your project.


Now that you have completed the Webhook settings, you should have a complete working Mailchimp trigger that will activate when called.
Available OperationsCopy
The examples below show one or two of the available connector operations in use.
Please see the Full Operations Reference at the end of this page for details on all available operations for this connector.
Example usageCopy
In order to demonstrate what is possible with Tray.io automation and Mailchimp, this example will send an email notification each time a new subscriber joins:
Create a form input for new subscribers to fill in.
Select the Mailchimp connector to add said new subscriber to your mock newsletter list.
Create and send an email notification each time a new subscriber joins.
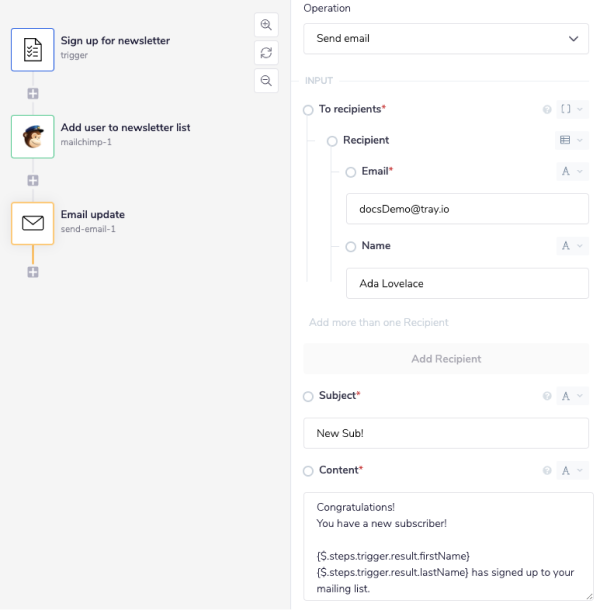
The completed workflow will look like this:

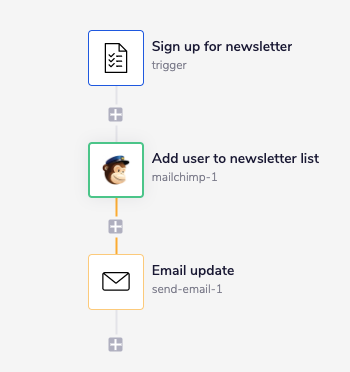
1 - Setup triggerCopy
Choose the 'Form trigger' from the trigger options available in your Tray.io dashboard, when creating a new workflow.
This trigger only has one operation available ('Form request') but its always best to check it is set correctly.
Your inputs should be project specific, which means that in our case we will be referencing a situation where a new subscriber wants to join our mailing list.
You will need the following inputs filled in for our demo:
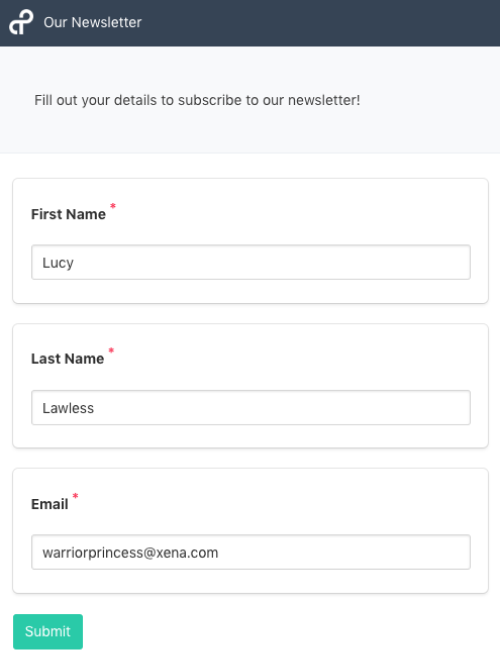
'Form title':
Our Newsletter,'Description':
Fill out your details to subscribe to our newsletter!'Name':
firstName'Label':
First Name'Name':
lastName'Label':
Last Name'Name':
email'Label':
Email
In order to have the option for these input labels, you will need to make sure you click on the 'Add Field' option - this is a greyed out button below the 'Description'. See the gif below for more details on setting up the input fields in the form trigger.

Last but not least make sure you ENABLE your workflow by pressing the green button in the bottom right hand corner.
2 - Add member to your listCopy
Add the Mailchimp connector to the next step of your workflow. Make sure you hve your authentication is set up and selected before continuing with the rest of the example.
If this is not the case then please follow the example outlined above in the "Authentication" section above.
Select 'Create List Member' for your operation.
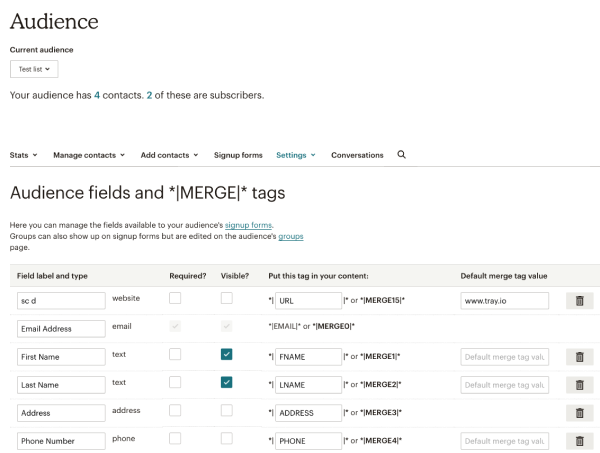
Your 'List ID' will automatically create a dropdown list of options for you, from the lists available in your mailchimp account. Select the appropriate list - in our case we have a list named 'Subscribers'.
Note that in Mailchimp, your lists are known as 'Audience's. Make SURE that under your settings tab in your Mailchimp audience dashboard you have nothing ticked under 'Required?' apart from 'email' otherwise your workflow will fail on the this step.

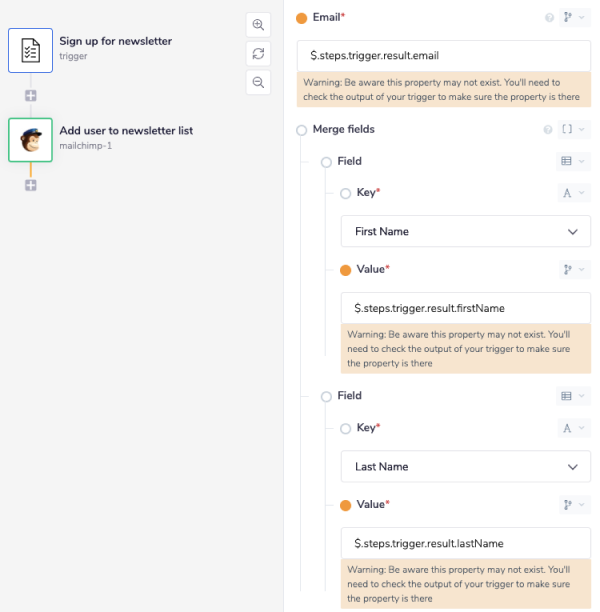
The email can be generated from your trigger output. Click on the 'Debug' button above your workflow to see your output. When you run your workflow (or trigger it so to speak), you will get more tha just first and last name - there is also 'email'.


Use the following JSON path to target said result, while making sure your type elector is set to 'jsonpath': $.steps.trigger.result.email.
Under the 'Merge fields' option, click on the 'Add Field' button again, twice, so that you have two new Key - Value pairs to fill in.
The 'Key' will be an auto-generated dropdown list (which in our case includes "first name" etc as options), while the value fields should have the following JSON paths.
Again, this can be confirmed through opening your debug panel and looking at your output. See above image for reference. Once more double check that your type elector is set to 'jsonpath' for the value inputs:
'Key':
First Name'Value':
$.steps.trigger.result.firstName'Key':
Last Name'Value':
$.steps.trigger.result.lastName
Notice that the final section in the value JSON path, correlates to the 'Name' field you created earlier, when you were setting up your trigger.

Check that your 'Status' input (under the 'Add Field' button) is automatically displaying 'Subscribed'.
3 - Send email updateCopy
Finally add a 'Send email' connector as your last step.
Set the operation to 'Send email' and put your recipient as appropriate. The same goes for the 'Name' and 'Subject' fields.
You can see from our example image that we have used Tray.io's Interpolation method to include the results from our workflow in our final email output and we highly recommend using this method for production as it avoids hard coding and means that in the long run there is less maintenance to deal with.

Go to the gear icon in the top left corner and get your 'Public URl'.

Paste this into a separate tab and fill it in with some demo data:

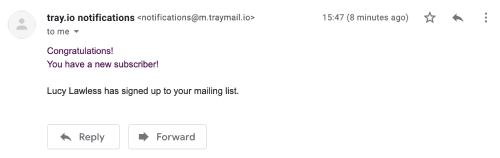
As a result you should not only get green output in your debugger panel, but also an email notification telling you that you have a new subscriber!

Note for Embedded customersCopy
Custom OAuth AppCopy
You can create a custom OAuth app to whitelablel the auth dialog in your integrations. Follow the steps below: