
Looker 1.5
Looker is a business intelligence software and big data analytics platform that helps you explore, analyze and share real-time business analytics easily.
- On this page
- Looker
- Overview
- Authentication
- Available Operations
OverviewCopy
As a data exploration and discovery business intelligence platform, Looker's tool suite allows you to connect live to your data, describe and consolidate usable business definitions, and output/ share results across a variety of endpoints and workflows.
AuthenticationCopy
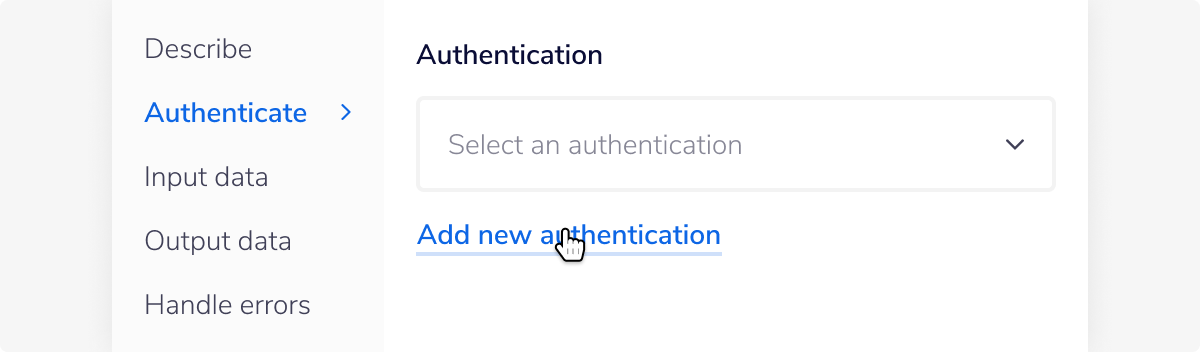
When using the Looker connector, the first thing you will have to do is click on 'New Authentication' in the step editor:

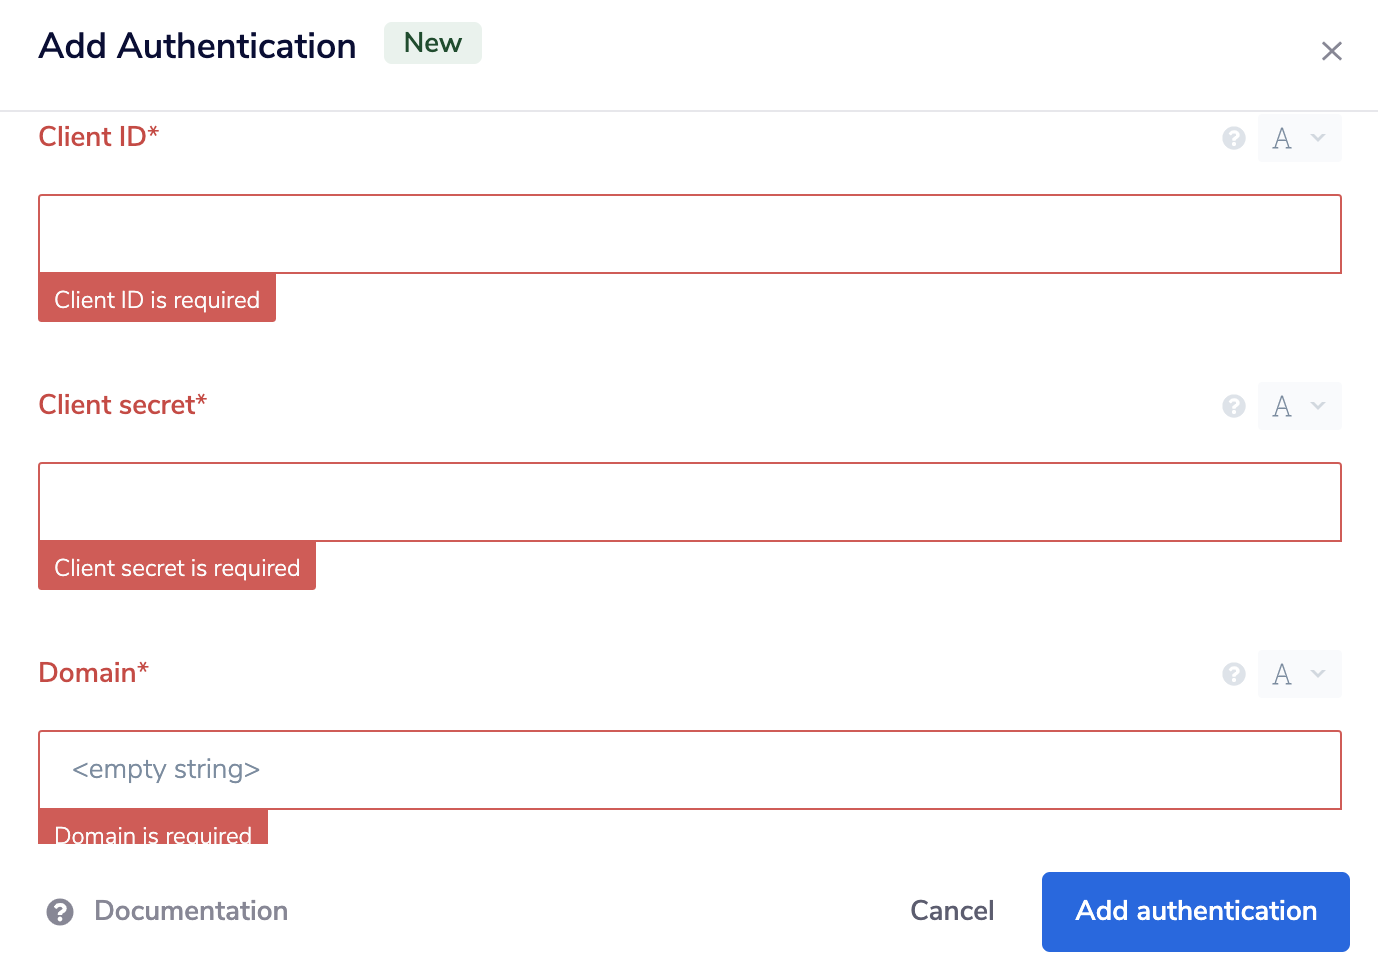
Next, you can add your 'Client ID', 'Client secret' & 'Domain', as shown in the example:

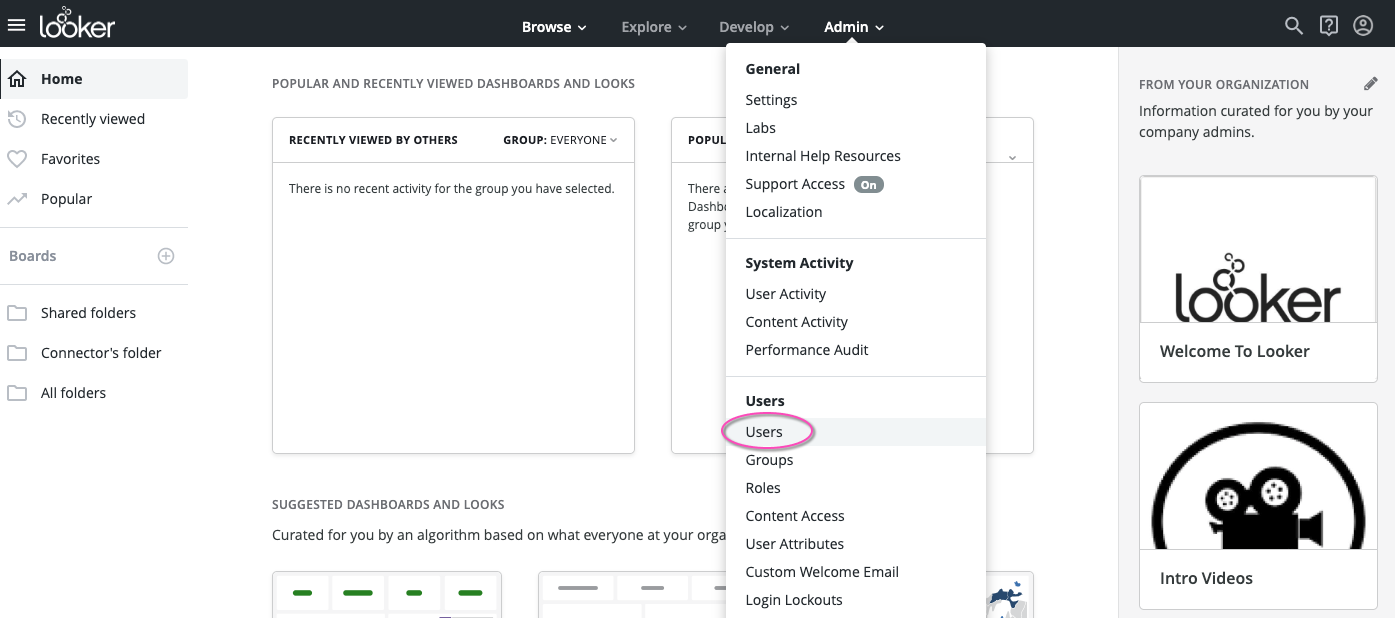
In order to retrieve this information you will need to log into your Looker account (make sure you have Admin level clearance in your account before proceeding).
In ther heading seciton of your account click on the 'Admin' option and within the dropdown list select 'Users':

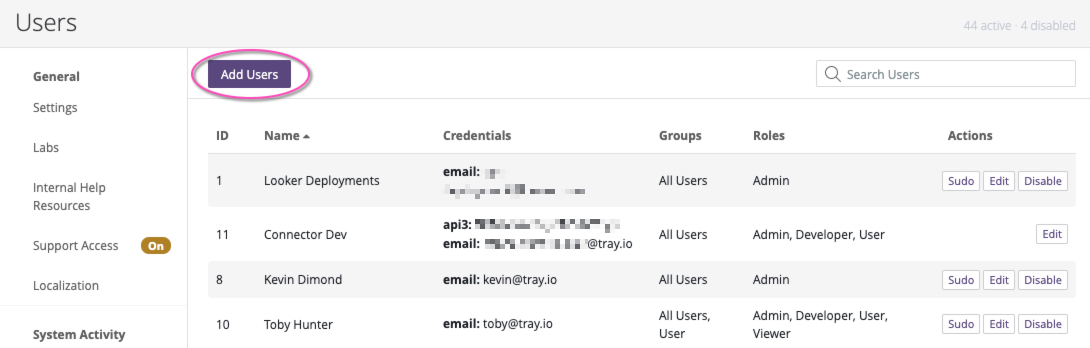
In the User list (which may be empty if this is your first time adding any) click on the 'Add Users' button.

Create your user as appropriate and click on the new 'Add Users' button as displayed below:


You will be sent to a completion page, press 'Done'.


Head back to the Users page, and you will see your newly created user present. Click 'Edit'.

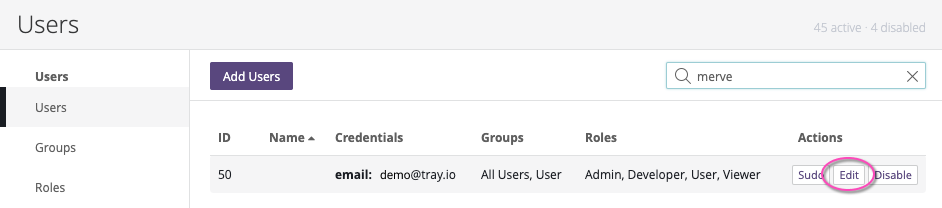
There will be a long list of information regarding your new user and near the bottom you will see an option called 'API£ Keys'.

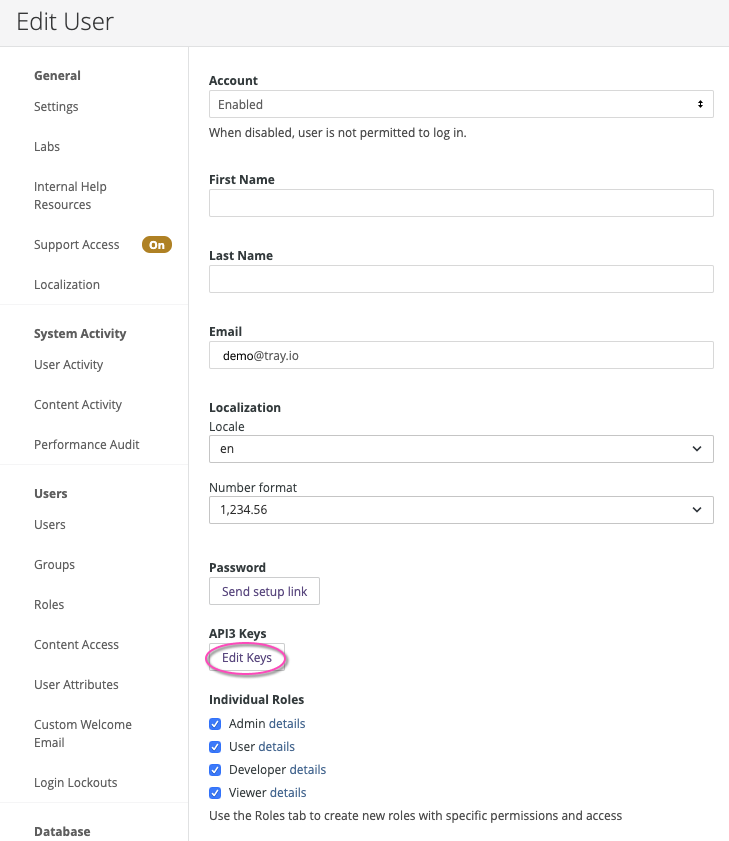
Click though in order to generate the keys needs..


This is where you will find your required information. Copy the keys over to your Tray.io authentication for completion.


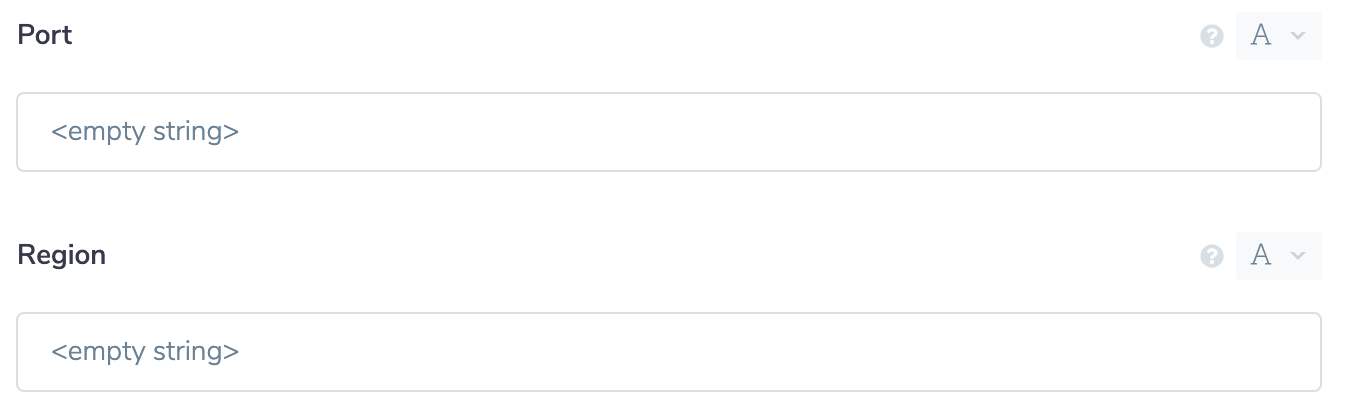
Note that in the Tray.io Looker authentication options, that the 'Port' and 'Region' fields are optional parameters that should be added on an either/or basis if your Looker instance configuration is setup to use either one of these.
REMEMBER that 'Port' and 'Region' should not both be filled for any authentication.

Available OperationsCopy
The examples below show one or two of the available connector operations in use.
Please see the Full Operations Reference at the end of this page for details on all available operations for this connector.
Note on Operations usageCopy
The Looker API requires that to add a select group of information to a user, the the relevant endpoint be used to do so. Existing creation operations include:
Create user email credentials:
/users/{user_id}/credentials_emailCreate password reset token:
/users/{user_id}/credentials_email/password_resetCreate API 3 credentials:
/users/{user_id}/credentials_api3Create two factor login information:
/users/{user_id}/credentials_totp
All of these operations require an existing user to be present when applying this information to that user.
Using the Universal Operation ('Raw HTTP request')Copy
As of v1.1, it is now possible to effectively create your own operations.
This is a very powerful feature which you can put to use when there is an endpoint in Looker which is not used by any of our operations.
To use this you will first of all need to research the endpoint in the Looker v3.1 API documentation , to find the exact format that Looker will be expecting the endpoint to be passed in.
Note that you will only need to add the suffix to the endpoint, as the base url will be automatically set (the base url is picked up from the value you entered when you created your authentication).
IMPORTANT!: The base url will depend on what authentication parameters have been provided.
Assuming that region or port has not been provided, the base url would look like https://{{your-domain}}.api.looker.com.
If region has been provided, the base url would look like https://{{your-domain}}.api.{{your-region}}.looker.com.
If port has been provided, the base url would look like https://{{your-domain}}.api.looker.com:{{your-port}}.
Please remember that both region and port cannot be used at the same time.
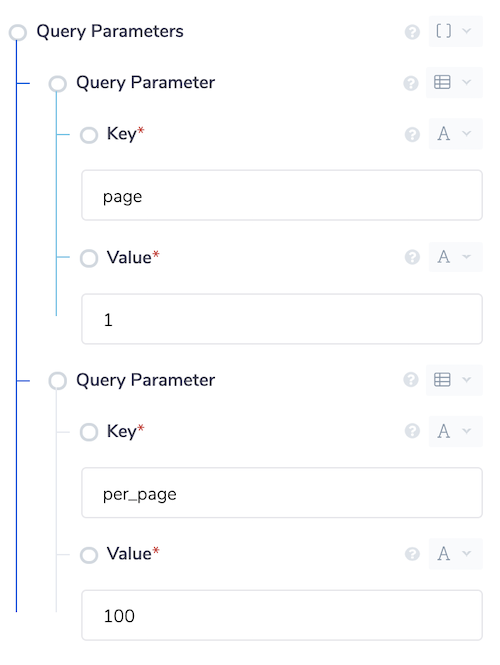
For example, say that the List users operation did not exist in our Looker connector, and you wanted to use this endpoint, you would use the Looker API docs to find out what the endpoint is and what parameters can be sent here .


From the documentation you can see that the endpoint for listing users would be /api/3.1/users and that the method would be GET. The input for the raw HTTP request would look like this:

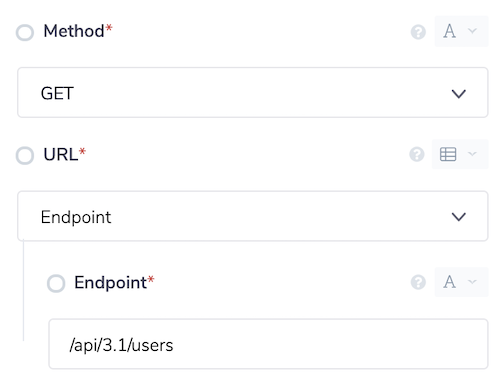
Notice that the documentation specifies parameters such as page and per_page. This can be used for pagination by adding to the query parameters in the raw HTTP request.

Example usageCopy
TRAY POTENTIAL: Tray.io is extremely flexible. By design there is no fixed way of working with it - you can pull whatever data you need from other services and work with it using our core and helper connectors. This demo which follows shows only one possible way of working with Tray.io and the Looker connector. Once you've finished working through this example please see our Introduction to working with data and jsonpaths page and Data Guide for more details.
In the following example we create a workflow that gets a list of users, creates an individual user then retrieves that newly created user.
Please see the above section on example usage for list and get account type operations.
Create a workflow with a manual trigger and add the Looker connecter with the 'List users' operation.
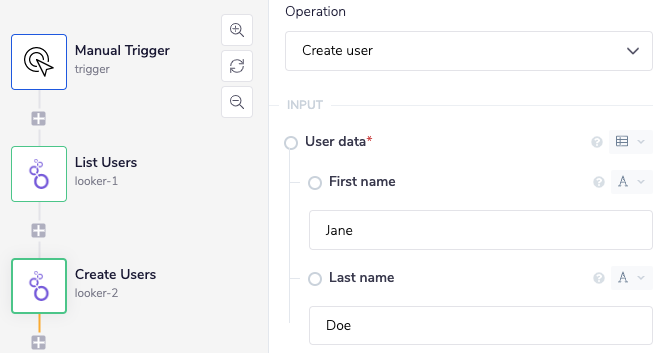
Add the 'Create user' step using the Looker connector.
Use the 'Get user' operation to complete setup utilising a final Looker connector.
1 - SetupCopy
To begin with, create a workflow with a Manual Trigger, then add a step from the Looker connector with the operation set to 'List users':

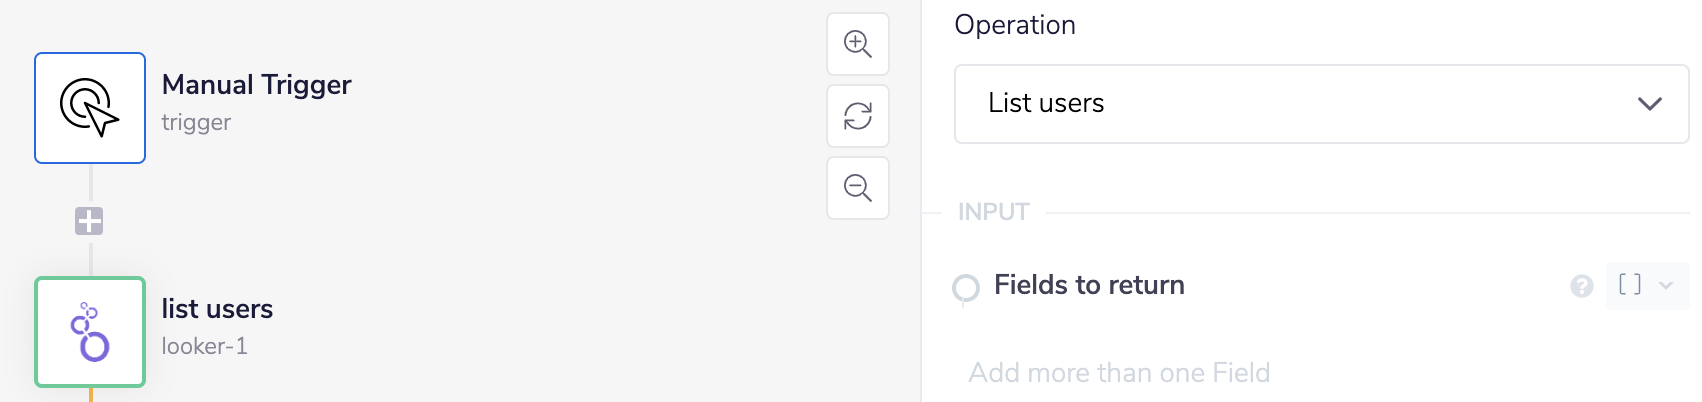
We can run our workflow and view our list of users in the output panel of the workflow, as shown in this example:


2 - Create UserCopy
Next, add another Looker connector step and specify the operation as 'Create user'.
In the input options, set the 'First name' and 'Last name' for our new user.

It is possible to add additional, custom input parameters. A full list of these parameters can be found on the Looker API documentation page.
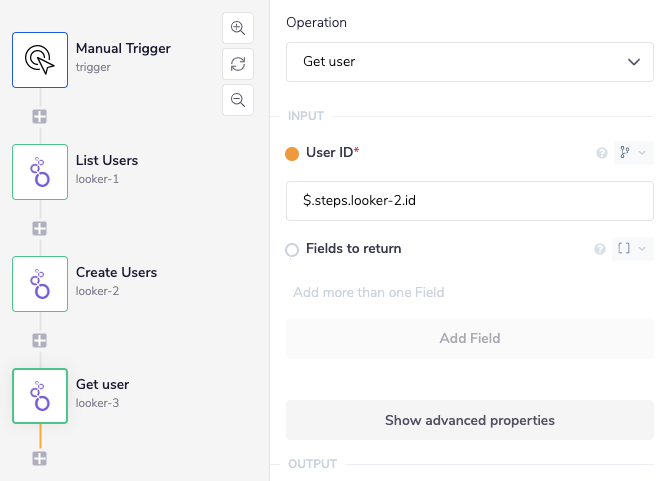
3 - Get User IDCopy
Finally add one more Looker connector to the workflow and set the operation to 'Get user'.
We want to set the 'User ID' to the ID of the newly created user in the previous step. In order to do this without hard coding the answer, we utilise the connector-snake in order to auto-generate a jsonpath as pictured below in this example.
JSONPATHS: For more information on what jsonpaths are and how to use jsonpaths with Tray.io, please see our pages on Basic data concepts and Mapping data between steps
CONNECTOR-SNAKE: The simplest and easiest way to generate your jsonpaths is to use our feature called the Connector-snake. Please see the main page for more details.

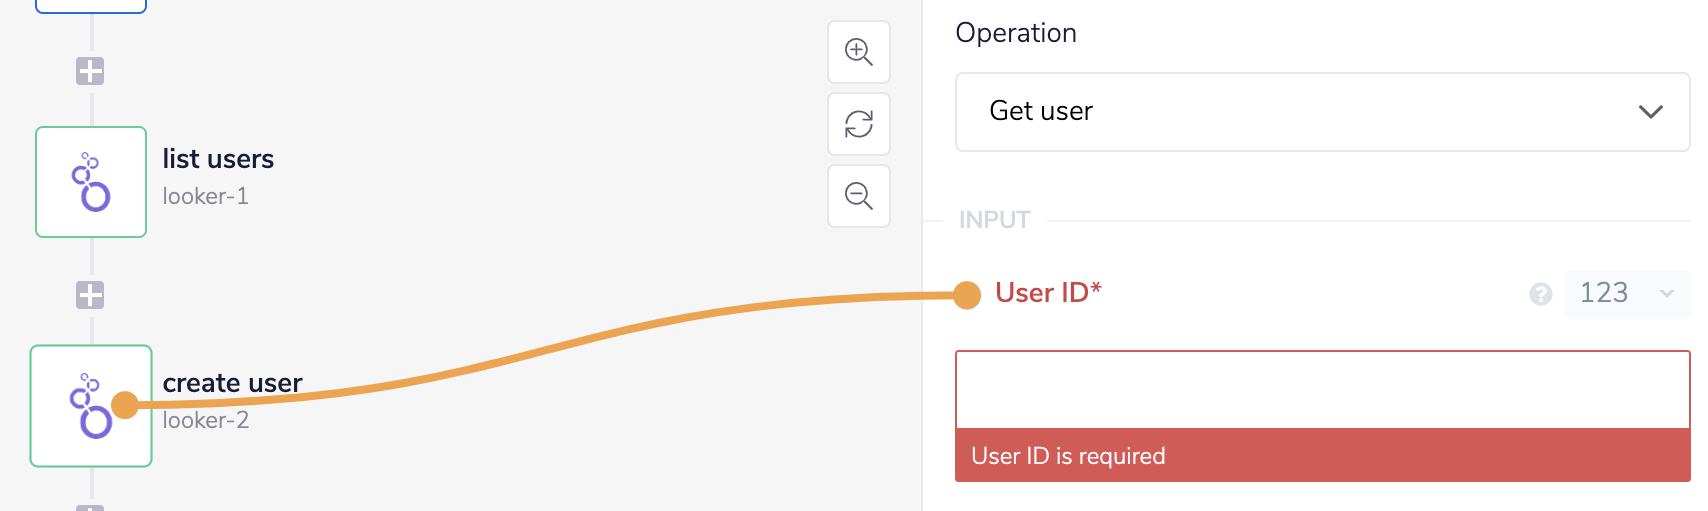
Be sure to click and drag from your input panel (in this case from our User ID) towards the connector step you wish to utilise.
Your result should be something like this:

We can then run the workflow to retrieve the newly created user information:


BEST PRACTICES: Whenever you do decide to create your own workflow, be sure to check out some of our key articles such as: