
Lever 1.1
Lever is a recruiting software that provides talent acquisition suites to customers, offering efficiency in the recruitment process.
OverviewCopy
Lever provide an application tracking software (ATS) with features such as The Lever Hire and Lever Nature, which allow leaders to grow, source and build their people pipelines.
API INFO: The Base URL used for the lever connector is [YOUR-BASE-URL]. More information can be found on their main API documentation (v1.0) site.
Below is an example of a way in which you could potentially use the Lever connector, to list all notes for an opportunity, loop through these notes and retrieve information regarding each note.
The steps will be as follows:
Setup using a manual trigger and List notes
Add a Loop connector
Get note
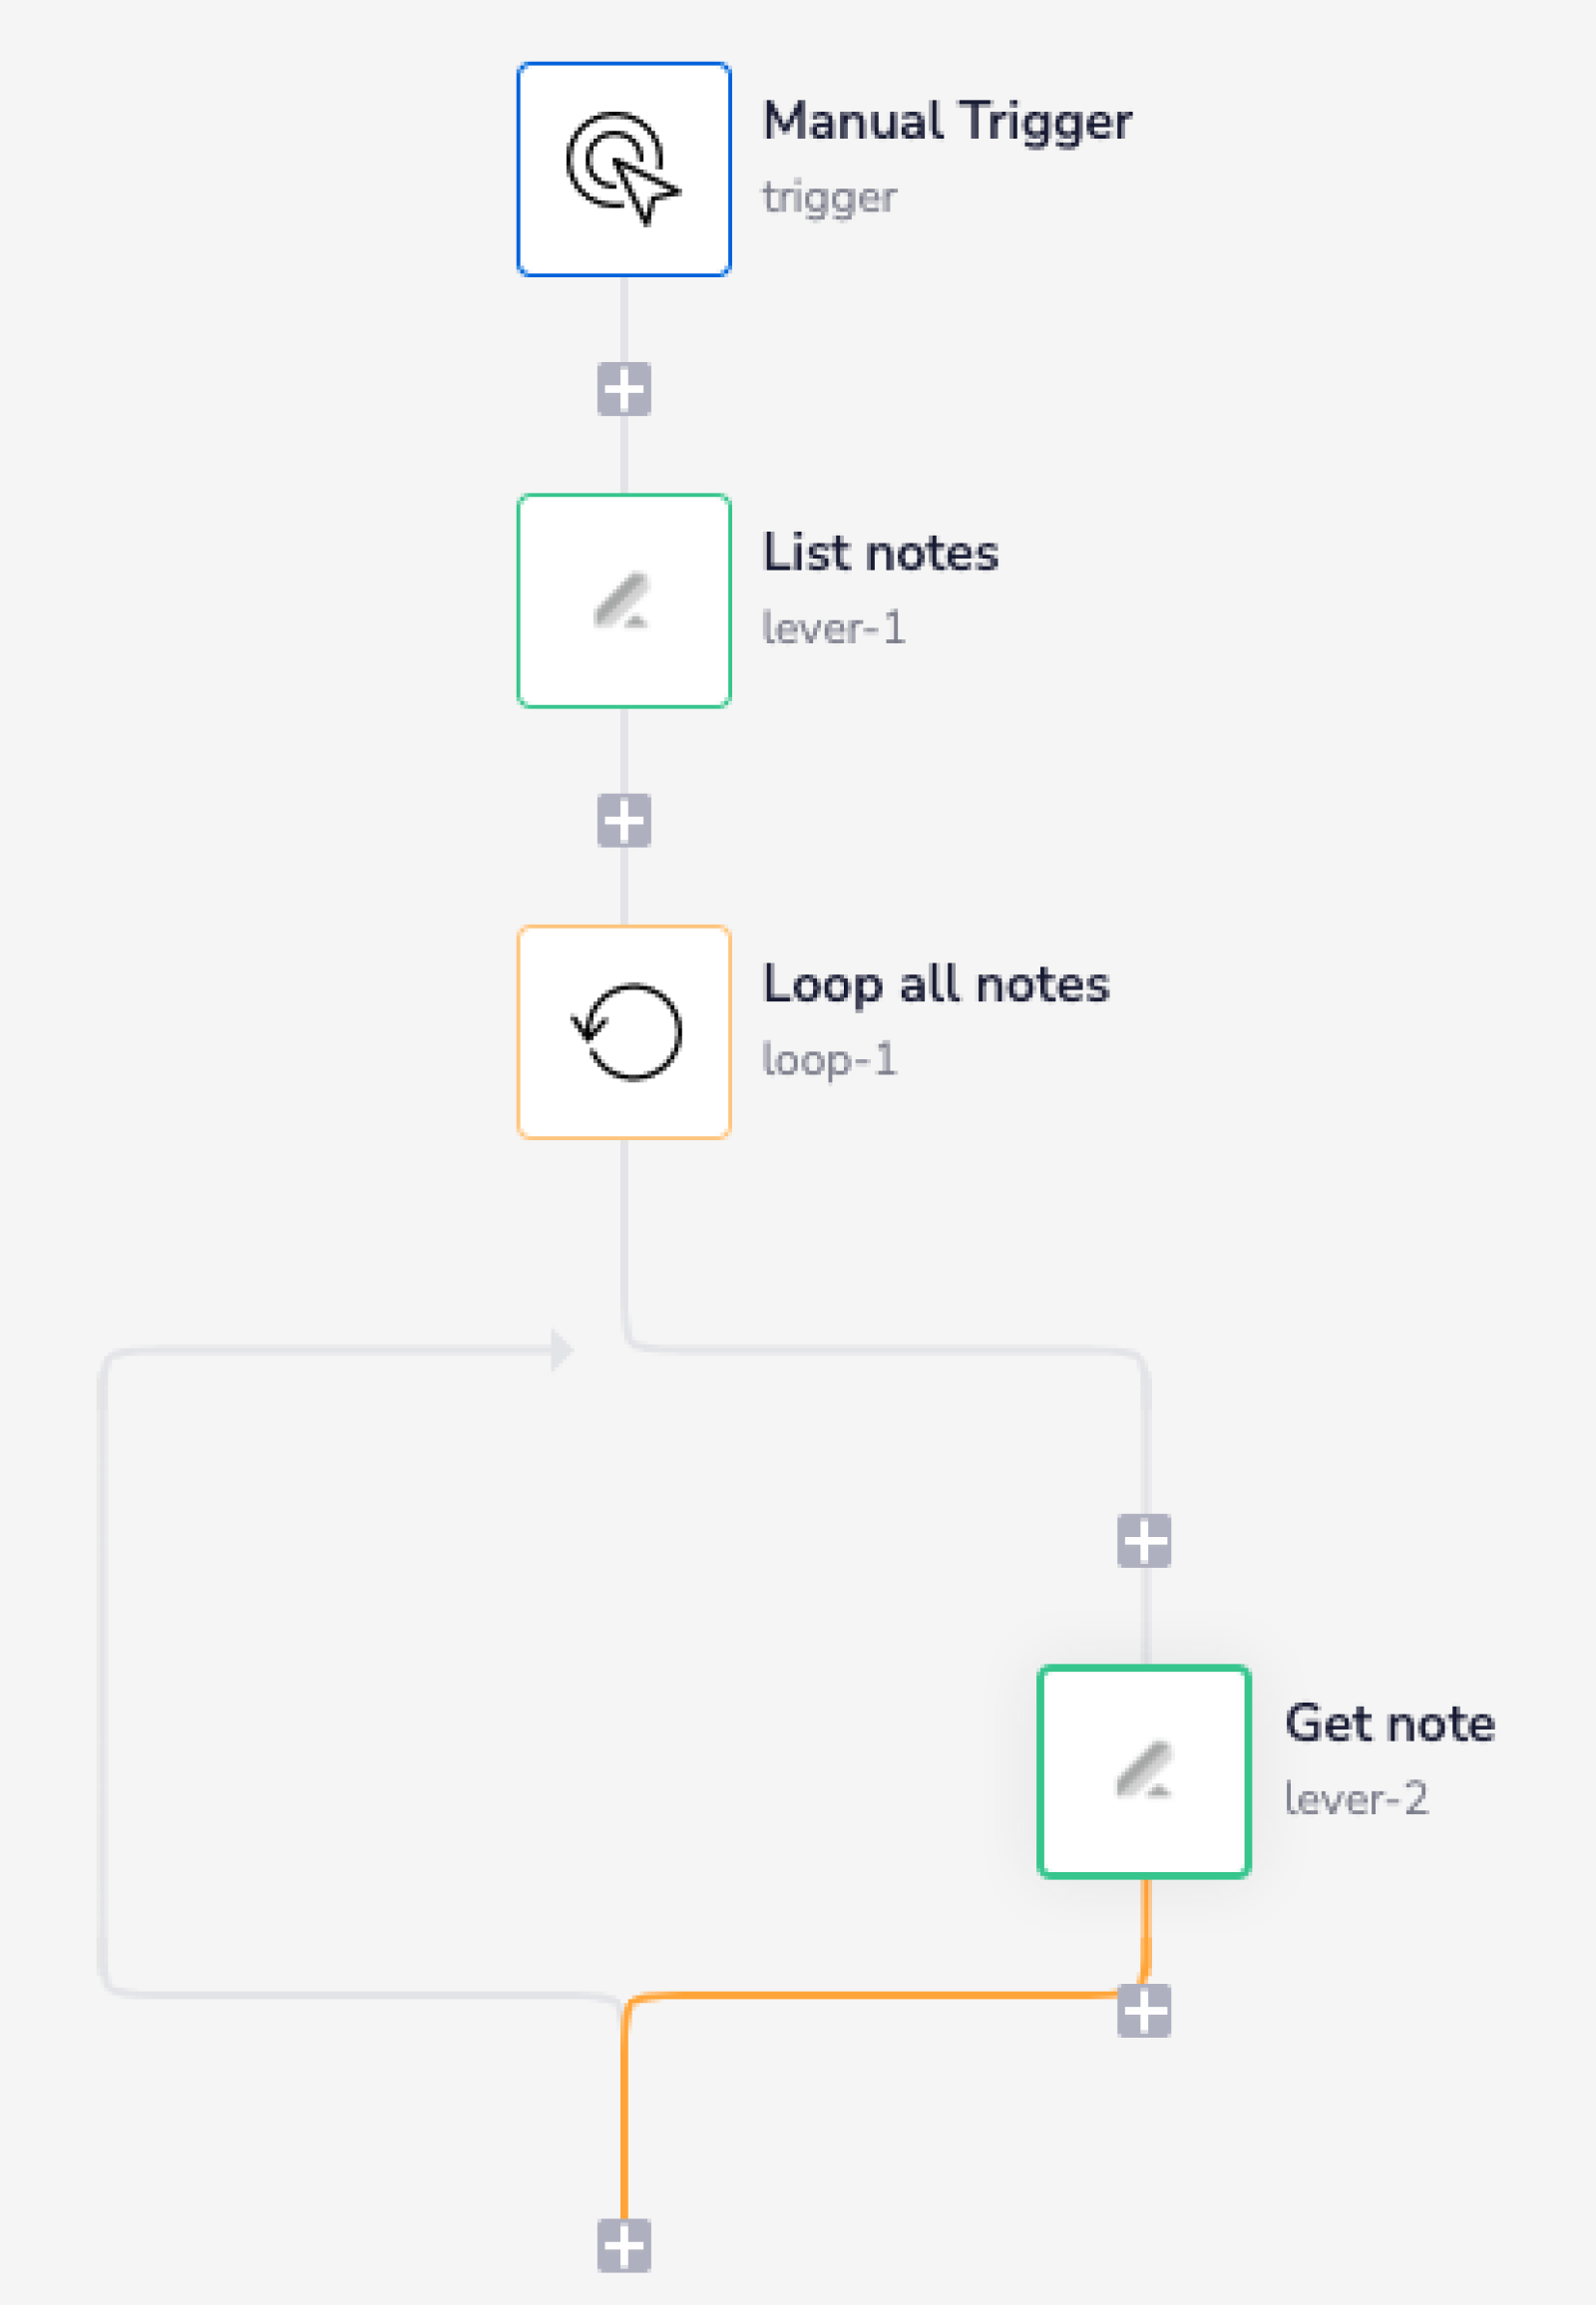
Your completed workflow should look similar to this:

1 - Setup Trigger & List notesCopy
With your trigger in place (be it Manual, Scheduled, Callable etc) add a Lever connector. Set the operation to 'List notes'.

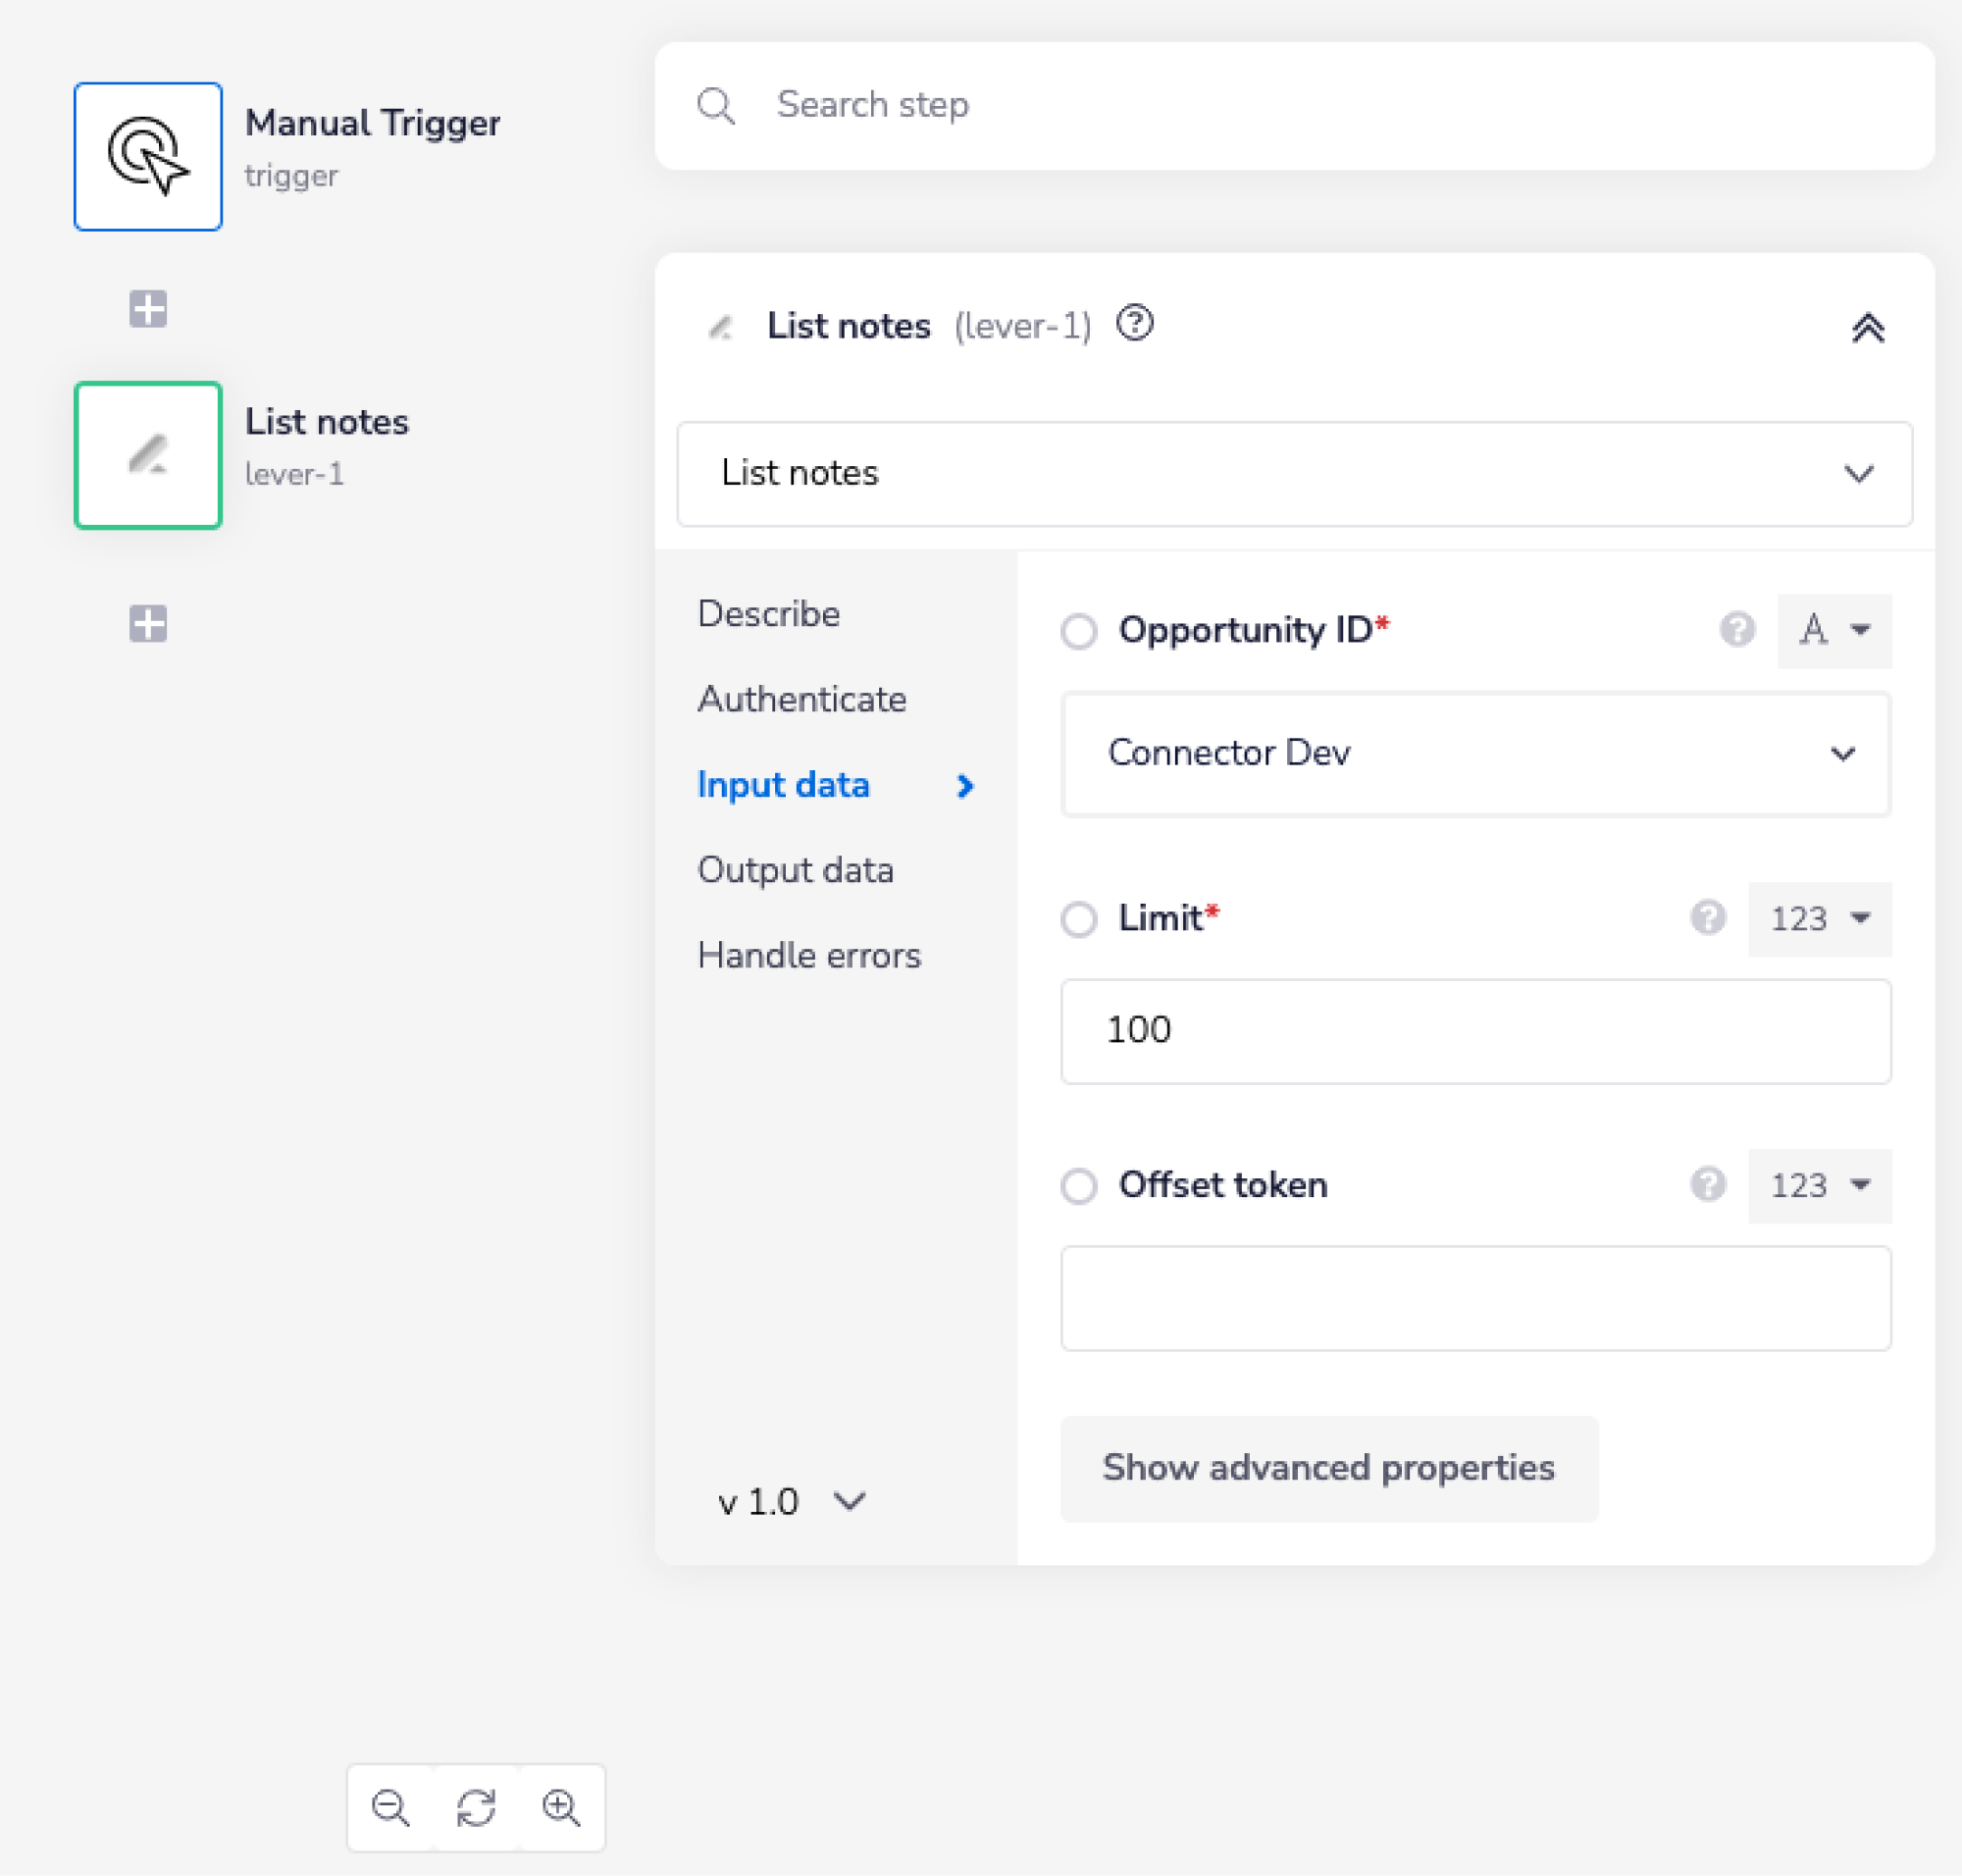
Feel free to re-name your steps as you go along to make things clearer for yourself and other users. The operation names themselves often suffice.
This will list all the notes currently in the selected opportunity, in this example within the 'Connector Dev' opportunity.
2 - Add a Loop connectorCopy
Next, search for the Loop connector within your connector panel, and drag it into your workflow as your next step. Set your operation to 'Loop List'.
The Loop connector allows you to iterate through a list of results. In this example, we will use it to iterate through the data found within the previous Lever connector step.
In order to specify the list you want to loop through, start by using the list mapping icon (found next to the list input field, within the properties panel) to generate the connector-snake.
While hovering over the 'List' field in the 'List notes' step (with the tail end of the connector-snake), select data from the list of output properties displayed. This will auto-populate a jsonpath within your list input field, and update the type selector to jsonpath.
For more clarification on the pathways you have available, open the Debug panel to view your step's Input and Output.
JSONPATHS: For more information on what jsonpaths are and how to use jsonpaths with Tray.io, please see our pages on Basic data concepts and Mapping data between steps
CONNECTOR-SNAKE: The simplest and easiest way to generate your jsonpaths is to use our feature called the Connector-snake. Please see the main page for more details.


When run, this workflow will iterate through the list of notes provided by the earlier step.
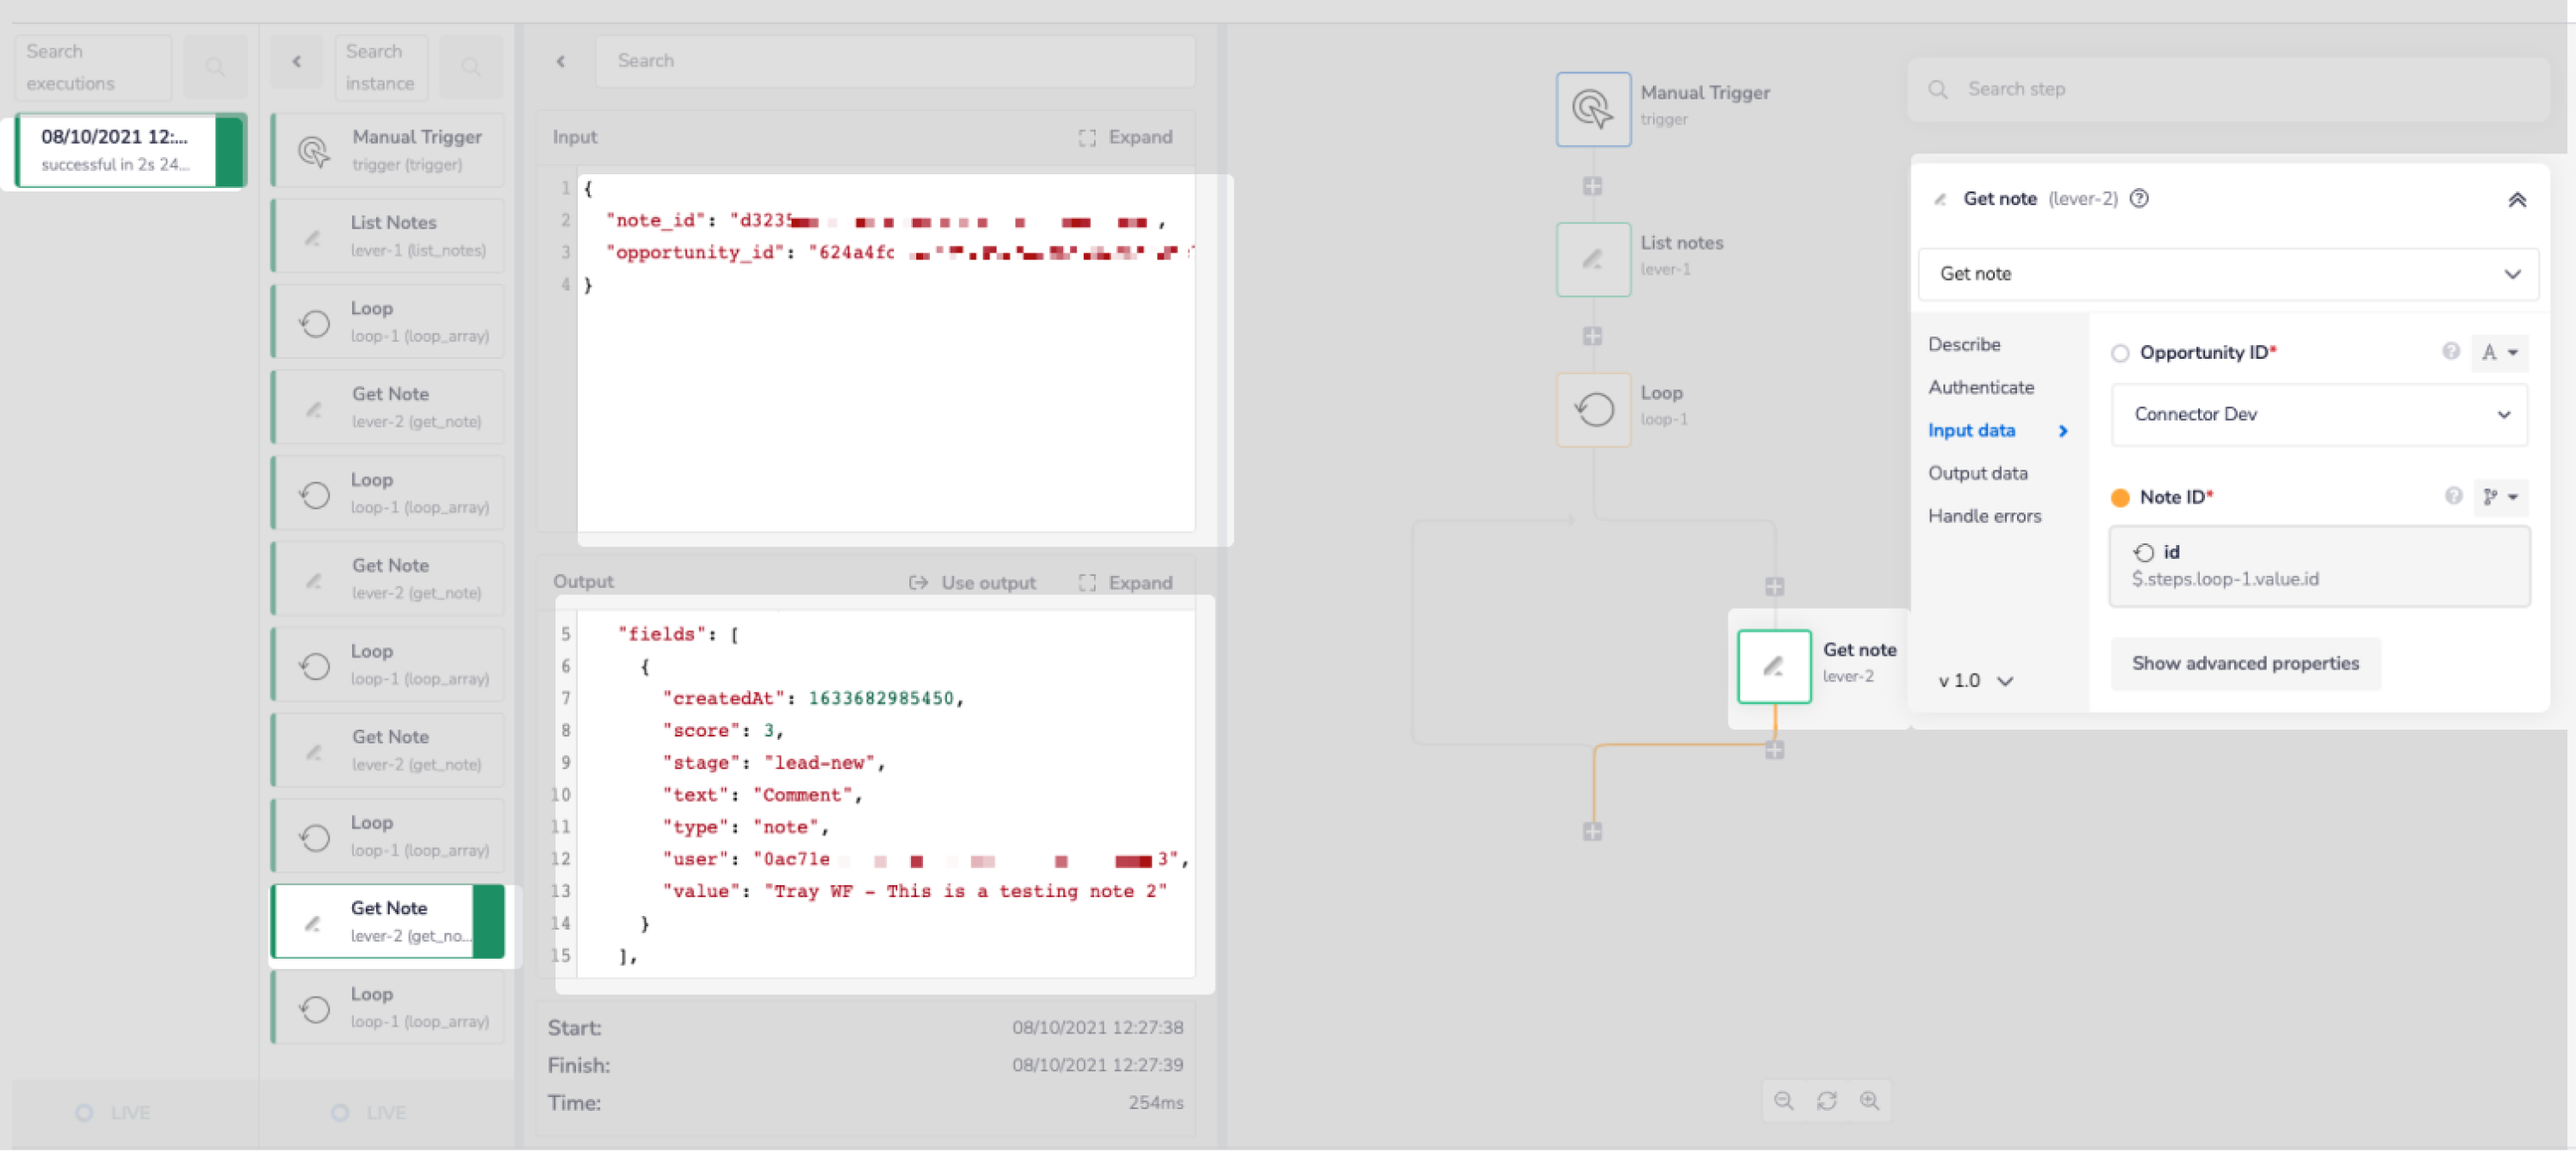
3 - Get noteCopy
The last step is to drag a Lever connector inside the Loop Collection step itself. Set the operation to 'Get note. As you can see, the 'Opportunity ID' and 'Note ID' fields are required. Please ensure that the 'Opportunity ID' selected from the dropdown is the same as the ID provided in the 'List notes' step.
Use the connector-snake to find the jsonpath for the 'Note ID' field from the loop step. It should appear similar to this $.steps.loop-1.value.id.
INTERPOLATION: When you wish to include JSON generated data within another input/output result, use our Interpolation method as described here.


When run, the workflow will now iterate through the list of notes, and retrieve information for each note.

BEST PRACTICES: Whenever you do decide to create your own workflow, be sure to check out some of our key articles such as: