
Google Vision 1.0
Google Cloud's Vision API offers powerful pre-trained machine learning models through REST and RPC APIs.
OverviewCopy
AuthenticationCopy
When using the Google Vision connector, the first thing you will need to do is go to your Tray.io account page, and select the workflow you wish to work on. Once in the workflow builder itself, search and drag the Google Vision connector from the connectors panel (on the left hand side) onto your workflow.
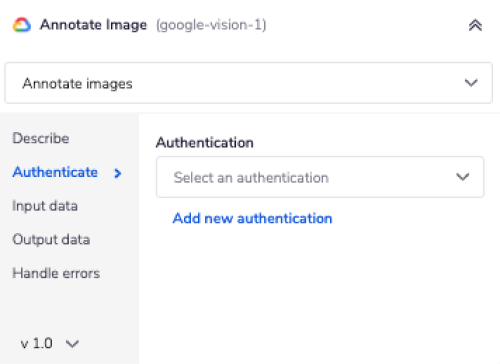
With the new Google Vision connector step highlighted, in the properties panel on the right, click on the ‘Authenticate’ panel followed by ‘Add new Authentication’ (located under the Authentication input field).

This will result in a Tray.io authentication pop-up window. The first page will ask you to name your authentication, and state which type of authentication you wish to create ('Personal' or 'Organisational').
As you can see, the next page asks you for your 'API Key' credentials.


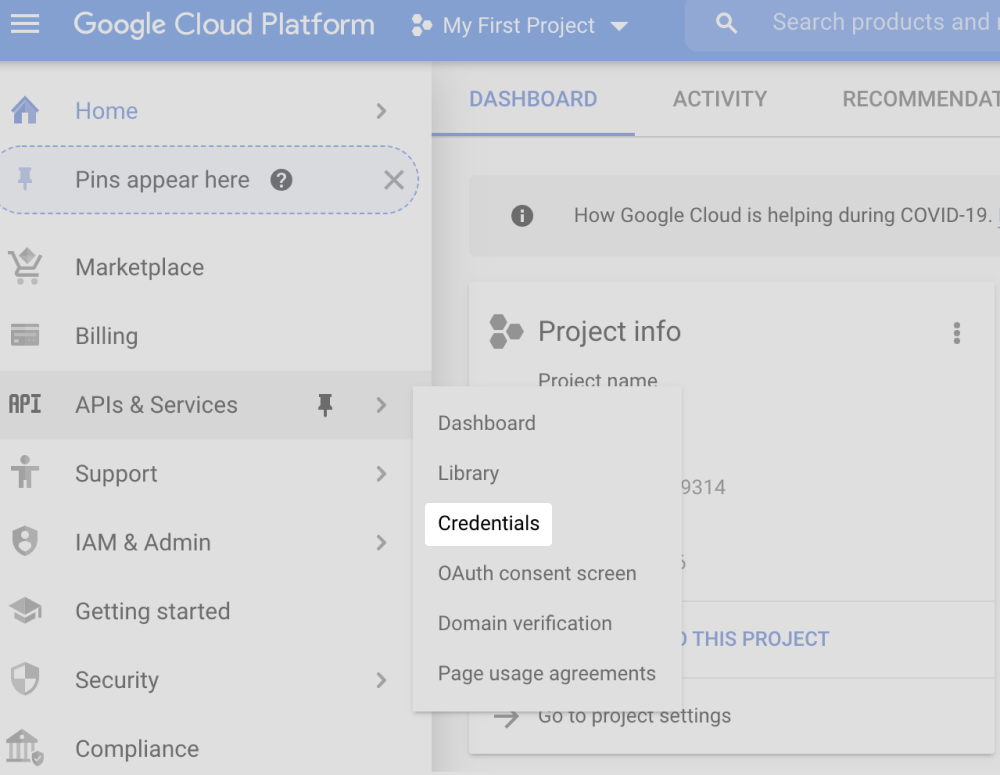
In order to get this field, head to your Google Cloud Platform dashboard. First click on the 'APIs & Services' tab in the side menu, then click on the 'Credentials' tab inside of the additional menu which appears.

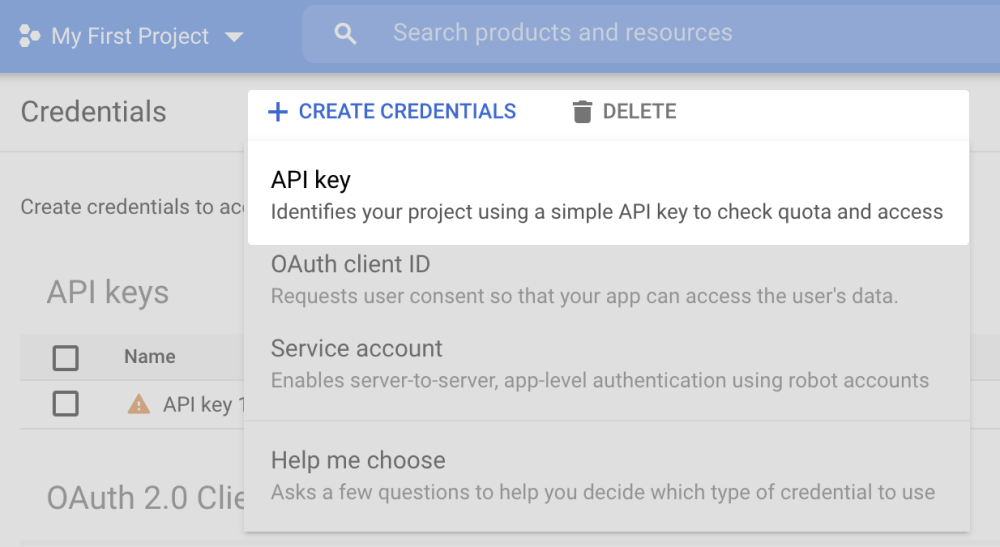
To get your API Key click on the 'Create Credentials' button underneath the blue navigation bar and select 'API Key' from the dropdown menu. This will generate a new API Key for you.

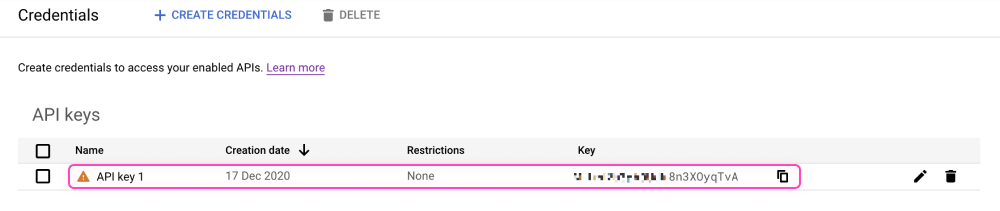
To copy your API Key to your clipboard, click on the icon to the right of your API Key. You can then navigate back to your workflow and paste the API Key into the auth field.

Once you have added these fields to your Tray.io authentication popup window, click on the 'Create authentication' button. Go back to your settings authentication field (within the workflow builder properties panel), and select the recently added authentication from the dropdown options now available.
Your connector authentication setup should now be complete.
Available OperationsCopy
The examples below show one or two of the available connector operations in use.
Please see the Full Operations Reference at the end of this page for details on all available operations for this connector.
Note on Operations UsageCopy
API LIMITATIONS: PRICING: Please note that the pricing schemes are tiered. Only the first 1000 units used each month are free. For more details, check out Google's Pricing Information page. REQUESTS: Users are also limited to 1,800 requests per minute, for most quotas. However there are some exceptions. Please visit Google's Quotas page for more information.
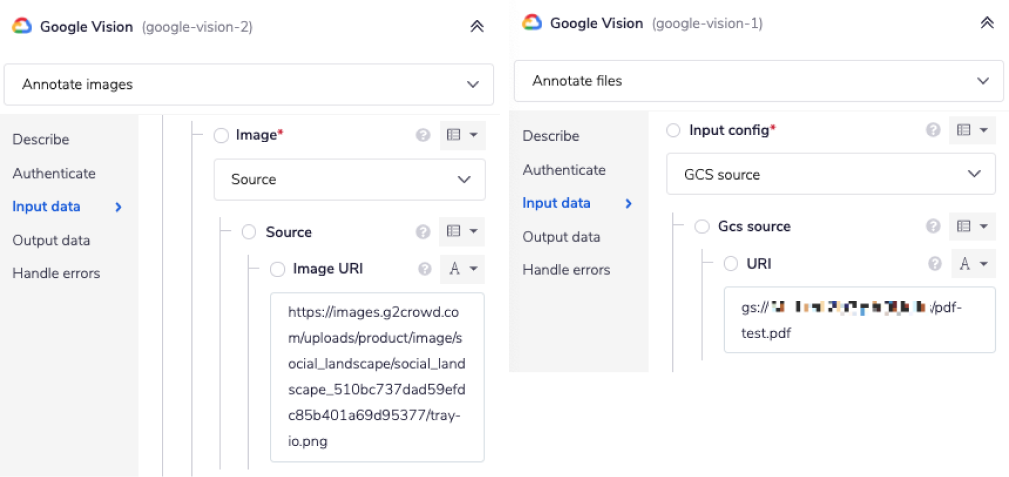
Annotate Image vs Annotate File URI HandlingCopy
A key difference between the two operations appears in the Source (or GCS Source) option for the request. You will use this option if you want to paste in a file URI instead of uploading one.
While the Annotate Image operation allows you to paste in a public URI, Annotate File requires you to use a URI from your Google Cloud Storage:

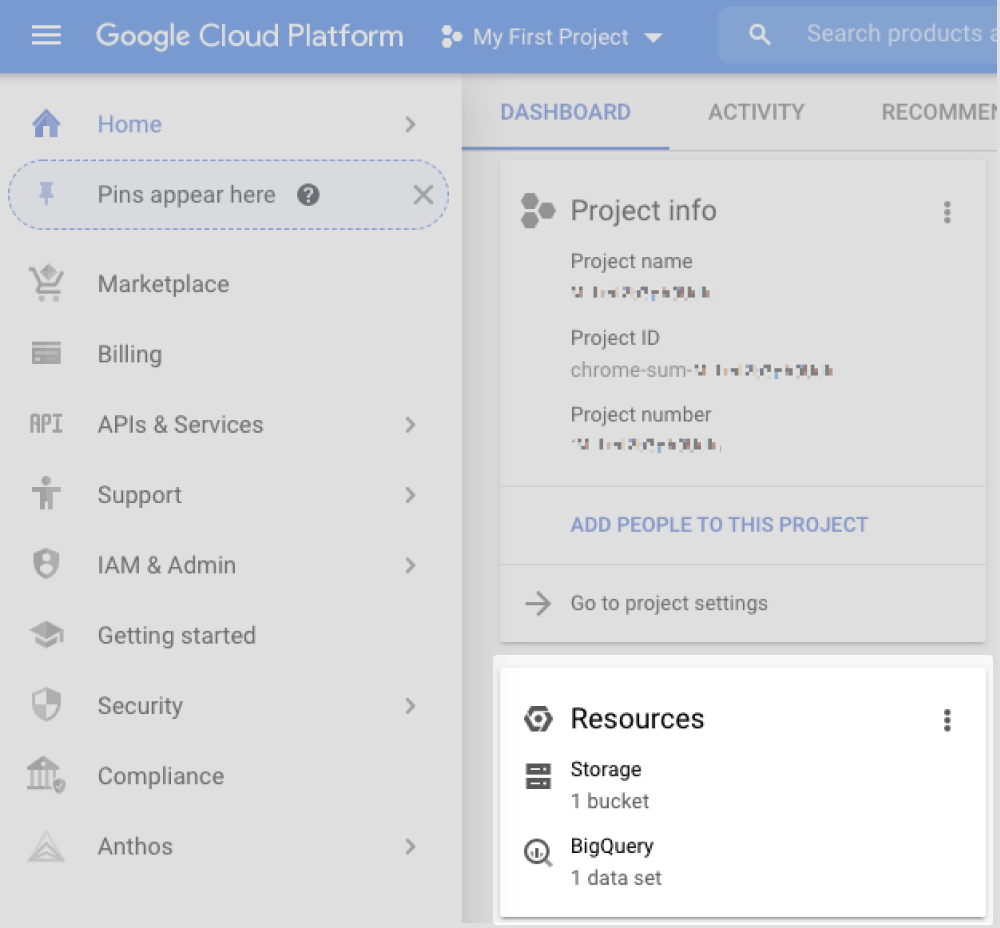
You can locate your Google Cloud Storage bucket by clicking on Storage inside of the Resources card on your Google Cloud Platform dashboard:

Form TriggerCopy
Please note that when using the Form Trigger to upload a file it will not automatically add an expiry property to the upload. This is required and will need to be added manually using the Script connector. Please see an example of this below.
Example UsageCopy
Below is an example of a way in which you could potentially use the Google Vision connector, to detect the emotions present in an image using the built-in Face Detection feature.
TRAY POTENTIAL: Tray.io is extremely flexible. By design there is no fixed way of working with it - you can pull whatever data you need from other services and work with it using our core and helper connectors. This demo which follows shows only one possible way of working with Tray.io and the Google Vision connector. Once you've finished working through this example please see our Introduction to working with data and jsonpaths page and Data Guide for more details.
USER TIP: There are many different built-in features available in the Google Vision connector for you to experiment with (including Face Detection, Landmark Detection and Text Detection) - feel free to get creative!
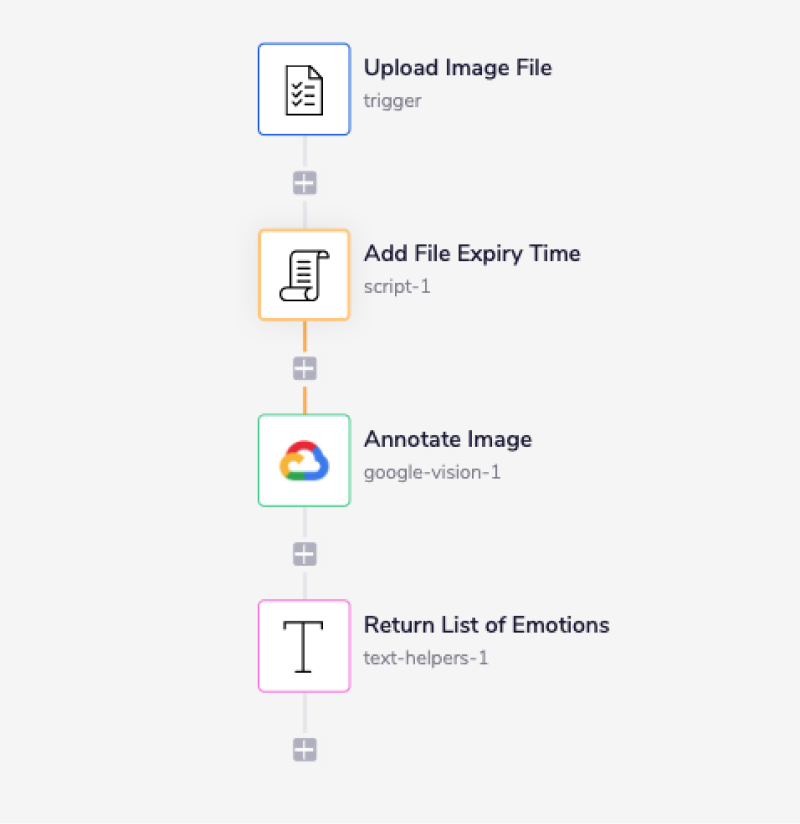
The steps will be as follows:
Upload an image file using the Form Trigger.
Add an expiration date for your image file using the Script connector.
Annotate your image using the Face Detection feature.
Use the Text Helper to return a list of the likelihood of different emotions present in the image.
The final outcome should look like this:

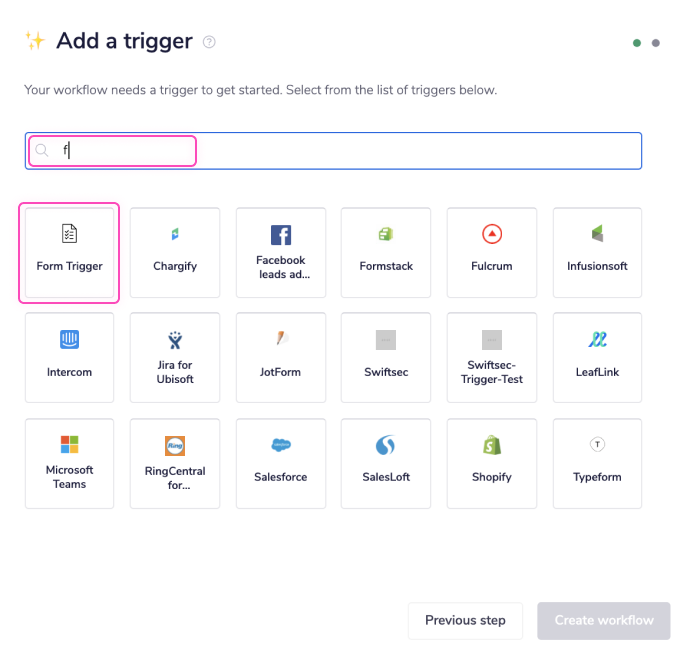
1 - Setup Trigger & Create a Form to Upload a FileCopy
Once you have clicked 'Create new workflow' from your main Tray.io dashboard and named it, select the Form trigger from the trigger options available:

The Form Trigger allows you to capture information from End Users via a webform and use this to kick off a workflow based on this information. In this example, we will use it to allow the End User to upload a file.
Inside of the panel on the right, you can give your form a name (Form Title) and add some input (Input Fields):

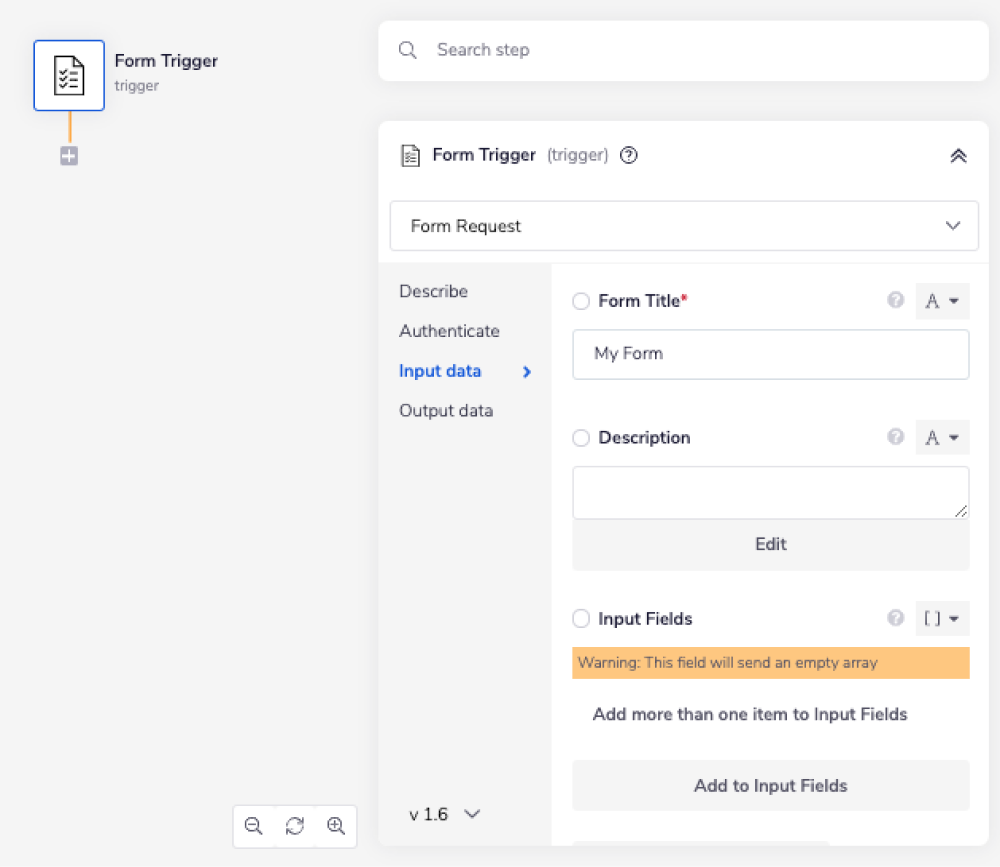
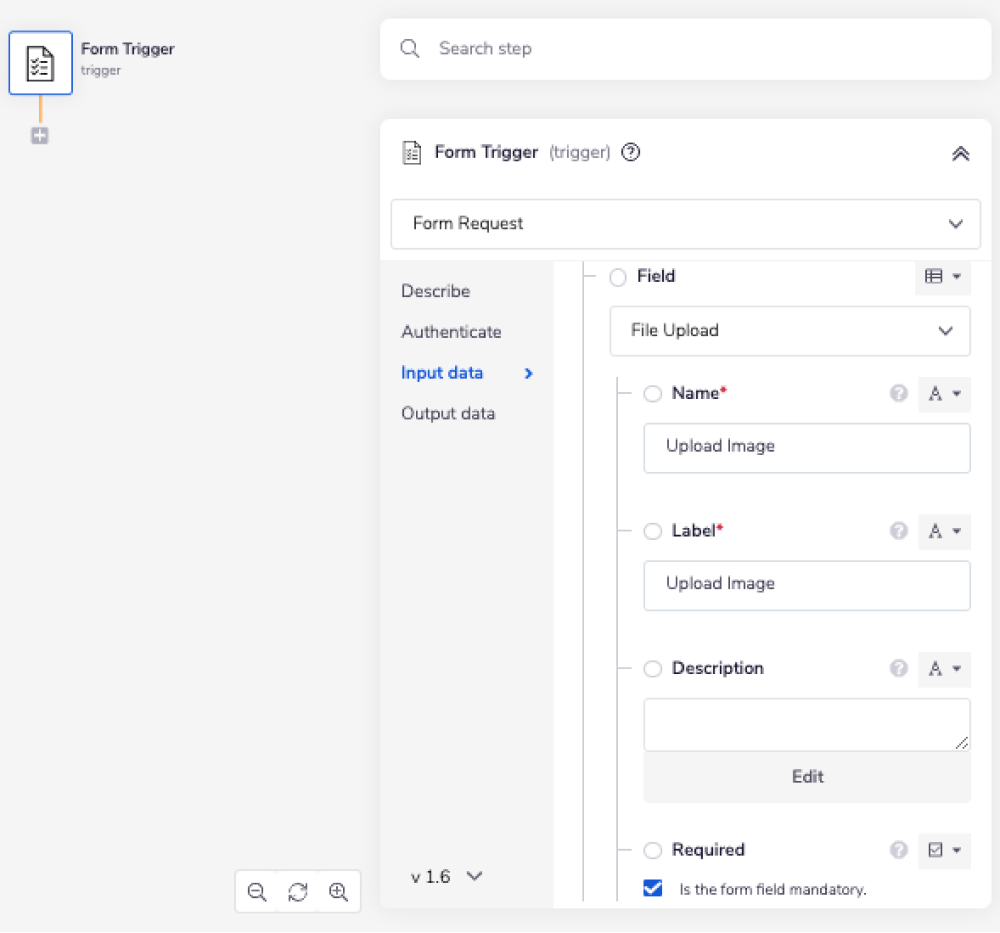
To allow file uploads, set the operation of your input field to 'File Upload' and give it a name and a label. Make sure that you also tick the 'Required' checkbox for your form field:

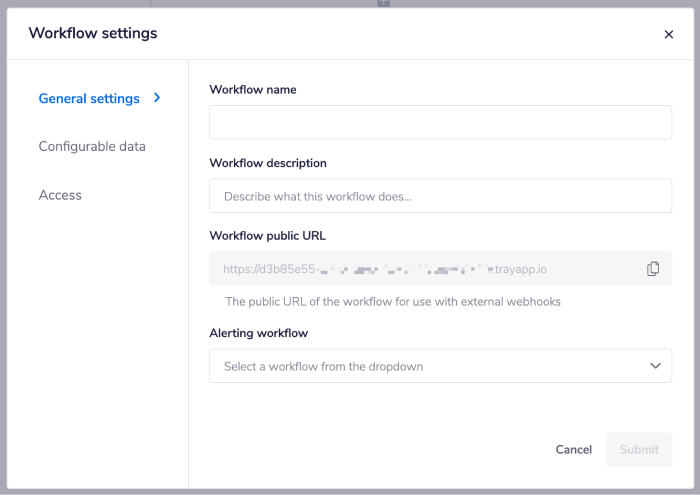
To upload a file, and trigger your workflow, click on the 3 ellipses in the top left corner beside the name of your workflow.

Next, access your workflow's public URL by clicking on 'Workflow Settings', then 'General Settings'. The public URL can then be copied and pasted into a new browser window to access your form.

USER TIP: Feel free to re-name your steps as you go along, to make things clearer for yourself and other potential users of this workflow. Usually the operation name itself is enough however please note that there is also a 'Description' field available under the Describe tab.
2 - Add a Script connectorCopy
Next, search for the Script connector within your connector panel (to the left of your workflow) and drag it into your workflow as your next step. Set your operation to 'Execute Script' and add a new variable.
The Script connector allows you to add JavaScript functions to your workflows. In this example, we will use it to add an expiration date to the file you uploaded via the Form Trigger in the previous step.
In order to specify the file you want to add an expiry time to, start by using the 'Value' mapping icon (found next to the 'Value' input field, within the properties panel) to generate the connector-snake.
CONNECTOR-SNAKE: The simplest and easiest way to generate your jsonpaths is to use our feature called the Connector-snake. Please see the main page for more details.
While hovering over the Form Trigger step (with the tail end of the connector-snake), select 0 (Underneath 'Upload Image') from the list of output properties displayed.
This will auto-populate a jsonpath within your 'List' input field, and update the type selector to jsonpath.
JSONPATHS: For more information on what jsonpaths are and how to use jsonpaths with Tray.io, please see our pages on Basic data concepts and Mapping data between steps
For more clarification on the pathways you have available, open the Debug panel to view your step's Input and Output.
To add an expiry time, you will need to edit the 'Script' field (also inside of the property panel). This is where you can input your JavaScript code:

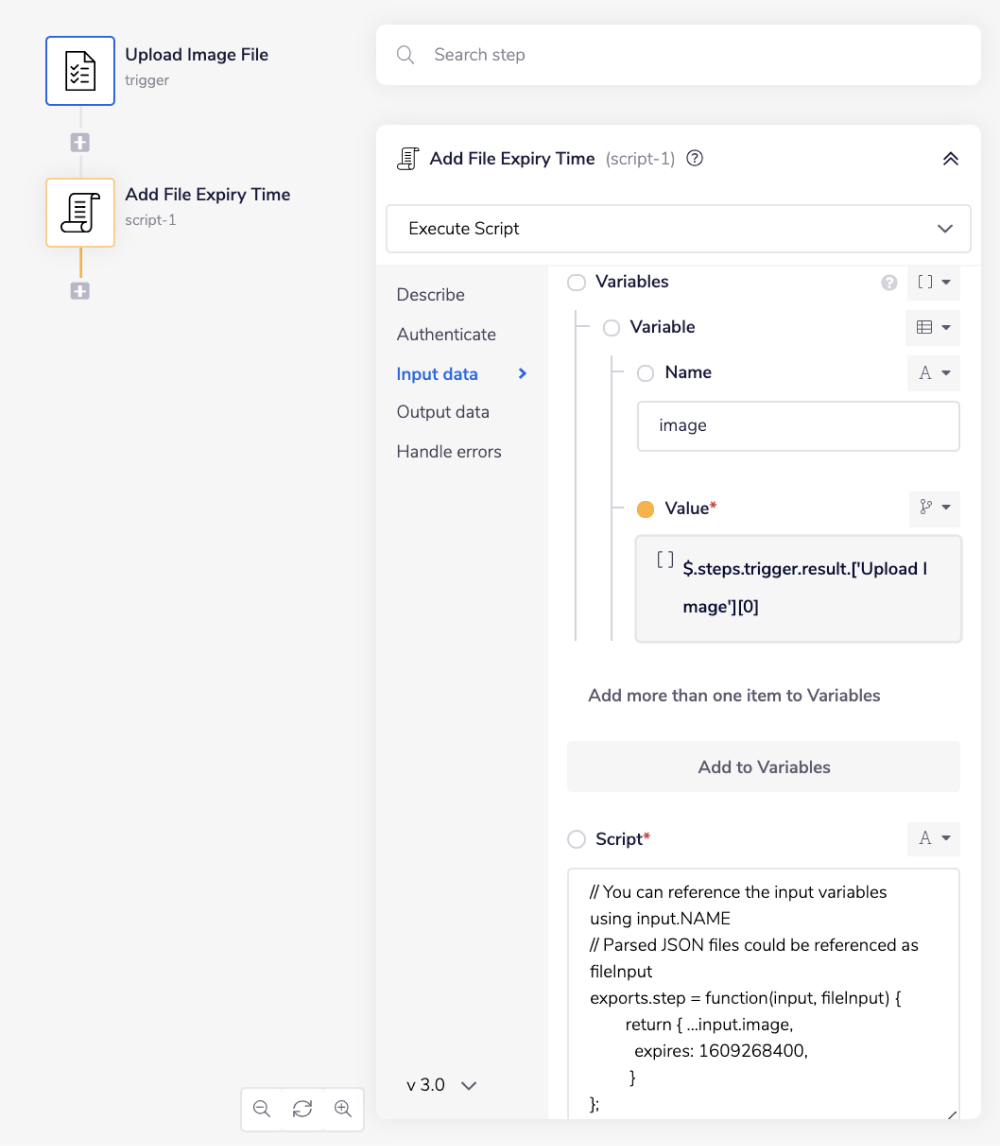
PLEASE NOTE: The date must be formatted in Epoch time. For example: 1610446992.
The Form Trigger does not add an expiry property to the files uploaded to it, so by completing the above steps you are ensuring that an expiry time is added.
3 - Annotate Image File Using Face DetectionCopy
After this, select the Google Vision connector from the connectors panel and drag it into your workflow underneath the Script connector. Set your operation to 'Annotate Images'.
If you have not already completed the Google Vision Authentication setup, please do this now.
The Google Vision connector allows you to either annotate an image or a file (with the option of doing this by inputting a public URL or uploading a file). In this example, we will use it to annotate an image file uploaded in the Form Trigger connector step.
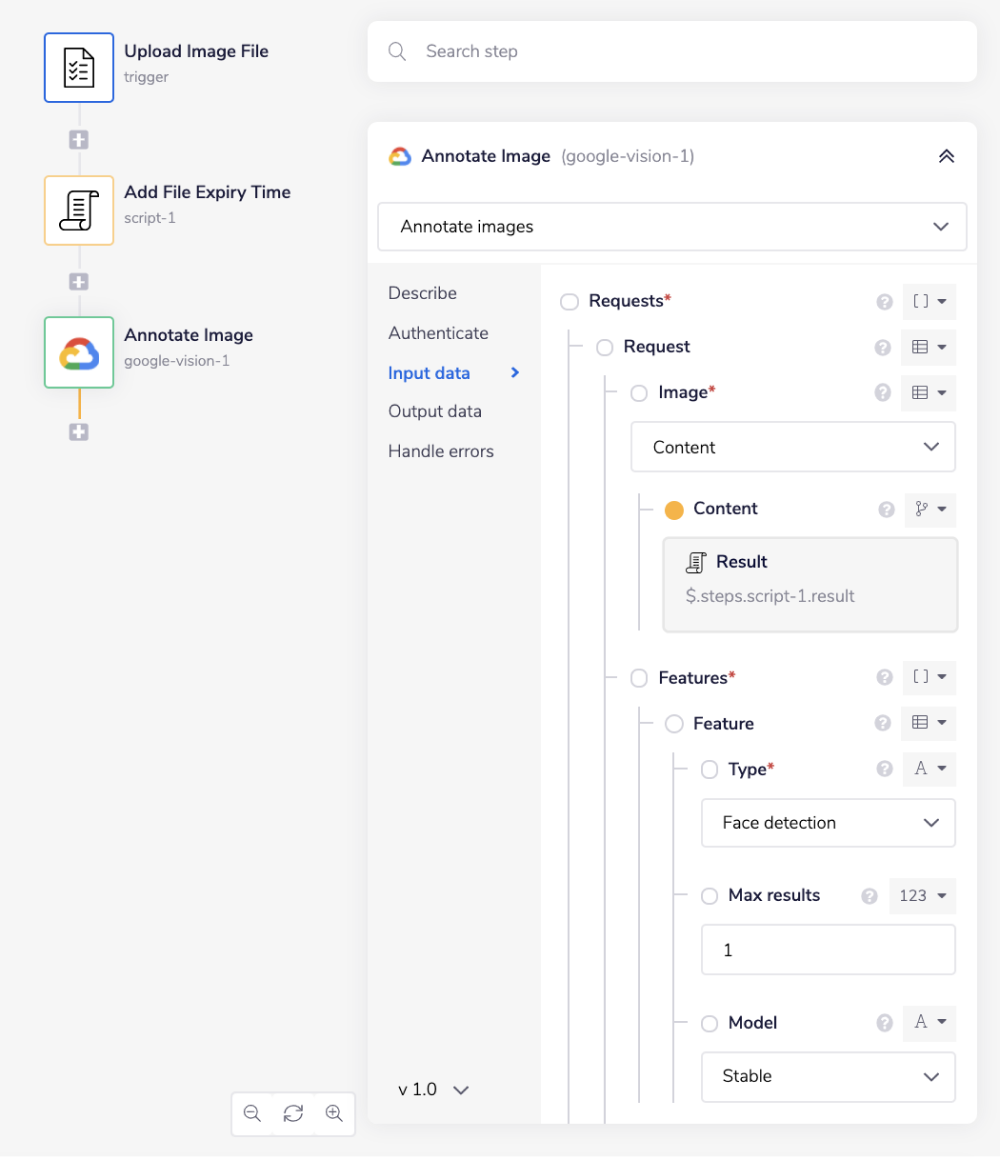
To do so, start by adding a new request in the property panel. Then, set the image operation to be 'Content' and add a new feature (for this example we will be using 'Face Detection'):
In order to specify the image you wish to annotate, start by using the 'Content' mapping icon (found underneath the selected 'Content' operation within the properties panel) to again generate the connector-snake.
While hovering over the 'Add File Expiry Time' step (with the tail end of the connector-snake), select result from the list of output properties displayed. This will auto-populate a jsonpath within your 'List' input field, and update the type selector to jsonpath.

Now that you have set up your Google Vision connector to annotate an image using Face Detection you're ready to move on to the last step!
4 - Return List of Detected EmotionsCopy
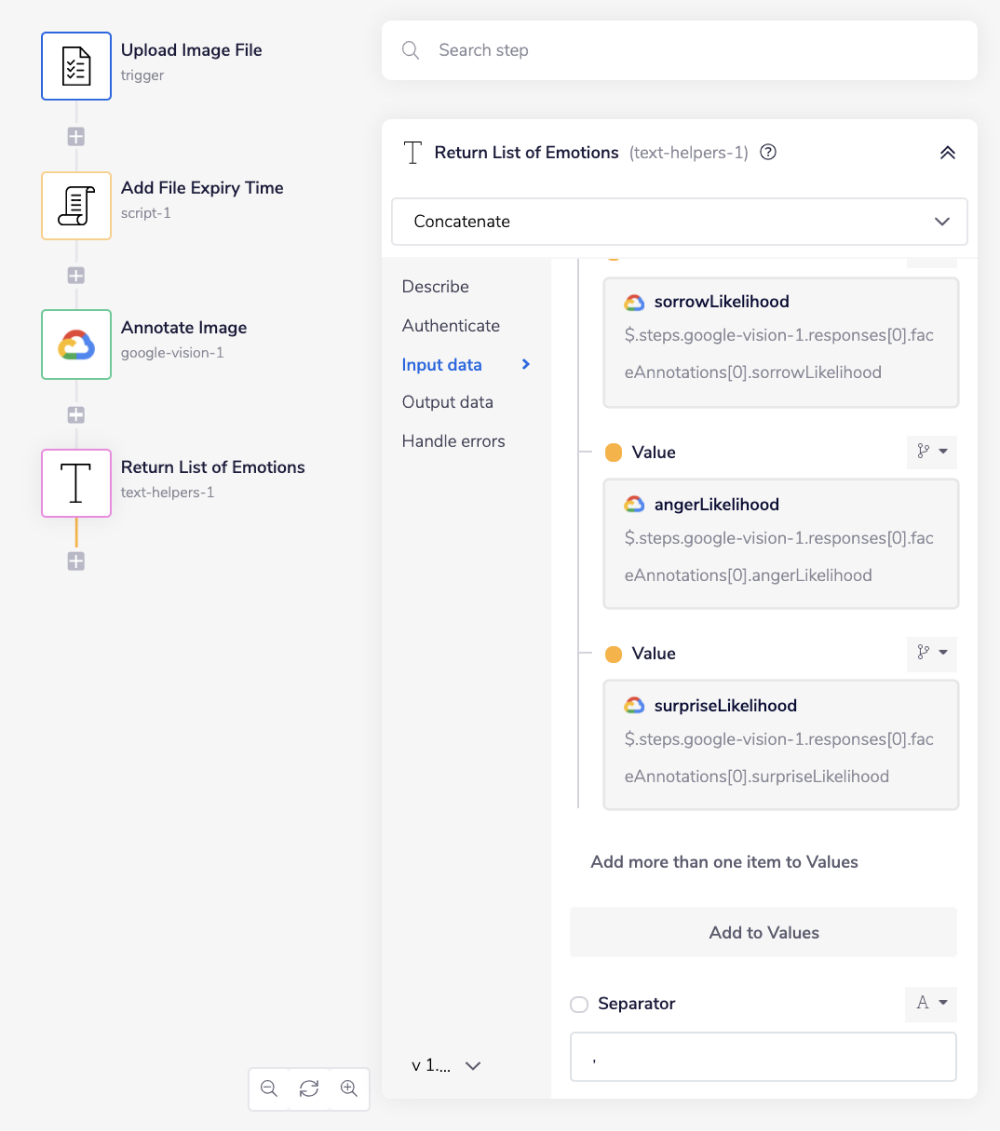
The last step is to drag a Text Helper connector into your workflow and place it underneath your Google Vision connector. Set the operation to 'Concatenate'. As you can see, the 'Values' field is required.
To generate a list containing the likelihood of emotions detected in the image, you will again use the connector snake to populate the input fields. Start by adding a new value.
While hovering over the 'Annotate Image' step (with the tail end of the connector-snake), select joyLikelihood from the list of output properties displayed. This will auto-populate a jsonpath within your 'List' input field, and update the type selector to jsonpath.
Add three more values to the value list and repeat the above step for each one, swapping out joyLikelihood for the next emotion in the output properties list.
Finish by adding , inside of the Separator field (below Values in the input property panel) - this will format the list outputted from your workflow.

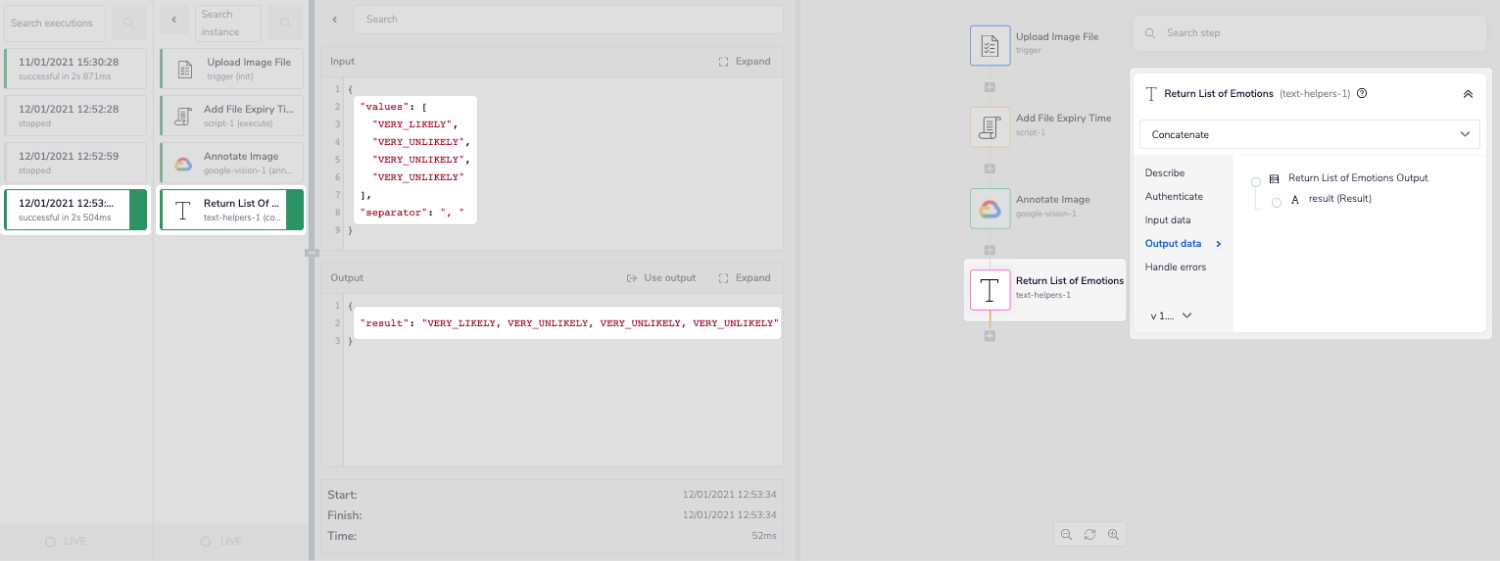
When run, the workflow will now add the required expiry field to your file upload, before annotating it using the Face Detection feature and returning the likelihood of the emotions detected in a formatted list.
You can also check the Debug panel for more details on the provided output:

BEST PRACTICES: Whenever you do decide to create your own workflow, be sure to check out some of our key articles such as: