
Google Tasks 1.0
Google Tasks helps you to access and automate your Google tasks todo list.
OverviewCopy
Google Tasks lets you create a to-do list within your desktop Gmail or the Google Tasks app. When you add a task, you can integrate it into your Gmail calendar, and add details or subtasks. Gmail has offered a Tasks tool for years, but with the new Google design, Tasks is sleeker and easier to use.
AuthenticationCopy
When using the Google Tasks connector, the first thing you will need to do is go to your Tray.io account page, and select the workflow you wish to work on. Once in the workflow dashboard itself, search and drag the Google Tasks connector from the connectors panel (on the left hand side) onto your workflow.
With the new Google Tasks connector step highlighted, in the properties panel on the right,click on 'New Authentication' which is located under the 'Settings' heading.


This will result in a Tray.io authentication pop-up window. The first page will ask you to name your authentication appropriately, and state which type of authentication you wish to make ('Personal' or 'Organisational').
As you can see, the next page asks you for your 'Authentication name' and any 'Scopes' you need.


Select all the necessary scopes and click the 'Add authentication' button. You will be redirected to the Google sign in page, where you will need to fill in your google email and password.


After that you will be sent to another page where Tray.io requests permission to access your Google account details.


Once you have clicked the 'Allow' button, your authentication go back to your authentication field (within the workflow dashboard properties panel from earlier), and select the recently added authentication from the dropdown options now available.
Your connector authentication setup should now be complete.
Available OperationsCopy
The examples below show one or two of the available connector operations in use.
Please see the Full Operations Reference at the end of this page for details on all available operations for this connector.
Note on Operations usageCopy
As the Google Drive connector holds most of the permissions available for downloading Google files (regardless of type) - it is recommended to try revising your workflow to include this connector, should you face any Google file downloading issues.
Example usageCopy
TRAY POTENTIAL: Tray.io is extremely flexible. By design there is no fixed way of working with it - you can pull whatever data you need from other services and work with it using our core and helper connectors. This demo which follows shows only one possible way of working with Tray.io and the Google Tasks connector. Once you've finished working through this example please see our Introduction to working with data and jsonpaths page and Data Guide for more details.
Below is an example of a way in which you could potentially use the Google Tasks connector, to get all of the information available for each individual task.
The steps will be as follows:
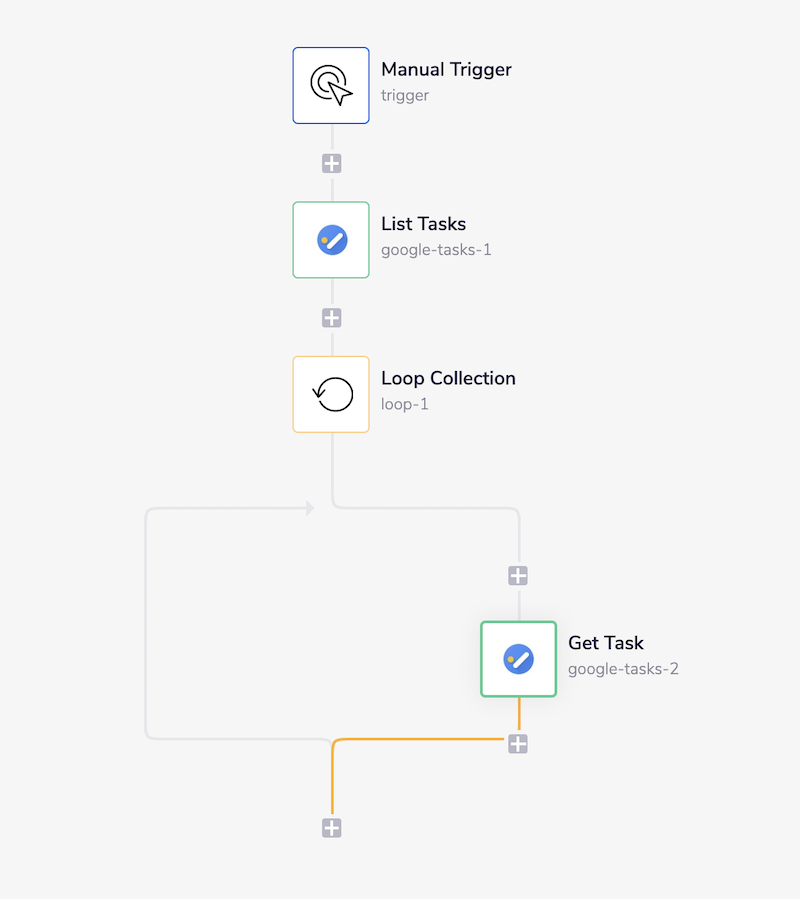
Setup a manual trigger and list the tasks available.
Add a Loop collection step to iterate through each task.
Add another Google Tasks connector to gather the information available for each task.
The final outcome should look like this:

1 - Setup Trigger & List UsersCopy
Once you have clicked 'Create new workflow' on your main Tray.io dashboard (and named the new workflow), select the Manual trigger from the trigger options available:


Once you have been redirected to the Tray.io workflow dashboard, from the connectors panel on the left, add a Google Tasks connector to your second step. Set the operation to 'List tasks'.
You will need your 'List ID' in order to complete this step. Provided you have set up your authentication correctly, this should be available from the dropdown options within the 'List ID' field itself.
As you can see there are several other properties available to further refine the list we desire to create, but for our purposes they are not currently necessary.
Both 'Show completed' and 'Max results' are automatically filled in for you. Feel free to edit them as your needs require.


Feel free to re-name your steps as you go along to make things clearer for yourself and other steps.
When run, this workflow will list all the tasks available within your Google Tasks account.
2 - Add Loop CollectionCopy
The Loop Collection allows you to iterate through a list of results. In this example, we will use it to iterate through each user that was returned by the previous step.
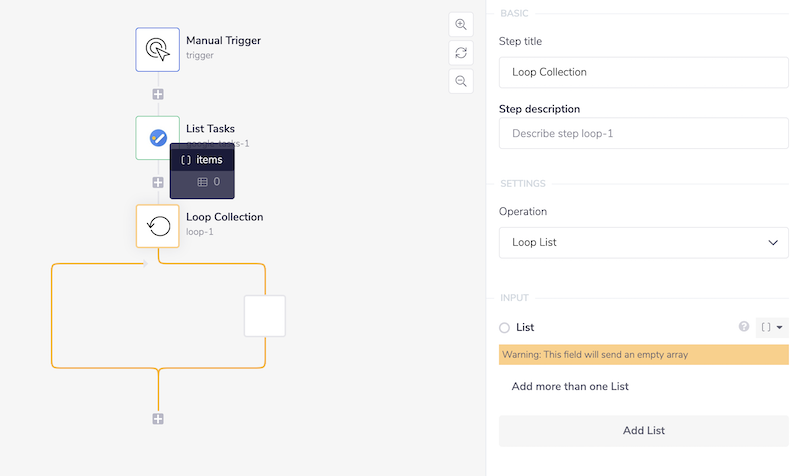
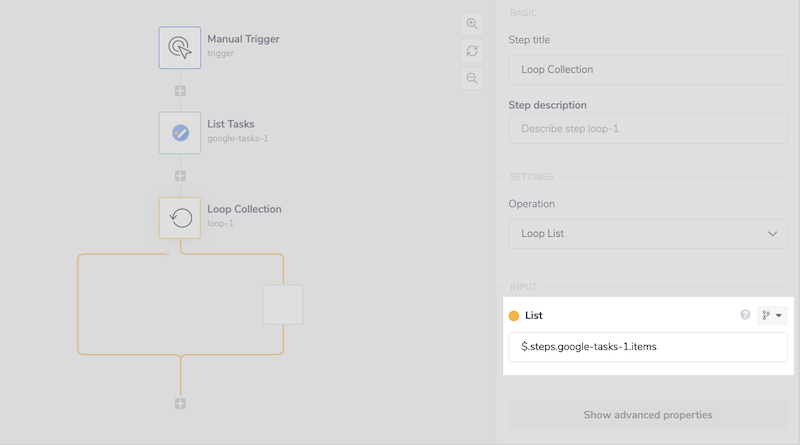
Search for 'loop collection' within your connector panel and drag it into your workflow as the next step. Set the operation to 'Loop List'.


You can specify the list you want to loop through using the 'List' input field. Use the connector-snake to assign this field to the 'items' array that is produced by the 'List tasks' step as exemplified in the images below.


For more details see the links below:
JSONPATHS: For more information on what jsonpaths are and how to use jsonpaths with Tray.io, please see our pages on Basic data concepts and Mapping data between steps
CONNECTOR-SNAKE: The simplest and easiest way to generate your jsonpaths is to use our feature called the Connector-snake. Please see the main page for more details.
When run, this workflow step will iterate through the list of tasks provided one by one.
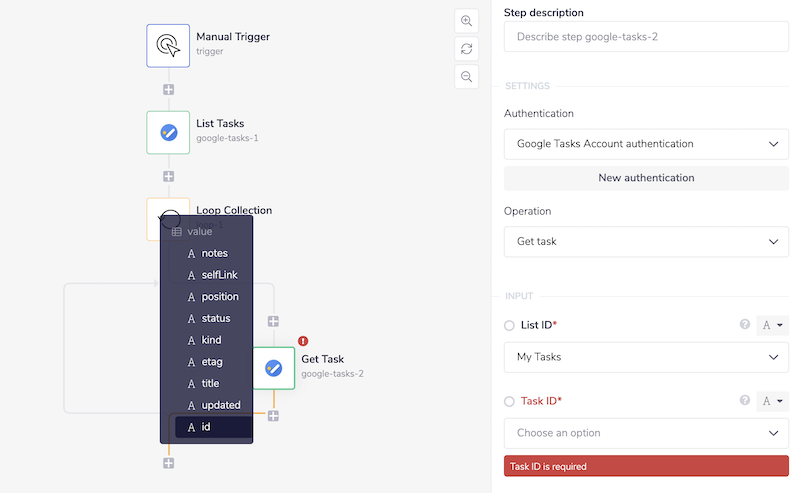
3 - Get taskCopy
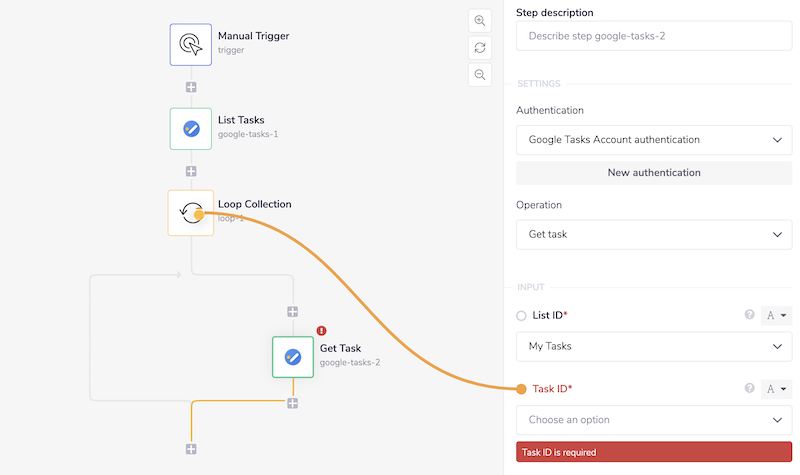
Finally, drag another Google Tasks connector step INTO the Loop collection step itself, and select the operation 'Get task'.
Your 'List ID' will be available in drop down format again, while you can use the same connector-snake method previously for auto-generating the jsonpath to get the 'Task 'ID'. This time, making sure to hover over the Loop step itself.


Once run, your workflow will create a list of tasks from your google account, will iterate through each task and collect all the data available for each one.
BEST PRACTICES: Whenever you do decide to create your own workflow, be sure to check out some of our key articles such as: