
FreshService 1.0
Freshservice is a cloud-based IT Help Desk and service management solution.
OverviewCopy
Freshservice is a cloud-based IT Help Desk and service management solution that enables organizations to simplify their IT operations. The solution offers features that include a ticketing system, self-service portal, and knowledge-base.
AuthenticationCopy
Within the workflow builder, highlight the FreshService connector.
In the FreshService connector properties panel to the right of the builder, click on the Authenticate tab and the 'New authentication' button. This will result in a Tray.io authentication pop-up modal.


Name the authentication something that will easily identify it in a larger list. For example using the name of the service account, whether it is a Sandbox or Production OAuth, etc.
When choosing between the type of authentication you wish to create ('Personal' or 'Organisational'), consider who and how many people will need access to it.
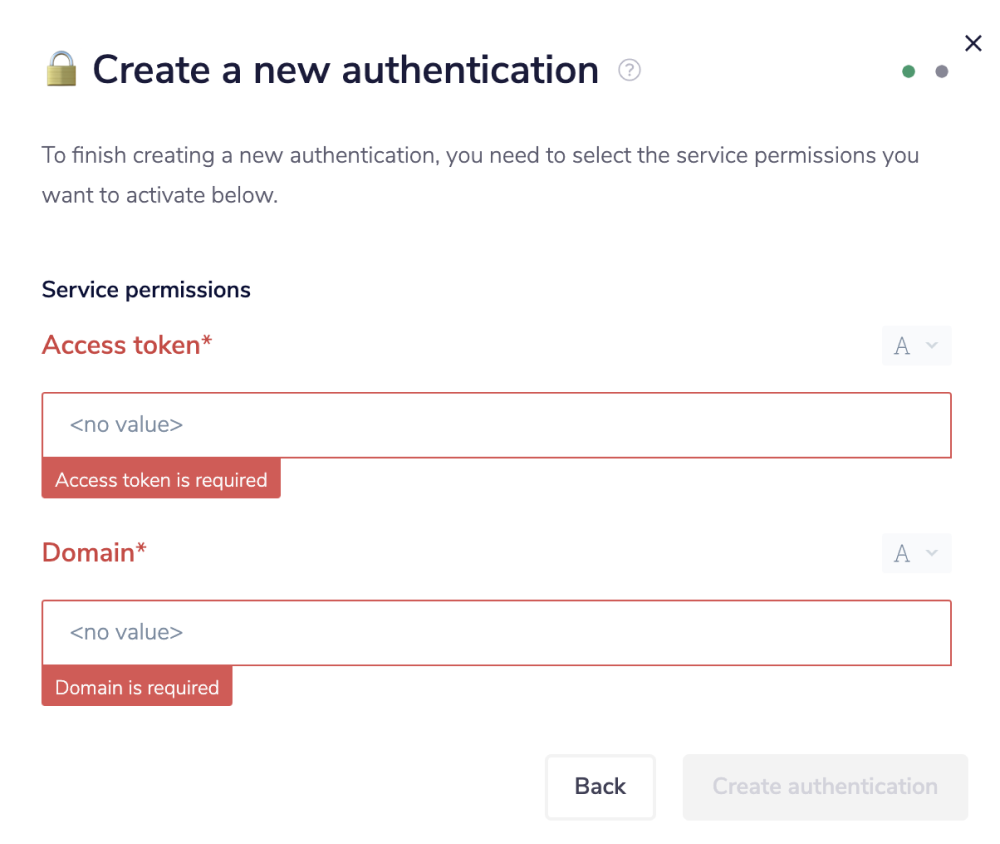
The next page asks you for your 'Access token' and 'Domain' credentials.

To get the 'Domain', head to your FreshService account and sign in. Select the URL of the FreshService account.
The URL will be similar to: https://trayio-org.myfreshservice.com/crm/sales/.
The Domain is the hash between https:// and .myfreshservice.com.
In this case, the Domain is: trayio-org.
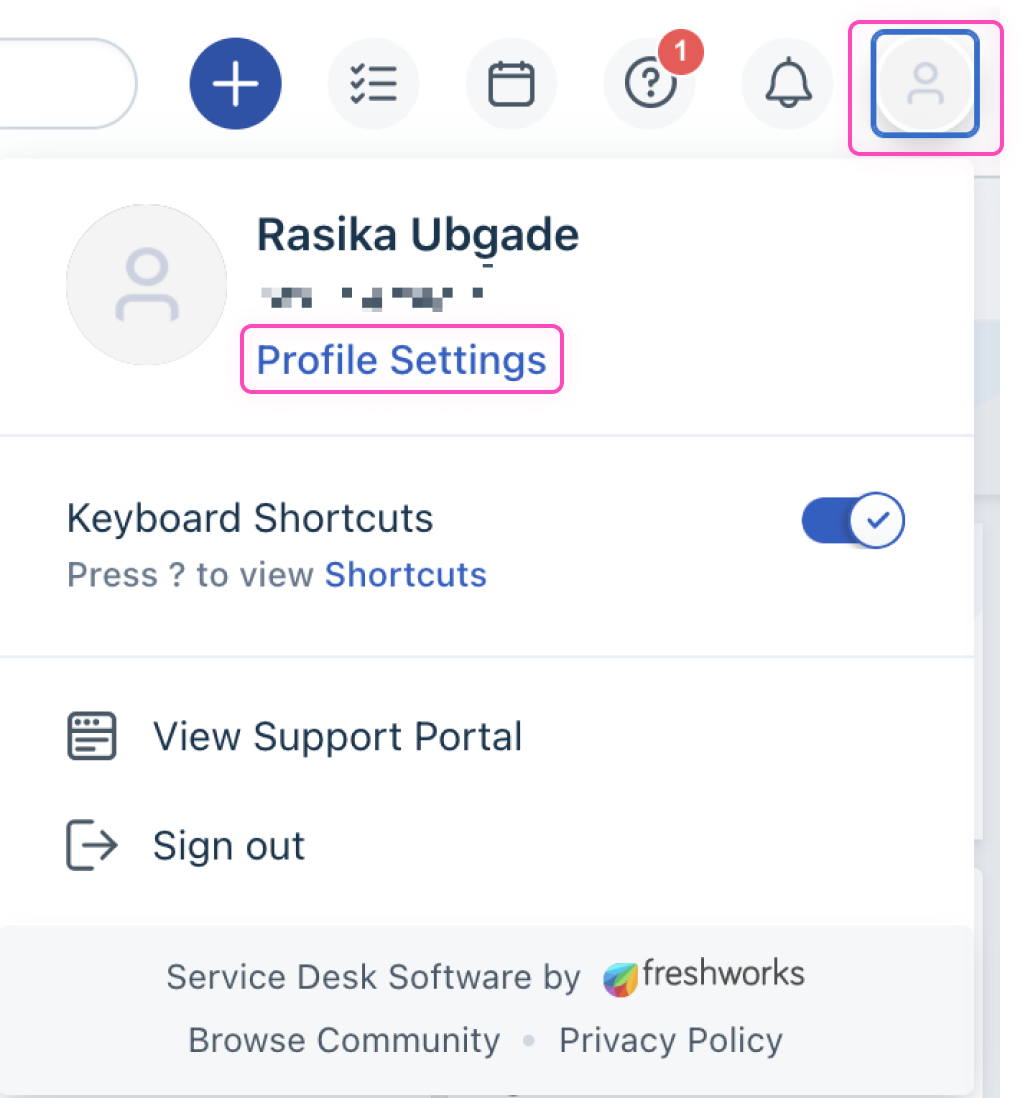
To get the 'API key' on your FreshService account, click on your profile picture on the top right corner of your portal. Go to the 'Profile Settings' page.

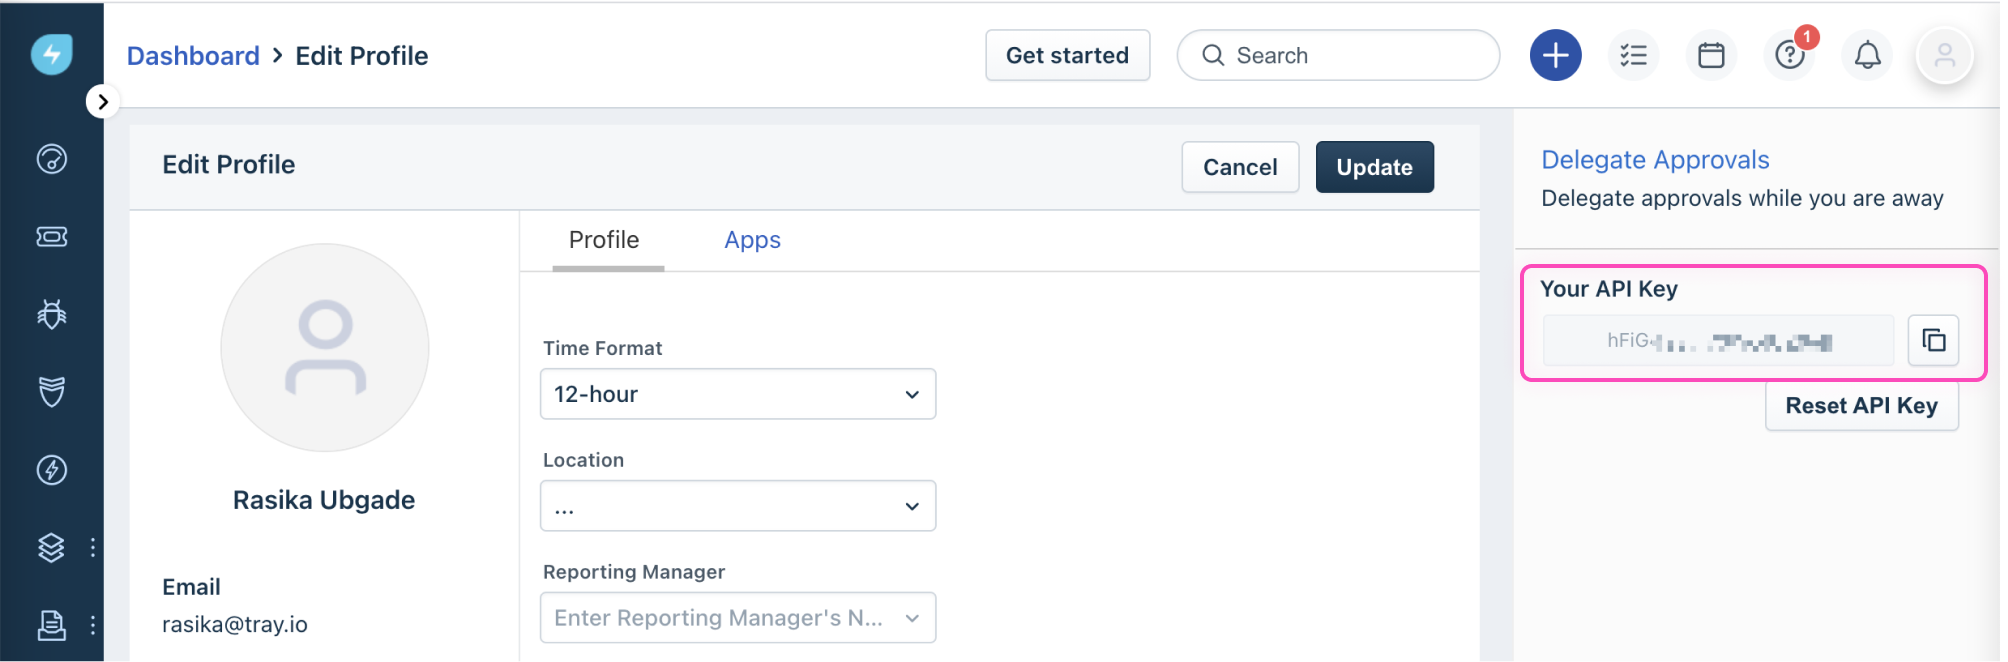
Your API key will be available below the 'Delegate Approvals' section to your right.

Once you have added these fields to your Tray.io authentication pop-up window, click the 'Create authentication' button.
Go back to your settings authentication field (within the workflow builder properties panel), and select the recently added authentication from the dropdown options now available.
Your connector authentication setup should now be complete.
Available OperationsCopy
The examples below show one or two of the available connector operations in use.
Please see the Full Operations Reference at the end of this page for details on all available operations for this connector.
Example UsageCopy
TRAY POTENTIAL: Tray.io is extremely flexible. By design there is no fixed way of working with it - you can pull whatever data you need from other services and work with it using our core and helper connectors. This demo which follows shows only one possible way of working with Tray.io and the FreshService connector. Once you've finished working through this example please see our Introduction to working with data and jsonpaths page and Data Guide for more details.
Below is an example of a way in which you could potentially use the FreshService connector, to create tickets and then send notifications for the newly created tickets on chosen Slack channel.
PLEASE NOTE: In these examples, we show data being received via the Webhook trigger - i.e. a scenario whereby you have configured an external service to automatically send new record data to your Tray.io workflow. In practice, you can receive data in any structure, and in other ways, such as from any pre-built Tray.io service trigger or from a previous workflow step that has pulled data from another source (e.g., Salesforce 'Find Records', CSV Reader, etc.)
The steps will be as follows:
Setup using a Webhook trigger and fetch data.
Loop through the fetched data using a Loop connector.
Create tickets in Freshservice based on the looped data.
Send messages on the selected Slack channel for the newly created tickets.
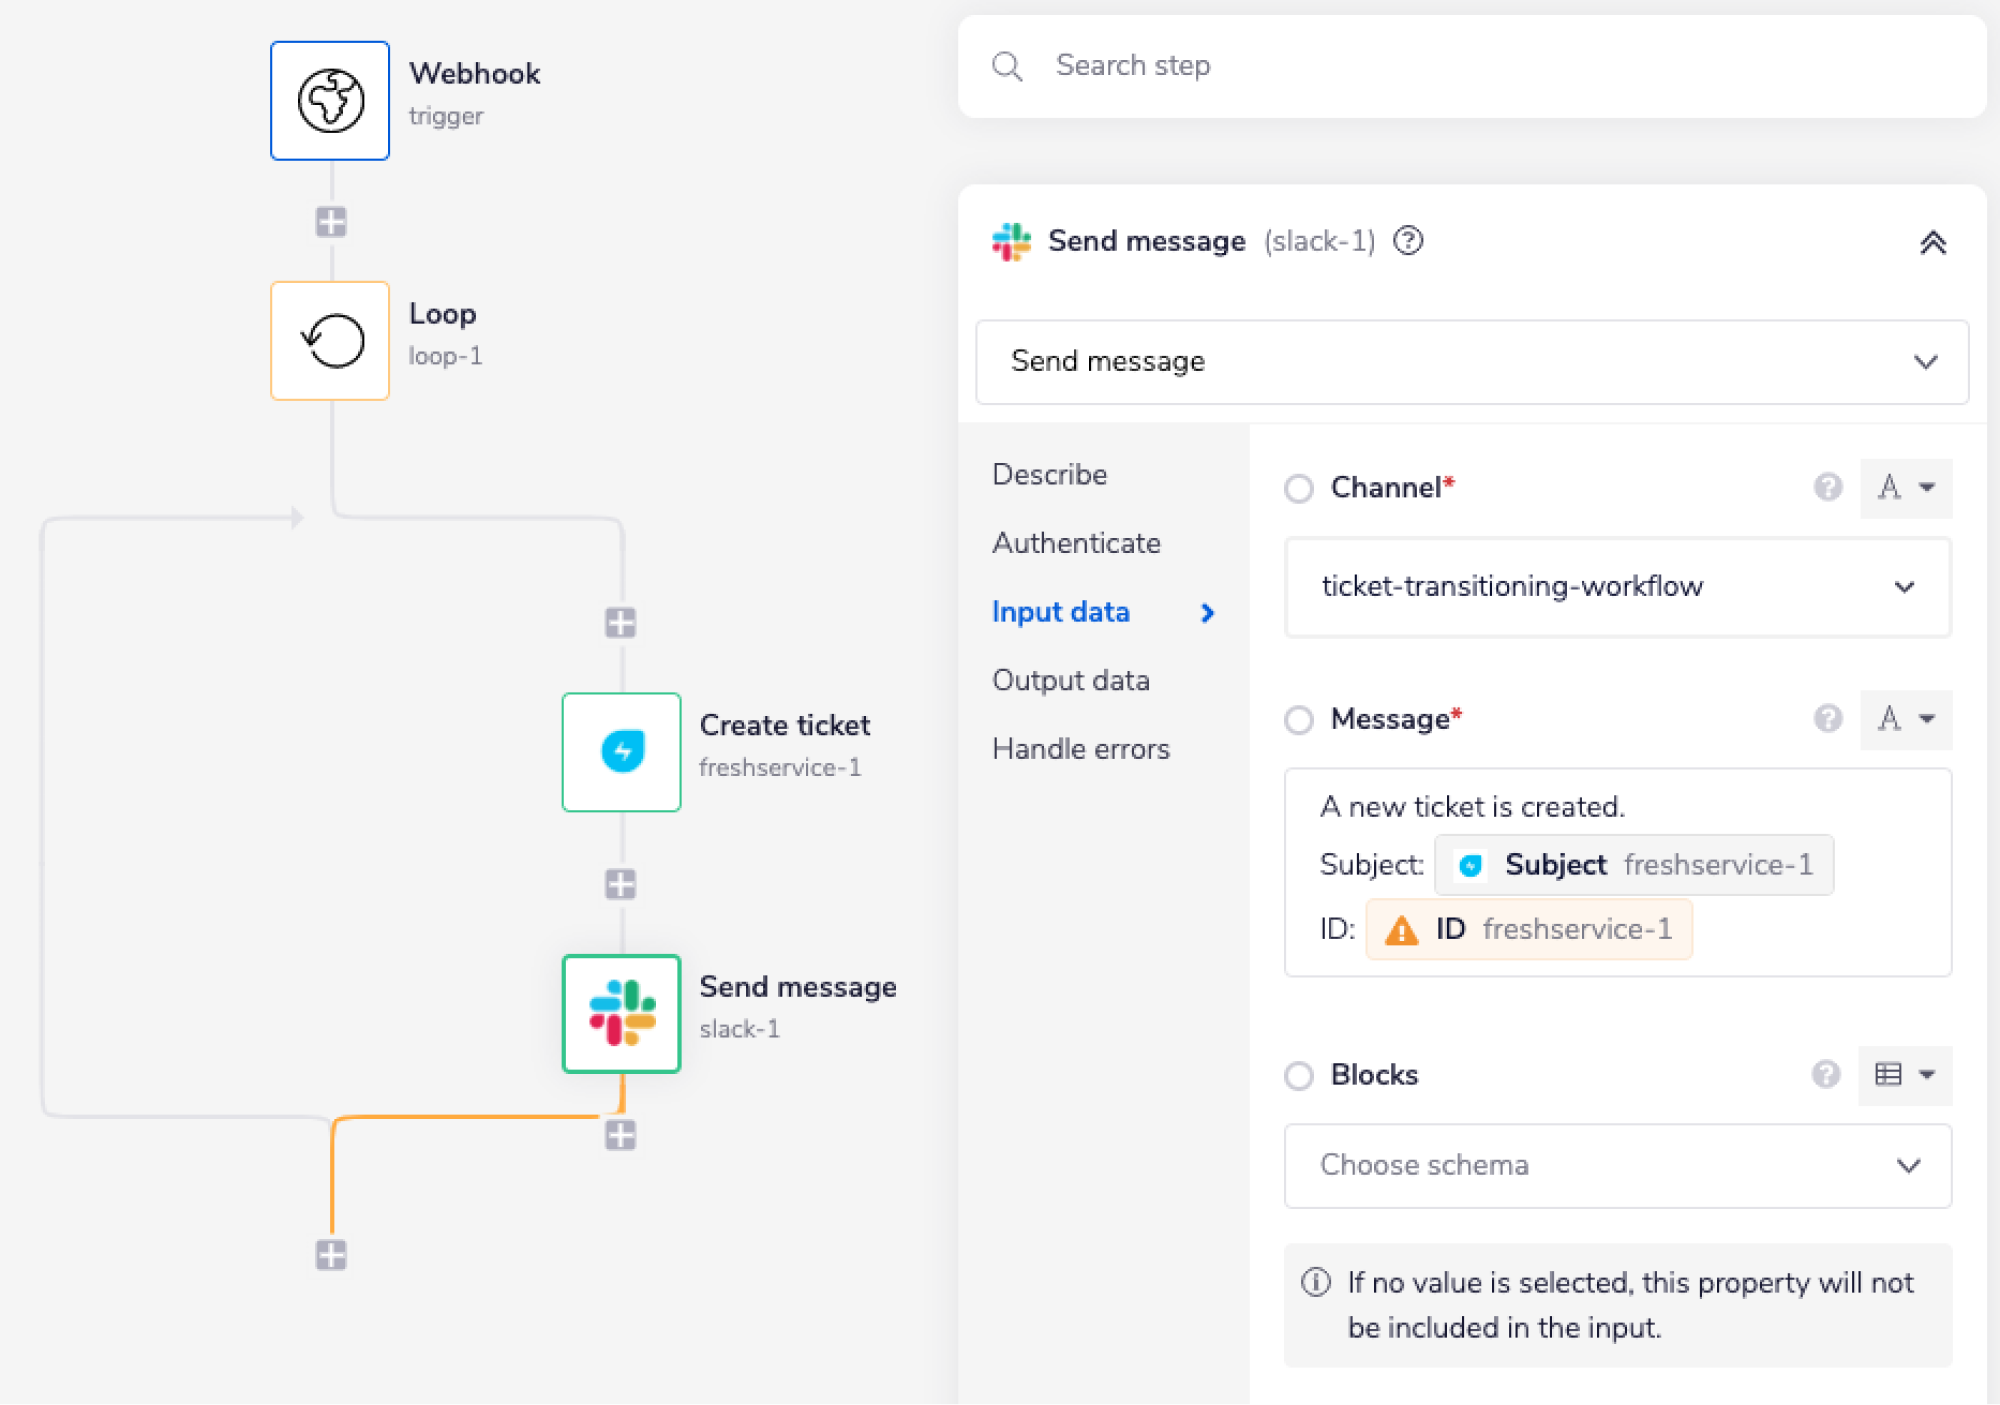
The following workflow demonstrates one approach to achieving this:


1 - Setup TriggerCopy
Setup using a trigger (Webhook in this case) to fetch the data.
The data received through the Webhook trigger is in JSON format:
1[{2"email": "emaggorini0@census.gov",3"subject": "Health Benefits",4"description": "Request information about employee health benefits."5}, {6"email": "lfisher1@feedburner.com",7"subject": "Incorrect information",8"description": "Correct the authentication information in Redshift docs."9}, {10"email": "dgoodridge2@nature.com",11"subject": "Update",12"description": "Update operation references."13}]
Feel free to re-name your steps as you go along to make things clearer for yourself and other users. The operation names themselves often suffice.
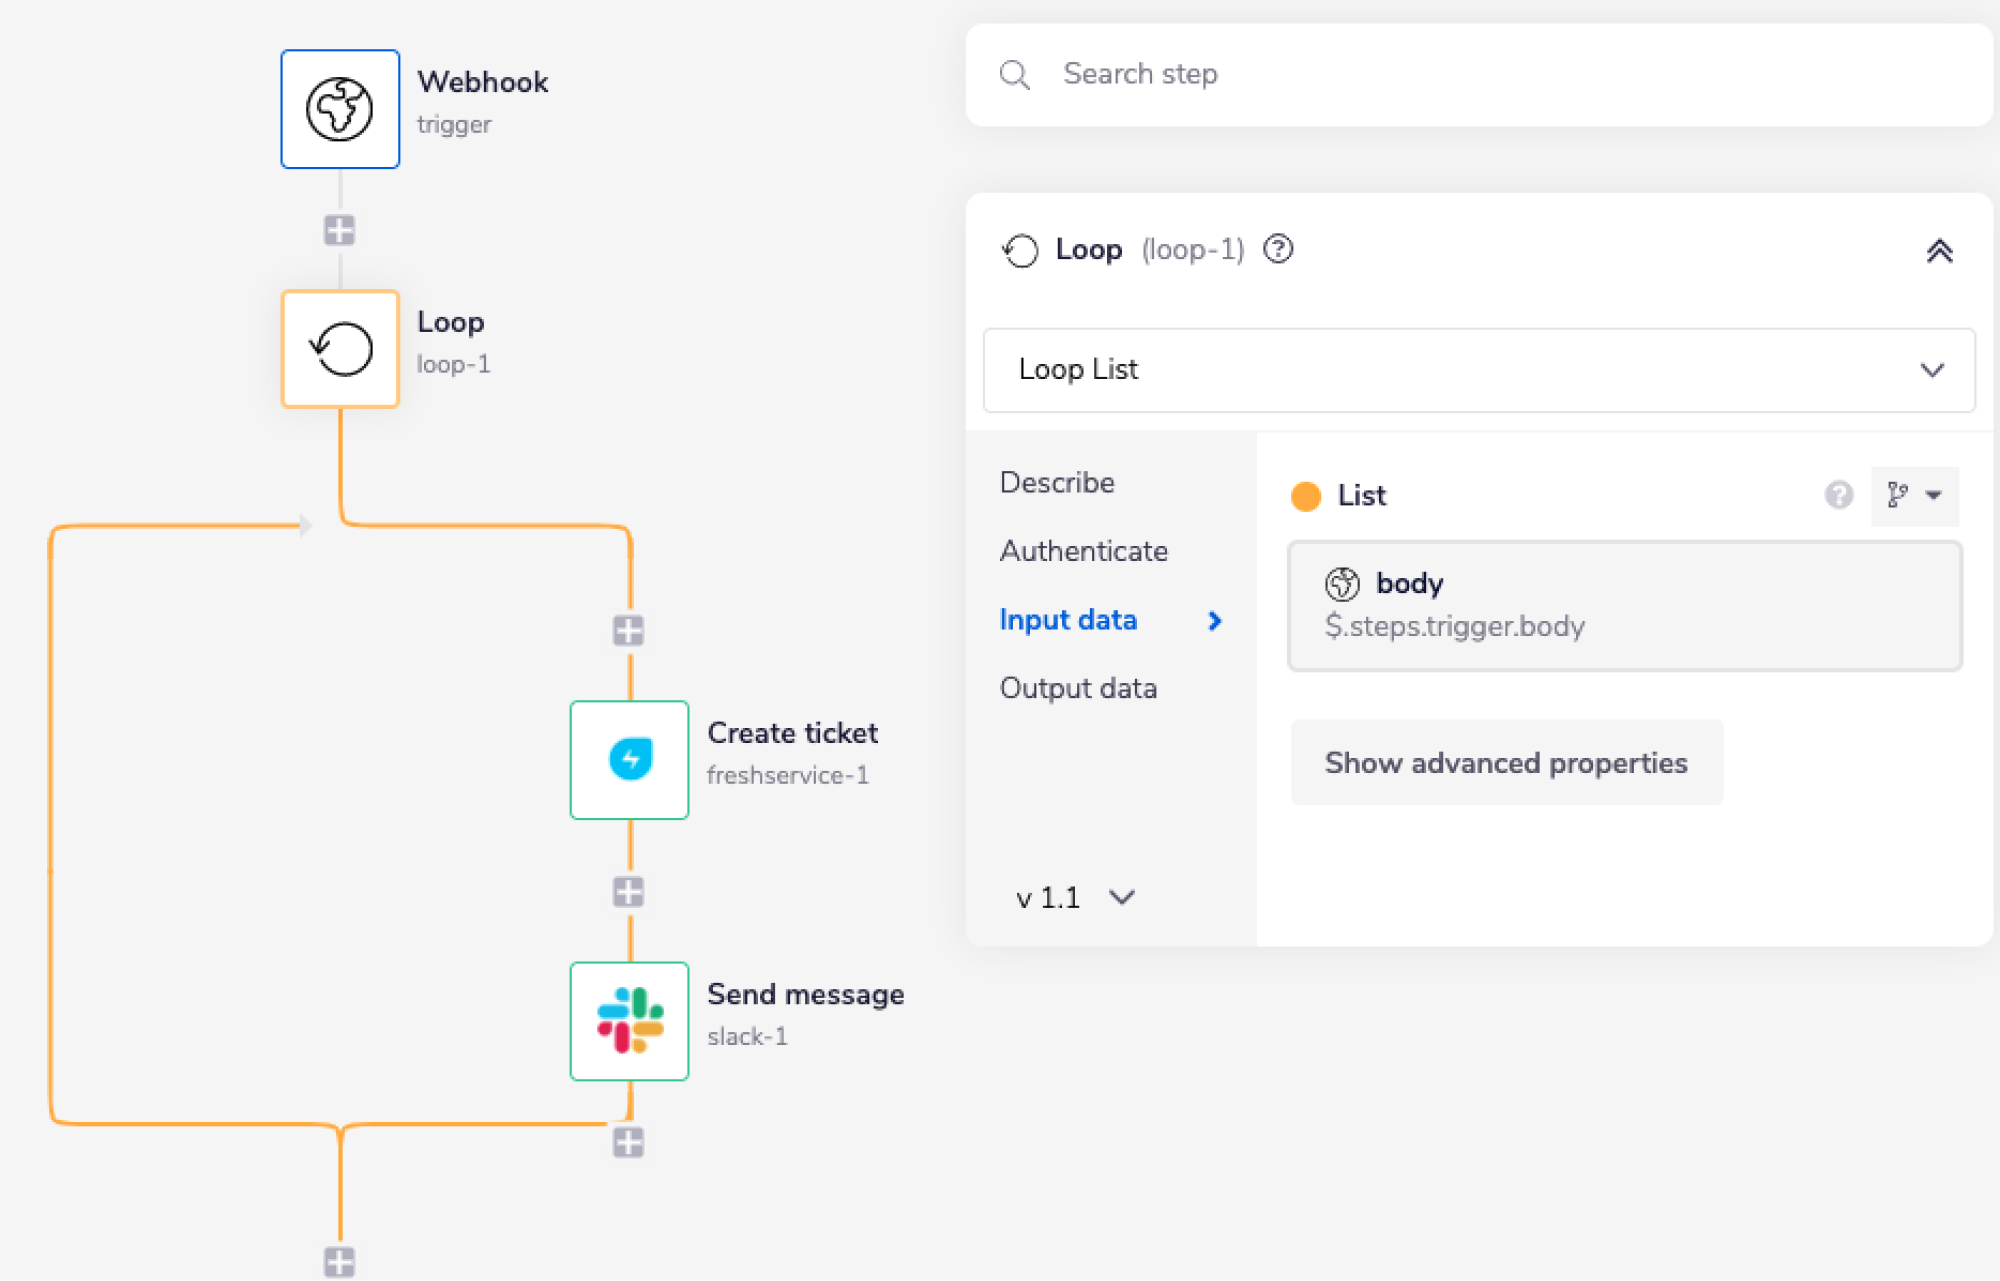
2 - Loop fetched data and create ticketsCopy
Loop is set to 'Loop List' the data received from the trigger.
A jsonpath for the 'List' field should appear similar to this: $.steps.trigger.body. You can always use a connector-snake to find the jsonpath.

JSONPATHS: For more information on what jsonpaths are and how to use jsonpaths with Tray.io, please see our pages on Basic data concepts and Mapping data between steps
CONNECTOR-SNAKE: The simplest and easiest way to generate your jsonpaths is to use our feature called the Connector-snake. Please see the main page for more details.

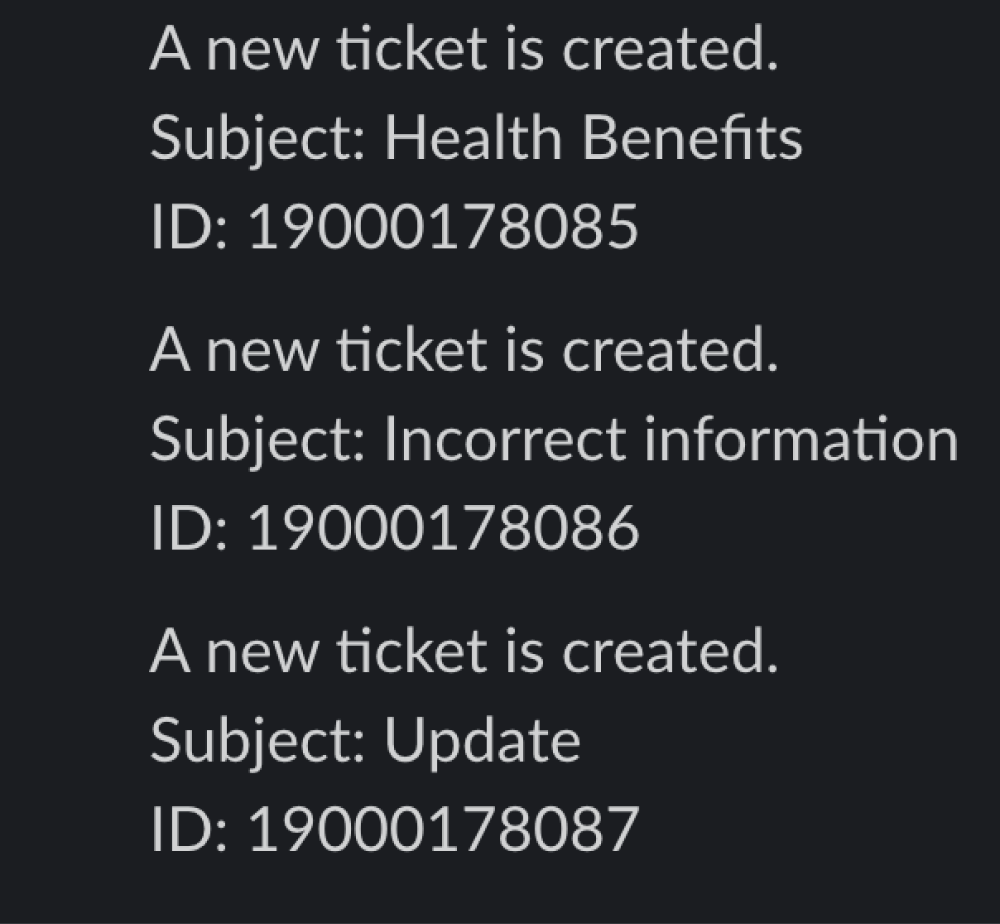
The final message sent on the Slack channel would look like this:

BEST PRACTICES: Whenever you do decide to create your own workflow, be sure to check out some of our key articles such as: