
Filemaker Pro 3.1
FileMaker is a cross-platform relational database. An application that helps you build other smaller applications.
OverviewCopy
Filemaker Pro integrates a database engine with a graphical user interface and security features. Allowing users to modify the database by dragging new elements into layouts, screens, or forms.
API INFO: The Base URL used for the Filemaker Pro connector is <user-determined-hostname>/fmi/data/vLatest/databases/<user-determined-solution-name>/layouts. More information can be found on their main API documentation (v18) site. This is where users will also be able to find the API Limitations page.
Below is an example of a way in which you could potentially use the Filemaker Pro connector, to check and update any records within an Addon. I.e: does this persons subscription exist within the Monthly Subscription Addon?. If yes, update the Addon associated, if none exist create a new one.
The steps will be as follows:
Setup using a Webhook and send preexisting record data to the workflow. Search the record data for using the UUID and reference value.
Create a boolean condition to check whether the record exist within the monthly subscription addon.
If found, update the record data accordingly. If non exist, create a new Addon and add it to the record.
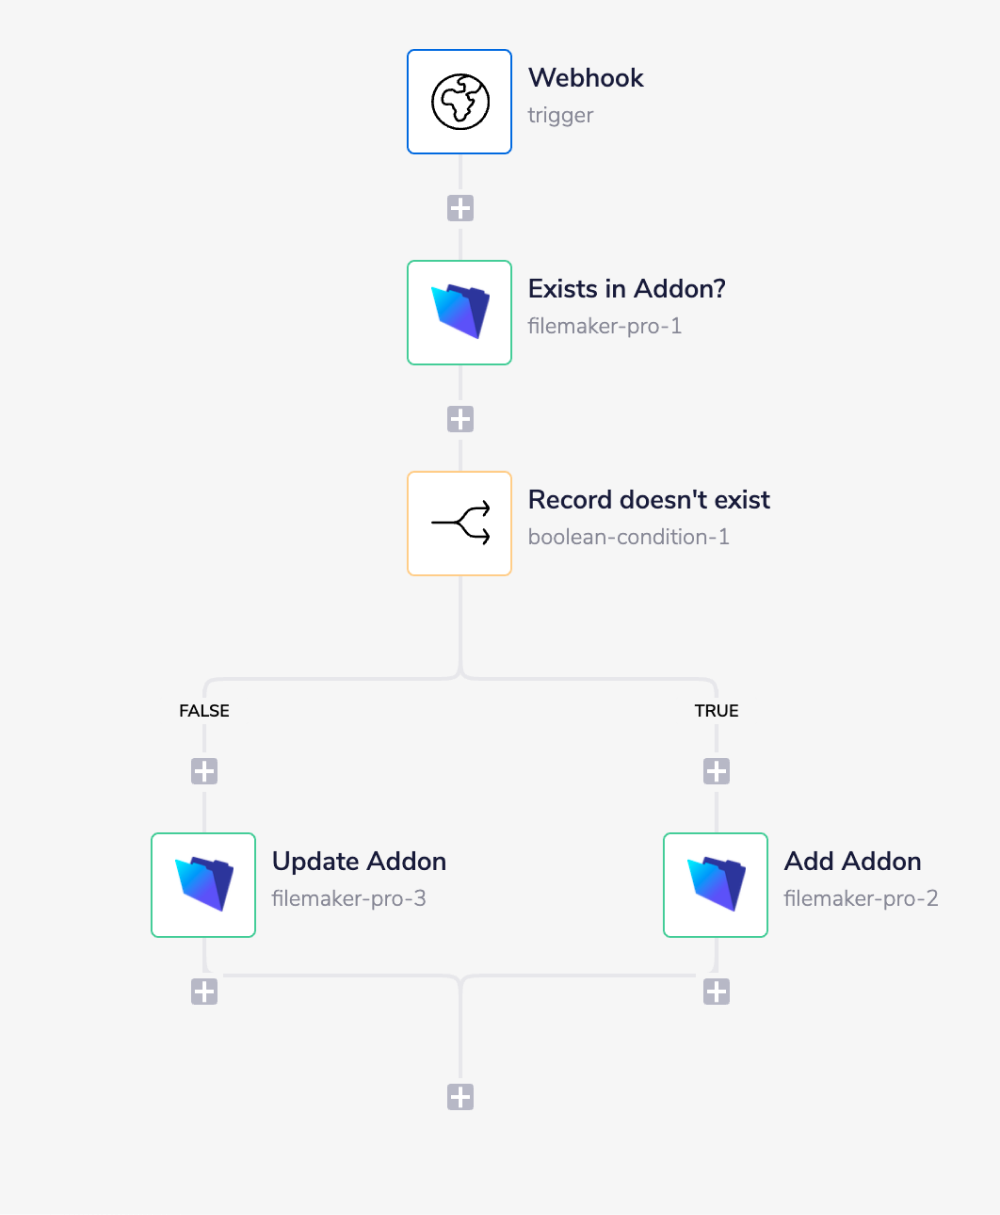
Your completed workflow should look similar to this:

1 - Setup Trigger & search recordsCopy
Select the Webhook trigger from the trigger options available. Make sure your test data is working by enabling the workflow and sending a request. Check the Debug panel for the expected output before continuing.

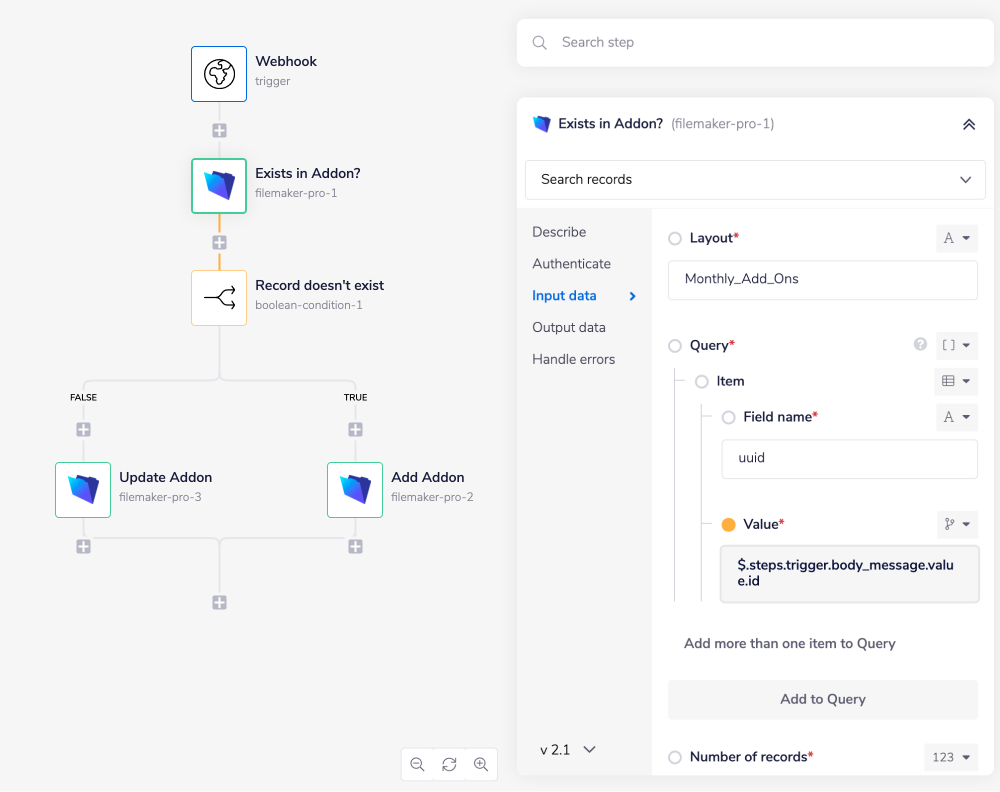
From the connectors panel on the left, add a Filemaker Pro connector to your workflow. Set the operation to 'Search records'.
The 'Layout' field refers to a pre-made arrangement layout created by the user for said record type. in this case, it is known as 'Monthly_Add_Ons'. See your Filemaker Pro UI for more details, specifically the record type's Layout bar:


As these records have uuid fields, this is used for the 'Field name' as it is unique and easy to query. To specify the value, start by using the list mapping icon (found next to the list input field, within the properties panel) to generate the connector-snake.
While hovering over the trigger step (with the tail end of the connector-snake), select id from the list of output properties displayed. This will auto-populate a jsonpath within your list input field, and update the type selector to jsonpath.
JSONPATHS: For more information on what jsonpaths are and how to use jsonpaths with Tray.io, please see our pages on Basic data concepts and Mapping data between steps
CONNECTOR-SNAKE: The simplest and easiest way to generate your jsonpaths is to use our feature called the Connector-snake. Please see the main page for more details.

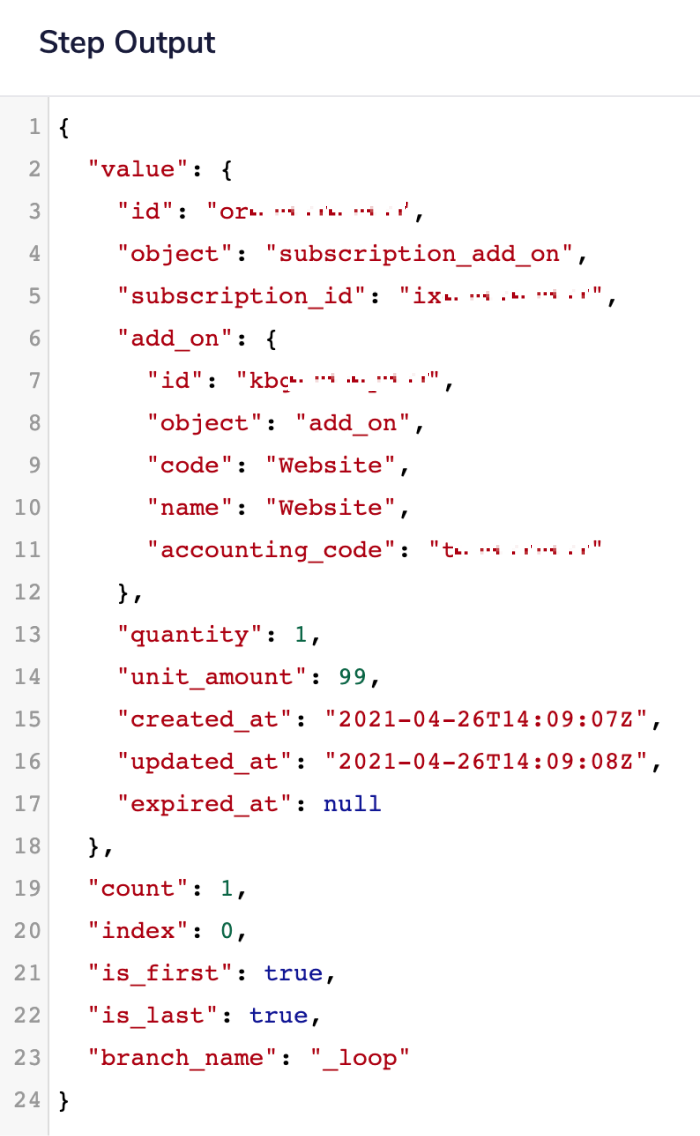
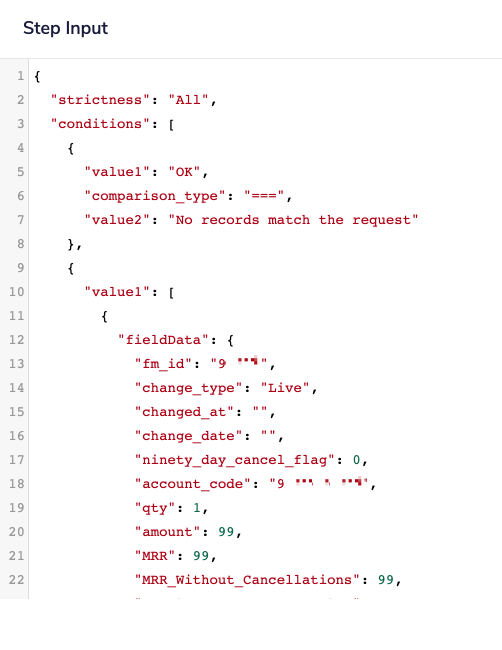
For more clarification on the pathways you have available, open the Debug panel to view your step's Input and Output.
Below is an image of what the record data Input panel would look like once the search has run.


Feel free to re-name your steps as you go along to make things clearer for yourself and other users. The operation names themselves often suffice.
This step is essentially setup for the later query. The data has been sent and the record is searched through using the field name and value specified.
2 - Does record exist?Copy
Next, search for the Boolean connector within your connector panel, and drag it into your workflow as your next step. Set your operation to 'Boolean condition'.

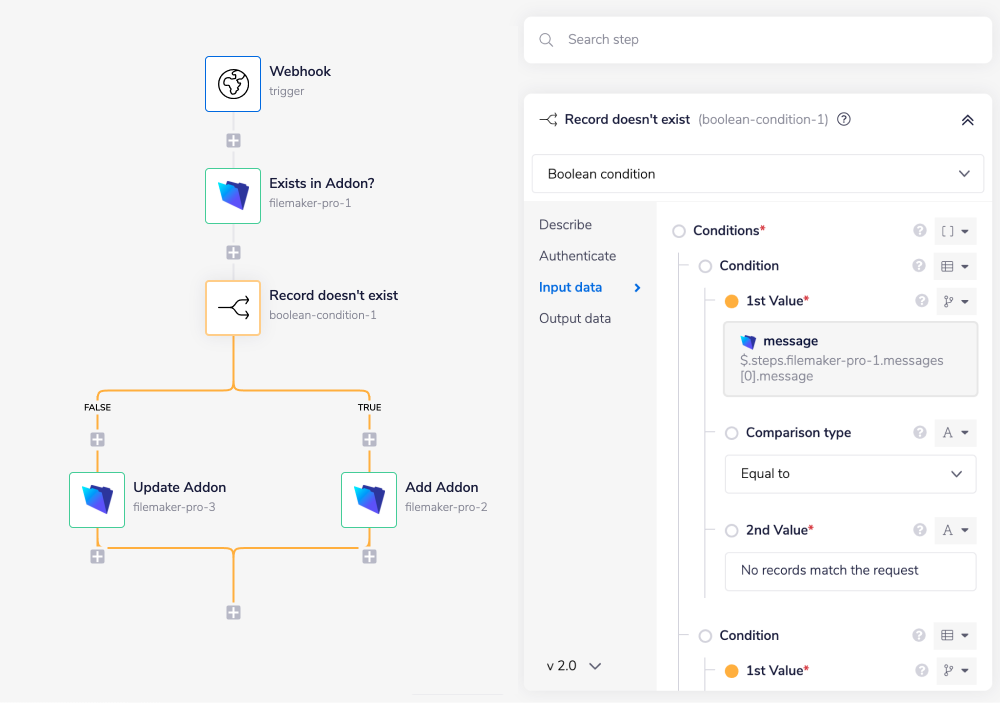
The conditions are set to register whether or not this persons subscription (or record) exists within the Monthly Subscription Addon or not. If it does then the record is updated. If not, then the Addon is created.
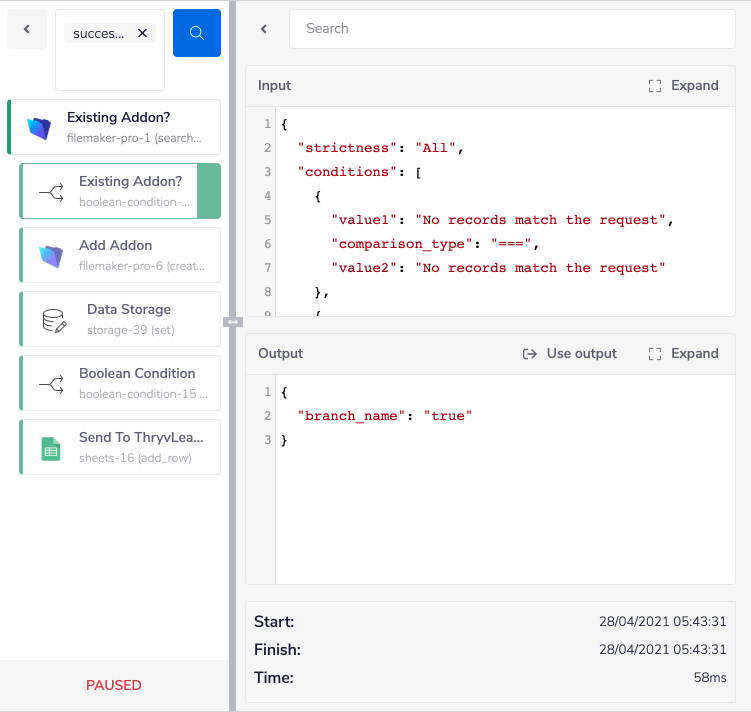
The first condition is set up to check for the returned string No records match the request. Since then statement presented in the Boolean condition is essentially 'Record does not exist', should this be true, then the true branch follows through.
The second condition naturally results in a false condition. See the properties panels below for more details.


The Debug panel shots below demonstrate what the Output looks like depending on the results:


3 - Update or create recordCopy
Once the outcome is determined, you can add as many 'Field data' inputs as you like.

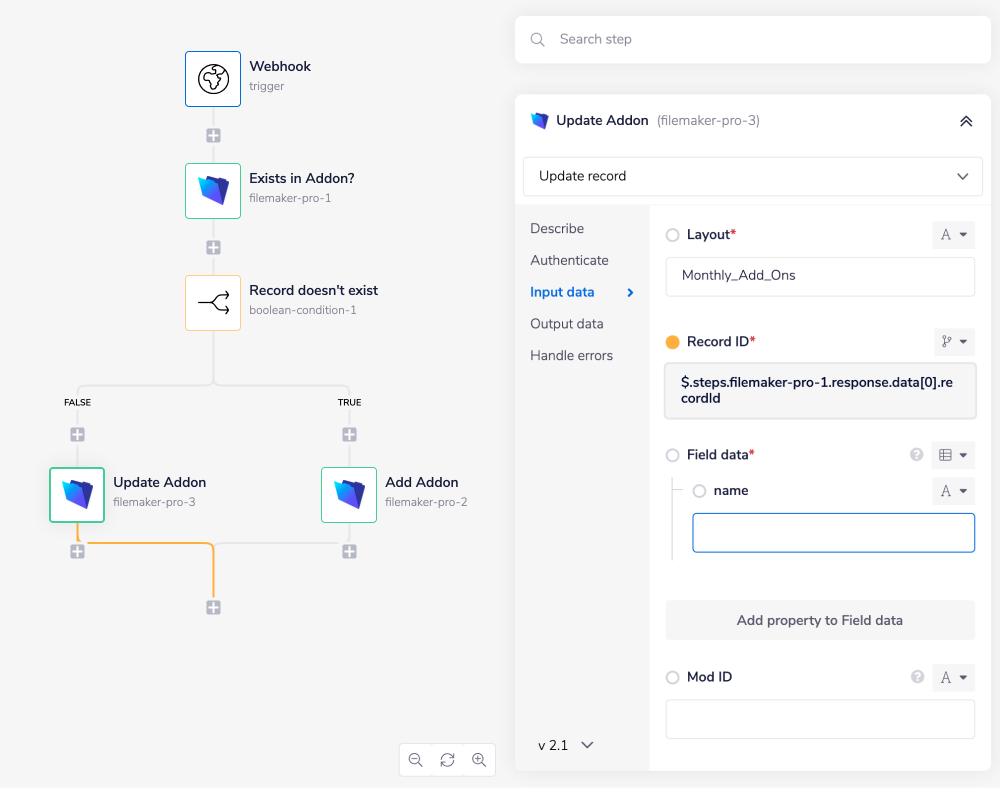
These new fields and values will become part of the record data.
BEST PRACTICES: Whenever you do decide to create your own workflow, be sure to check out some of our key articles such as: