
Cvent 2.1
A leading cloud-based enterprise event management platform.
- On this page
- Cvent
- Overview
- Authentication
- Available Operations
OverviewCopy
Retrieve your Cvent data using the operations for the Cvent SOAP API 'Search' and 'Retrieve' calls, or get your API settings using the operation for the 'DescribeGlobal' call.
AuthenticationCopy
IMPORTANT!: Please ensure that you select the correct corresponding environment of your Cvent account credentials, whether 'Production', 'EU Production', or 'Sandbox'. If you have more than one set of Cvent account credentials you wish to work with, you should create each authentication separately.
When using the Cvent connector, the first thing you will need to do is go to your Tray.io account page, and select the workflow you wish to work on. Once in the workflow builder itself, search and drag the Cvent connector from the connectors panel (on the left hand side) onto your workflow.
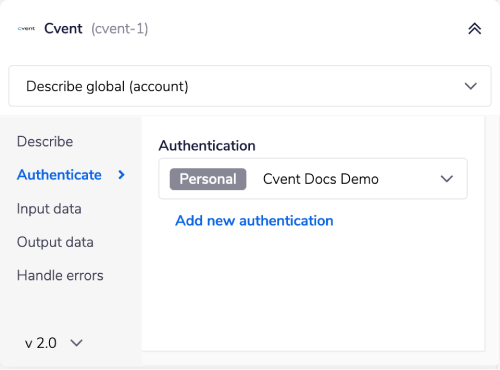
With the new Cvent connector step highlighted, in the properties panel on the right, click on the Authenticate tab and 'Add new authentication' (located under the 'Authentication' field).


This will result in a Tray.io authentication pop-up window. The first page will ask you to name your authentication, and state which type of authentication you wish to create ('Personal' or 'Organization').

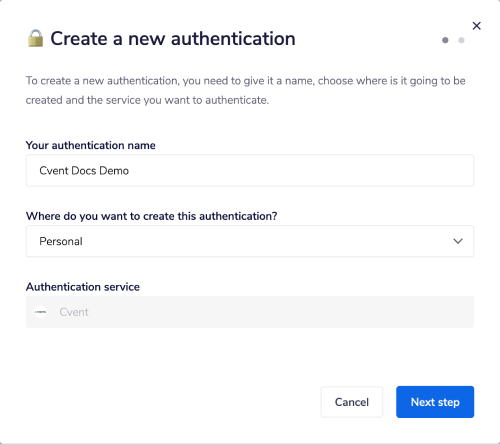
As you can see, the next page asks you for 'Environment', 'Account number', 'Username' and 'Password'.
<span style={{ display: 'block', textAlign: 'center' }}>


<Content type in custom component span TBD>
If you are not sure what your API credentials are, contact your account manager.
Once you have added these fields to your Tray.io authentication popup window, click on the 'Create authentication' button. Go back to your settings authentication field (within the workflow builder properties panel), and select the recently added authentication from the dropdown options now available.

Your connector authentication setup should now be complete.
Available OperationsCopy
The examples below show one or two of the available connector operations in use.
Please see the Full Operations Reference at the end of this page for details on all available operations for this connector.
Note on Operations UsageCopy
Using 'Search' and 'Retrieve by IDs' togetherCopy
For the sake of demonstration, a contrived example usage is described below.
Depending on your use case, rather than first looping through the list of IDs returned by 'Search' it may be more efficient to directly pass the entire list into the 'Retrieve by IDs' operation.


Indeed, this way requires far fewer API calls since 'Retrieve by IDs' only needs to run once. You may then loop through the list of full results that it returns.
The example is more relevant if you specifically wanted to do something with each of the IDs, one at a time, and don't care about the actual data associated with them.
It just so happens that in our example, the thing we are doing with each of the IDs is just retrieving their full data, one at a time.
Example UsageCopy
TRAY POTENTIAL: Tray.io is extremely flexible. By design there is no fixed way of working with it - you can pull whatever data you need from other services and work with it using our core and helper connectors. This demo which follows shows only one possible way of working with Tray.io and the Cvent connector. Once you've finished working through this example please see our Introduction to working with data and jsonpaths page and Data Guide for more details.
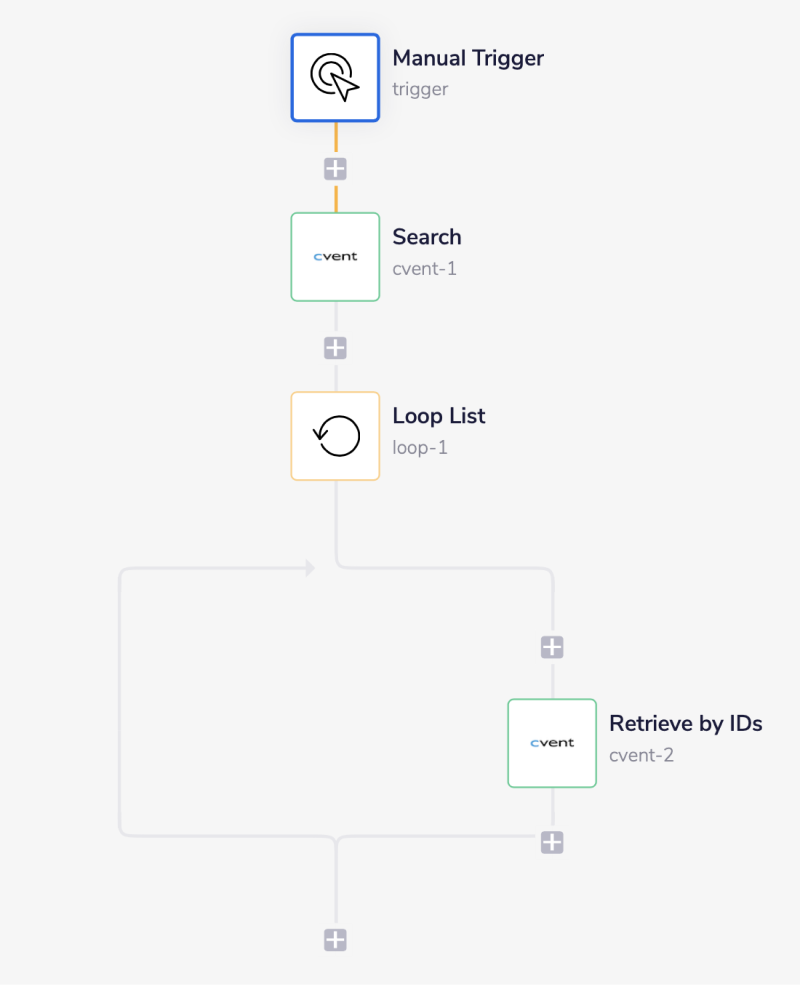
Below is an example demonstrating the 'Search' and 'Retrieve by IDs' operations of the Cvent connector. The workflow loops through a filtered list of Contacts and returns complete data for each contact.
The steps will be as follows:
Setup the Manual trigger.
Add a 'Cvent' connector with the 'Search' operation to get a list of contacts, filtered to only return those contacts that are
ExcludedFromEmail.Add a 'Loop Collection' connector step and set up the 'Loop list' operation to iterate through the list of Contacts.
Add a 'Cvent' connector with the 'Retrieve by IDs' operation to retrieve the entire data of each Contact.
The final outcome should look like this:

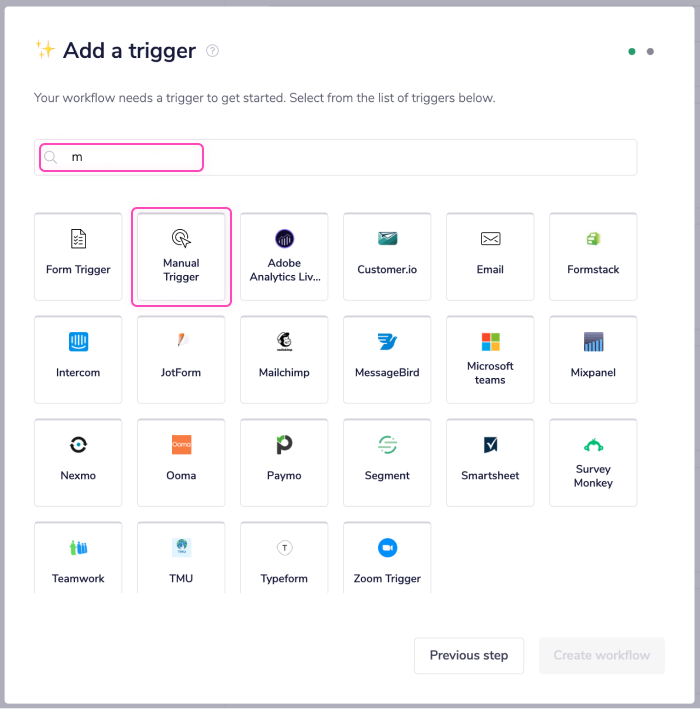
1 - Setup the Manual triggerCopy
Once you have clicked 'Create new workflow' from your main Tray.io dashboard named it, select the Manual trigger from the trigger options available:

After clicking 'Create workflow', you will be redirected to the Tray.io workflow dashboard.

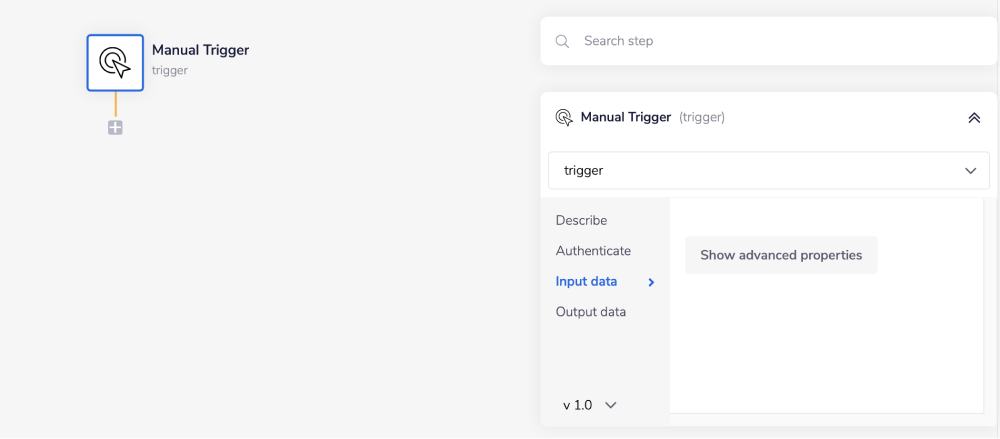
You are now ready to begin building your workflow.
2 - Fetch and loop through a list of contactsCopy
From the connectors panel on the left, add a 'Cvent' connector to your second step. Set the operation to 'Search'.
In this example, we will apply a filter to restrict the number of results we will be dealing with.
To do so, click the 'Add to Filters' button from the properties panel. Provide appropriate values as follows for the filter:
Field: Choose ExcludedFromEmail value from the available drop-down options.
You can start typing until the list shows the value which you can select.
Operator: Set the operator to Equals.
Value: True, type this in.

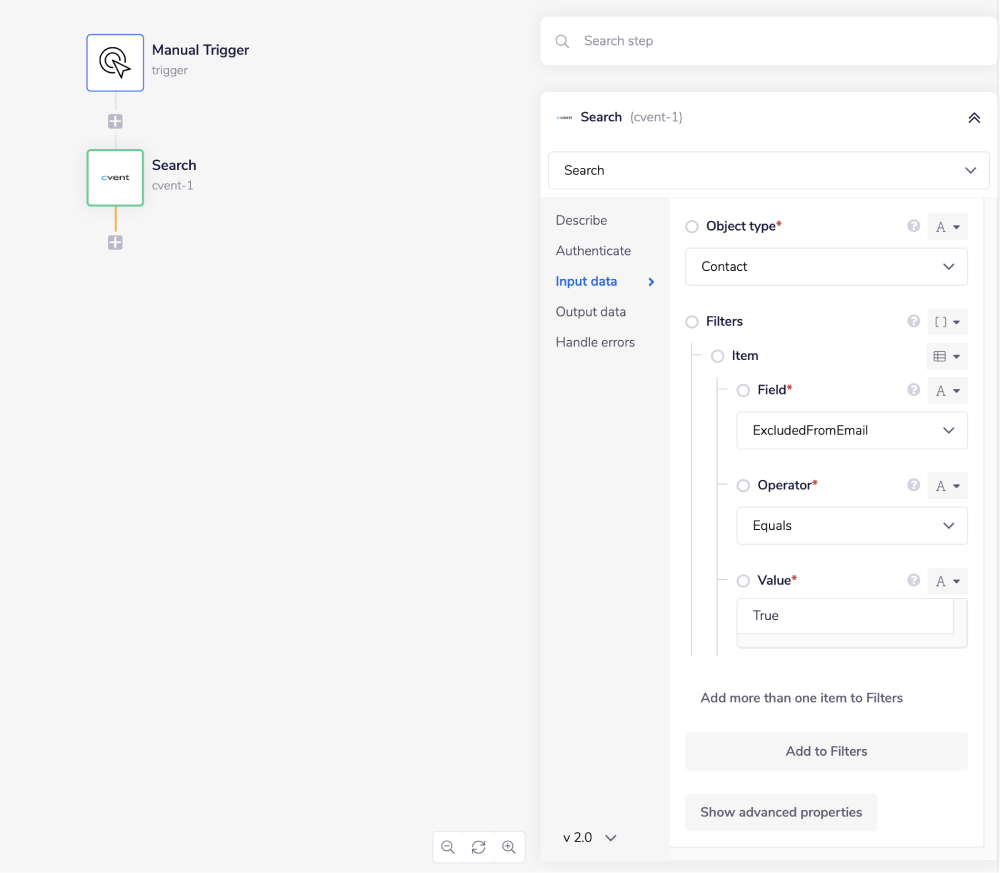
Feel free to rename your steps as you go along to make things clearer for yourself and other users.
We have now set up the Search operation to return a list of IDs of every contact where the field ExcludedFromEmail has the value True.
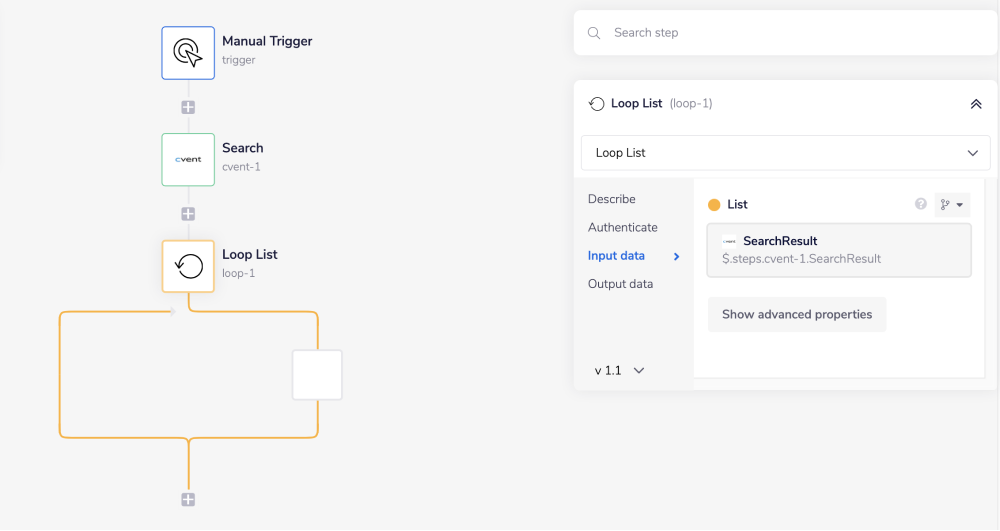
Next, search for the 'Loop Collection' connector within your connector panel, and drag it into your workflow as your next step. Set your operations to 'Loop list'.
The 'Loop Collection' connector allows you to iterate through a list of results. In this example, we will use it to iterate through the list of IDs returned by the previous Cvent connector step.
In order to specify the list, you want to loop through, start by using the 'List' mapping icon (found next to the list input field, within the properties panel) to generate the connector-snake.
CONNECTOR-SNAKE: The simplest and easiest way to generate your jsonpaths is to use our feature called the Connector-snake. Please see the main page for more details.
While hovering over the 'Search' step (with the tail end of the connector-snake), select the array of results SearchResult from the list of output properties displayed. This will auto-populate a jsonpath within your 'List' input field, and update the type selector to jsonpath.
JSONPATHS: For more information on what jsonpaths are and how to use jsonpaths with Tray.io, please see our pages on Basic data concepts and Mapping data between steps
For more clarification on the pathways, you have available, open the Debug panel to view your step's Input and Output.

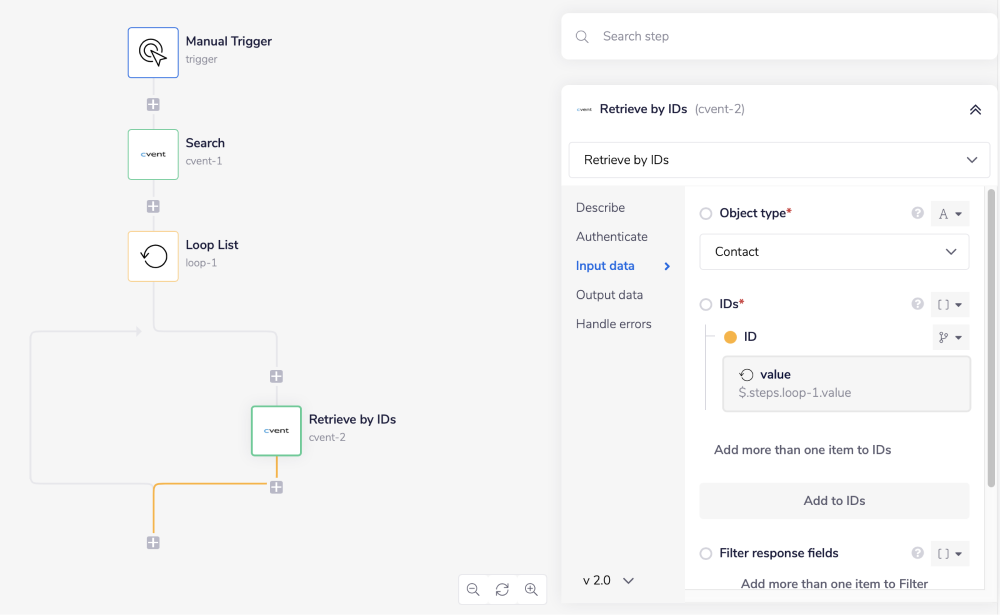
3 - Retrieve entire data for each contactCopy
The last step is to drag a Cvent connector inside of the 'Loop Collection' step itself. Set the operation to 'Retrieve by IDs' and 'Object type' as Contact. As you can see, the 'IDs' field is required.
This means that the 'Retrieve by IDs' operation will run once for each of the ID.
In order to specify this ID, click the 'Add to IDs' button to add a new ID item.
Set the type selector for the ID field as 'jsonpath'. Use the connector-snake to find the jsonpath for the ID field from the previous step. It should appear similar to $.steps.loop-1.value.

Running the workflow will loop through the list of IDs returned by the 'Search' operation, retrieving the complete data of each ID.


BEST PRACTICES: Whenever you do decide to create your own workflow, be sure to check out some of our key articles such as: