
Customer.io 2.0
A messaging platform, allowing marketers to create automated messaging campaigns.
OverviewCopy
Customer.io is an automated messaging platform for marketers who want more control and flexibility to craft and send data-driven emails, push notifications, and SMS messages.
Notes on using Customer.ioCopy
There are three available Customer.io connectors, for each of the three separate Customer.io APIs. These are 'Customer.io - Track', 'Customer.io - App', and 'Customer.io - Beta'.
Each of these connectors has its distinct base URLs and authentication methods.
The base URLs for each of the connectors are as follows:
Customer.io - Track:
US: https://track.customer.io/api
EU: https://track-eu.customer.io/api
Customer.io - App:
US: https://api.customer.io/v1
EU: https://api-eu.customer.io/v1
Customer.io - Beta:
US: https://beta-api.customer.io/v1/api
EU: https://beta-api-eu.customer.io/v1/api
AuthenticationCopy
Within the workflow builder, highlight the Customer.io connector you want to use.
In the Customer.io connector properties panel to the right of the builder, click on the Authenticate tab and the 'New authentication' button. This will result in a Tray.io authentication pop-up modal.

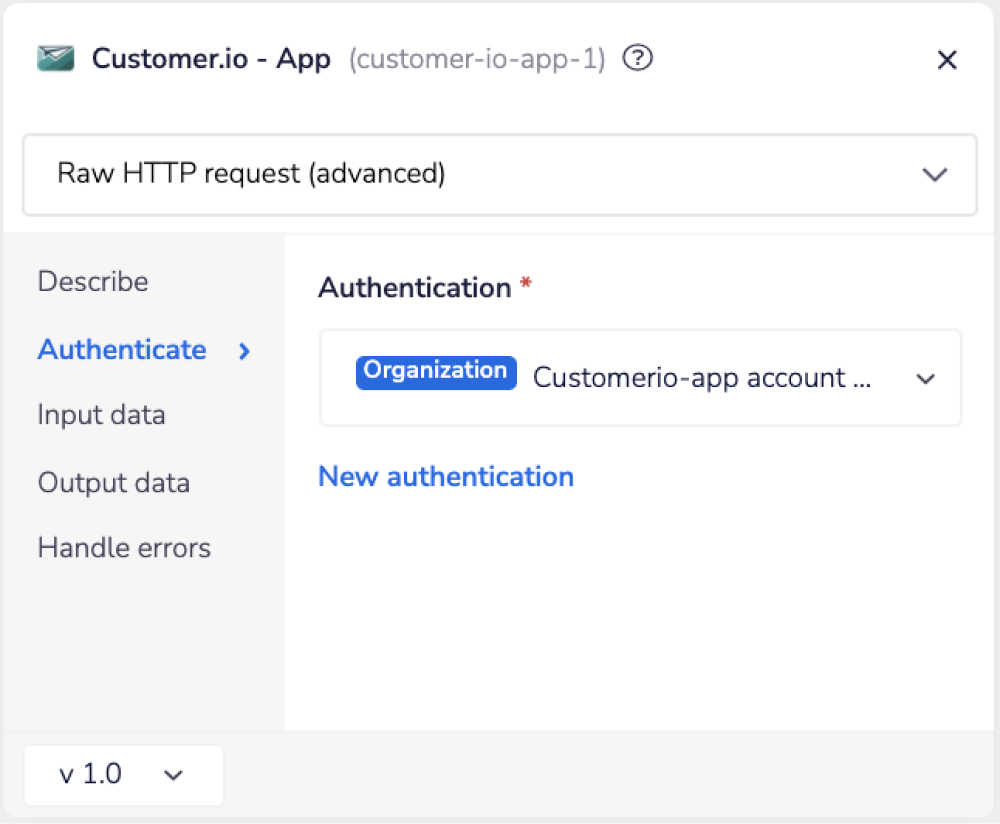
Name the authentication something that will easily identify it in a larger list. For example, using the name of the service account, or whether it is a Sandbox or Production OAuth. Note, it could also be useful to include the specific Customer.io connector - Track, App or Beta - that you are working with.
When choosing between the type of authentication you wish to create ('Personal' or 'Organisational'), consider who and how many people will need access to it.
For the Customer.io App and Beta connectors, the second page asks you for your App/Beta 'API Key' and your chosen 'Region'.
For the Customer.io Track connector, you will be asked for your 'Site ID', Track 'API Key' credentials, for your chosen 'Region'.

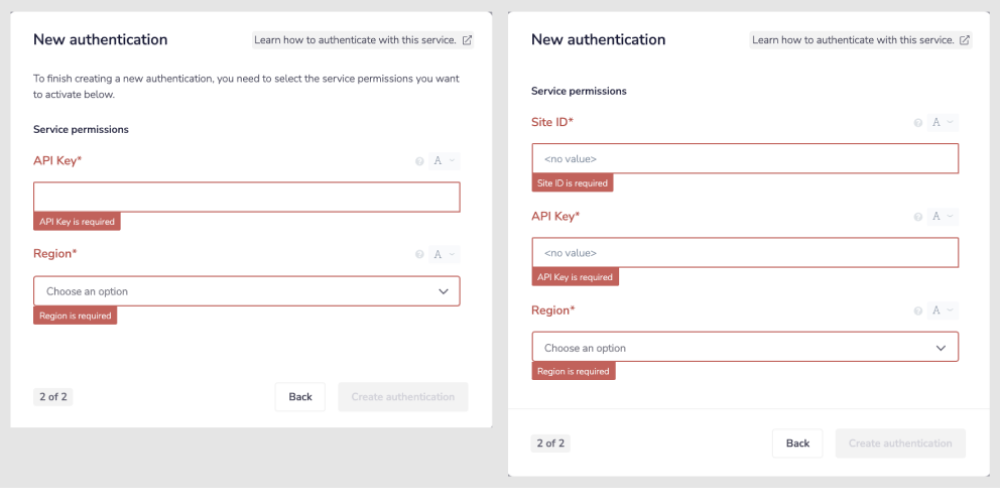
In order to get your credentials, head to your Customer.io dashboard. Click on the 'Settings', 'Account Settings', and navigate to the 'API Credentials' tab.
On this page, you can see separate tabs for Tracking API Keys and App API Keys. Note that the Beta connector will also use the App API key.
Based on your API preferences, select a suitable tab and click on the 'Create API Key' button to generate a new API key and Site ID if applicable.


Once you have added these fields to your Tray.io authentication pop-up window, click on the 'Create authentication' button. Go back to your settings authentication field (within the workflow builder properties panel), and select the recently added authentication from the available drop-down options.
Your connector authentication setup should now be complete.
Available OperationsCopy
The examples below show one or two of the available connector operations in use.
Please see the Full Operations Reference at the end of this page for details on all available operations for this connector.
Using the Raw HTTP Request ('Universal Operation')Copy
As of Customer.io App and Beta connectors version v.1.0, and Customer.io Track connector version v2.0, you can effectively create your own operations.
This is a very powerful feature which you can put to use when there is an endpoint in Customer.io which is not used by any of our operations.
To use this you will first of all need to research the endpoint in the Customer.io API documentation v1, to find the exact format that Customer.io will be expecting the endpoint to be passed in.
You will only need to add the suffix to the endpoint. The base URL value is picked up from the value you chose for 'Region' when you created your authentication. The base URLs for each connector are listed above in the 'Notes on using Customer.io' section. Using this, and the API documentation for your chosen endpoint, add the remaining part of the URL as the 'endpoint' value.
As an example, we will set up the 'Get the status of a broadcast' endpoint from the Customer.io App API.
To do this, you would use the Customer.io API docs to find the relevant endpoint - which in this case is a GET request called: '/v1/campaigns/{broadcast_id}/triggers/{trigger_id}'.
Remembering the base URLs from the 'Notes on using Customer.io' section, the '/v1' part of this endpoint is already accounted for.
So our value for the endpoint will be /campaigns/{broadcast_id}/triggers/{trigger_id}.


As you can see there are two required URL path parameters, Broadcast ID and Trigger ID. Add these to your URL instead of the placeholders. In this example, our values are '8' and '1' respectively, but this may be different for you.
So, if we know what our method and full endpoint is, you can get the status of a broadcast with the following settings:
Method: GET
Endpoint: /campaigns/8/triggers/1
Body Type : none
Final Example outcome being: https://api.customer.io/v1/campaigns/8/triggers/1
Note that this example uses the Customer.io App API, but your base URL may be different.


Now you can see the details of a broadcast. You can see the output of this step in the connector debug panel.


BEST PRACTICES: Whenever you do decide to create your own workflow, be sure to check out some of our key articles such as: