
Bynder 2.0
Bynder offers a cloud-based platform for marketing teams to create, find, and use digital content.
- On this page
- Bynder
- Overview
- Authentication
- Available Operations
OverviewCopy
Brands that leverage media, graphics and documents for marketing or sales efforts are can use Bynder's portal to collaborate globally, produce, review and approve new marketing collateral and circulate company content.
AuthenticationCopy
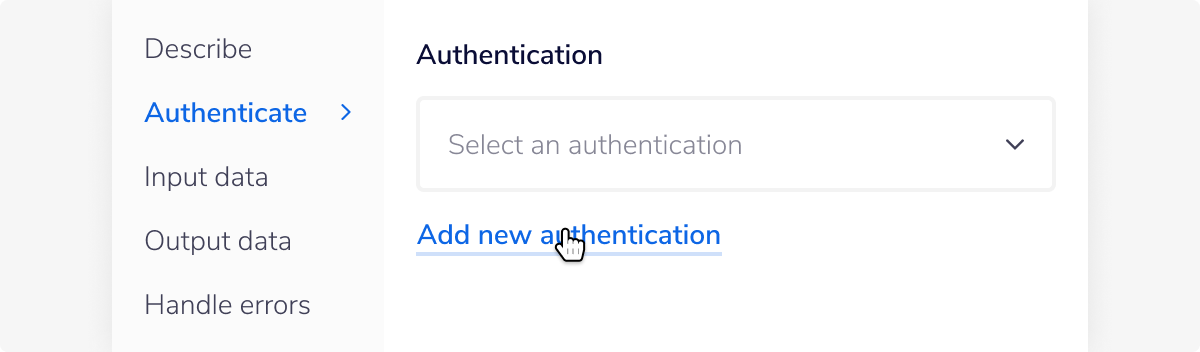
When using the Bynder connector, the first thing you will need to do is go to your Tray.io account page, and select the relevant workflow. Once in the workflow dashboard itself, search and drag the Bynder connector from the connectors panel (on the left hand side) onto your workflow.
With the new Bynder connector step highlighted, in the properties panel on the right, click on 'New Authentication' which is located under the 'Settings' heading.

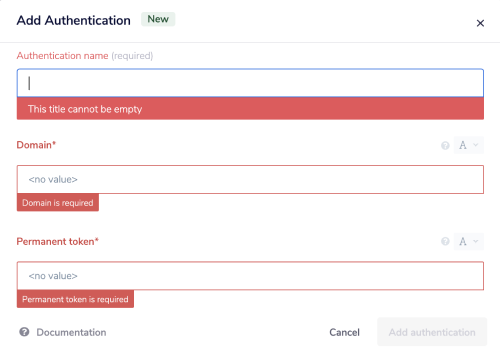
This will result in a Tray.io authentication pop-up window, that should look like the image below.
In order to fully authenticate with Tray.io and Bynder, you will need to name your authentication appropriately, not to mention the 'Domain' and 'Permanent Token'.

These can be found in your Bynder account portal page.
When you log into your Bynder account, copy the domain name used and paste it into your Tray.io 'Bynder domain' authentication. You can also copy it from your browser URL once you are logged in.

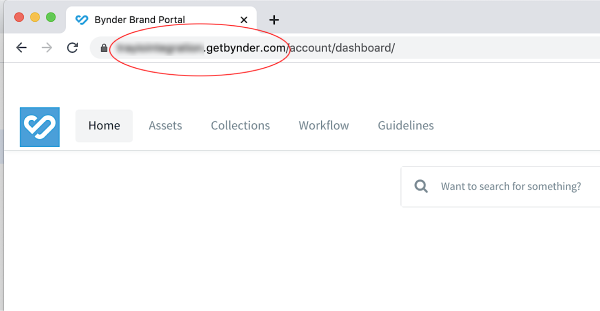
You can access the page where you log into your Asset Library by typing the account URL in your browser. Normally, the URL is : [YourOrganisationName].bynder.com. However it might happen that your company uses a custom URL. In this case you will need to contact your system administrator.
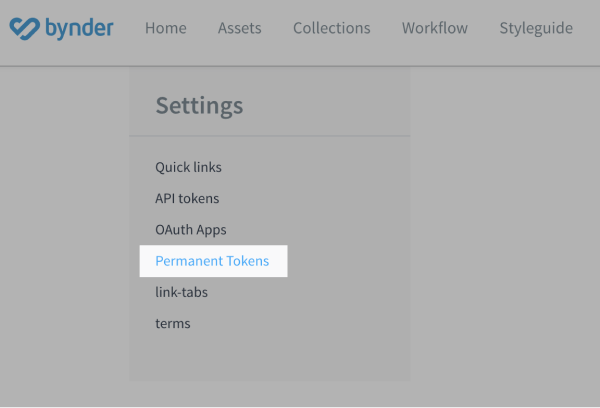
To get the 'Permanent Token', you will first need to navigate to the 'Settings' icon on the right hand side of your Bynder dashboard, and then click on the 'Advanced settings' option to reveal 'Portal settings'.

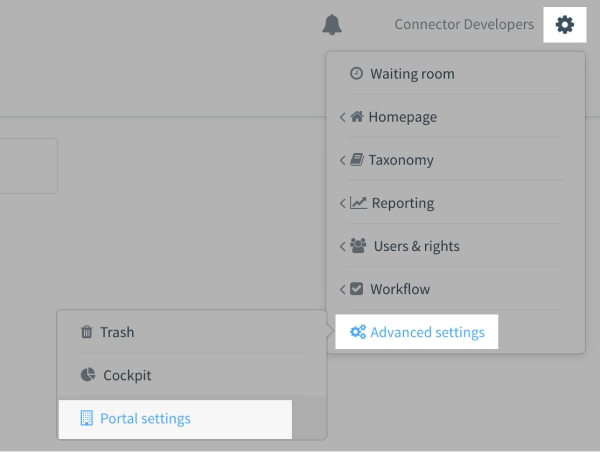
Once you have navigated this far, click on 'Permanent Tokens' which should be located under another 'Settings' menu.
You will need to create a permanent token here if you haven't already done so.

Having followed all of the above, you should have all the requirements you need for your Tray.io authentication box. Once you have added your 'Domain' and 'Permanent token', simply click the 'Add authentication' button to finish the process.
Congratulations! You have now completed the authentication process and can use the Bynder connector. Your auth field will now automatically select the Bynder auth created until stipulated otherwise.
Available OperationsCopy
The examples below show one or two of the available connector operations in use.
Please see the Full Operations Reference at the end of this page for details on all available operations for this connector.
Note on Operations UsageCopy
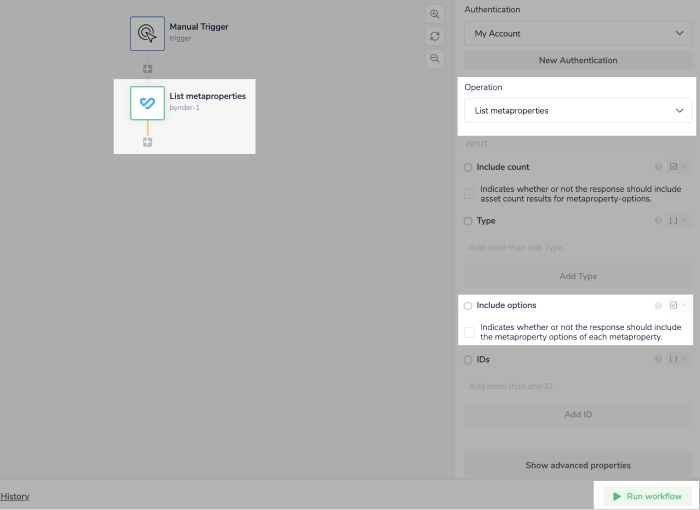
List MetapropertiesCopy
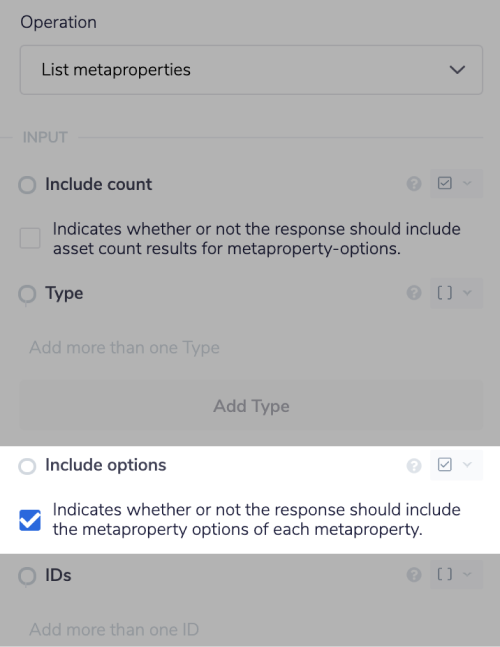
The 'List metaproperties' operation lists all available Metaproperties. Each Metaproperty returns options by default.
For example, the 'Language Metaproperty' has English, French, etc, available to choose from.
The 'Region Metaproperty' includes options such as Europe, Asia, Africa, etc.
You can unselect the include options property to skip options as displayed below:

Modify AssetCopy
You may assign Metaproperties to your assets using the 'Modify asset' operation.
You must include at least one option of the Metaproperty you are targeting.
The 'ID' refers to each unique Metaproperty.


You can only send one request per Metaproperty. If you'd like to add more metaproperties, you need will need to edit your input and click on Run workflow again.
We are currently working on a feature to enable you to send multiple request per Metaproperty.
Upload AssetCopy
To upload files to Bynder you will need to get the file information (such as URL size and name).
Bynder requires files to have an extension i.e. "image.jpg". Note that file managing connectors such as Google Drive will automatically provide the file extension, but Workfront doesn't so please be aware of this when using this kind of operation.
How would you know if the connector includes the file extension?: When connecting your file to your file handling connector, run the workflow. You can then check the Debug tab which is where you have access to your latest workflow runs and their input/ output. The input panel will show what input you sent to Bynder which in this case, will or will not include the file extension.
CONNECTOR-SNAKE: The simplest and easiest way to generate your jsonpaths is to use our feature called the Connector-snake. Please see the main page for more details.

If you're using the Workfront connector, you also need a File Helper connector in order to create a file, using a URL. For more information on this connector please visit our File Helper documentation page.
Example UsageCopy
In this example we imagine a scenario where we would like to grab one of our metaproperties and look at what information they contain.
TRAY POTENTIAL: Tray.io is extremely flexible. By design there is no fixed way of working with it - you can pull whatever data you need from other services and work with it using our core and helper connectors. This demo which follows shows only one possible way of working with Tray.io and the Bynder connector. Once you've finished working through this example please see our Introduction to working with data and jsonpaths page and Data Guide for more details.
The steps will be as follows:
Setup a manual trigger & use your first Bynder connector to list the Metaproperties available.
Get the Metaproperty ID.
Get the Metaproperty information from the ID specified.
The final outcome should look like this:


1 - Setup trigger & list MetapropertiesCopy
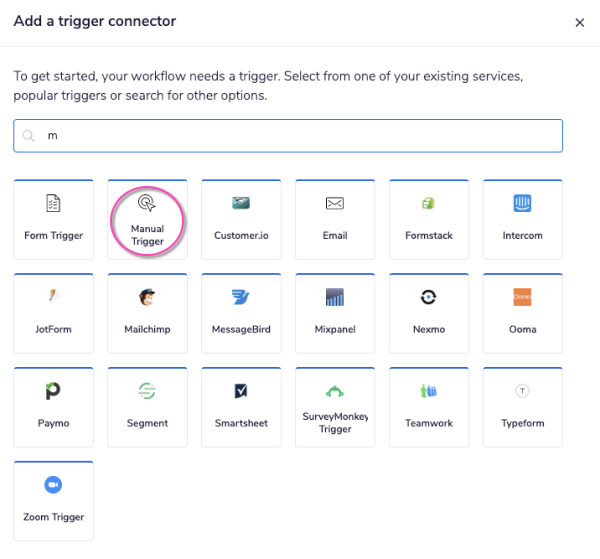
Once you have named your new workflow, select the Manual Trigger from the options available:

Add a Bynder connector to your second step. Set the operation to 'List metaproperties'. Your 'Limit' field should be prepopulated for you, but feel free to change it as you see fit.
You can turn off Include options for this example.

2 - Copy the Metaproperty IDCopy
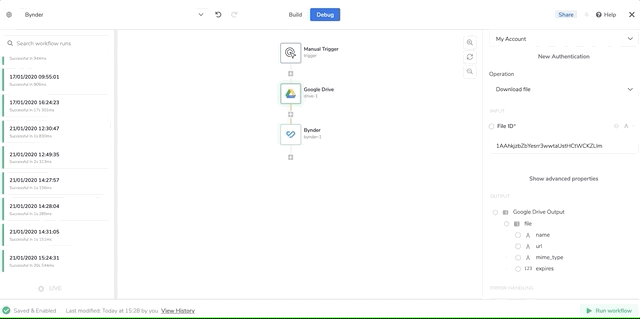
Click on 'Run workflow' followed by the Debug tab at the top of your workflow dashboard.
You will now be able to see the input you sent and the data you received from Bynder. In the output window click on Expand to view your result more easily:

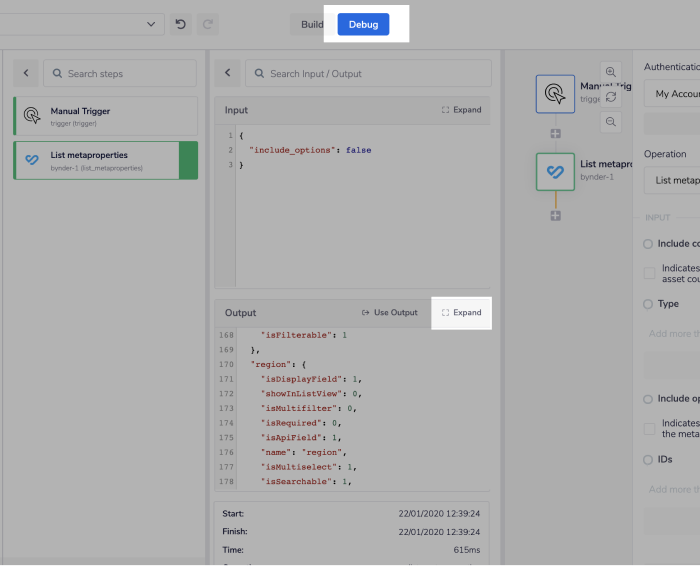
For this example I am going to choose the region metaproperty. So I look for the keyword 'ID', which is within 'region'. Copy the ID without the ID keyword and double quotes.
e.g: 67A2A361-9177-43BD-861998E686XXXXXX or whatever your own region ID would be.

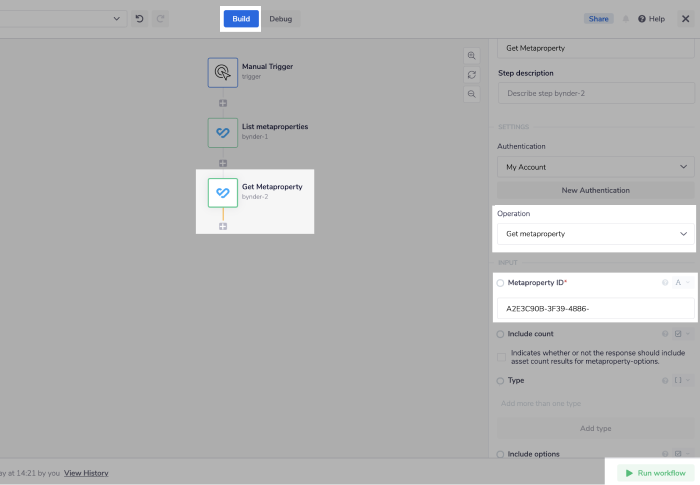
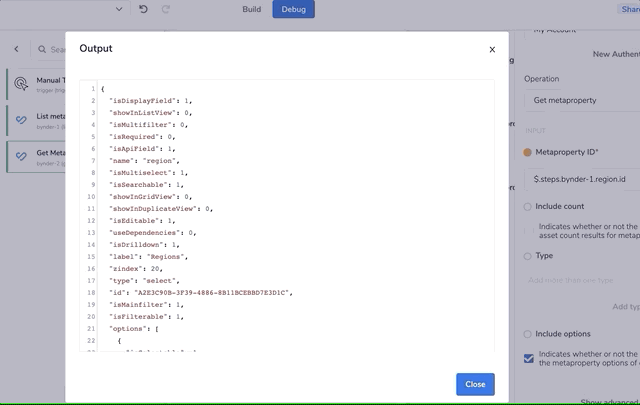
3 - Get the MetapropertyCopy
Now select another Bynder connector and add it to your workflow.
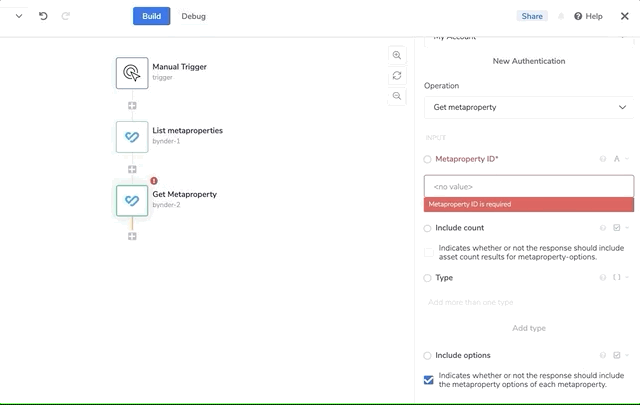
Can we not use the same connector to look for another operation?: Certainly! but for a smoother presentation experience and future references of the workflow I suggest to list your actions separately. To do this, select 'Get metaproperty' from the operation dropdown list and paste your ID into the 'Metaproperty ID' field. Now click Run Workflow.

Alternatively you can JSON path the ID field to grab it from List metaproperties. Here I only change the name of the metaproperty to "region":
JSONPATHS: For more information on what jsonpaths are and how to use jsonpaths with Tray.io, please see our pages on Basic data concepts and Mapping data between steps

Following Step 2 to get to the output via the Debug tab here are the output result:
BEST PRACTICES: Whenever you do decide to create your own workflow, be sure to check out some of our key articles such as: