
Braintree 1.0
Braintree is a service connector that specializes in mobile and web payment systems for e-commerce companies.
- On this page
- Braintree
- Overview
- Authentication
- Braintree Trigger
OverviewCopy
Braintree is a mobile and web payment platform that helps merchants to reach more buyers and drive higher conversion with a payment solution that processes PayPal, Venmo, credit and debit cards, Apple Pay, and Google Pay.
AuthenticationCopy
Within the builder, click on the Braintree connector to display the connector properties panel. Select the 'Authentication' tab and click on the 'New authentication' button.

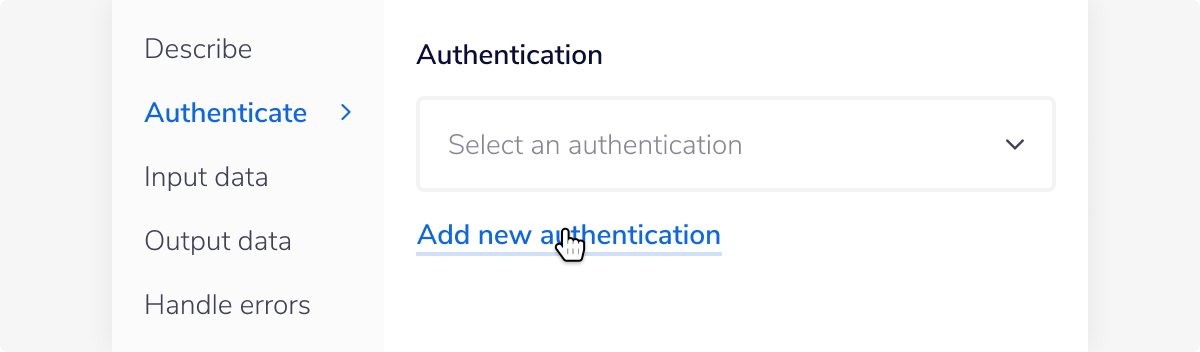
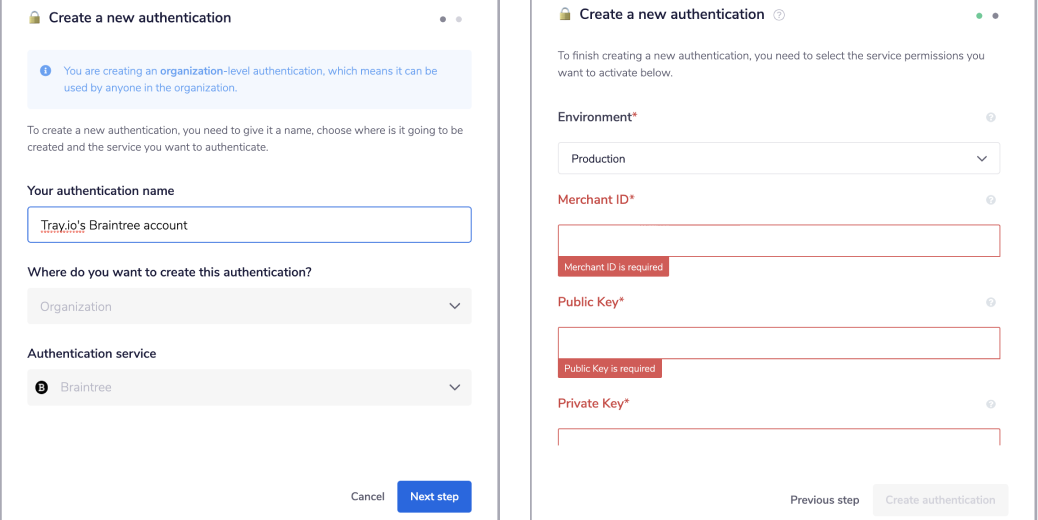
In the Tray.io authentication pop-up modal, name the authentication in a way that will quickly identify it within a potentially large list. For example, whether it is a Sandbox or Production auth, etc.
Consider who/ how many people will need access to this authentication when choosing where to create this authentication ('Personal' or 'Organisational').
As you can see, the next page asks you to choose the relevant Braintree 'Environment' and for your 'Merchant ID', 'Public Key' and 'Private Key' credentials.

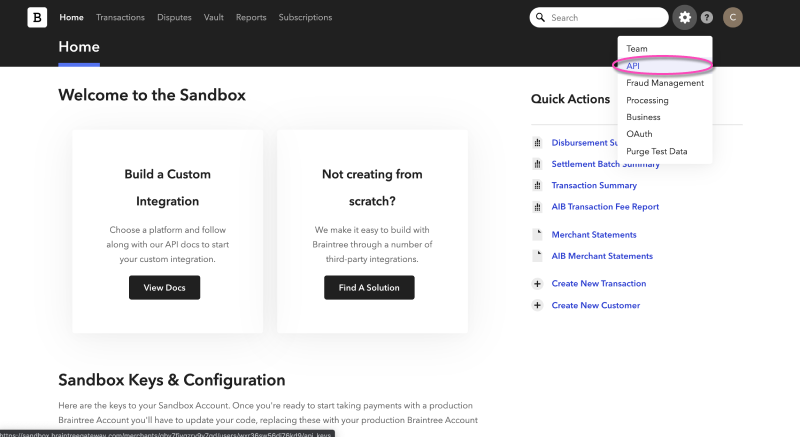
In order to get these fields, head to your Braintree dashboard. Click on the settings wheel in the top right corner and select 'API'.

Here you will see 'API Keys' for your account.

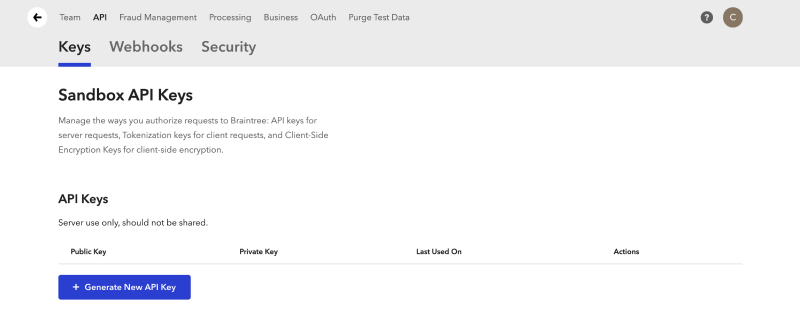
Click 'Generate New API Key' to create a key. A popup should appear with the message the 'API Key successfully created' and the 'Public Key' should now be visible under the 'API Keys' heading.
To get all the information required including the 'Private Key', select 'View' underneath the 'Private Key' heading.

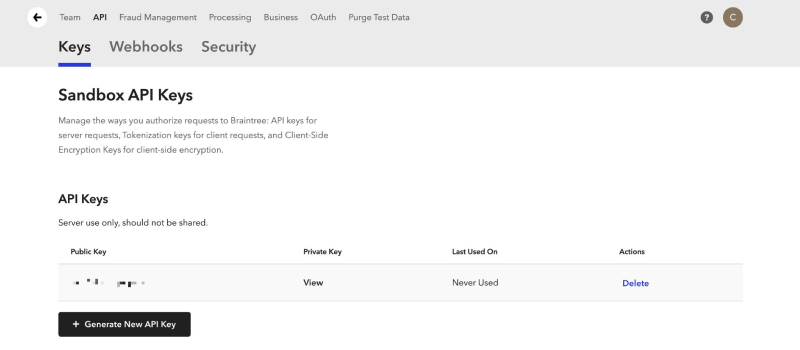
This will take you to the individual key page. Here you will find all the information required for authentication; 'Merchant ID', 'Public Key' and 'Private Key':

Once you have added these fields to your Tray.io authentication popup window, click on the 'Create authentication' button. Go back to your settings authentication field (within the workflow builder properties panel), and select the recently added authentication from the dropdown options now available.
Your connector authentication setup should now be complete.
Braintree TriggerCopy
If you wish your workflow to be kicked off by a particular action in Braintree, you can use the Braintree Trigger.
The Braintree trigger allows you to receive notifications and trigger workflows when given events occur associated with the selected trigger operation.
Instead of using a connector, choose Braintree as your trigger at the 'Create new workflow' section and wait to be redirected to your new workflow.


Trigger Operations Available:Copy
Webhook
Webhook SetupCopy
Use the instructions above to authenticate your trigger, and select the 'Webhook' operation.

For now, leave the properties panel settings and do not select any of the options until the next stage is complete.
To trigger the workflow you have to manually add and set up the webhook, adding the workflow URL to the Webhook tab section within your Braintree account.
First, make sure to enable the workflow by clicking on the green 'Enable' button, in the bottom right corner of the builder.
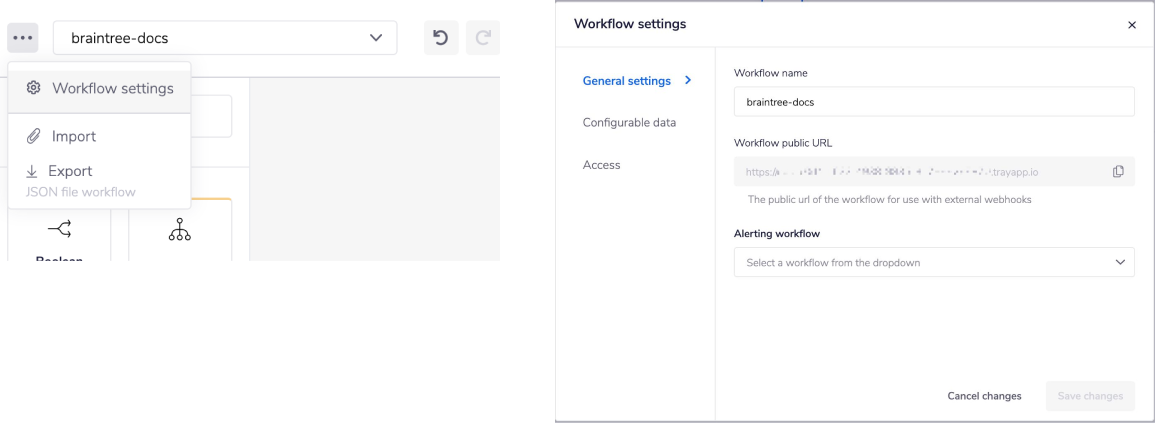
Then get your Tray.io Public URL for the workflow by clicking on the settings wheel in the top left of the build screen, and copying it from the settings window:

Head to your Braintree account API settings (the same place you found the authentication information above). Once there click on 'Webhooks':

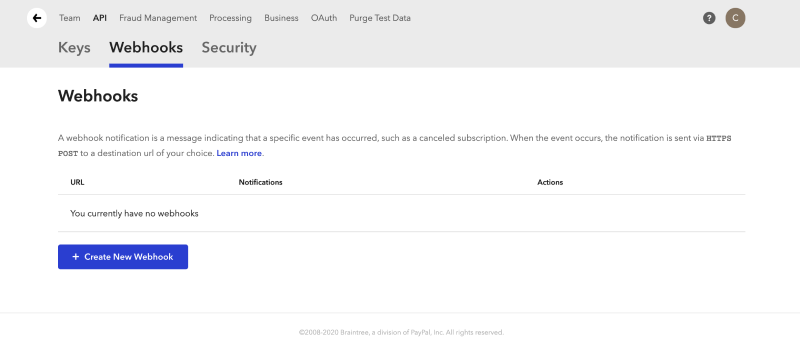
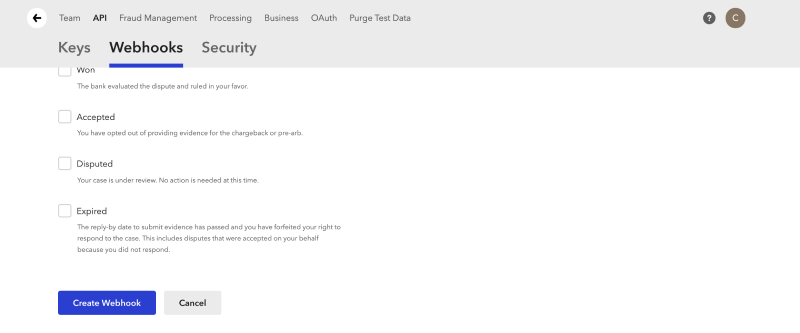
Here you will see all the available 'Webhooks' for your account. Click 'Generate New Webhook' to create a new webhook if you have none already. A new window should appear. Paste the Tray.io URL into the destination URL field, and select which 'Notification' types you would like to trigger the workflow.
Make a note of these for later use.

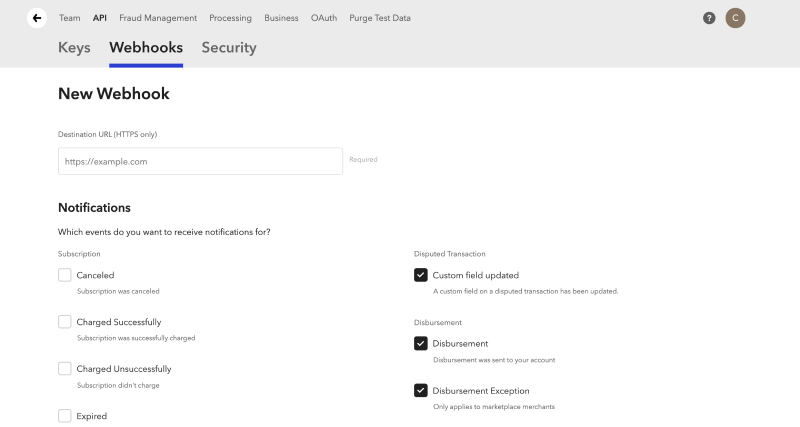
Once you have finished selecting these, scroll to the bottom of the page and select 'Create Webhook'.

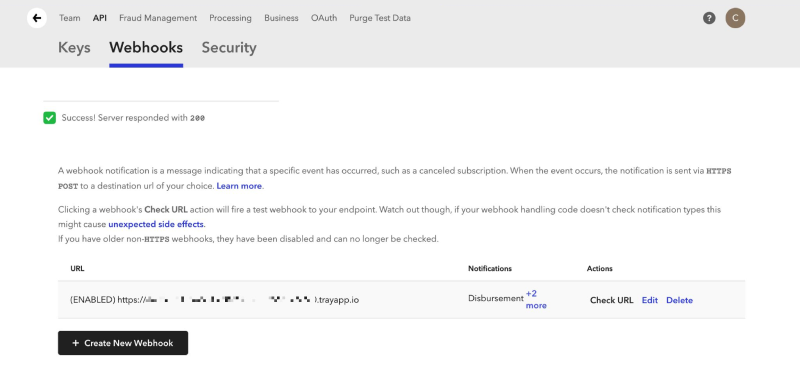
Your new webhook should now be shown on the 'Webhooks' page in your Braintree dashboard.
To test whether your webhook has been set up correctly, select the 'Check URL' option within the Braintree webhook dashboard (to the right of the webhook, under the 'Actions' tab). A popup should appear with the message 'Success! Server responded with 200'.

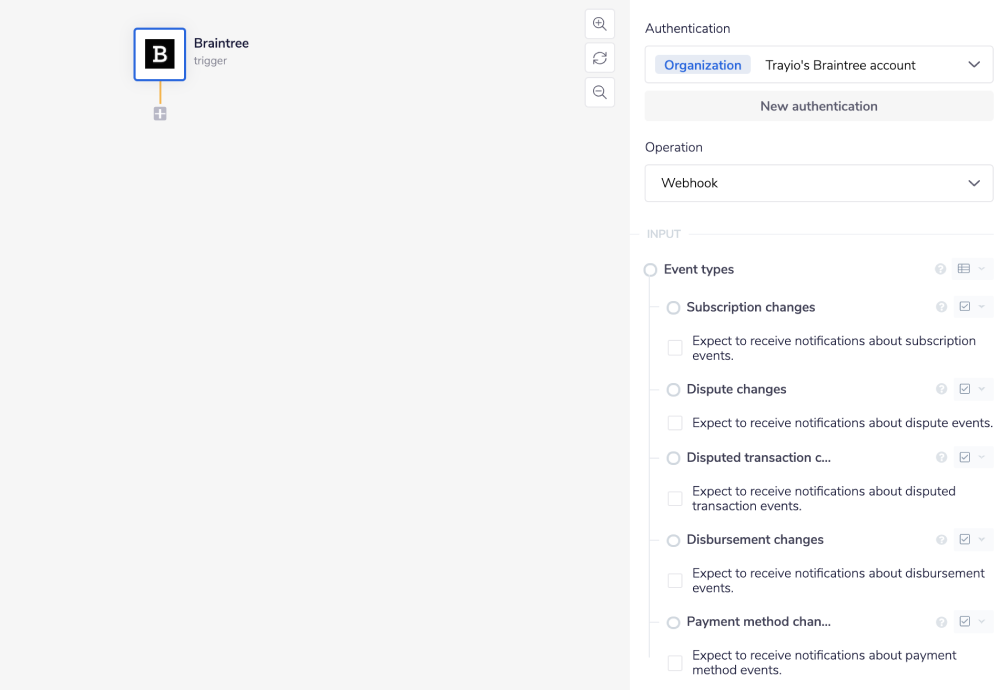
Head back over to your Tray.io workflow and make sure your trigger is selected once more.
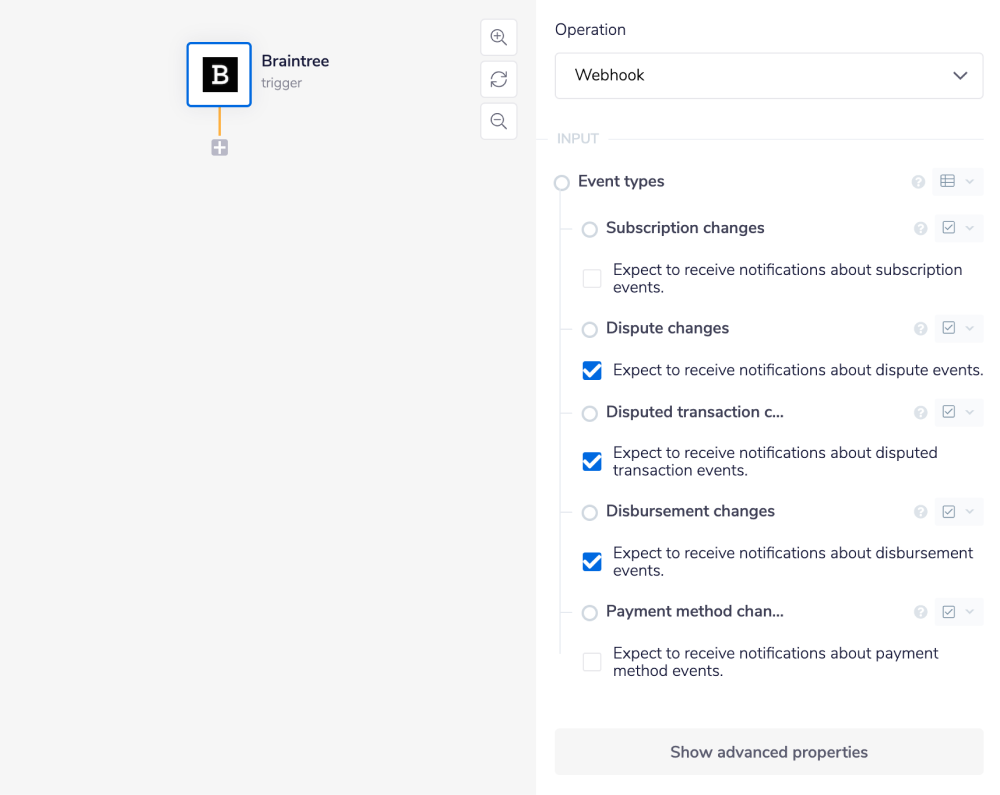
Select the 'Event types' you want your trigger to respond to, making sure to match them with the 'Notifications' that were selected during the online Braintree webhook setup, from earlier.
IMPORTANT!: Changing the ‘Event types’ within your Tray.io Braintree properties panel will notimpact which ‘Notifications’ trigger the workflow.
The Braintree trigger, only responds to the 'Notifications' setup within the Braintree webhook setup page - which are in effect Braintree terminology for Tray.io 'Event types'.
The event types listed within your Braintree trigger properties panel however only dictate the output schema that your trigger will generate - which is based off the Braintree webhook request itself. For more details on output schema and the like, see our jsonpath shortcuts

Make sure to check the output within the Debug panel, in order to test the setup. Select Debug at the top of the workflow builder. You should be able to choose one of workflow runs and select a log step to see your output.


Available OperationsCopy
The examples below show one or two of the available connector operations in use.
Please see the Full Operations Reference at the end of this page for details on all available operations for this connector.
Notes on using BraintreeCopy
Raw HTTP RequestCopy
The Braintree connector uses the Braintree GraphQL API, rather than the Braintree SDK. Thus, all requests should be POST requests and the raw body will need to be formatted correctly as a GraphQL query. A Content-Type header should be set for this endpoint, with the value of application/json.
Using the Raw HTTP Request ('Universal Operation')Copy
As of version 1.0, you can effectively create your own operations.
This is a powerful feature that you can use when there is an endpoint in Braintree that is not used by any of our operations.
To use this, you will first of all need to research the endpoint in the Braintree API documentation to find the exact format that Braintree will be expecting the endpoint to be passed in.
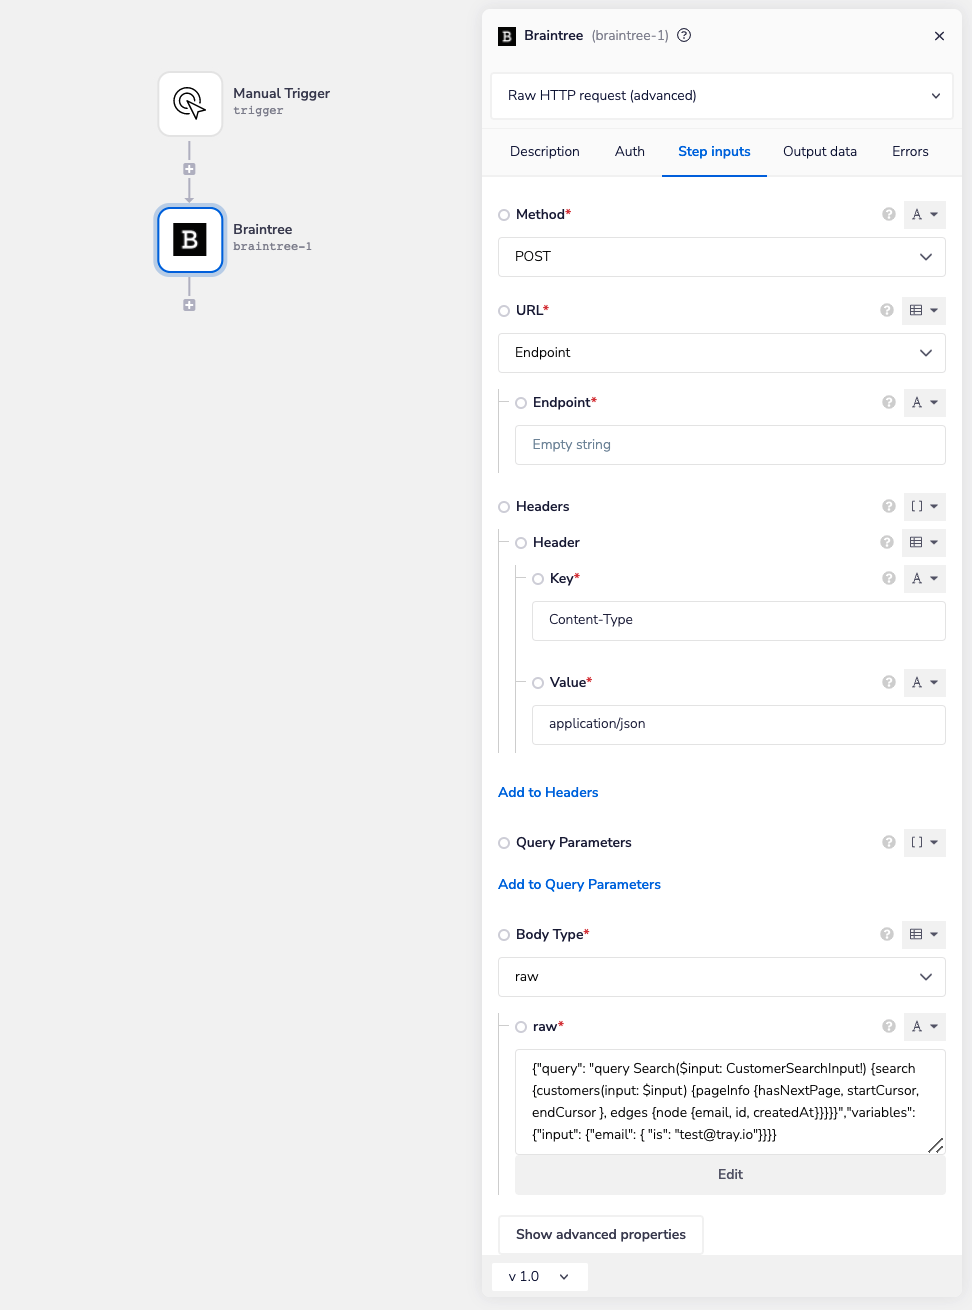
For example, say that the 'Search customers by email' operation did not exist in our Braintree connector, and you wanted to use this endpoint. You would use the Braintree API docs to find the relevant endpoint information. Note that the Braintree GraphQL API documentation should be used, rather than the Braintree SDK documentation. All GraphQL requests should be POST requests. The 'edges' part of the request allows you to specify which data you would like to be returned in the request. You can find more information about creating a GraphQL request for Braintree's API here.

In this example, we will query for a customer with the email address test@tray.io, and we will request that the email, id, and createdAt values be returned for this user. You will need to configure the following attributes on your Tray platform:
Method: POST
Headers: 'Content-Type': 'application/json'
Body Type: 'Raw'
Raw Body: {"query": "query Search($input: CustomerSearchInput!) {search {customers(input: $input) {pageInfo {hasNextPage, startCursor, endCursor }, edges {node {email, id, createdAt}}}}}","variables": {"input": {"email": { "is": "test@tray.io"}}}}

Once the API call is executed successfully, you should get the following results:


Example UsageCopy
TRAY POTENTIAL: Tray.io is extremely flexible. By design there is no fixed way of working with it - you can pull whatever data you need from other services and work with it using our core and helper connectors.
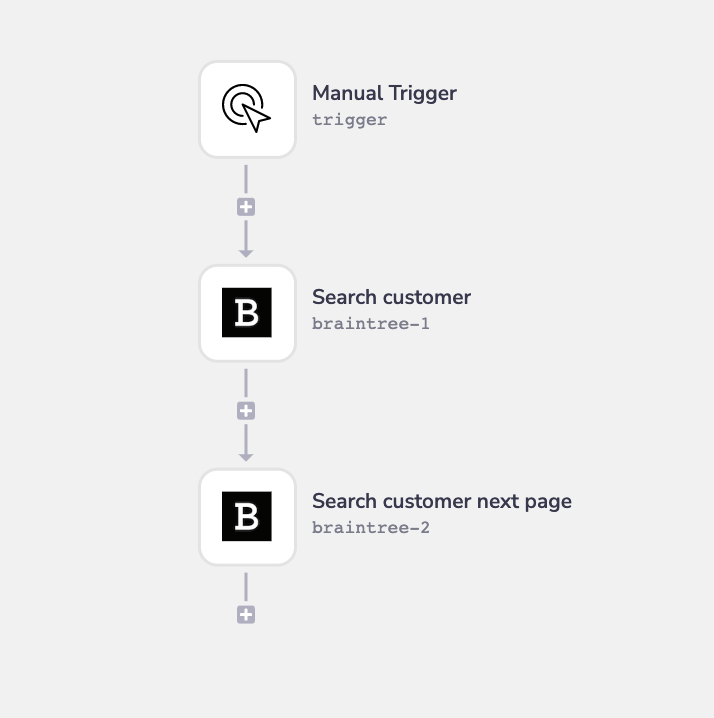
Below is an example of a way in which you could potentially use the Braintree connector to search for a customer, and then retrieve the second page of results.
The overall logic of the workflow is:
Setup using a manual trigger.
Add a Braintree connector to search for the customer by email address.
Add a second Braintree connector to retrieve the next page of results for that customer.
Your completed workflow should look similar to this:

Step-by-step ExplanationCopy
BEST PRACTICES: Whenever you do decide to create your own workflow, be sure to check out some of our key articles such as: